Quickstart: Create an Azure DNS zone and record using the Azure portal
You can configure Azure DNS to resolve host names in your public domain. For example, if you purchased the contoso.xyz domain name from a domain name registrar, you can configure Azure DNS to host the contoso.xyz domain and resolve www.contoso.xyz to the IP address of your web server or web app.
In this quickstart, you create a test domain, and then create an address record to resolve www to the IP address 10.10.10.10.

Important
The names and IP addresses in this quickstart are examples that do not represent real-world scenarios. The private IP address 10.10.10.10 is used here with a public DNS zone for testing purposes.
You can also perform these steps using Azure PowerShell or the cross-platform Azure CLI.
If you don't have an Azure subscription, create a free account before you begin.
For all portal steps, sign in to the Azure portal.
Prerequisites
An Azure account with an active subscription is required. Create an account for free.
Sign in to the Azure portal
Sign in to the Azure portal with your Azure account.
Create a DNS zone
A DNS zone contains the DNS entries for a domain. To start hosting your domain in Azure DNS, create a DNS zone for that domain name.
To create the DNS zone:
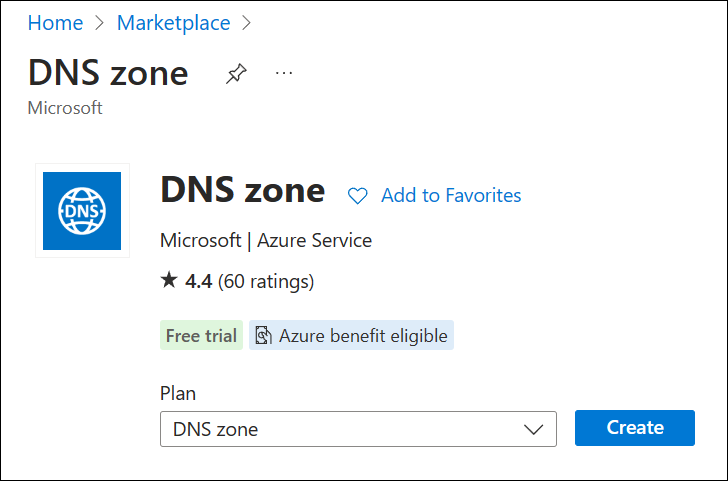
- At the upper left, select Create a resource, enter DNS zone into Search services and marketplace and then select DNS zone.
- On the DNS zone page, select Create.
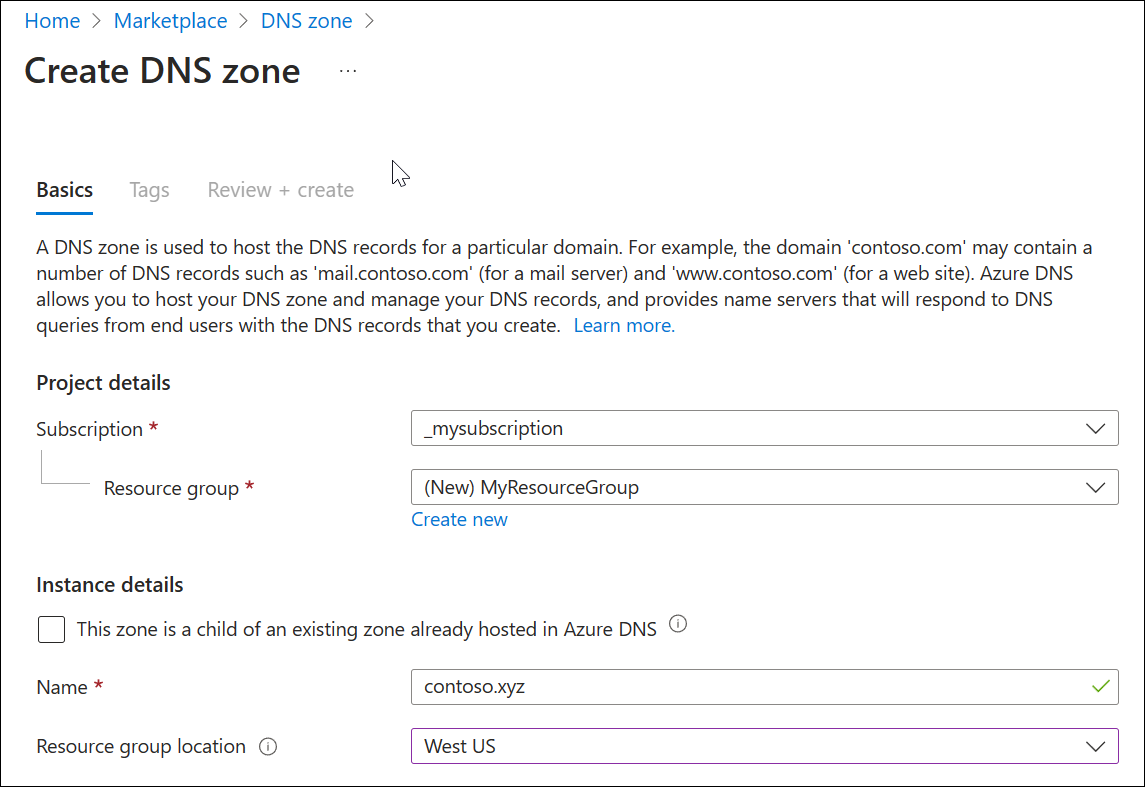
On the Create DNS zone page, type or select the following values:
- Resource group: Select Create new, enter MyResourceGroup, and select OK. The resource group name must be unique within the Azure subscription.
- Name: Type contoso.xyz for this quickstart example. The DNS zone name can be any value that isn't already configured on the Azure DNS servers. A real-world value would be a domain that you bought from a domain name registrar.
- Resource group location: Select a location for the new resource group. In this example, the location selected is West US.
Select Review + create and then select Create.
It may take a minute to create the zone.
Create a DNS record
Next, DNS records are created for your domain inside the DNS zone. A new address record, known as an 'A' record, is created to resolve a host name to an IPv4 address.
To create an 'A' record:
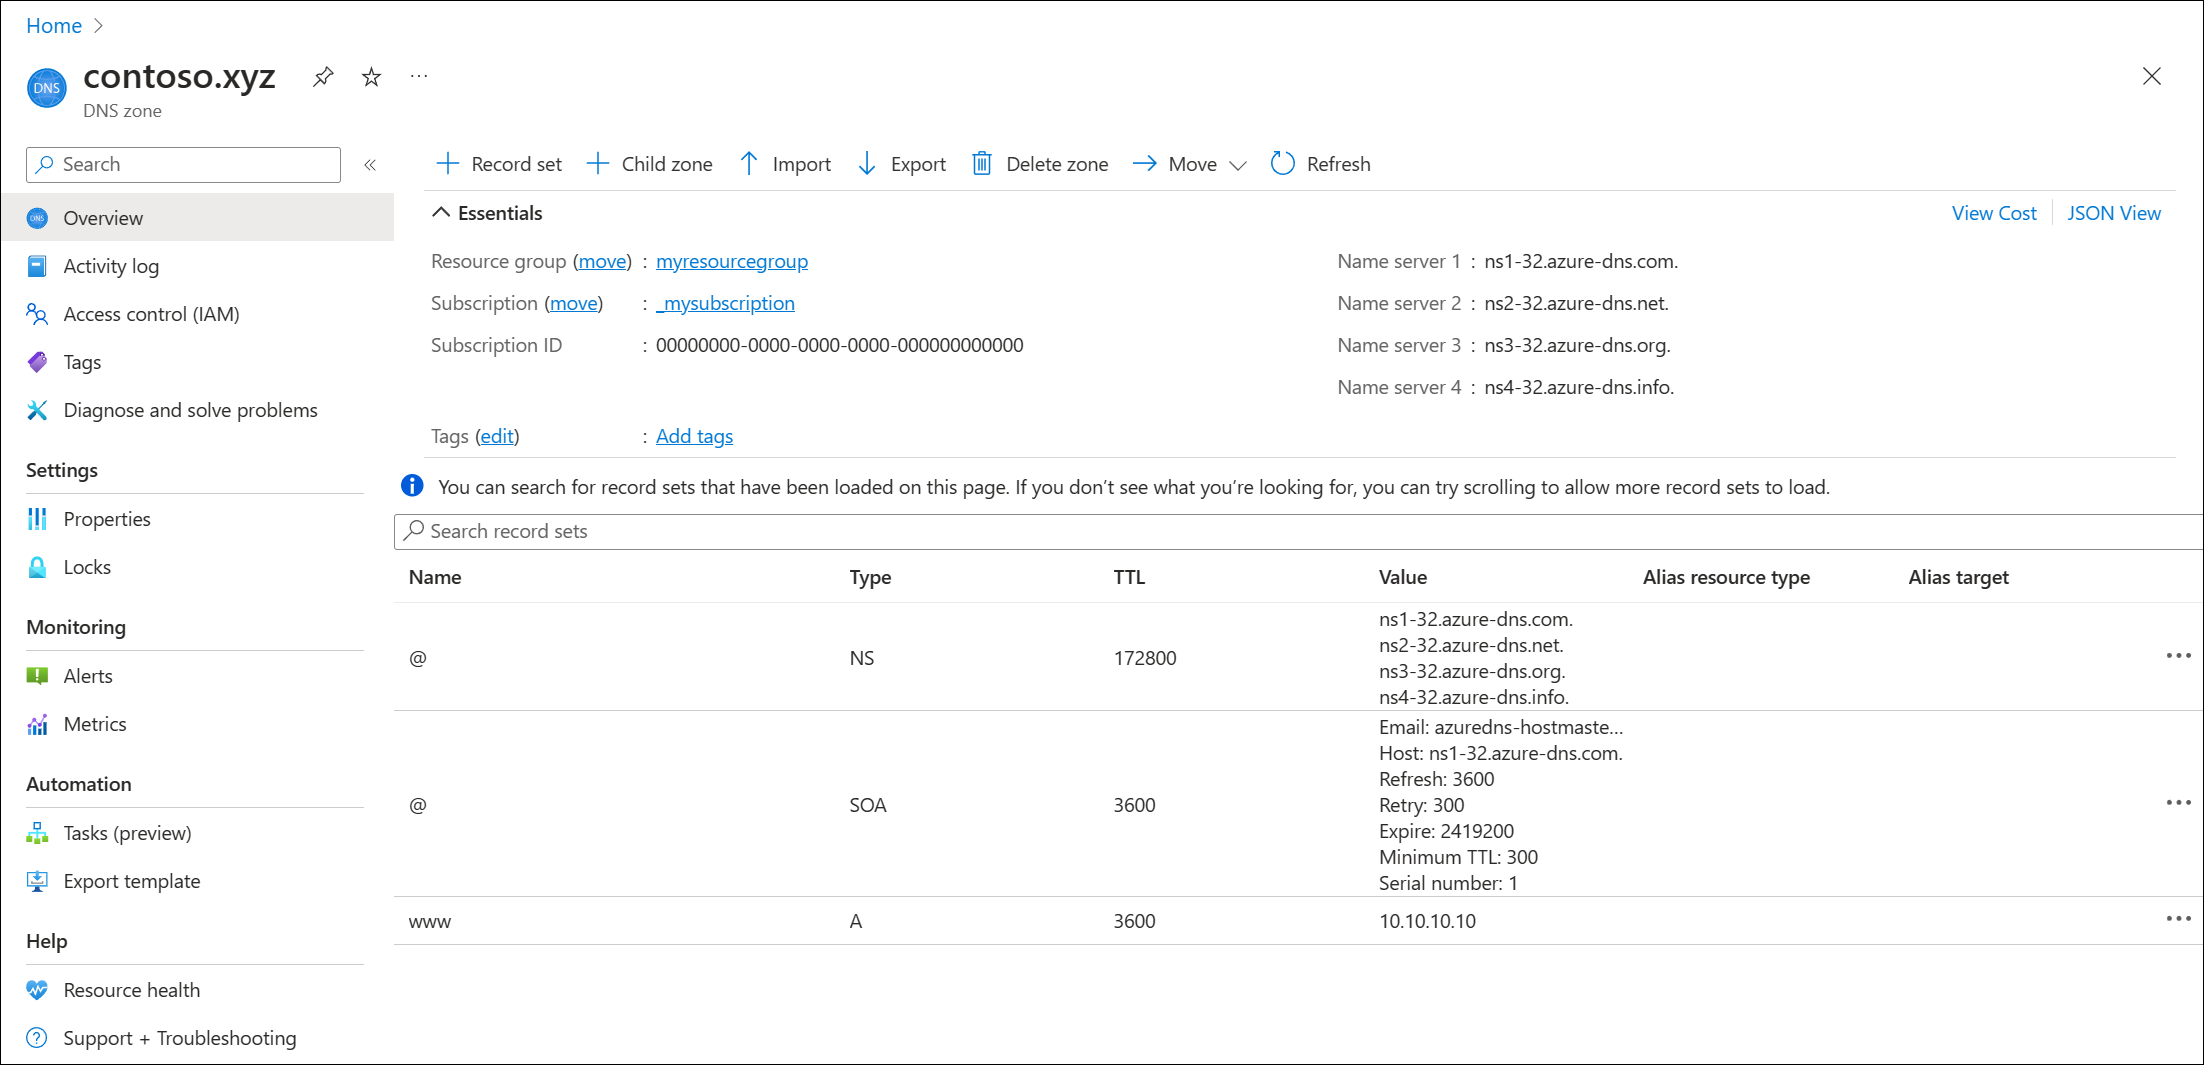
In the Azure portal, under Resources, open the contoso.xyz DNS zone.
At the top of the contoso.xyz DNS zone page, select Record sets and then select + Add. The Add a record set window appears.
In the Add a record set window, enter or select the following values:
- Name: Type www. This record name is the host name that you want to resolve to the specified IP address.
- Type: Select A. 'A' records are the most common, but there are other record types for mail servers ('MX'), IP v6 addresses ('AAAA'), and so on.
- Alias record set: Choose No.
- TTL: Enter 1. Time-to-live of the DNS request specifies how long DNS servers and clients can cache a response.
- TTL unit: Select Hours. The time unit for the TTL entry is specified here.
- IP address: For this quickstart example, enter 10.10.10.10. This value is the IP address that the record name resolves to. In a real-world scenario, you would enter the public IP address for your web server.
Select Add to create the A record.
Since this quickstart is just for quick testing purposes, there's no need to configure the Azure DNS name servers at a domain name registrar. In a real production domain, you must enable users on the Internet to resolve the host name and connect to your web server or app. To accomplish this task, visit your domain name registrar and replace the name server records with the Azure DNS name servers. For more information, see Tutorial: Host your domain in Azure DNS.
Test the name resolution
Now that you have a test DNS zone with a test 'A' record, you can test the name resolution.
To test DNS name resolution:
On the contoso.xyz | Recordsets page, copy one of the name server names from the name server list. For example: ns1-37.azure-dns.com.
Open a command prompt, and run the following command:
nslookup www.contoso.xyz <name server name>For example:
nslookup www.contoso.xyz ns1-37.azure-dns.com.See the following example:
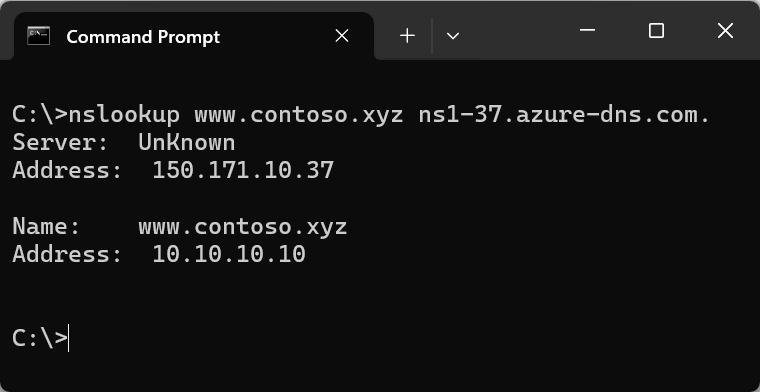

The host name www.contoso.xyz resolves to 10.10.10.10, just as you configured it. This result verifies that name resolution is working correctly.
Clean up resources
When you no longer need the resources you created in this quickstart, remove them by deleting the MyResourceGroup resource group. Open the MyResourceGroup resource group, and select Delete resource group.
Next steps
Feedback
Coming soon: Throughout 2024 we will be phasing out GitHub Issues as the feedback mechanism for content and replacing it with a new feedback system. For more information see: https://aka.ms/ContentUserFeedback.
Submit and view feedback for