Note
Access to this page requires authorization. You can try signing in or changing directories.
Access to this page requires authorization. You can try changing directories.
In this quickstart, you create a topic, create a subscription to that topic using a Webhook endpoint, trigger a sample event, and then view the result. Typically, you send events to an endpoint that processes the event data and takes actions. However, to simplify this tutorial, you send the events to a web app that collects and displays the messages.
Prerequisites
- If you don't have an Azure subscription, create an Azure free account before you begin.
- If you're new Azure Event Grid, see Event Grid overview.
Register the Event Grid resource provider
Unless you've used Event Grid before, you'll need to register the Event Grid resource provider. If you’ve used Event Grid before, skip to the next section.
In the Azure portal, do the following steps:
On the left menu, select Subscriptions.
Select the subscription you want to use for Event Grid from the subscription list.
On the Subscription page, select Resource providers under Settings on the left menu.
Search for Microsoft.EventGrid, and confirm that the Status is Not Registered.
Select Microsoft.EventGrid in the provider list.
Select Register on the command bar.
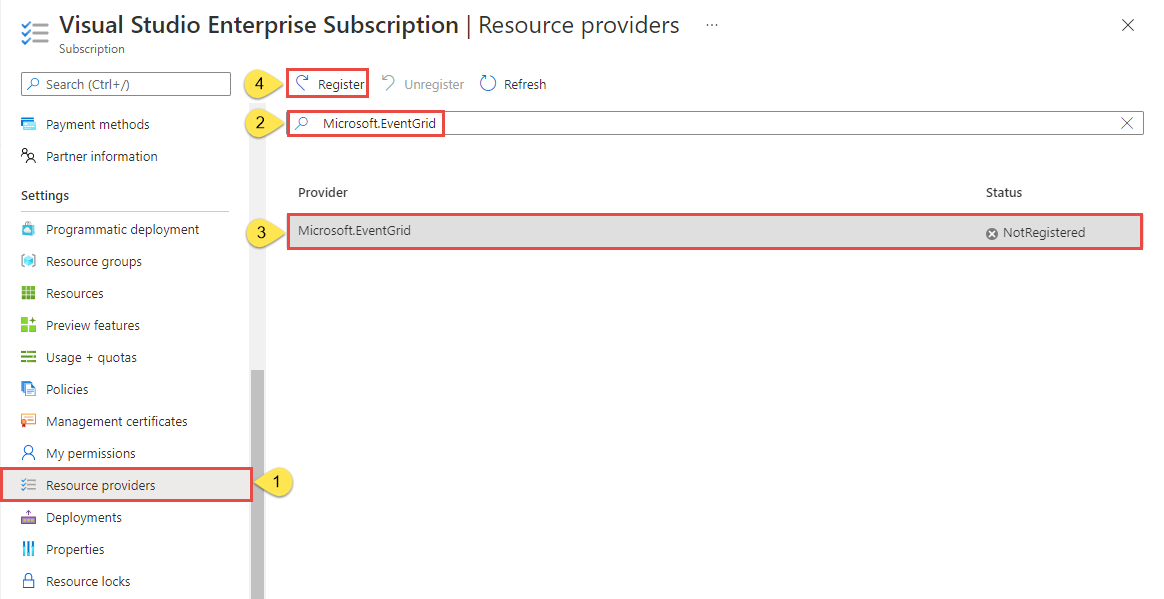
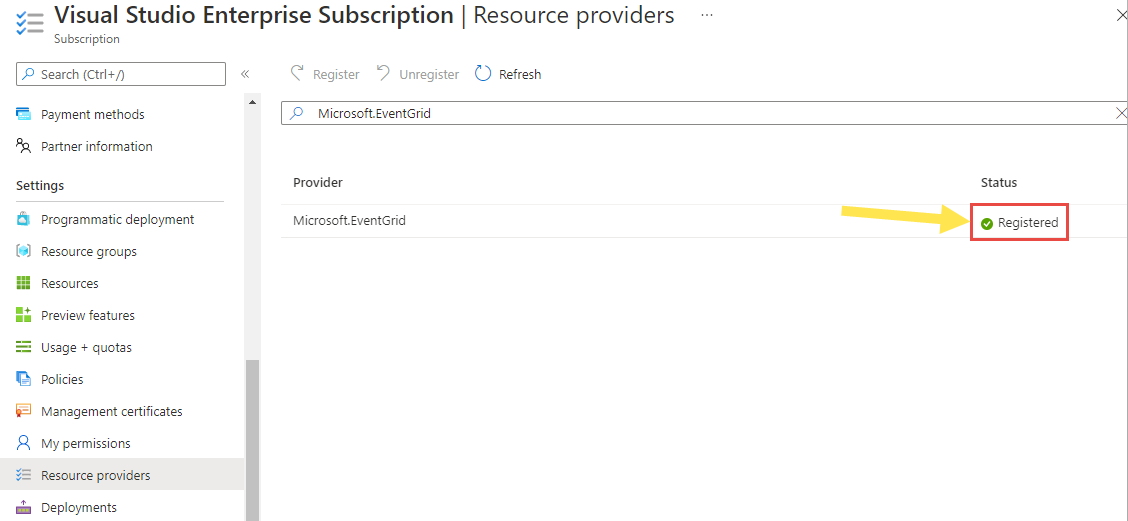
Refresh to make sure the status of Microsoft.EventGrid is changed to Registered.
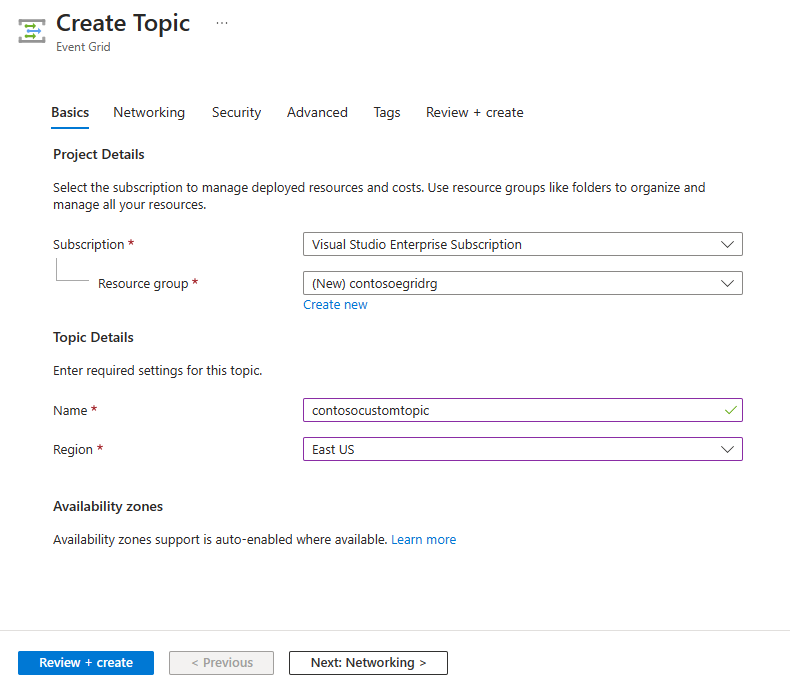
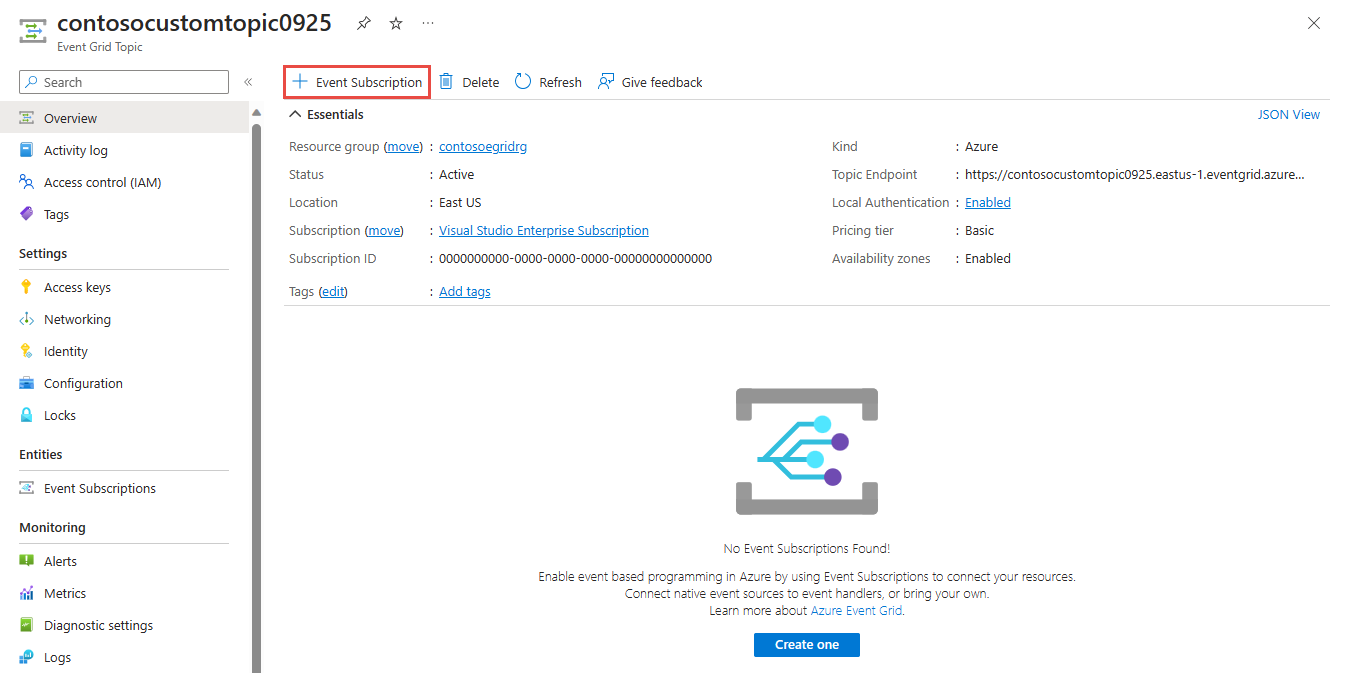
Create a custom topic
An Event Grid topic provides a user-defined endpoint that you post your events to.
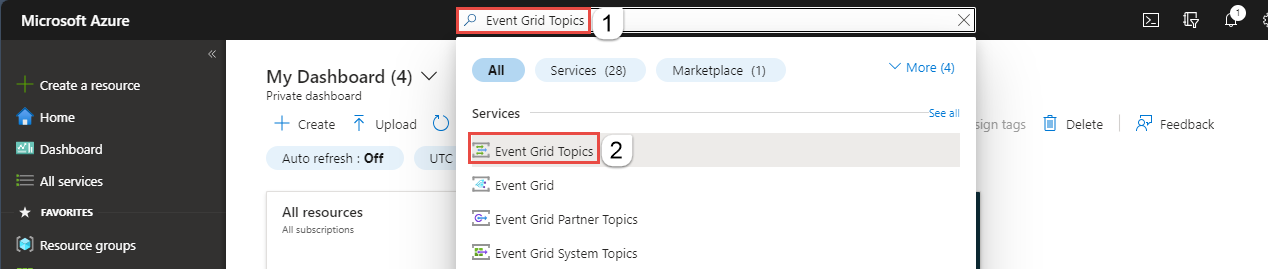
Sign in to Azure portal.
In the search bar at the topic, type Event Grid Topics, and then select Event Grid Topics from the drop-down list.
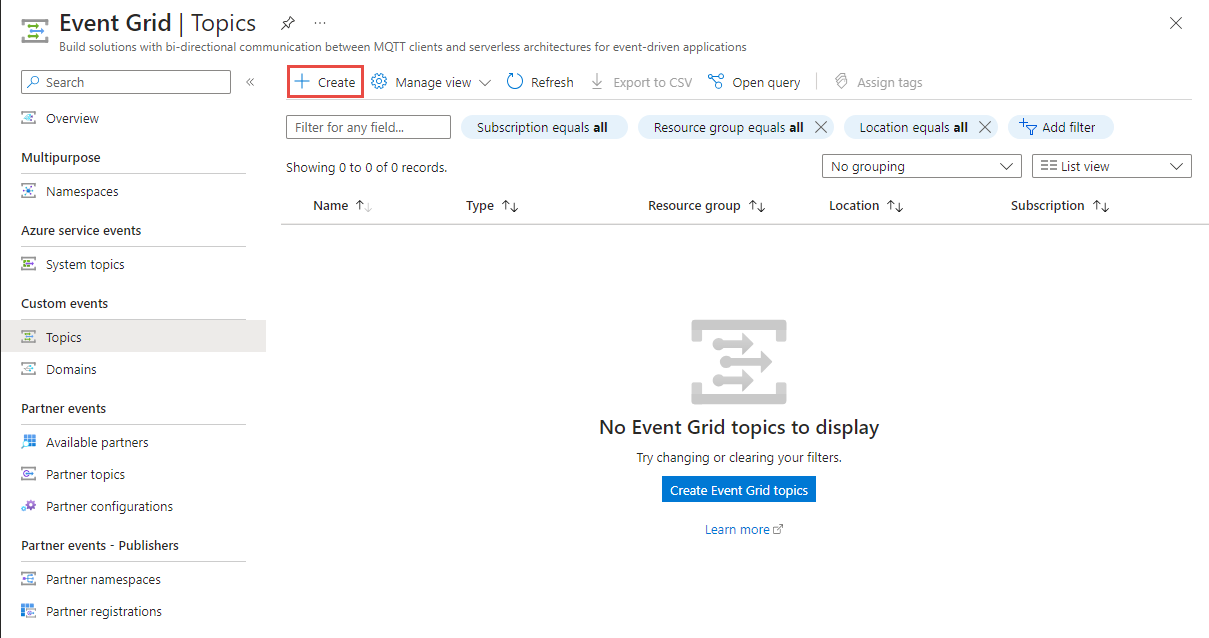
On the Event Grid Topics page, select + Create on the toolbar.
On the Create Topic page, follow these steps:
Select your Azure subscription.
Select an existing resource group or select Create new, and enter a name for the resource group.
Provide a unique name for the custom topic. The topic name must be unique because it's represented by a DNS entry. Don't use the name shown in the image. Instead, create your own name - it must be between 3-50 characters and contain only values a-z, A-Z, 0-9, and
-.Select a location for the Event Grid topic.
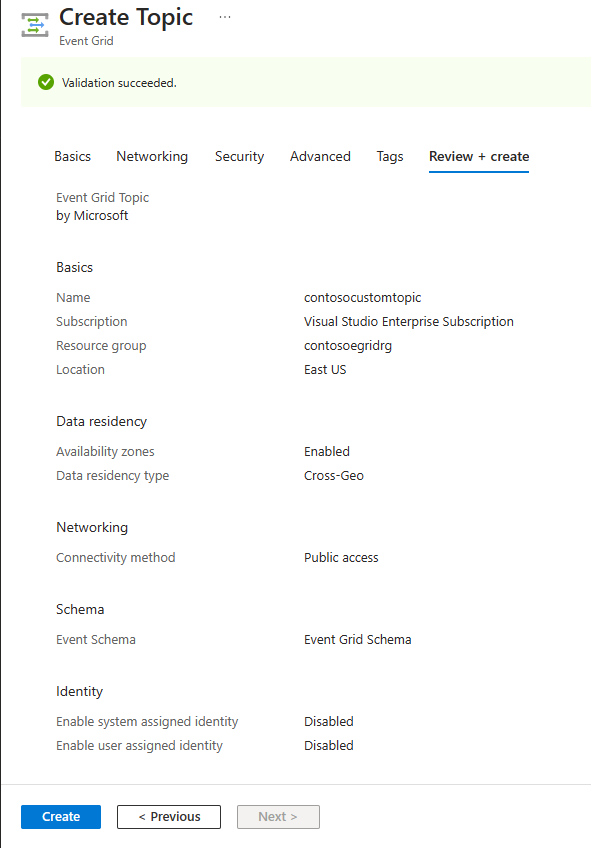
Select Review + create at the bottom of the page.
On the Review + create tab of the Create topic page, select Create.
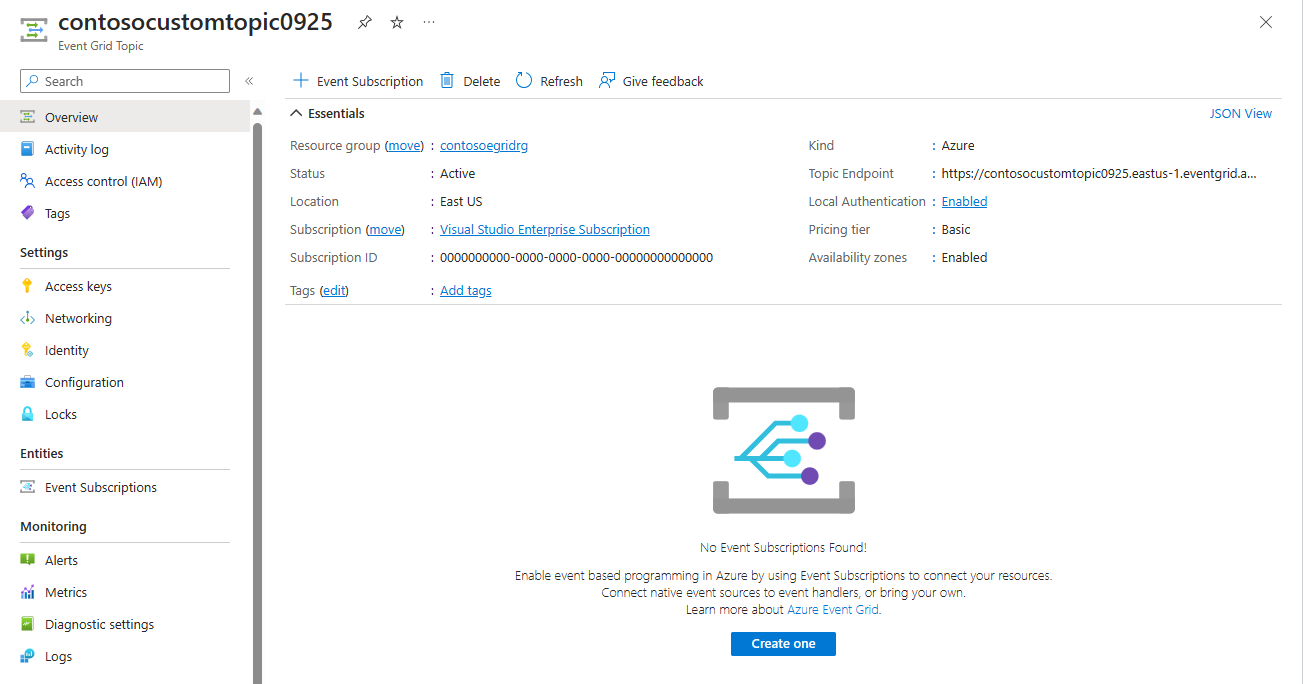
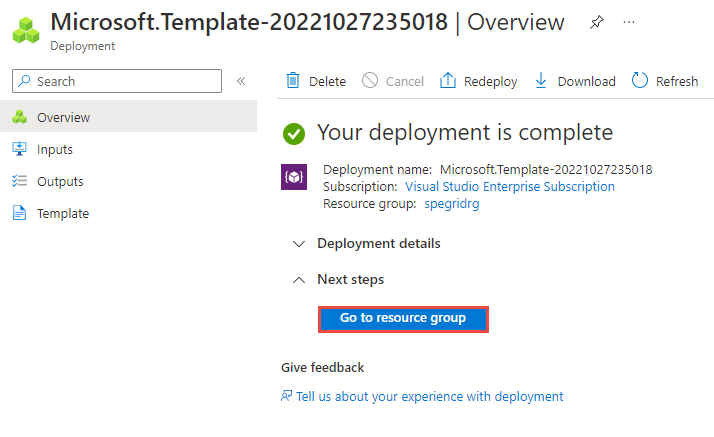
After the deployment succeeds, select Go to resource to navigate to the Event Grid Topic page for your topic. Keep this page open. You use it later in the quickstart.
Note
To keep the quickstart simple, you'll be using only the Basics page to create a topic. For detailed steps about configuring network, security, and data residency settings on other pages of the wizard, see Create a custom topic.

Create a message endpoint
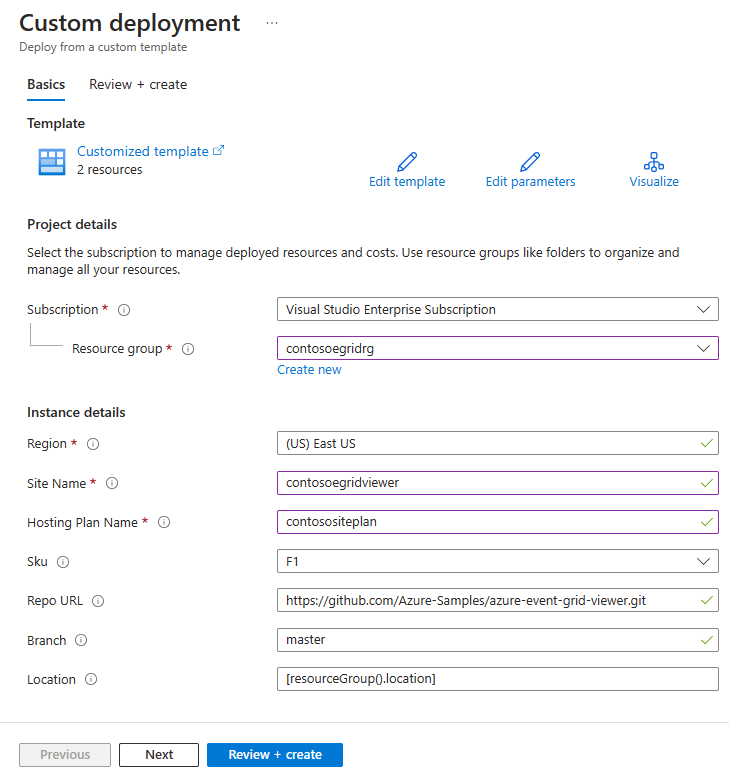
Before you create a subscription for the custom topic, create an endpoint for the event message. Typically, the endpoint takes actions based on the event data. To simplify this quickstart, you deploy a prebuilt web app that displays the event messages. The deployed solution includes an App Service plan, an App Service web app, and source code from GitHub.
In the article page, select Deploy to Azure to deploy the solution to your subscription. In the Azure portal, provide values for the parameters.

On the Custom deployment page, do the following steps:
For Resource group, select an existing resource group or create a resource group.
For Site Name, enter a name for the web app.
For Hosting plan name, enter a name for the App Service plan to use for hosting the web app.
Select Review + create.
On the Review + create page, select Create.
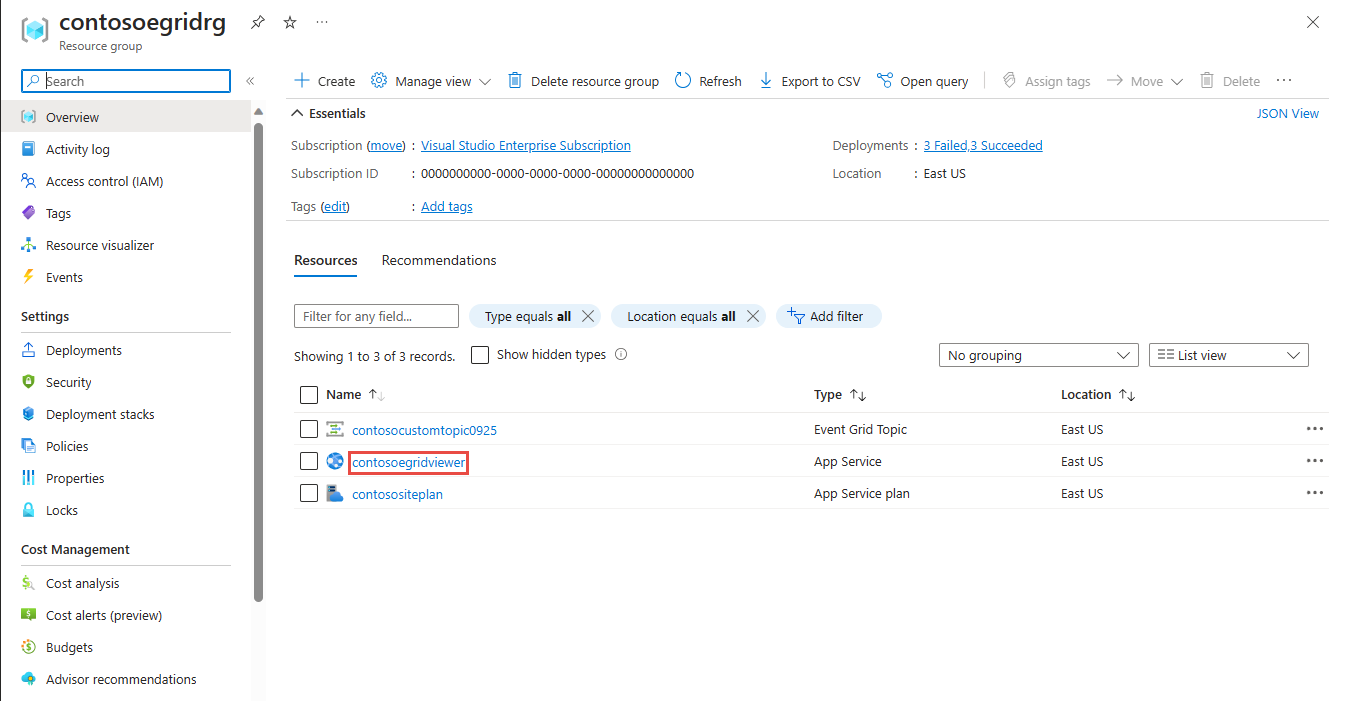
The deployment might take a few minutes to complete. Select Alerts (bell icon) in the portal, and then select Go to resource group.
On the Resource group page, in the list of resources, select the web app (contosoegriviewer in the following example) that you created.
On the App Service page for your web app, select the URL to navigate to the web site. The URL should be in this format:
https://<your-site-name>.azurewebsites.net.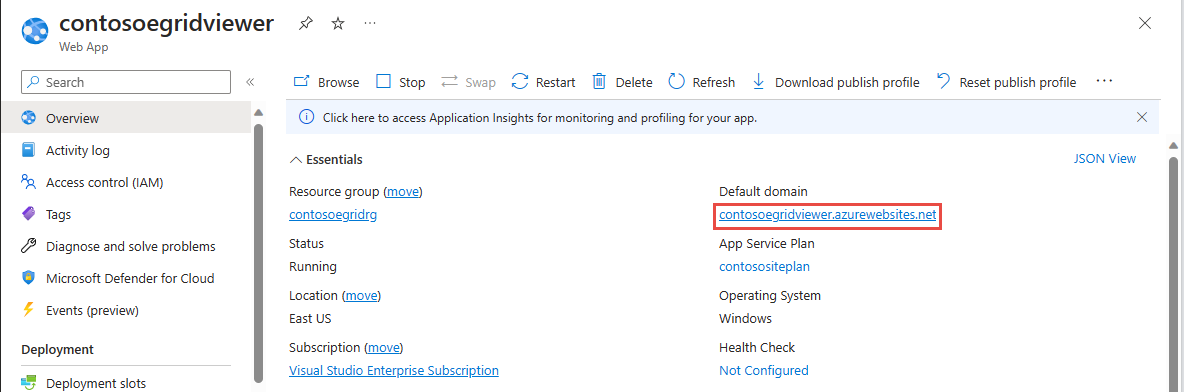
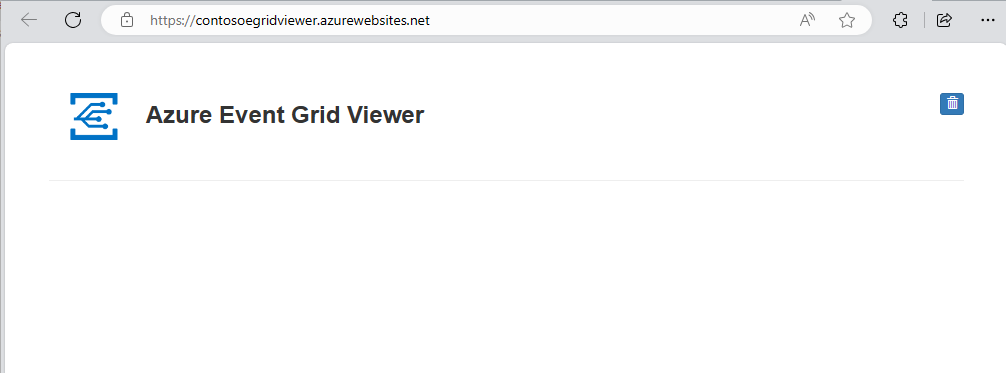
Confirm that you see the site but no events have been posted to it yet.
Subscribe to custom topic
You subscribe to an Event Grid topic to tell Event Grid which events you want to track, and where to send the events.
Now, on the Event Grid Topic page for your custom topic, select + Event Subscription on the toolbar.
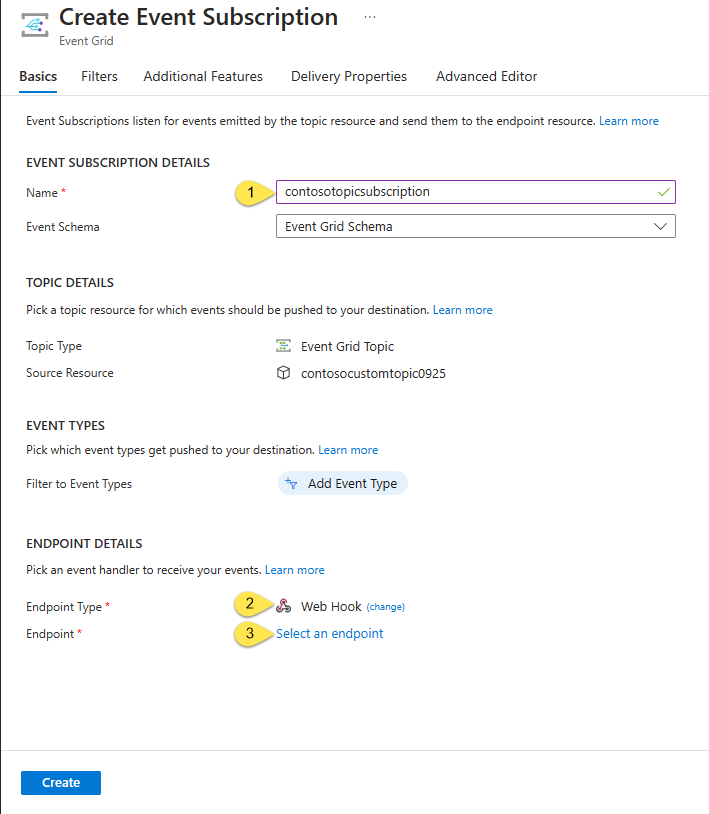
On the Create Event Subscription page, follow these steps:
Enter a name for the event subscription.
Select Web Hook for the Endpoint type.
Choose Select an endpoint.
For the web hook endpoint, provide the URL of your web app and add
api/updatesto the home page URL. Select Confirm Selection.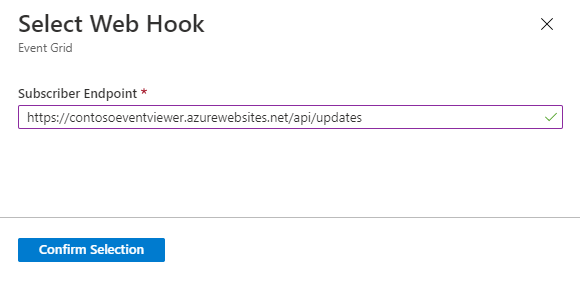
Back on the Create Event Subscription page, select Create.
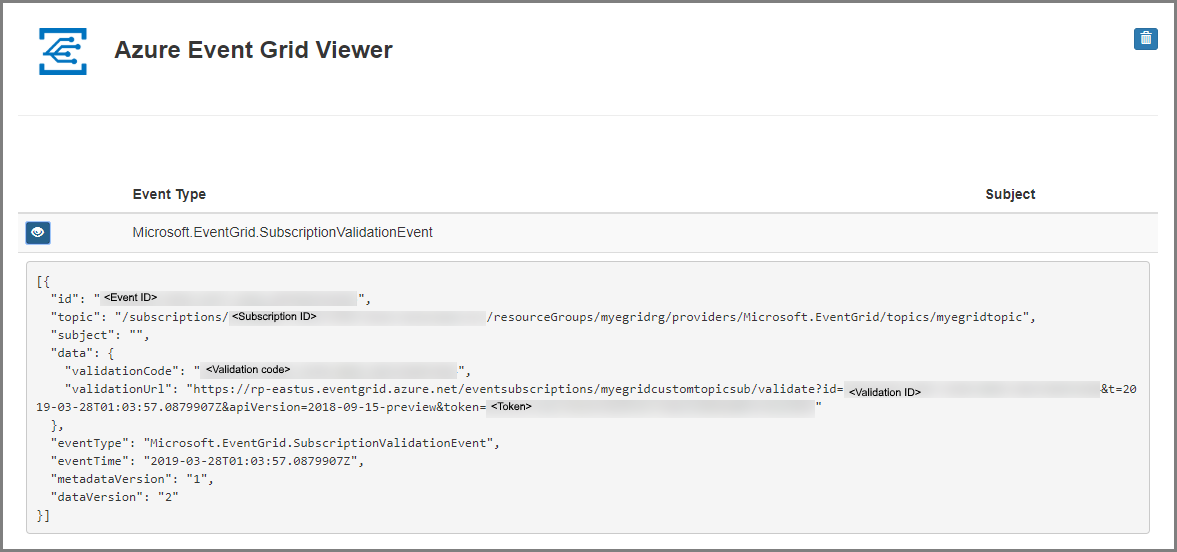
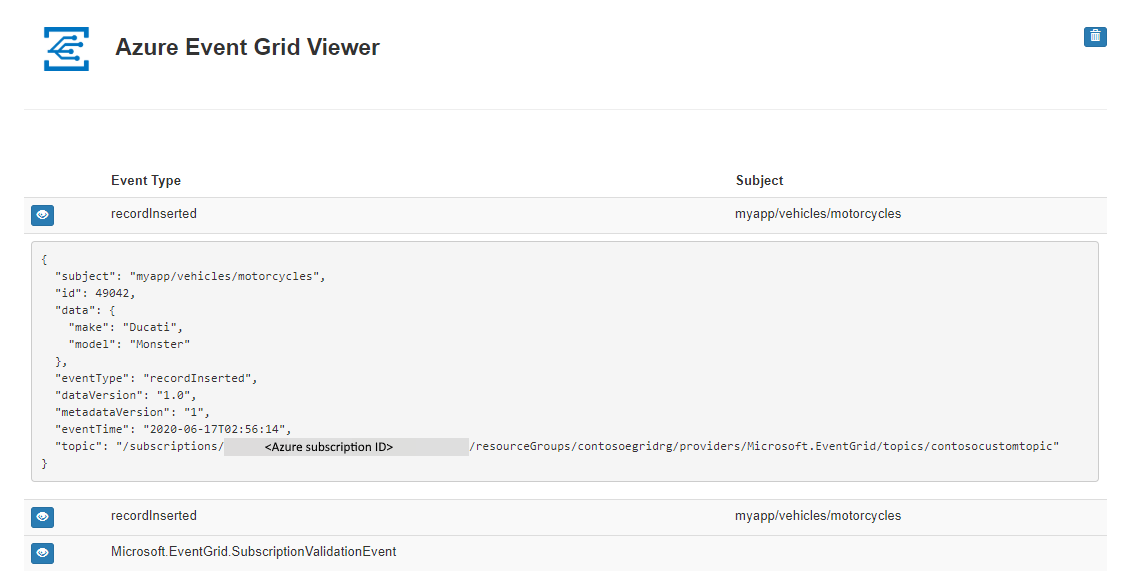
View your web app again, and notice that a subscription validation event has been sent to it. Select the eye icon to expand the event data. Event Grid sends the validation event so the endpoint can verify that it wants to receive event data. The web app includes code to validate the subscription.

Send an event to your topic
Now, let's trigger an event to see how Event Grid distributes the message to your endpoint. Use either Azure CLI or PowerShell to send a test event to your custom topic. Typically, an application or Azure service would send the event data.
The first example uses Azure CLI. It gets the URL and key for the custom topic, and sample event data. Use your custom topic name for <topic name>. It creates sample event data. The data element of the JSON is the payload of your event. Any well-formed JSON can go in this field. You can also use the subject field for advanced routing and filtering. CURL is a utility that sends HTTP requests.
Azure CLI
In the Azure portal, select Cloud Shell. The Cloud Shell opens in the bottom pane of the web browser.
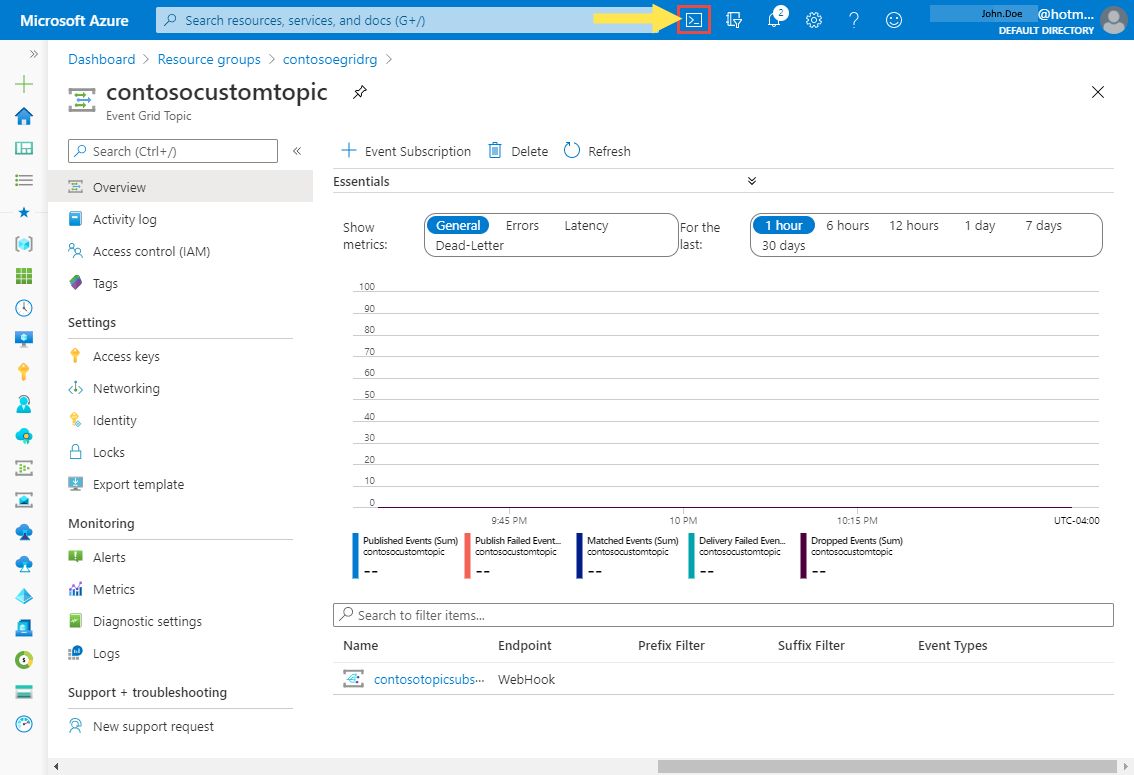
If the Cloud Shell opens a PowerShell session, select Switch to Bash in the top-left corner of the Cloud Shell window. If not, continue to the next step.
Run the following command to get the endpoint for the topic: After you copy and paste the command, update the topic name and resource group name before you run the command. You publish sample events to this topic endpoint.
endpoint=$(az eventgrid topic show --name <topic name> -g <resource group name> --query "endpoint" --output tsv)Run the following command to get the key for the custom topic: After you copy and paste the command, update the topic name and resource group name before you run the command. It's the primary key of the Event Grid topic. To get this key from the Azure portal, switch to the Access keys tab of the Event Grid Topic page. To be able post an event to a custom topic, you need the access key.
key=$(az eventgrid topic key list --name <topic name> -g <resource group name> --query "key1" --output tsv)Copy the following statement with the event definition, and press ENTER.
event='[ {"id": "'"$RANDOM"'", "eventType": "recordInserted", "subject": "myapp/vehicles/motorcycles", "eventTime": "'`date +%Y-%m-%dT%H:%M:%S%z`'", "data":{ "make": "Ducati", "model": "Monster"},"dataVersion": "1.0"} ]'Run the following Curl command to post the event: In the command,
aeg-sas-keyheader is set to the access key you got earlier.curl -X POST -H "aeg-sas-key: $key" -d "$event" $endpoint

Azure PowerShell
The second example uses PowerShell to do similar steps.
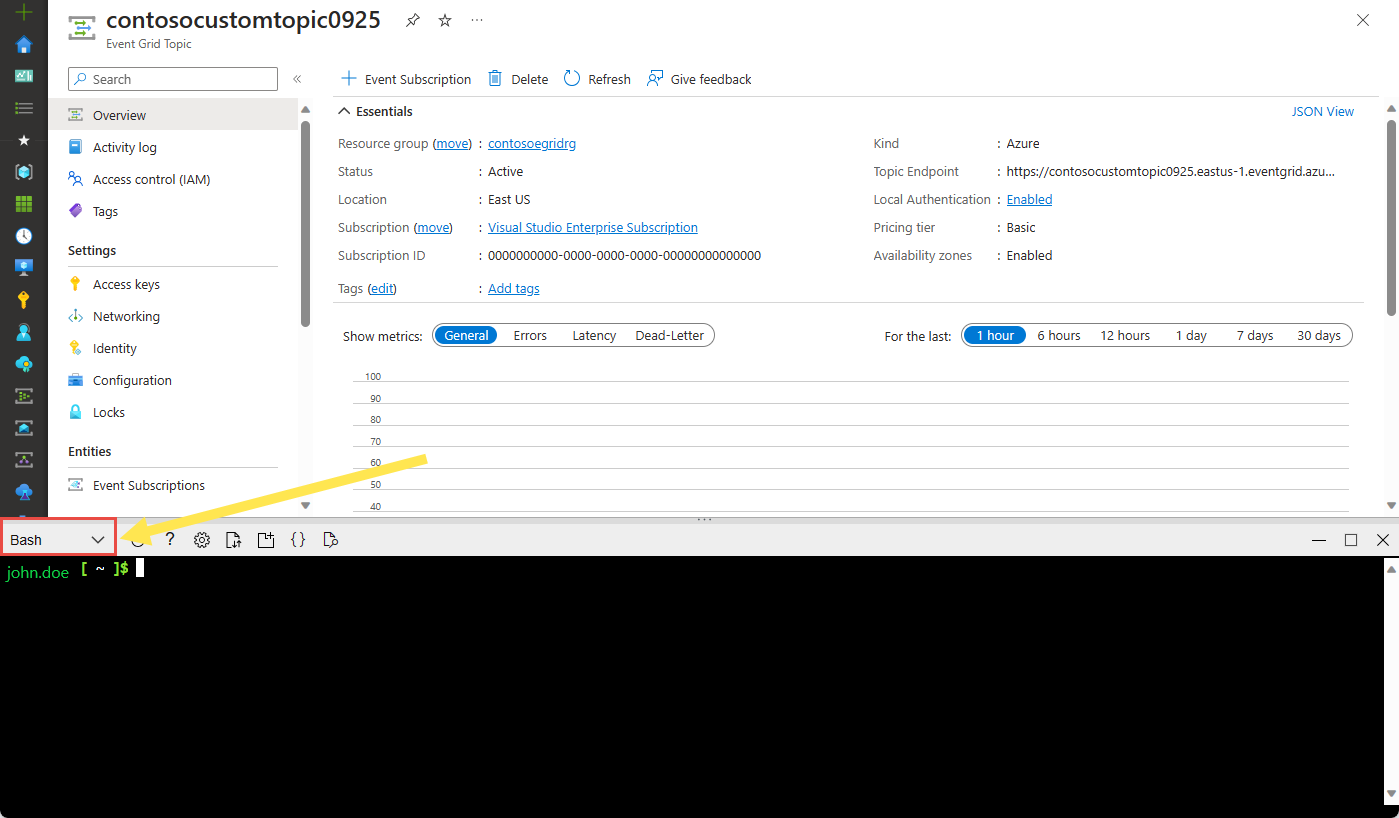
In the Azure portal, select Cloud Shell (alternatively go to
https://shell.azure.com/). The Cloud Shell opens in the bottom pane of the web browser.
In the Cloud Shell, select PowerShell in the top-left corner of the Cloud Shell window. See the sample Cloud Shell window image in the Azure CLI section.
Set the following variables. After you copy and paste each command, update the topic name and resource group name before you run the command:
Resource group:
$resourceGroupName = "<resource group name>"Event Grid topic name:
$topicName = "<topic name>"Run the following commands to get the endpoint and the keys for the topic:
$endpoint = (Get-AzEventGridTopic -ResourceGroupName $resourceGroupName -Name $topicName).Endpoint
$keys = Get-AzEventGridTopicKey -ResourceGroupName $resourceGroupName -Name $topicName
Prepare the event. Copy and run the statements in the Cloud Shell window.
$eventID = Get-Random 99999

#Date format should be SortableDateTimePattern (ISO 8601)
$eventDate = Get-Date -Format s

#Construct body using Hashtable
$htbody = @{
    id= $eventID
    eventType="recordInserted"
    subject="myapp/vehicles/motorcycles"
    eventTime= $eventDate
    data= @{
        make="Ducati"
        model="Monster"
    }
    dataVersion="1.0"
}

#Use ConvertTo-Json to convert event body from Hashtable to JSON Object
#Append square brackets to the converted JSON payload since they are expected in the event's JSON payload syntax
$body = "["+(ConvertTo-Json $htbody)+"]"
Use the Invoke-WebRequest cmdlet to send the event.
Invoke-WebRequest -Uri $endpoint -Method POST -Body $body -Headers @{"aeg-sas-key" = $keys.Key1}
Verify in the Event Grid Viewer
You've triggered the event, and Event Grid sent the message to the endpoint you configured when subscribing. View your web app to see the event you just sent.
Clean up resources
If you plan to continue working with this event, don't clean up the resources created in this article. Otherwise, delete the resources you created in this article.
Select Resource Groups on the left menu. If you don't see it on the left menu, select All Services on the left menu, and select Resource Groups.
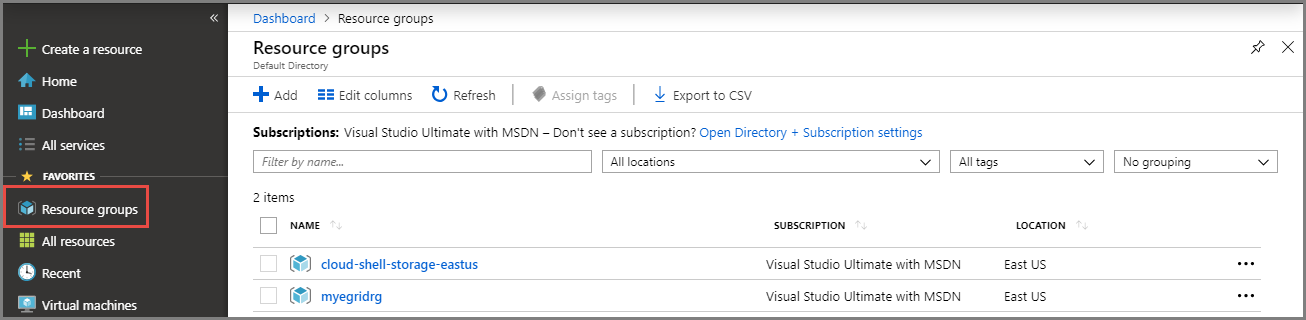
Select the resource group to launch the Resource Group page.
Select Delete resource group on the toolbar.
Confirm deletion by entering the name of the resource group, and select Delete.
The other resource group you see in the image was created and used by the Cloud Shell window. Delete it if you don't plan to use the Cloud Shell window later.
Related content
Now that you know how to create custom topics and event subscriptions, learn more about what Event Grid can help you do: