Modernize ASP.NET web apps to Azure Kubernetes Service (preview)
This article shows you how to migrate ASP.NET web apps at-scale to Azure Kubernetes Service using Azure Migrate. Currently, this flow only supports ASP.NET web apps running on VMware. For other environments, follow these steps.
Note
Tutorials show you the simplest deployment path for a scenario so that you can quickly set up a proof-of-concept. Tutorials use default options where possible and don't show all possible settings and paths.
In this tutorial, you'll learn how to:
- Choose and prepare ASP.NET web apps at-scale for migration to Azure Kubernetes Service using the integrated flow in Azure Migrate.
- Configure target settings such as the number of application instances to run and replicate your applications.
- Run test migrations to ensure your applications spin up correctly.
- Run a full migration of your applications to AKS.
Prerequisites
Before you begin this tutorial, you should address the following:
- If you don't have an Azure subscription, create a free account before you begin.
- Complete the first tutorial to discover web apps running in your VMware environment.
- Go to the existing project or create a new project.
Limitations
- You can migrate ASP.NET applications using Microsoft .NET framework 3.5 or later.
- You can migrate application servers running Windows Server 2012 R2 or later (application servers should be running PowerShell version 5.1).
- Applications should be running on Internet Information Services (IIS) 7.5 or later.
Enable replication
Once the web apps are assessed, you can migrate them using the integrated migration flow in Azure Migrate. The first step in this process is to configure and begin replication of your web apps.
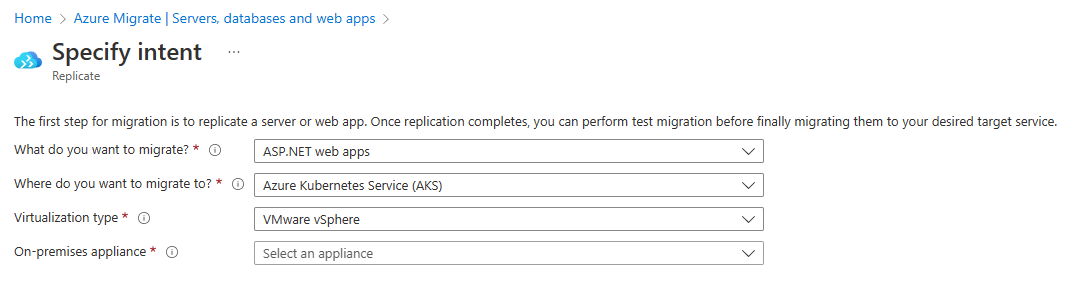
Specify intent
Navigate to your Azure Migrate project > Servers, databases and web apps > Migration tools > Migration and modernization, select Replicate.
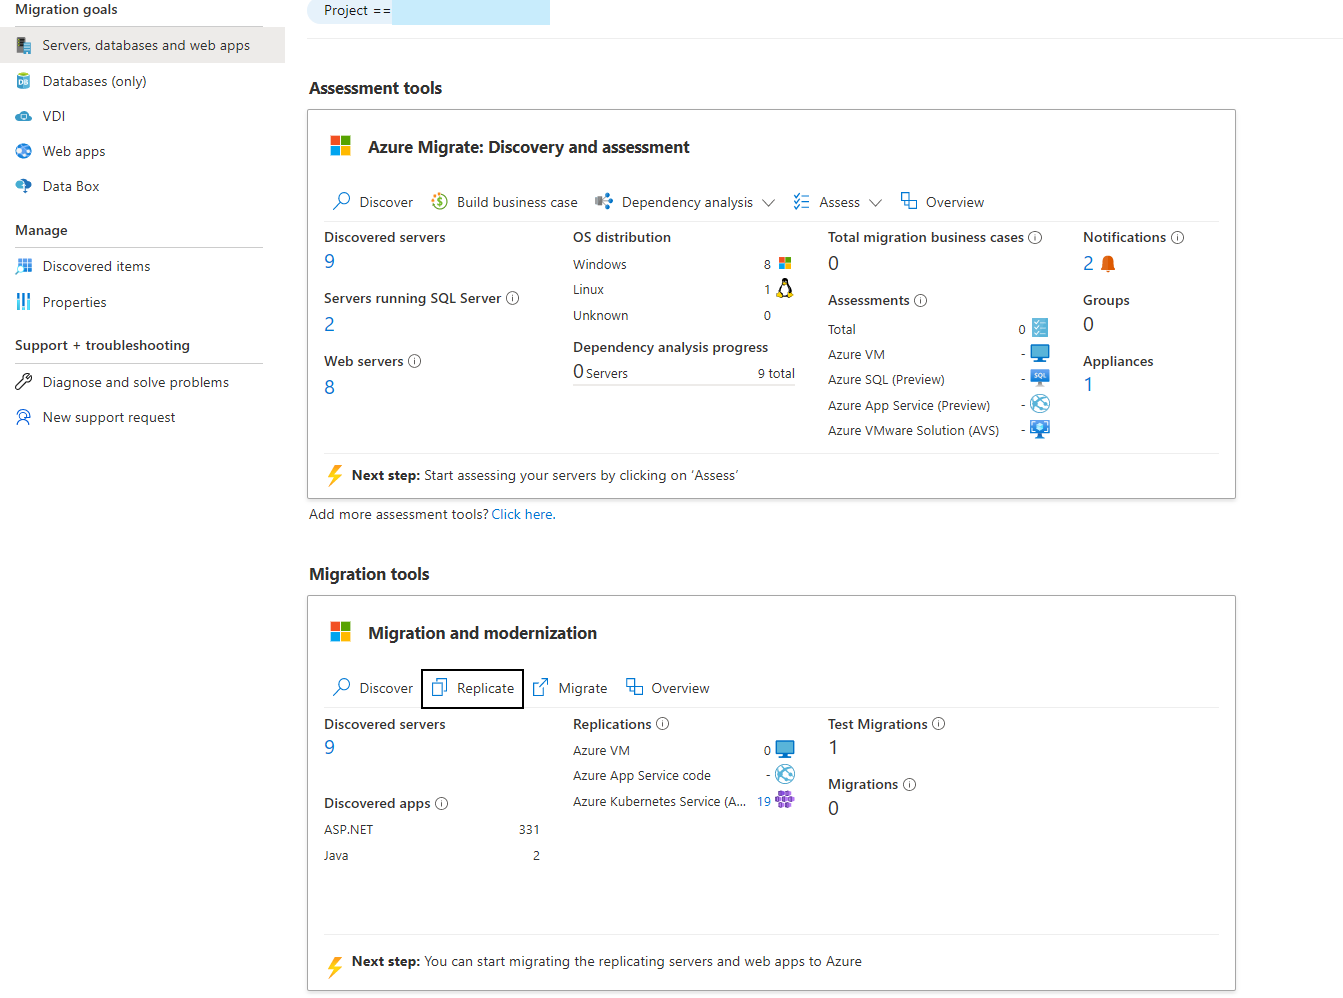
In the Specify intent tab, > What do you want to migrate?, select ASP.NET web apps from the drop-down.
In Where do you want to migrate to?, select Azure Kubernetes Service (AKS).
In Virtualization type, select VMware vSphere.
In On-premises appliance, choose the appliance which discovered your desired web apps on vSphere.
Select Continue.
Choose from discovered apps
In Replicate > Web apps, you can see a list of ASP.NET apps discovered on your environment.
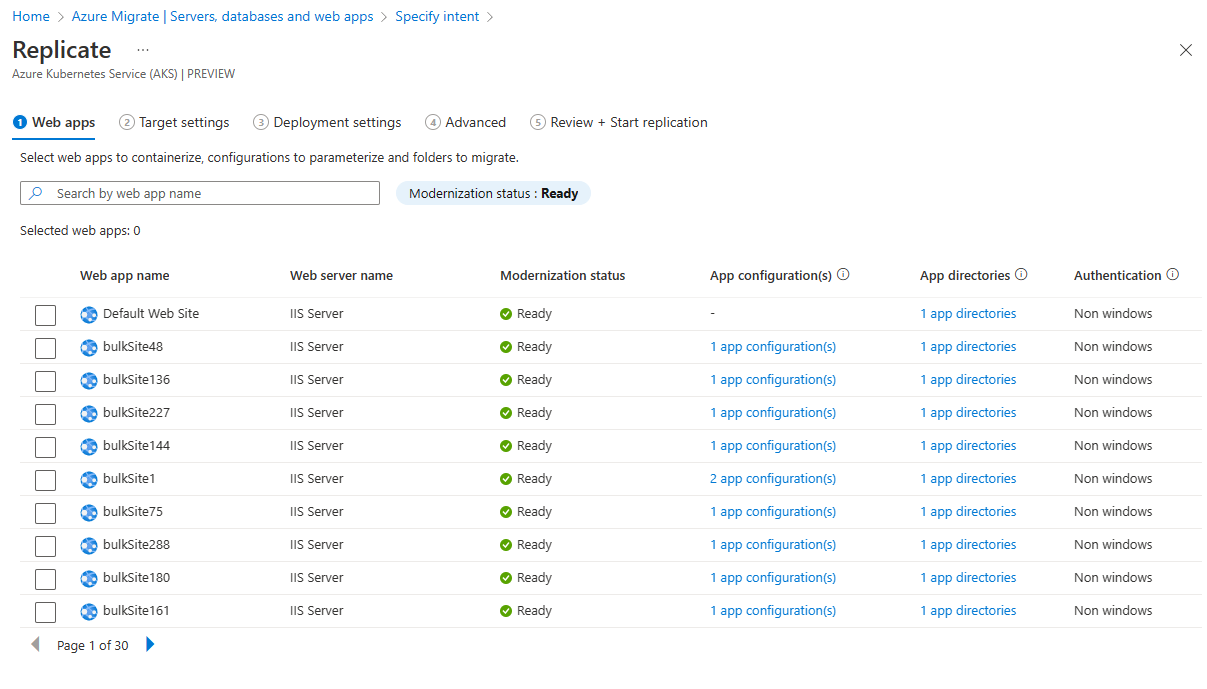
Choose one or more applications that should be replicated.
The Modernization status column indicates the readiness of the application to run on AKS. This can take one of the following values - Ready, Error(s), Replication in Progress.
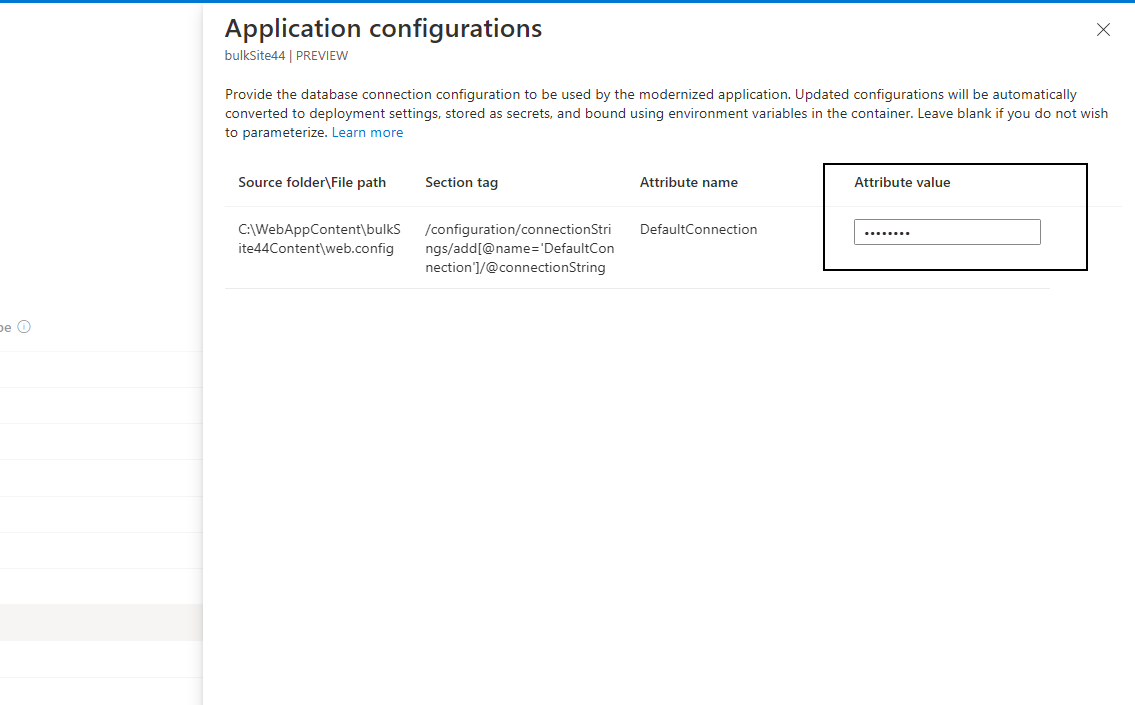
Select the application and select the App configuration(s) link to open the Application configurations tab. This provides the list of attributes detected from the discovered config files. Enter the required attribute values and select Save. These configurations will either be stored directly on the target cluster as secrets or can be mounted using Azure Key Vault. This can be configured in the advanced settings.
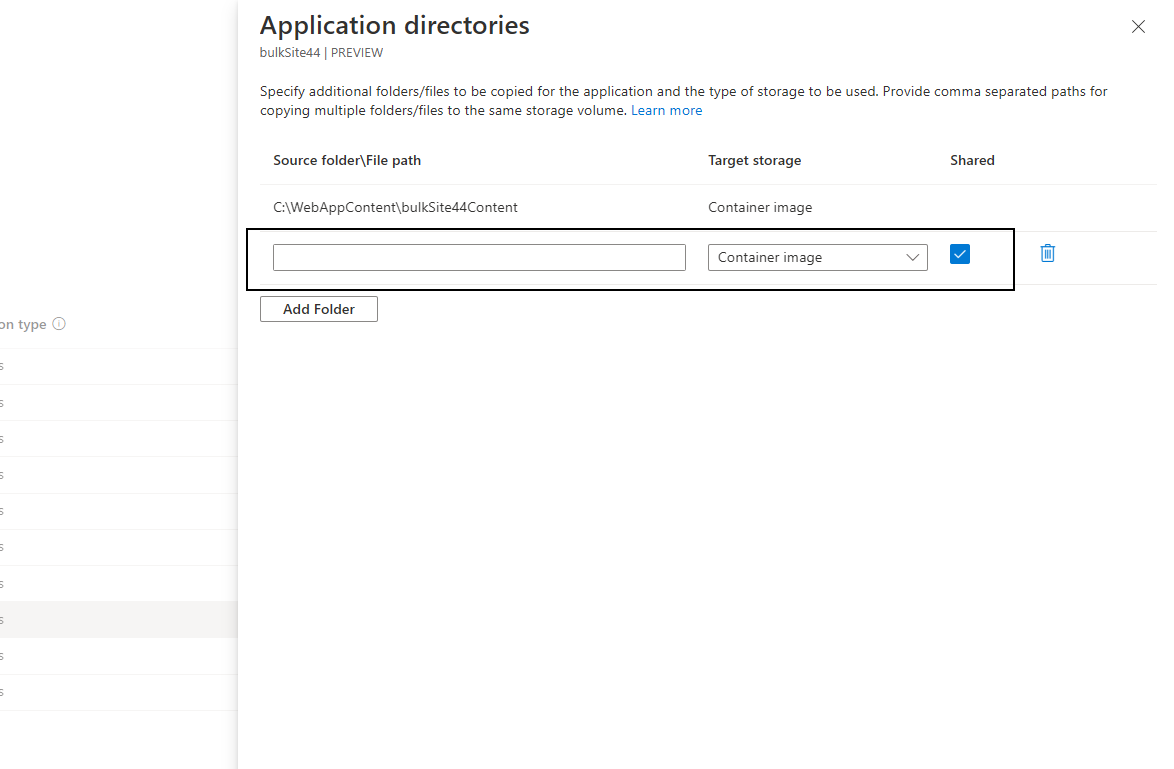
Select the application and select the App directories link to open the Application directories tab. Provide the path to folders/files that need to be copied for the application to run and select Save. Based on the option selected from the drop-down, these artifacts are either be copied directly into the container image or mounted as a persistent volume on the cluster via Azure file share. If persistent volume is chosen, the target can be configured in the advanced settings.
For the applications using Windows authentication, indicated by the Authentication type, you can configure gMSA V2 on the target AKS cluster.
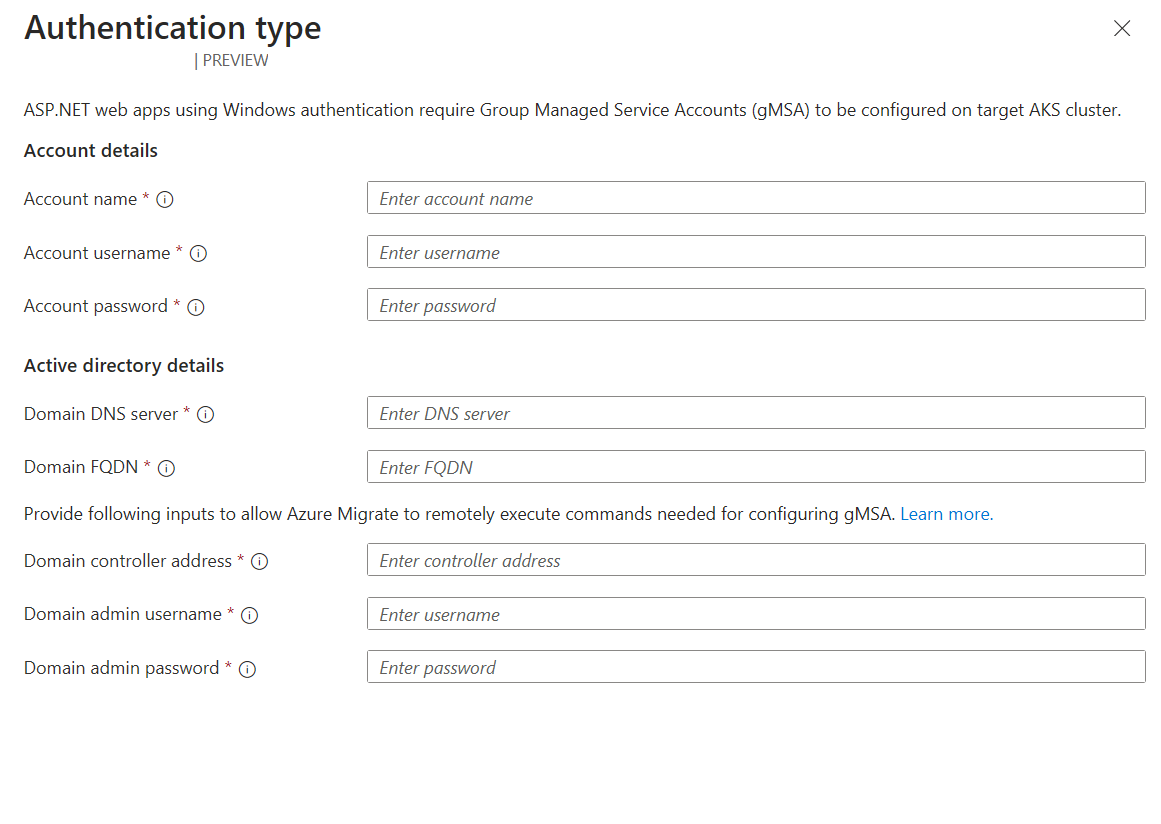
Setting Comments Account name Name of the gMSA account to use. If the account doesn't exist, a new account with this name is created automatically. Account username Username of the standard domain user that's authorized to access the gMSA configured on your Domain Controller. If the given username doesn't exist, a new standard domain user is created automatically. Account password Password of the above user. Domain DNS server IP address of the DNS server which can resolve your Active Directory domain name. Domain FQDN Fully qualified domain name of your Active Directory domain. Domain controller address IP address of the Active Directory Domain Controller. Connection is established to remotely allow the specified domain user to retrieve credentials for the specified gMSA. Domain admin username Username of a user that has sufficient privileges to remotely validate the gMSA account and domain user. Domain admin password Password for the admin user above. Select Next.
Note
The source path and the attribute value of App configurations and App directories together must be under 3000 characters in length. This can roughly be translated to around 15 entries (inclusive of both configurations and directories) of character length of about 200 each.
Configure target settings
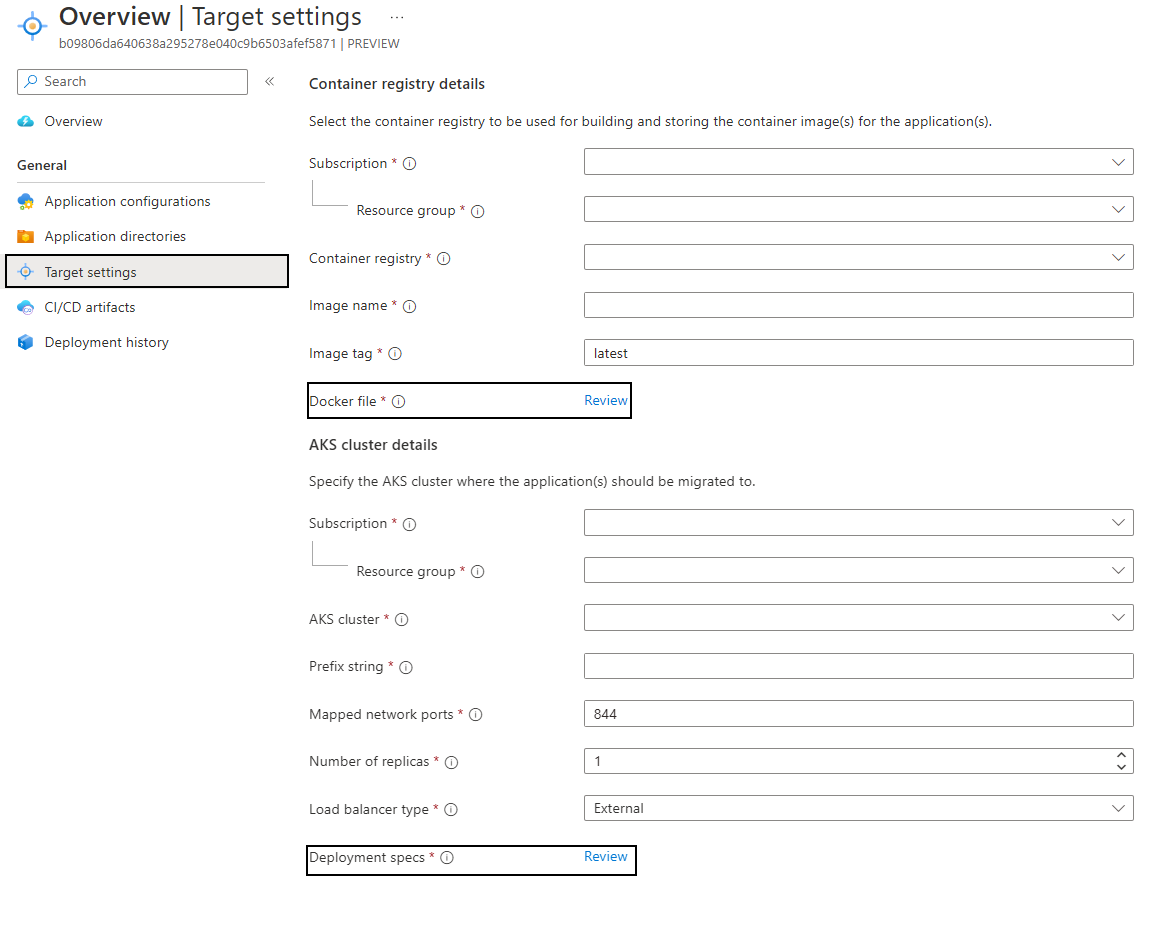
In Replicate > Target settings, you can configure the target where the applications will be migrated to.

- Choose the subscription, resource group, and container registry resource to which the app container images should be pushed.
- Choose the subscription, resource group, and AKS cluster resource on which the app should be deployed.
- Select Next.
Note
Only AKS clusters with Windows nodes are listed.
Configure deployment settings
In Replicate > Deployment settings, you can configure the application on the AKS cluster.
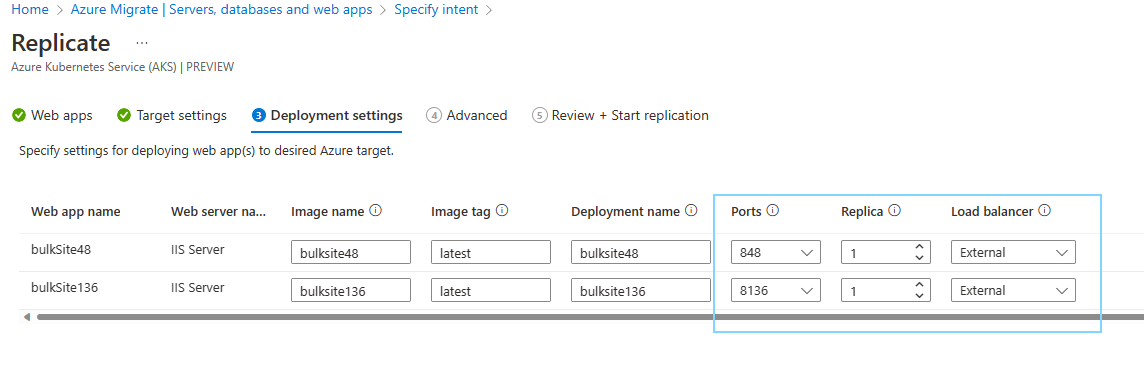
- Default values are provided based on the app discovery.
- In the Replica option, choose the number of app instances for each app.
- In the Load balancer option, choose External if the app needs to be accessed over the Internet. If Internal is chosen, the app can only be accessed within the virtual network of the AKS cluster.
- Select Next.
Configure advanced settings
If one or more apps had app configurations or directories updated in Replicate > Web apps, then Replicate > Advanced is used to provide additional required configurations.

- If application configurations were provided, choose to store them either as native Kubernetes secrets or on Azure Key Vault using secrets store CSI driver. Ensure that the target cluster has the secrets store driver addon enabled.
- If application directories were provided with a persistent storage option, select an Azure file share to store these files.
- Select Next.
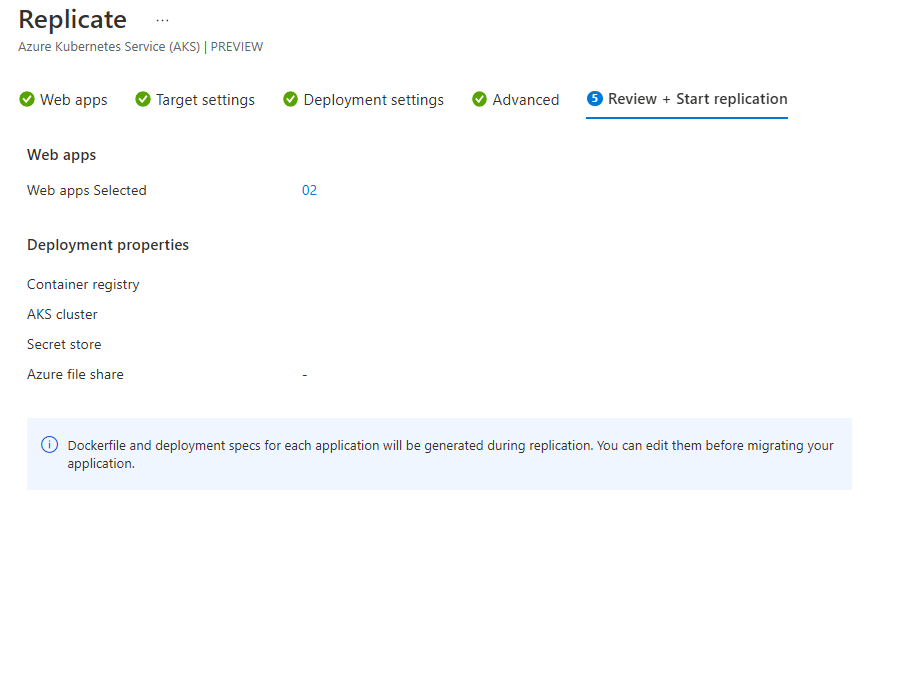
Review and start replication
Review your selections and make any other required changes by navigating to the right tab on the Replicate tab. After reviewing, select Replicate.
Prepare for migration
Once you begin replication, Azure Migrate creates a replication job which can be accessed from your project.
Navigate to the target resource
Navigate to your Azure Migrate project > Servers, databases and web apps > Migration tools > Migration and modernization, select Overview.
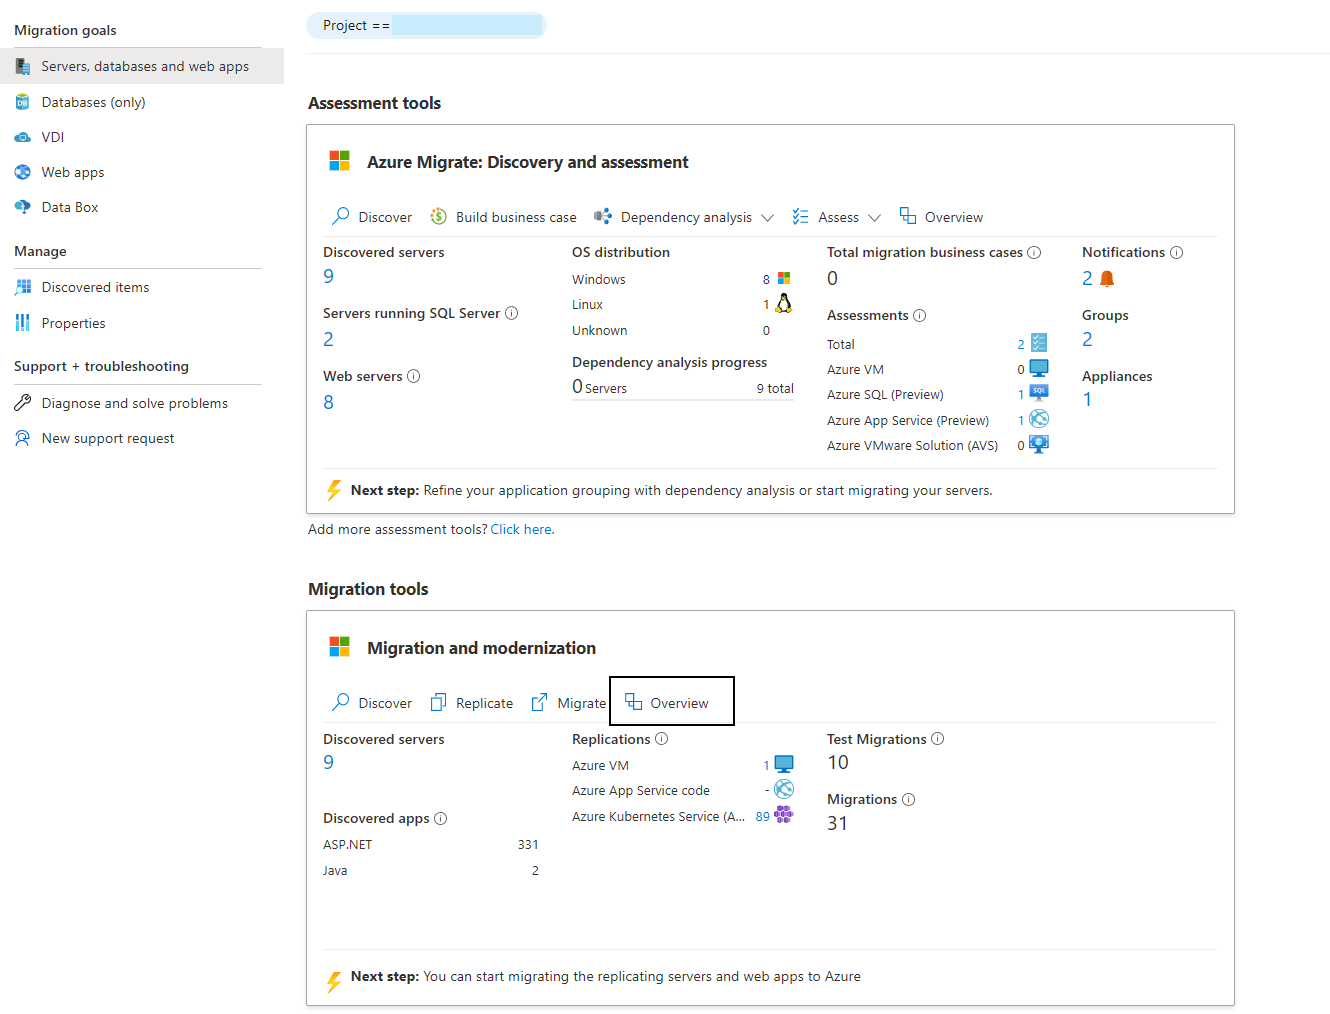
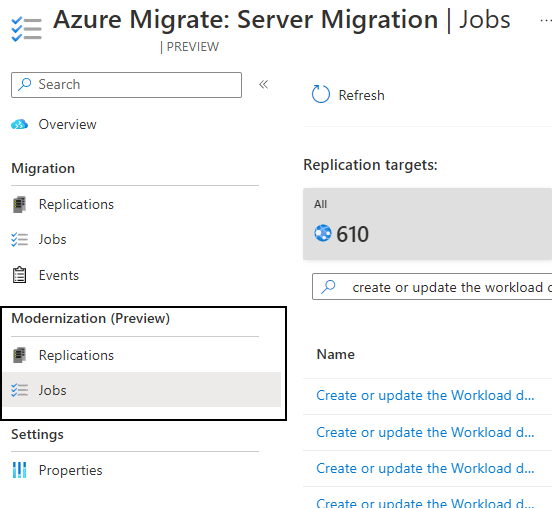
Select Azure Migrate: Server Migration hub > Modernization (Preview) > Jobs.
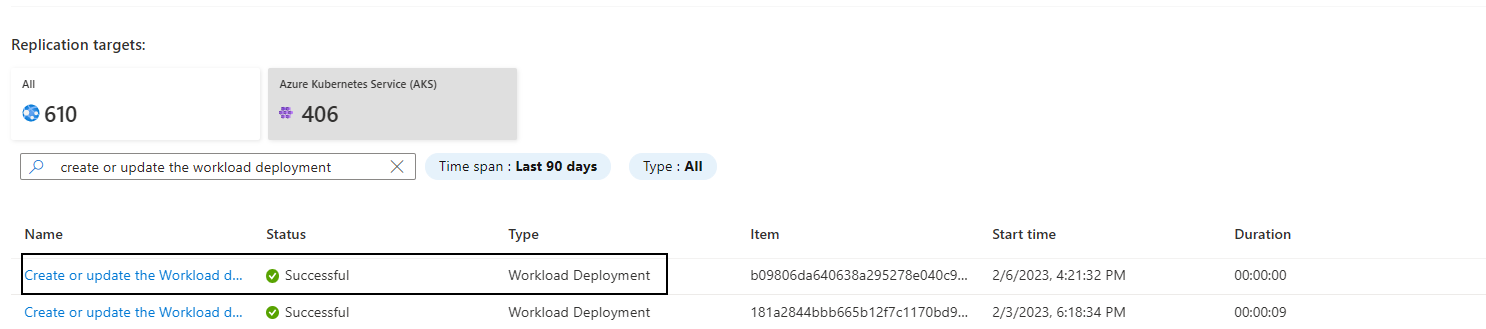
Select Azure Kubernetes Service (AKS) as the replication target. Azure Migrate will create one replication job for each ASP.NET app replicated. Select the Create or update the Workload deployment job of type Workload Deployment.
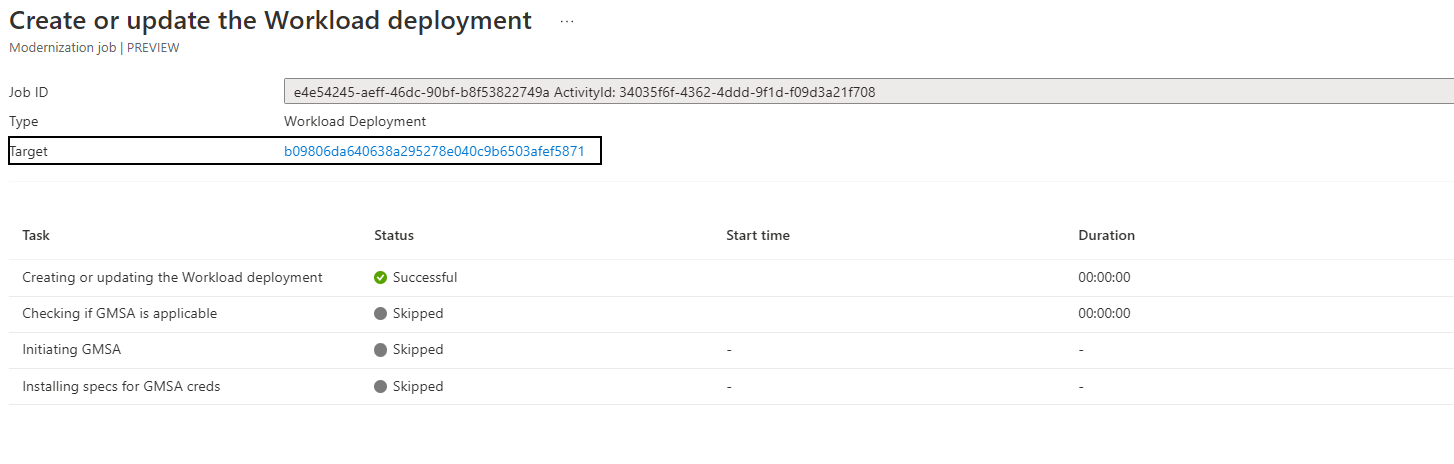
Select the Target resource. All the pre-migration steps can be configured here.
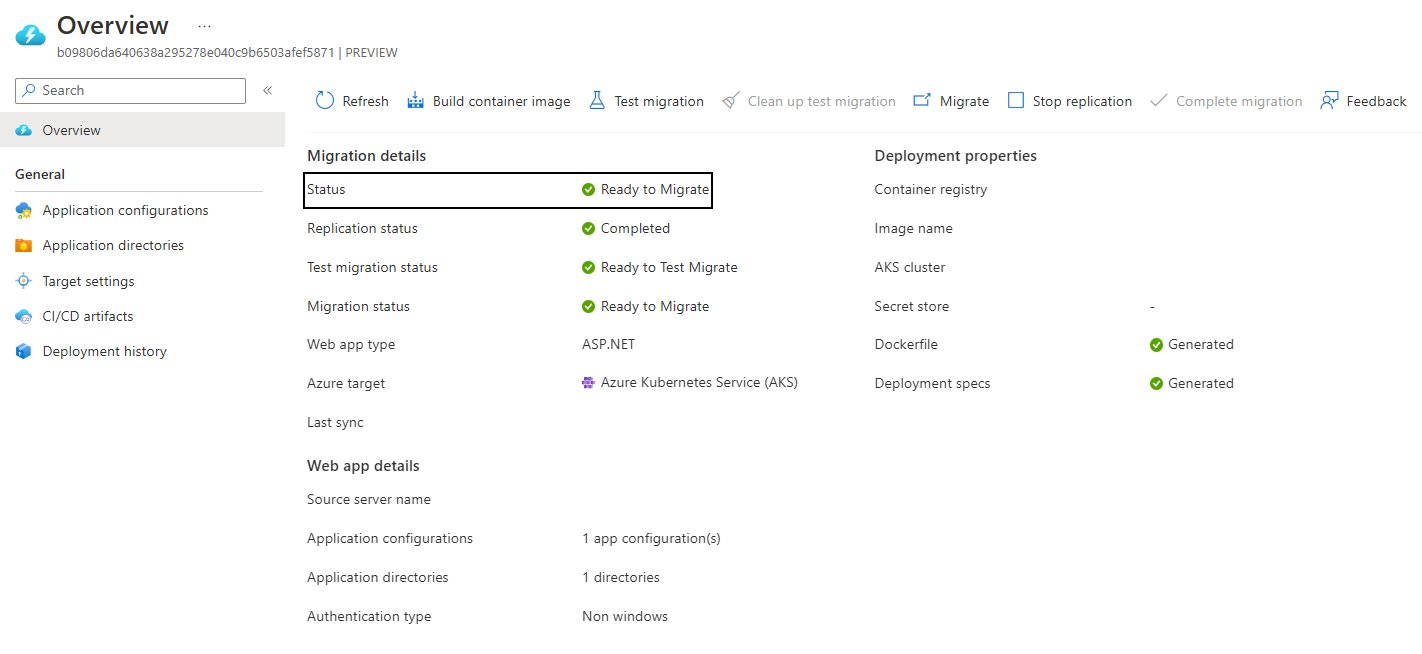
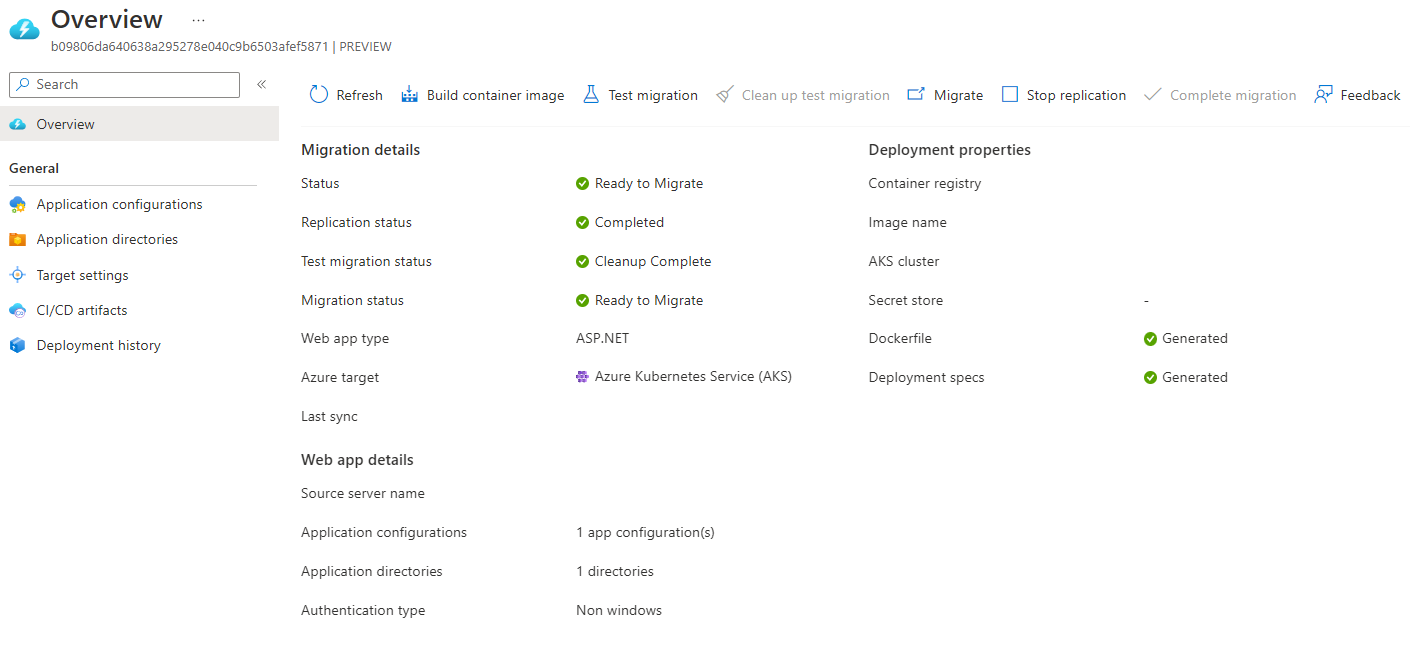
After replication is completed, the Replication status will be Completed and the overall Status will be Image build pending.
Review the container image and Kubernetes manifests
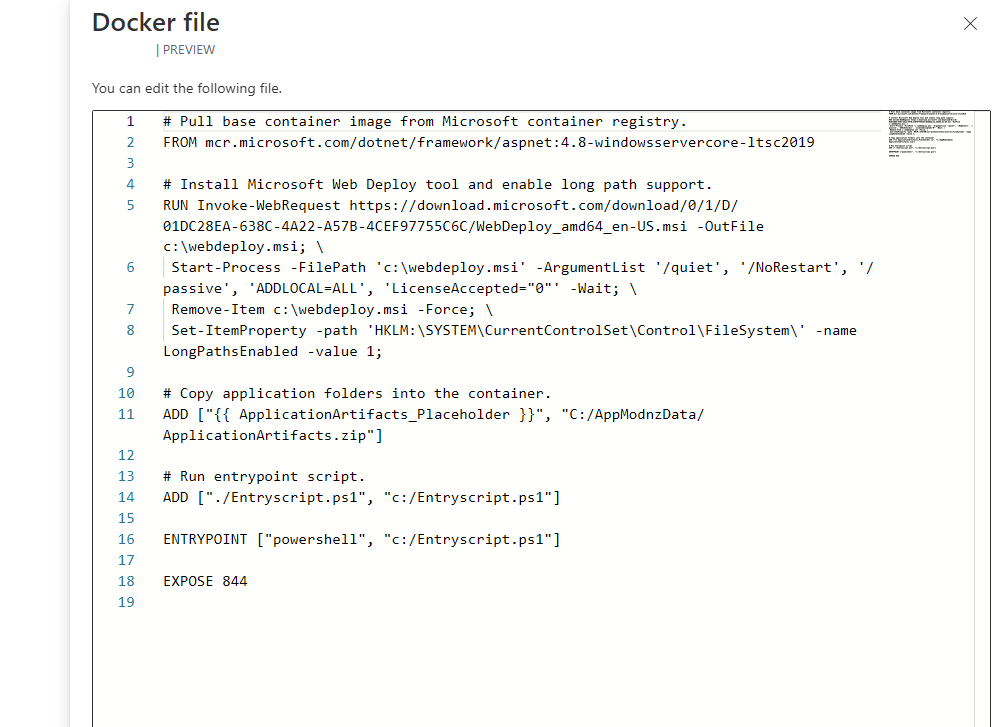
In the Target settings tab, links to the Docker file and the Kubernetes manifests will be provided.
Select the Docker file review link to open the editor. Review and make changes as required. Select Save.
Select the Deployment specs review link to open the editor. This contains the Kubernetes manifest file containing all the resources that will be deployed including
StatefulSet,Service,ServiceAccountetc. Review and make changes as required. Select Save.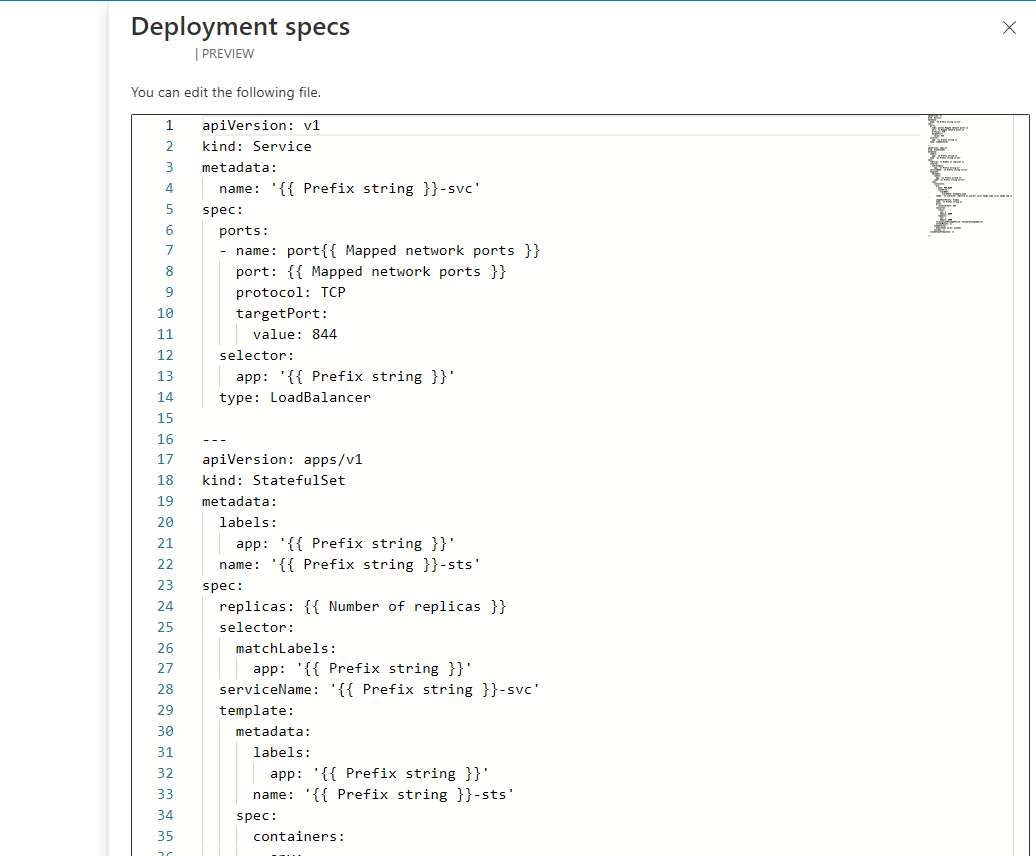
In the Overview tab, select Build container image to build and push the container image to the provided container registry.
After the image is built, the overall Status will change to Ready to Migrate.
Run a test migration
With the container image ready, run a test migration to ensure your application spins up correctly on AKS.
- In the Overview tab, select Test migration, then select Yes to confirm.
- Once the test migration completes, verify that the workloads are running on the AKS cluster. If the external load balancer option was chosen during the replication process, your application should be exposed to the Internet via a service of type
loadbalancerwith an assigned public IP address. - After verifying that the application is working, clean up the test migration by selecting Clean up test migration.
If the test migration fails:
Navigate to Azure Migrate: Server Migration hub > Modernization (Preview) > Jobs.
Select the Initiate test migrate job that failed.
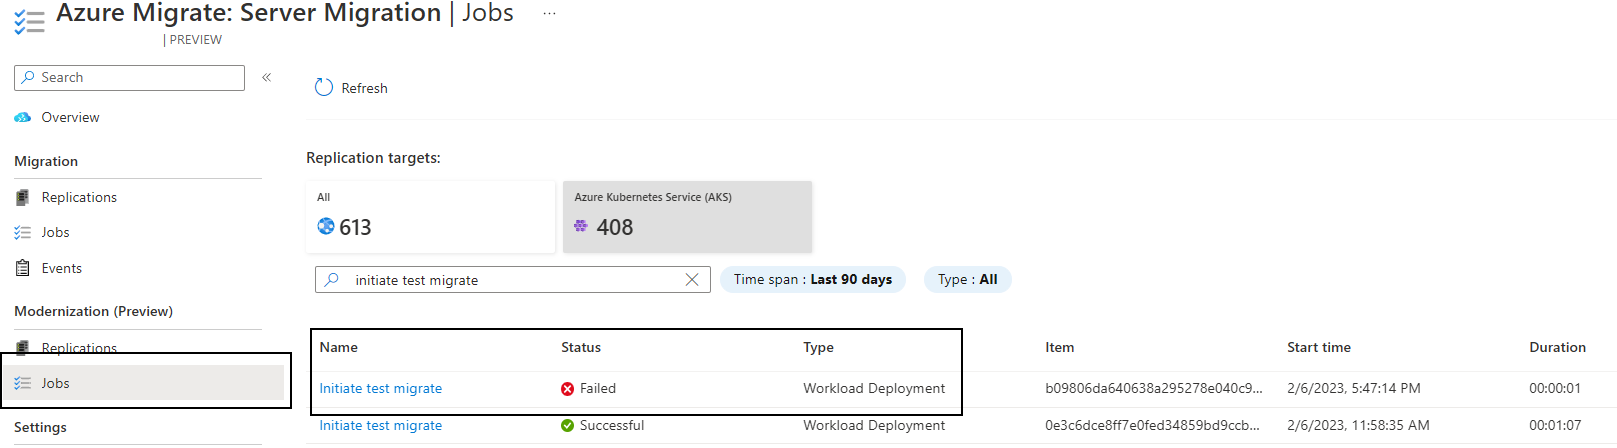
Select the failed task link to see possible failure causes and recommendations.

Migrate your applications to AKS
The application is finally ready for migration:
In the Overview tab, select Migrate, then select Yes to confirm.
Similar to the test migration workflow, verify that the workloads are running on the AKS cluster.
The application has now successfully been migrated. If you wish for the appliance to discover it again and make it available for migration, select Complete migration.
Next steps
After successfully migrating your applications to AKS, you may explore the following articles to optimize your apps for cloud:
- Set up CI/CD with Azure Pipelines, GitHub Actions or through GitOps.
- Use Azure Monitor to monitor health and performance of AKS and your apps.
- Harden the security posture of your AKS cluster and containers with Microsoft Defender for Containers.
- Optimize Windows Dockerfiles.
- Review and implement best practices to build and manage apps on AKS.