Move Azure SQL Database resources to another region
In this tutorial, you learn how to move Azure SQL databases and elastic pools to a different Azure region, using Azure Resource Mover.
In this tutorial, you learn how to:
- Move Azure SQL databases and elastic pools to a different Azure region
Note
Tutorials show the quickest path for trying out a scenario, and use default options.
Prerequisites
Before you begin:
- Check if you have Owner access on the subscription containing the resources that you want to move.
- The first time you add a resource for a specific source and destination pair in an Azure subscription, Resource Mover creates a system-assigned managed identity (formerly known as Managed Service Identify (MSI)) that's trusted by the subscription.
- To create the identity, and to assign it the required role (Contributor or User Access administrator in the source subscription), the account you use to add resources needs Owner permissions on the subscription. Learn more about Azure roles.
- Check if the subscription has enough quota to create the resources you're moving in the target region. If it doesn't have quota, request more limits.
- Verify pricing and charges associated with the target region to which you're moving resources. Use the pricing calculator to help you.
Sign in to Azure
If you don't have an Azure subscription, create a free account before you begin. Then sign in to the Azure portal.
Check SQL requirements
To check the SQL requirements before the move:
- Check which database/elastic pool features are supported for moving to another region.
- In the target region, create a target server for each source server and ensure proper user access. Learn more about how to configure logins and users.
- Check if the databases are encrypted with transparent data encryption (TDE). If databases are encrypted with transparent data encryption and you use your own encryption key in Azure Key Vault, learn how to move key vaults to another region.
- If SQL data sync is enabled, moving the member databases is supported. After the move, you need to set up SQL data sync to the new target database.
- Remove advanced data security settings before the move. After the move, configure the settings at the SQL Server level in the target region.
- If auditing is enabled, the policies reset to default after the move. Set up auditing again after moving.
- Back up retention policies for the source database are carried over to the target database. Learn more about modifying settings after the move.
- Remove server-level firewall rules before the move. Database-level firewall rules are copied from the source server to the target server, during the move. Set up firewall rules for SQL Server in the target region after the move.
- Remove autotuning settings before the move. Then set up autotuning again after moving.
- Remove database alert settings before the move. Reset it after moving.
Select resources
You can select any supported resource type in any resource groups in the selected source region. You move resources to a target region in the same subscription as the source region. If you want to change the subscription, you can do that after the resources are moved.
To select the resources you want to move, follow these steps:
In the Azure portal, search for resource mover. Then, under Services, select Azure Resource Mover.

On the Azure Resource Mover Overview pane, select Move across regions.

On Move resources > Source + destination:
- Select the source Subscription and Region.
- Under Destination, select the region to which you want to move the resources. Then select Next.

On Move resources > Resources to move:
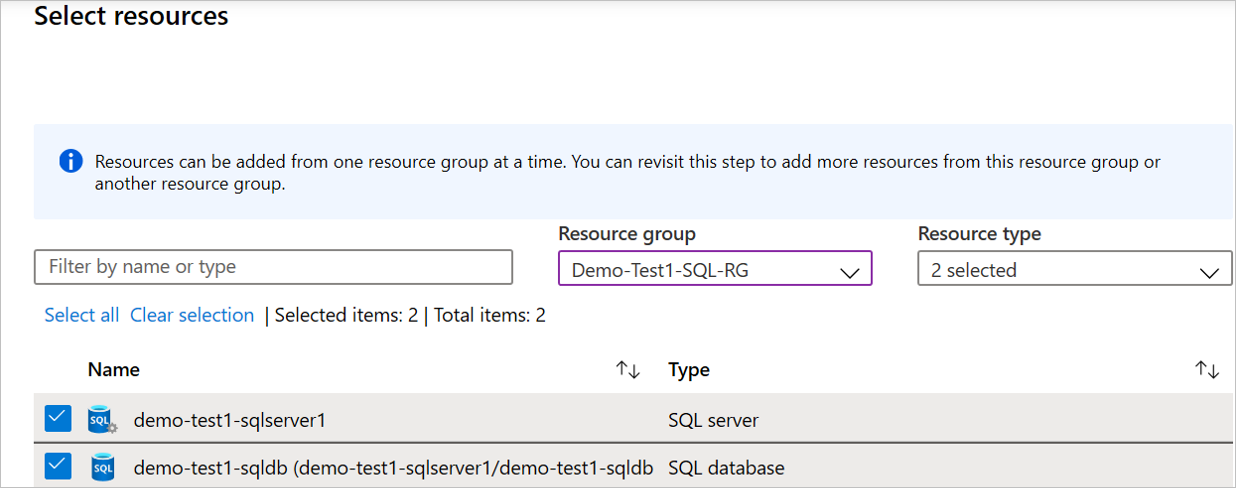
Go to Select resources.
On Select resources pane, select the resources. You can only add resources that are supported for move. Then select Done.
In Resources to move, select Next.
In Review + Add, check the source and destination settings. Verify that you understand that metadata about the move will be stored in a resource group created for this purpose in the metadata region.

Select Proceed, to begin adding the resources.
After the add process finishes successfully, select Adding resources for move in the notification icon.
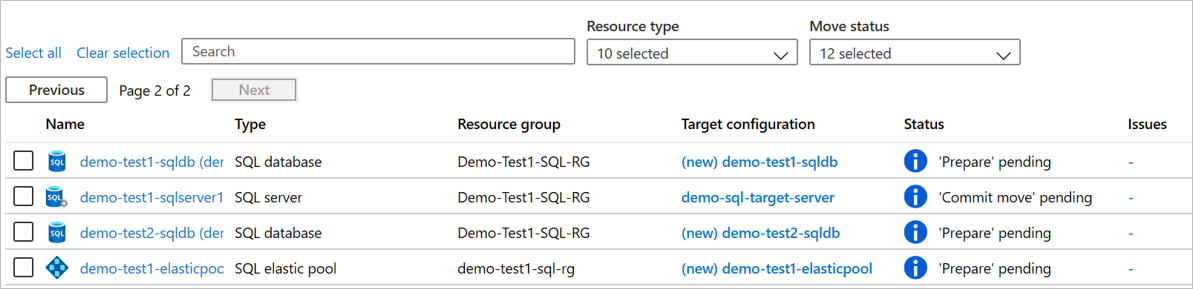
After selecting the notification, review the resources on the Across regions page.


Note
- The SQL Server is now in a Manual assignment pending state.
- Other added resources are in a Prepare pending state.
- If you want to remove an resource from a move collection, the method for doing that depends on where you are in the move process. Learn more.
Resolve dependencies
To resolve the dependent resources you want to move, follow these steps:
Dependencies are auto-validated in the background when you add the resources. If the initial auto validation does not resolve the issue, you will see a Validate dependencies option, select it to validate manually.
If dependencies are found, select Add dependencies.

In Add dependencies, select the dependent resources > Add dependencies. You can monitor the progress in the notifications.
Dependencies are auto-validated in the background once you add the dependencies. If you see a Validate dependencies option, select it to trigger the manual validation.
On the Across regions page, verify that the resources are now in a Prepare pending state with no issues.


Move SQL server
Azure Resource Mover currently doesn't move SQL server across regions. You must first assign a target SQL Server in the target region, and then commit the move.
To assign the destination resources manually, follow these steps:
Assign a target SQL server- To assign a target SQL server, follow these steps:
In Across regions, for the SQL server resource, in the Destination configuration column, select Resource not assigned.
Select an existing SQL Server resource in the target region.

Note
The source SQL Server state changes to Commit move pending.
Commit the SQL Server move- To commit a target SQL server and finish the move process, follow these steps:
In Across regions, select the SQL Server, and then select Commit move.
In Commit resources, select Commit.

Track the move progress in the notifications bar.
Note
After the commit, the SQL Server is now in a Delete source pending state.


Prepare resources to move
With the source SQL Server moved, you can prepare to move the other resources.
Prepare an elastic pool
To prepare an elastic pool for the move, follow these steps:
In Across regions, select the source elastic pool (demo-test1-elasticpool in our walkthrough), and select Prepare.

In Prepare resources, select Prepare.
When notifications show that the prepare process was successful, select Refresh.

Note
The elastic pool is now in an Initiate move pending state.
Prepare a single database
To prepare a single database for the move, follow these steps:
In Across regions, select the single database (not in an elastic pool), and then select Prepare.

In Prepare resources, select Prepare.
When notifications show that the prepare process was successful, select Refresh.

Note
The database is now in an Initiate move pending state, and has been created in the target region.
Move the pool and prepare pool databases
To prepare databases in an elastic pool, the elastic pool must be in a Commit move pending state. To move to this state, initiate the move for the pool.
Initiate move - elastic pool
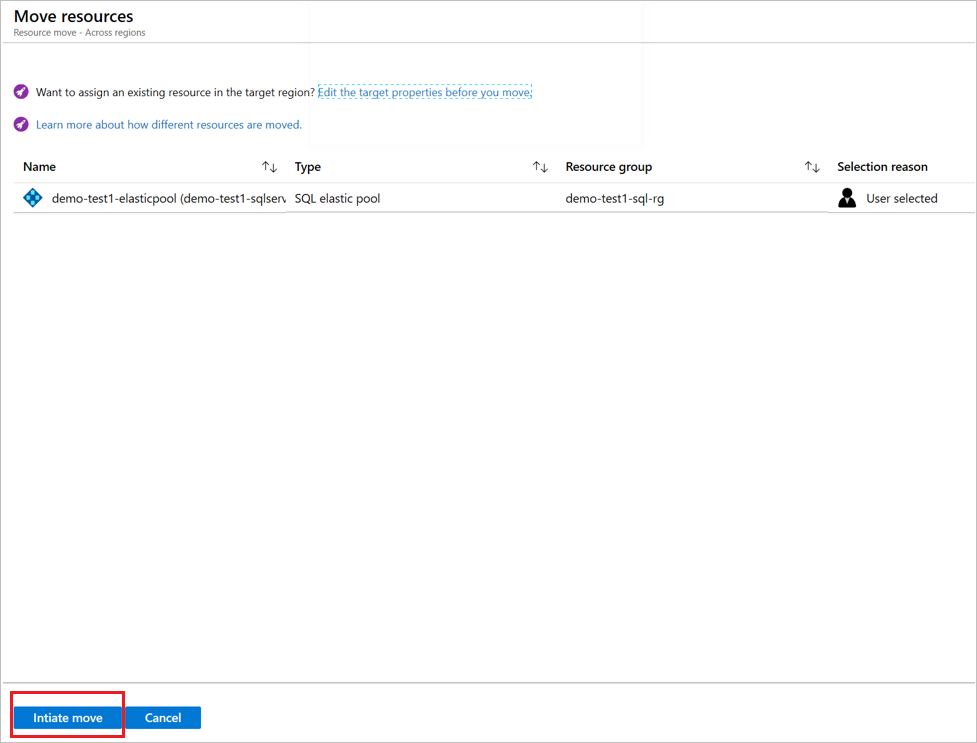
To initiate a move for an elastic pool, follow these steps:
In Across regions, select the source elastic pool (demo-test1-elasticpool in our walkthrough), and then select Initiate move.
In Move resources, select Initiate move.
Track the move progress in the notifications bar.
When the notifications show that the move was successful, select Refresh.

Note
The elastic pool is now in a Commit move pending state.
Prepare database
To prepare a database for the move, follow these steps:
In Across regions, select the database (demo-test2-sqldb in our walkthrough), and then select Prepare.
In Prepare resources, select Prepare.


During the prepare stage, the target database is created in the target region and the data replication starts. After Prepare, the database is in an Initiate move pending state.

Move databases
Now that you've prepared the resources prepared, you can initiate the move.
To move the databases, follow these steps:
In Across regions, select resources with state Initiate move pending. Then select Initiate move.
In Move resources, select Initiate move.

Track the move progress in the notifications bar.

Note
Databases are now in a Commit move pending state.
Commit or discard the move
After the initial move, you can decide whether you want to commit the move, or to discard it.
- Discard: You might want to discard a move if you're testing, and you don't want to actually move the source resource. Discarding the move returns the resource to a state of Initiate move pending.
- Commit: Commit completes the move to the target region. After committing, a source resource will be in a state of Delete source pending and you can decide if you want to delete it.
Discard the move
To discard the move, follow these steps:
- In Across regions, select resources with state Commit move pending, and select Discard move.
- In Discard move, select Discard.
- Track move progress in the notifications bar.
Note
- After discarding resources, they're in an Initiate move pending state.
- If there's only an elastic pool, discard progresses, and the elastic pool created in the target region is deleted.
- If there's an elastic pool with associated databases in the Commit move pending state, you can't discard the elastic pool.
- If you discard an SQL database, target region resources aren't deleted.
If you want to start the move again after discarding, select the SQL database, or elastic pool and initiate the move again.
Commit the move
Finish moving databases and elastic pools by following these steps:
Check that the SQL Server is a Delete source pending state.
Update database connection strings to the target region, before you commit.
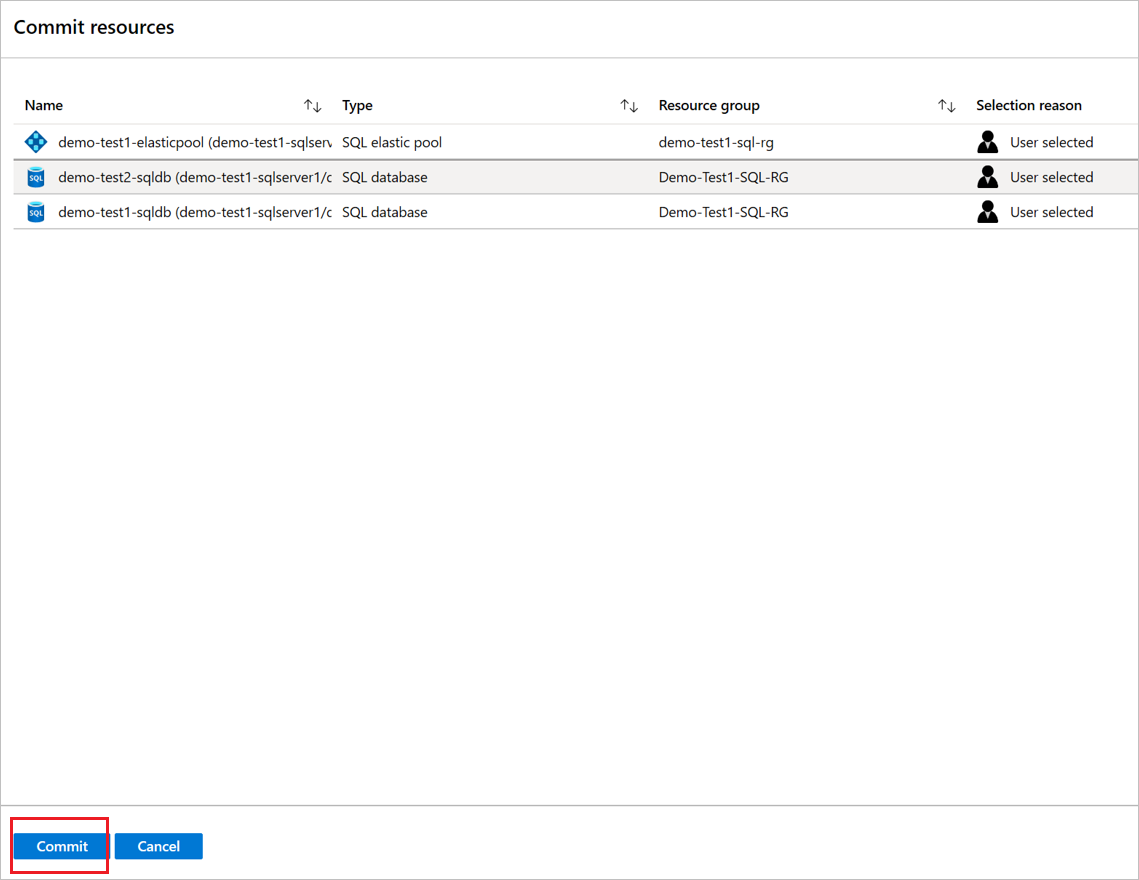
In Across regions, select the SQL resources, and then select Commit move.
In Commit resources, select Commit.
Track the commit progress in the notifications bar.

Note
Some downtime occurs for SQL databases during the commit process. Committed databases and elastic pools are now in a Delete source pending state. After the commit, update database-related settings, including firewall rules, policies, and alerts, on the target database.
Delete source resources after commit
After the move, you can optionally delete resources in the source region.
Note
SQL Server servers can't be deleted from the portal and must be deleted from the resource property page.
- On the Across regions pane, select the name of the source resource that you want to delete.
- Select Delete source.
Next steps
Learn more about moving Azure VMs to another region.
Feedback
Coming soon: Throughout 2024 we will be phasing out GitHub Issues as the feedback mechanism for content and replacing it with a new feedback system. For more information see: https://aka.ms/ContentUserFeedback.
Submit and view feedback for