Replicate on-premises machines by using private endpoints
Azure Site Recovery allows you to use Azure Private Link private endpoints to replicate your on-premises machines to a virtual network in Azure. Private endpoint access to a recovery vault is supported in all Azure Commercial & Government regions.
Note
Automatic upgrades are not supported for Private Endpoints. Learn more.
In this tutorial, you learn how to:
- Create an Azure Backup Recovery Services vault to protect your machines.
- Enable a managed identity for the vault. Grant the permissions required to access the storage accounts to enable replication of traffic from on-premises to Azure target locations. Managed identity access for storage is required for Private Link access to the vault.
- Make DNS changes that are required for private endpoints.
- Create and approve private endpoints for a vault inside a virtual network.
- Create private endpoints for the storage accounts. You can continue to allow public or firewalled access for storage as needed. Creating a private endpoint to access storage isn't required for Azure Site Recovery.
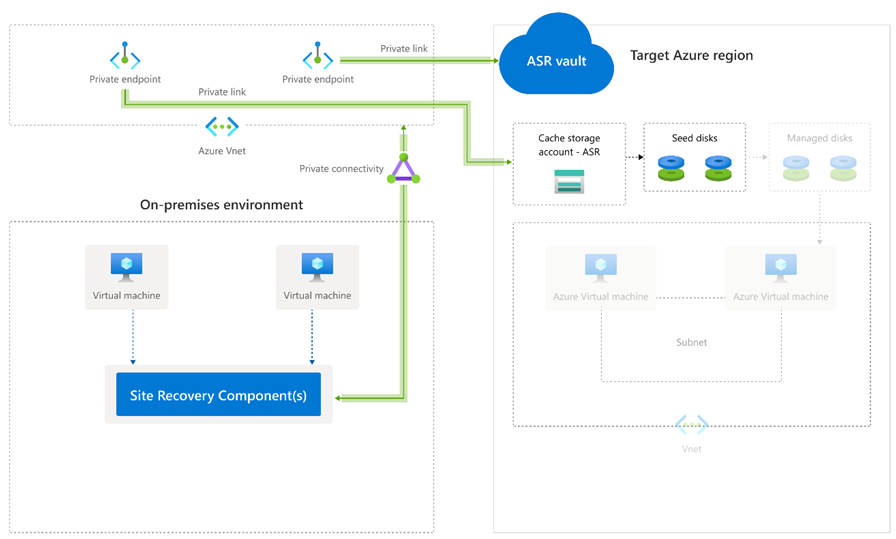
The following diagram shows the replication workflow for hybrid disaster recovery with private endpoints. You can't create private endpoints in your on-premises network. To use private links, you need to create an Azure virtual network (called a bypass network in this article), establish private connectivity between on-premises and the bypass network, and then create private endpoints in the bypass network. You can choose any form of private connectivity.
Prerequisites and caveats
Before you start, note the following:
- Private links are supported in Site Recovery 9.35 and later.
- You can create private endpoints only for new Recovery Services vaults that don't have any items registered to them. Therefore, you must create private endpoints before any items are added to the vault. See Azure Private Link pricing for pricing information.
- When you create a private endpoint for a vault, the vault is locked down. It can be accessed only from networks that have private endpoints.
- Microsoft Entra ID doesn't currently support private endpoints. So you need to allow outbound access from the secured Azure virtual network to IPs and fully qualified domain names that are required for Microsoft Entra ID to work in a region. As applicable, you can also use network security group tag "Microsoft Entra ID" and Azure Firewall tags to allow access to Microsoft Entra ID.
- Five IP addresses are required in the bypass network where you create your private endpoint. When you create a private endpoint for the vault, Site Recovery creates five private links for access to its microservices.
- One additional IP address is required in the bypass network for private endpoint connectivity to a cache storage account. You can use any connectivity method between on-premises and your storage account endpoint. For example, you can use the internet or Azure ExpressRoute. Establishing a private link is optional. You can create private endpoints for storage only on General Purpose v2 accounts. See Azure Page Blobs pricing for information about pricing for data transfer on General Purpose v2 accounts.
Note
While setting up private endpoints to protect VMware and physical machines, you will need to install MySQL on the configuration server manually. Follow the steps here to perform the manual installation.
URLs to be allowed
When using the private link with modernized experience for VMware VMs, public access is needed for a few resources. Below are all URLs to be included in the allowlist. If proxy-based configuration is used, make sure that the proxy resolves any CNAME records received while looking up the URLs.
| URL | Details |
|---|---|
| portal.azure.com | Navigate to the Azure portal. |
*.windows.net *.msftauth.net*.msauth.net*.microsoft.com*.live.com *.office.com |
To sign-in to your Azure subscription. |
*.microsoftonline.com *.microsoftonline-p.com |
Create Microsoft Entra applications for the appliance to communicate with Azure Site Recovery. |
management.azure.com |
Used for Azure Resource Manager deployments and operations. |
*.siterecovery.windowsazure.com |
Used to connect to Site Recovery services. |
Ensure the following URLs are allowed and reachable from the Azure Site Recovery replication appliance for continuous connectivity, when enabling replication to a government cloud:
| URL for Fairfax | URL for Mooncake | Details |
|---|---|---|
login.microsoftonline.us/* graph.windows.net |
login.microsoftonline.cn graph.chinacloudapi.cn |
To sign-in to your Azure subscription. |
*.portal.azure.us |
*.portal.azure.cn |
Navigate to the Azure portal. |
management.usgovcloudapi.net |
management.chinacloudapi.cn |
Create Microsoft Entra applications for the appliance to communicate with the Azure Site Recovery service. |
Create and use private endpoints for site recovery
The following sections describe the steps you need to take to create and use private endpoints for site recovery in your virtual networks.
Note
We recommend that you follow these steps in the order shown. If you don't, you might not be able to use private endpoints in the vault, and you might need to restart the process with a new vault.
Create a Recovery Services vault
A Recovery Services vault contains the machines' replication information. It's used to trigger Site Recovery operations. For information about how to create a Recovery Services vault in the Azure region where you want to fail over if there's a disaster, see Create a Recovery Services vault.
Enable the managed identity for the vault
A managed identity allows the vault to access your storage accounts. Site Recovery might need to access the target storage and cache/log storage accounts, depending on your requirements. Managed identity access is required when you're using the Private Link service for the vault.
Go to your Recovery Services vault. Select Identity under Settings:
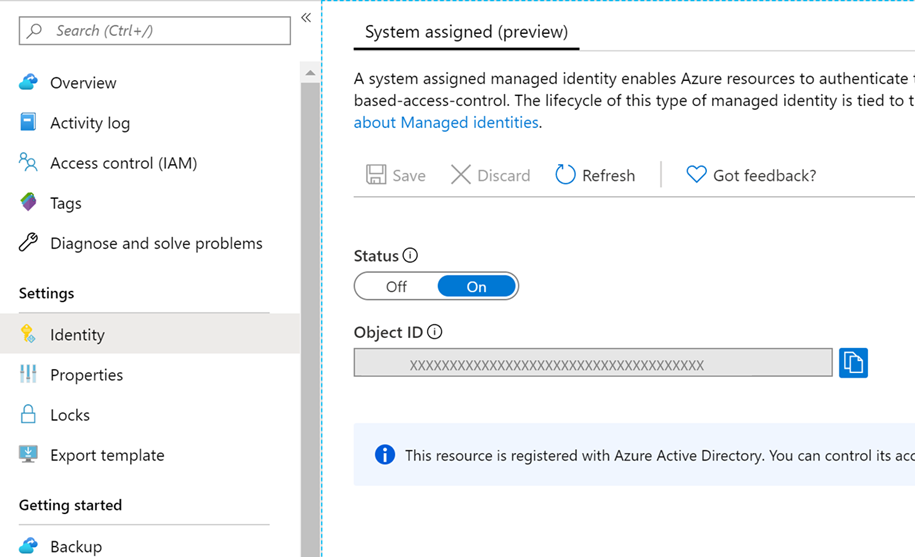
Change the Status to On and select Save.
An Object ID is generated. The vault is now registered with Microsoft Entra ID.
Create private endpoints for the Recovery Services vault
To protect the machines in the on-premises source network, you'll need one private endpoint for the vault in the bypass network. You can create the private endpoint by using Private Link Center in the Azure portal or by using Azure PowerShell.
To create a private endpoint follow these steps:
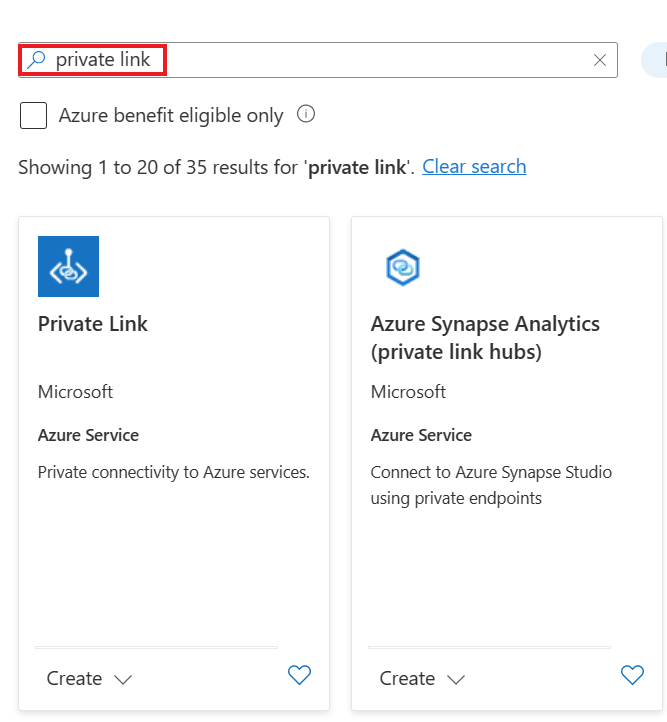
In the Azure portal, select Create a resource.
Search the Azure Marketplace for Private link.
Select Private Link from the search results, and in the Backup and Site Recovery page, select Create.
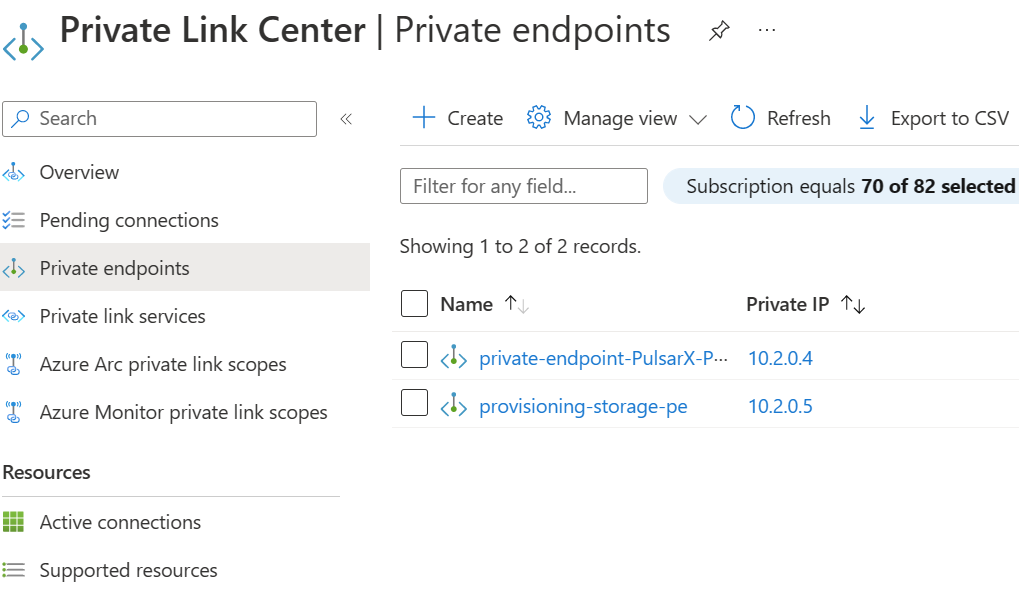
In the left pane, select Private endpoints. On the Private endpoints page, select Create to start creating a private endpoint for your vault:
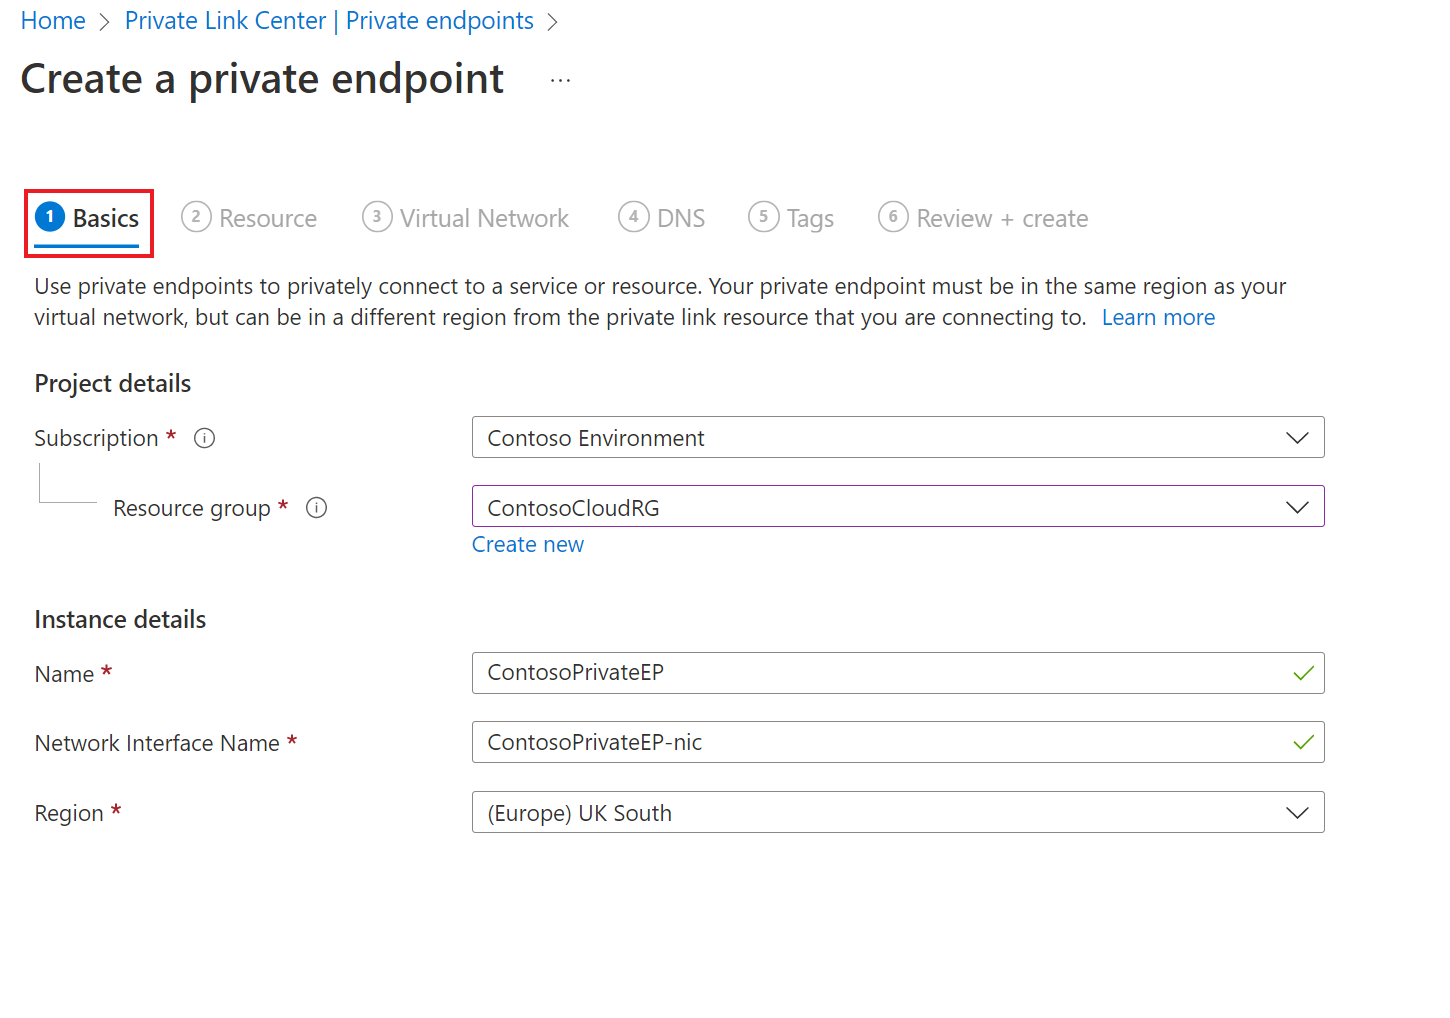
On the Create a private endpoint page, under the Basics > Project details section, do the following:
- Under Subscription select Contoso Environment.
- In Resource group, select an existing resource group or create a new one. For example, ContosoCloudRG.
In the Create a private endpoint page, under Basics > Instance details section, do the following:
- In Name, enter a friendly name to identify the vault. For example, ContosoPrivateEP.
- The Network Interface Name is auto populated based on your name selection in the previous step.
- In Region, use the region that you used for the bypass network. For example, (Europe) UK South.
- Select Next.
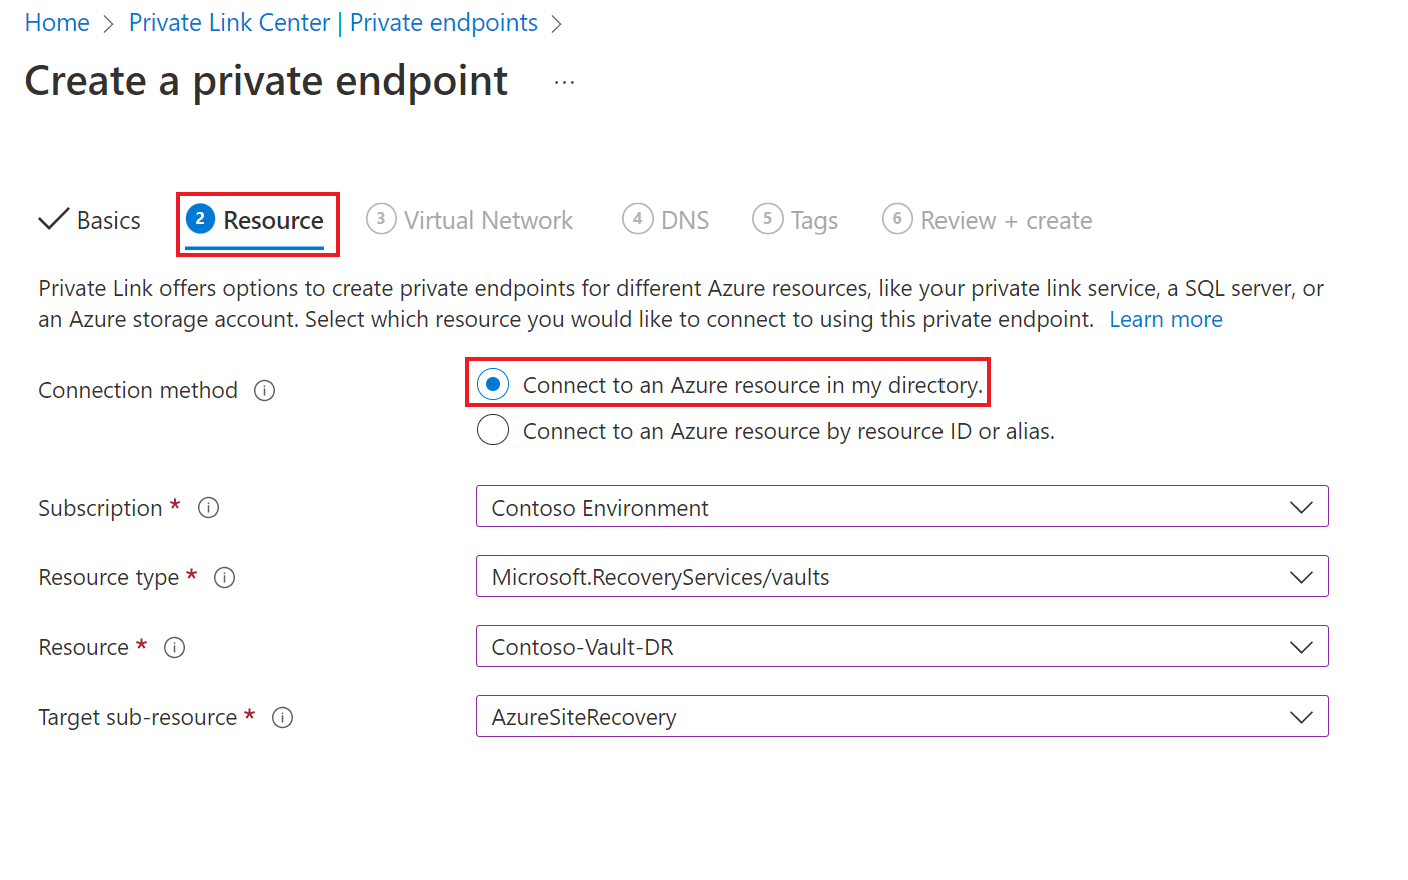
On the Resource section, do the following:
- In Connection method, select the Connect to an Azure resource in my directory.
- In Subscription, select Contoso Environment.
- In Resource type for your selected subscription, select Microsoft.RecoveryServices/vaults.
- Choose the name of your Recovery Services vault under Resource.
- Select AzureSiteRecovery as the Target sub-resource.
- Select Next.
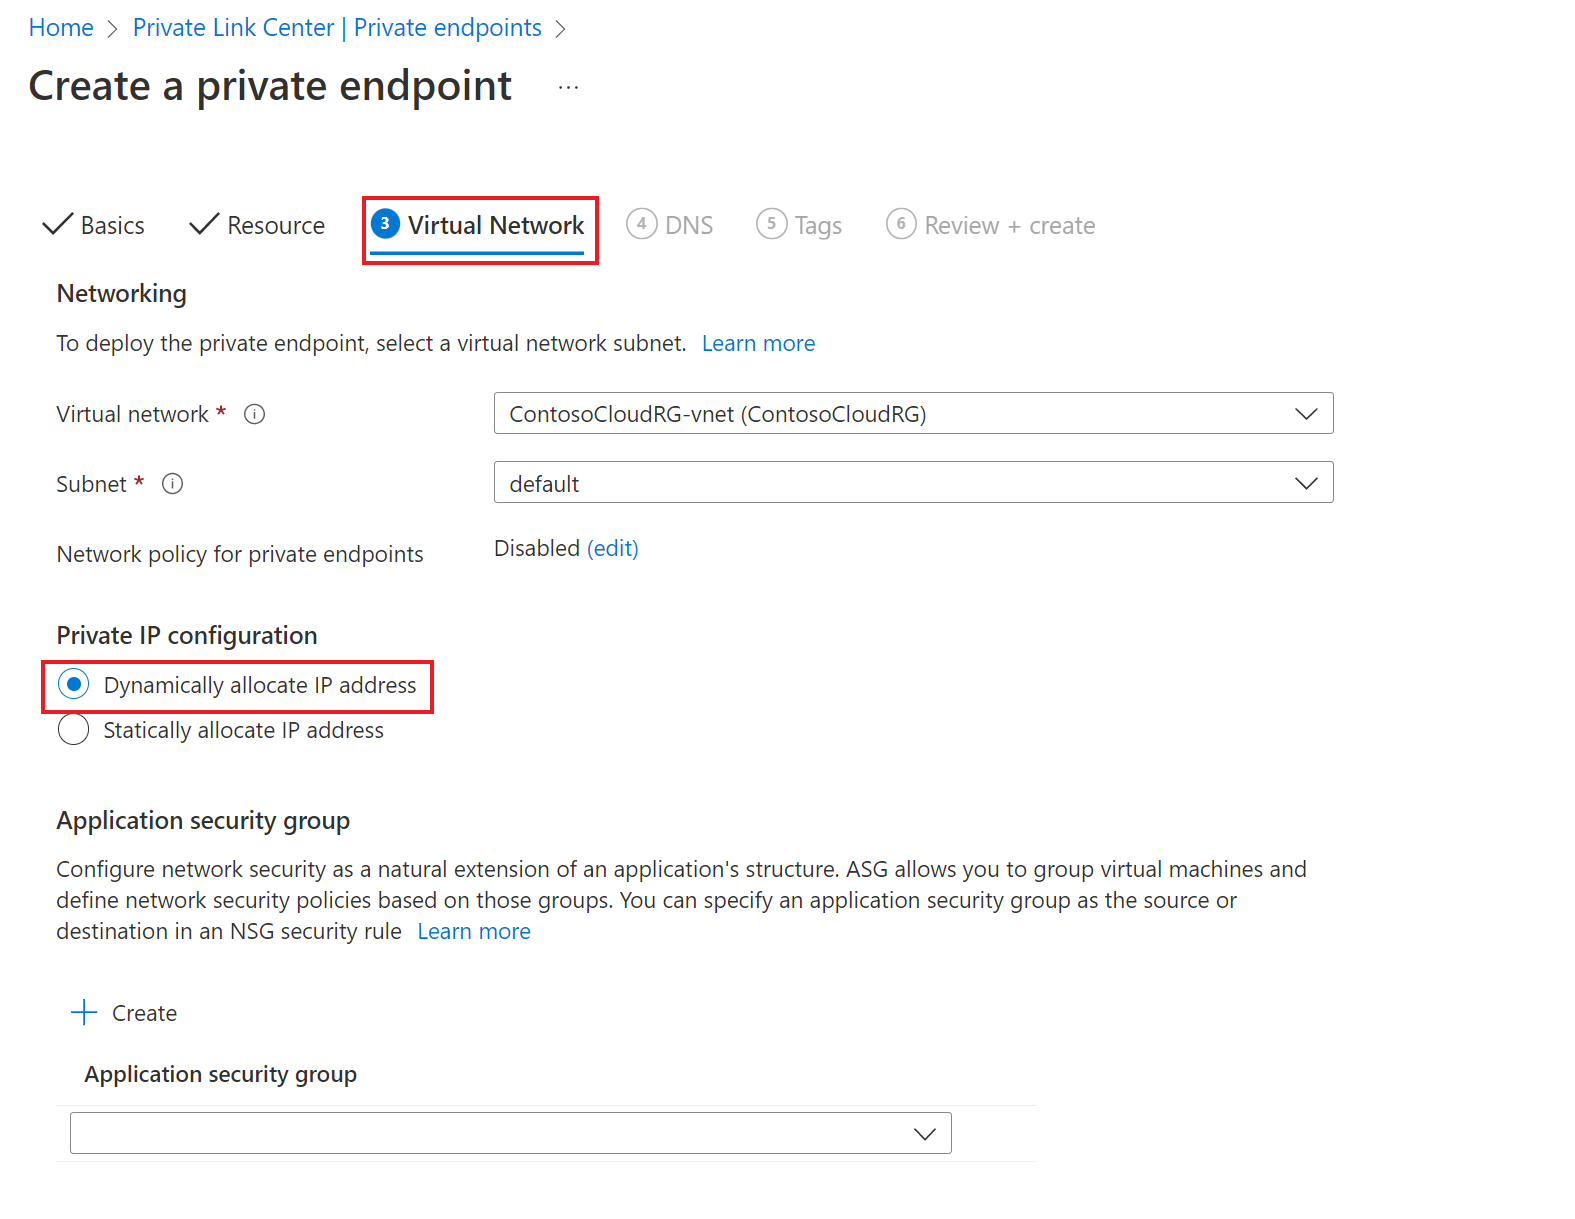
On the Virtual Network section, do the following:
- Under Virtual network, select a bypass network.
- Under Subnet, specify the subnet where you want the private endpoint to be created.
- Under Private IP configuration, retain the default selection.
- Select Next.
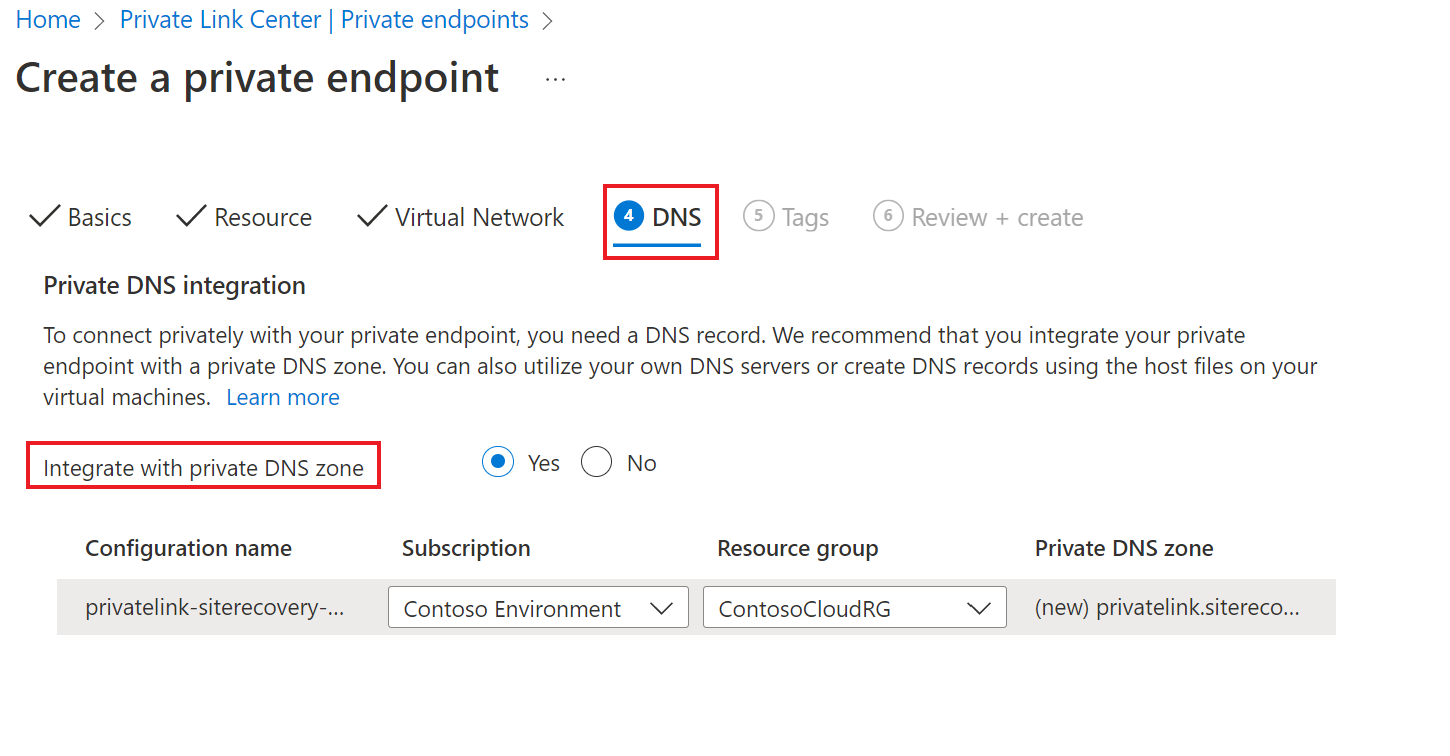
On the DNS section, do the following:
- Enable integration with a private DNS zone by selecting Yes.
Note
Selecting Yes automatically links the zone to the bypass network. This action also adds the DNS records that are required for DNS resolution of new IPs and fully qualified domain names created for the private endpoint.
- Choose an existing DNS zone or create a new one.
Ensure that you choose to create a new DNS zone for every new private endpoint connecting to the same vault. If you choose an existing private DNS zone, the previous CNAME records are overwritten. See Private endpoint guidance before you continue.
If your environment has a hub and spoke model, you need only one private endpoint and only one private DNS zone for the entire setup. This is because all your virtual networks already have peering enabled between them. For more information, see Private endpoint DNS integration.
To manually create the private DNS zone, follow the steps in Create private DNS zones and add DNS records manually.
- Enable integration with a private DNS zone by selecting Yes.
On the Tags section, you can add tags for your private endpoint.
Review + create. When validation completes, select Create to create the private endpoint.
When the private endpoint is created, five fully qualified domain names (FQDNs) are added to the private endpoint. These links enable the machines in the on-premises network to access, via the bypass network, all the required Site Recovery microservices in the context of the vault. You can use the same private endpoint for the protection of any Azure machine in the bypass network and all peered networks.
The five domain names are formatted in this pattern:
{Vault-ID}-asr-pod01-{type}-.{target-geo-code}.privatelink.siterecovery.windowsazure.com
Approve private endpoints for site recovery
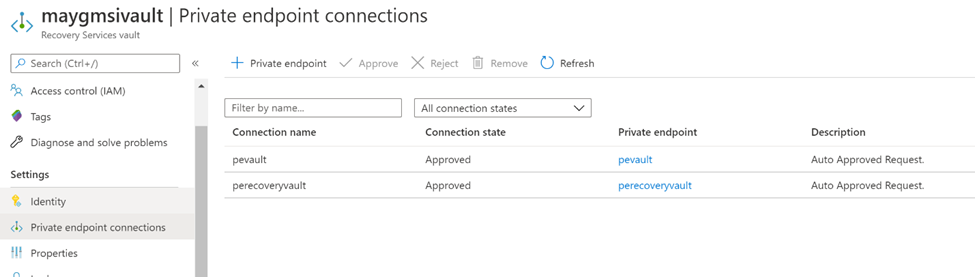
If you create the private endpoint and you're also the owner of the Recovery Services vault, the private endpoint you created previously is automatically approved within a few minutes. Otherwise, the owner of the vault must approve the private endpoint before you can use it. To approve or reject a requested private endpoint connection, go to Private endpoint connections under Settings on the recovery vault page.
You can go to the private endpoint resource to review the status of the connection before you continue:
(Optional) Create private endpoints for the cache storage account
You can use a private endpoint to Azure Storage. Creating private endpoints for storage access is optional for Azure Site Recovery replication. If you create a private endpoint for storage, you need a private endpoint for the cache/log storage account in your bypass virtual network.
Note
If private endpoints are not enabled on storage account, protection would still be successful. However, replication traffic would transit via internet to Azure Site Recovery public endpoints. To ensure replication traffic flows via private links, storage account must be enabled with private endpoints.
Note
Private endpoints for storage can be created only on General Purpose v2 storage accounts. For pricing information, see Azure Page Blobs pricing.
Follow the guidance for creating private storage to create a storage account with a private endpoint. Be sure to select Yes under Integrate with private DNS zone. Select an existing DNS zone or create a new one.
Grant required permissions to the vault
Depending on your setup, you might need one or more storage accounts in the target Azure region. Next, grant the managed identity permissions for all the cache/log storage accounts required by Site Recovery. In this case, you must create the required storage accounts in advance.
Before you enable replication of virtual machines, the managed identity of the vault must have the following role permissions, depending on the type of storage account.
- Resource Manager-based storage accounts (Standard type):
- Resource Manager-based storage accounts (Premium type):
- Classic storage accounts:
The following steps describe how to add a role assignment to your storage account. For detailed steps, see Assign Azure roles using the Azure portal.
Go to the storage account.
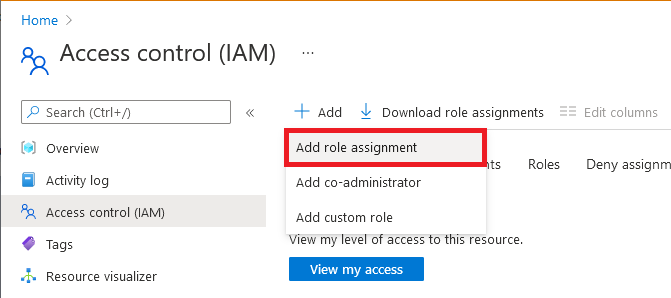
Select Access control (IAM).
Select Add > Add role assignment.
On the Role tab, select one of the roles listed in the beginning of this section.
On the Members tab, select Managed identity, and then select Select members.
Select your Azure subscription.
Select System-assigned managed identity, search for a vault, and then select it.
On the Review + assign tab, select Review + assign to assign the role.
In addition to these permissions, you need to allow access to Microsoft trusted services. To do so, follow these steps:
- Go to Firewalls and virtual networks.
- In Exceptions, select Allow trusted Microsoft services to access this storage account.
Protect your virtual machines
After you finish the preceding tasks, continue with the setup of your on-premises infrastructure. Continue by completing one of the following tasks:
- Deploy a configuration server for VMware and physical machines
- Set up the Hyper-V environment for replication
After the setup is complete, enable replication for your source machines. Don't set up the infrastructure until after the private endpoints for the vault are created in the bypass network.
Create private DNS zones and add DNS records manually
If you didn't select the option to integrate with a private DNS zone when you created the private endpoint for the vault, follow the steps in this section.
Create one private DNS zone to allow the Site Recovery provider (for Hyper-V machines) or the Process Server (for VMware/physical machines) to resolve private FQDNs to private IPs.
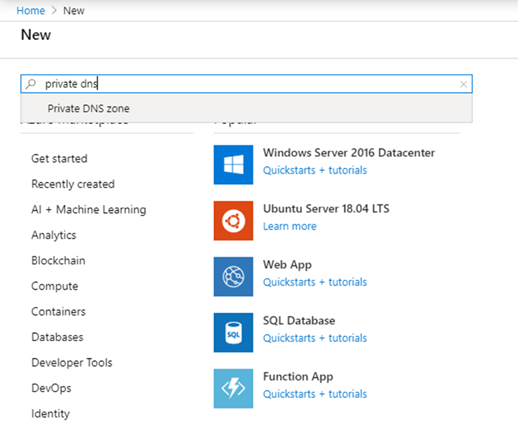
Create a private DNS zone.
Search for private DNS zone in the All services search box and then select Private DNS zone in the results:
On the Private DNS zones page, select the Add button to start creating a new zone.
On the Create private DNS zone page, enter the required details. Enter privatelink.siterecovery.windowsazure.com for the name of the private DNS zone. You can choose any resource group and any subscription.
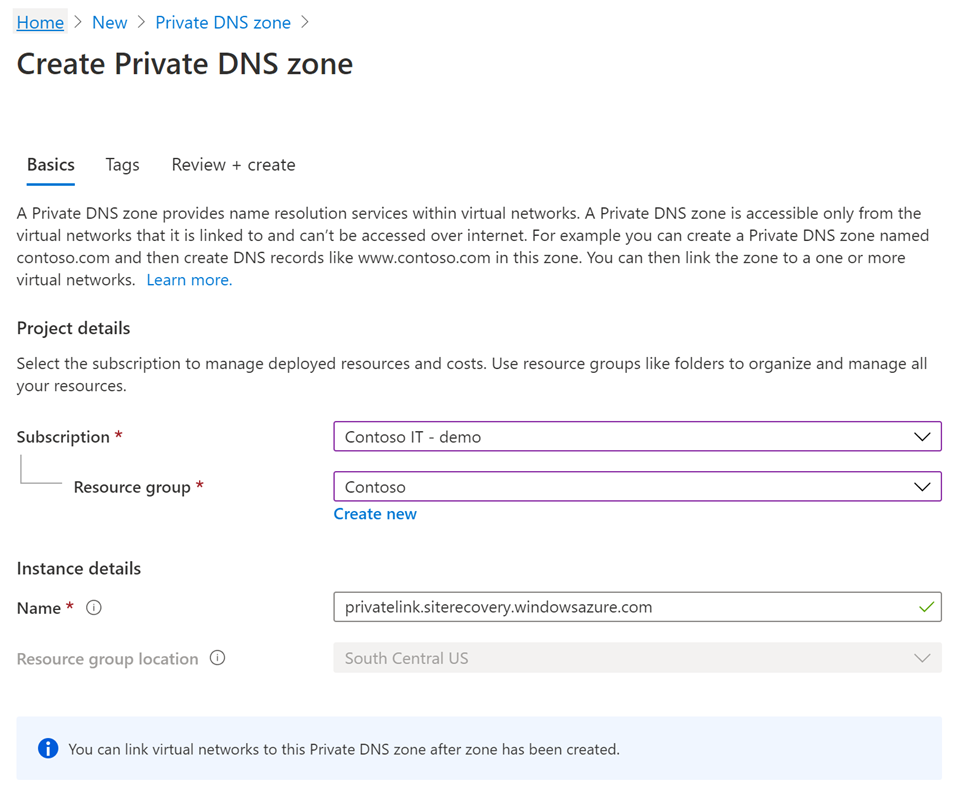
Continue to the Review + create tab to review and create the DNS zone.
If you're using modernized architecture for protection VMware or Physical machines, ensure to create another private DNS zone for privatelink.prod.migration.windowsazure.com. This endpoint is used by Site Recovery to perform the discovery of on-premises environment.
Important
For Azure GOV users, add
privatelink.prod.migration.windowsazure.usin the DNS zone.
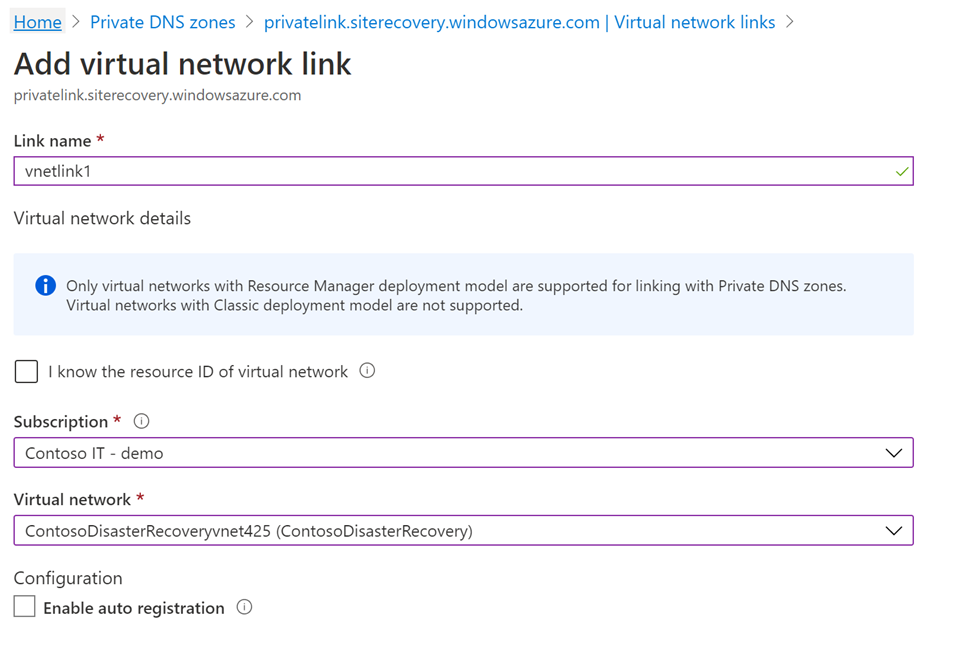
To link the private DNS zone to your virtual network, follow these steps:
Go to the private DNS zone that you created in the previous step and then go to Virtual network links in the left pane. Select Add.
Enter the required details. In the Subscription and Virtual network lists, select details that correspond to the bypass network. Leave the default values in the other fields.
Add DNS records.
Now that you've created the required private DNS zone and the private endpoint, you need to add DNS records to your DNS zone.
Note
If you're using a custom private DNS zone, be sure to make similar entries, as described in the following step.
In this step, you need to make entries for each FQDN in your private endpoint into your private DNS zone.
Go to your private DNS zone and then go to the Overview section in the left pane. Select Record set to start adding records.
On the Add record set page, add an entry for each fully qualified domain name and private IP as an A type record. You can get a list of the fully qualified domain names and IPs on the Private Endpoint page in Overview. As you can see in the following screenshot, the first fully qualified domain name from the private endpoint is added to the record set in the private DNS zone.
These fully qualified domain names match this pattern:
{Vault-ID}-asr-pod01-{type}-.{target-geo-code}.siterecovery.windowsazure.com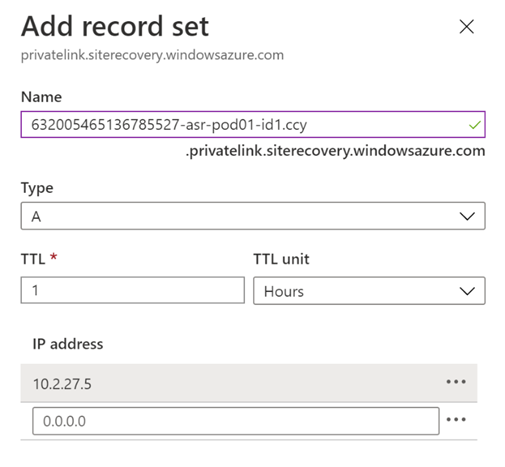
Next steps
Now that you've enabled private endpoints for your virtual machine replication, see these other articles for additional and related information:
Feedback
Coming soon: Throughout 2024 we will be phasing out GitHub Issues as the feedback mechanism for content and replacing it with a new feedback system. For more information see: https://aka.ms/ContentUserFeedback.
Submit and view feedback for