Data modeling in Azure Time Series Insights Gen2
Note
The Time Series Insights service will be retired on 7 July 2024. Consider migrating existing environments to alternative solutions as soon as possible. For more information on the deprecation and migration, visit our documentation.
This article describes how to work with Time Series Model in Azure Time Series Insights Gen2. It details several common data scenarios.
Tip
- Read more about the Time Series Model.
- Learn more about navigating the Azure Time Series Insights Gen2 explorer.
Instances
The Azure Time Series Insights explorer supports Instance CREATE, READ, UPDATE, and DELETE operations within the browser.
To begin, select the Model view from the Azure Time Series Insights explorer Analyze view.
Create a single instance
Go to the Time Series Model selector panel, and select Instances from the menu. All instances associated with your selected Azure Time Series Insights environment will be displayed.

Select + Add.

Enter the instance details, select the type and hierarchy association, and select Create.


Bulk upload one or more instances
Tip
You may save your instances to your desktop in JSON.The downloaded JSON file can then be uploaded through the following steps.
Select Upload JSON.
Select the file that contains the instances payload.

Select Upload.

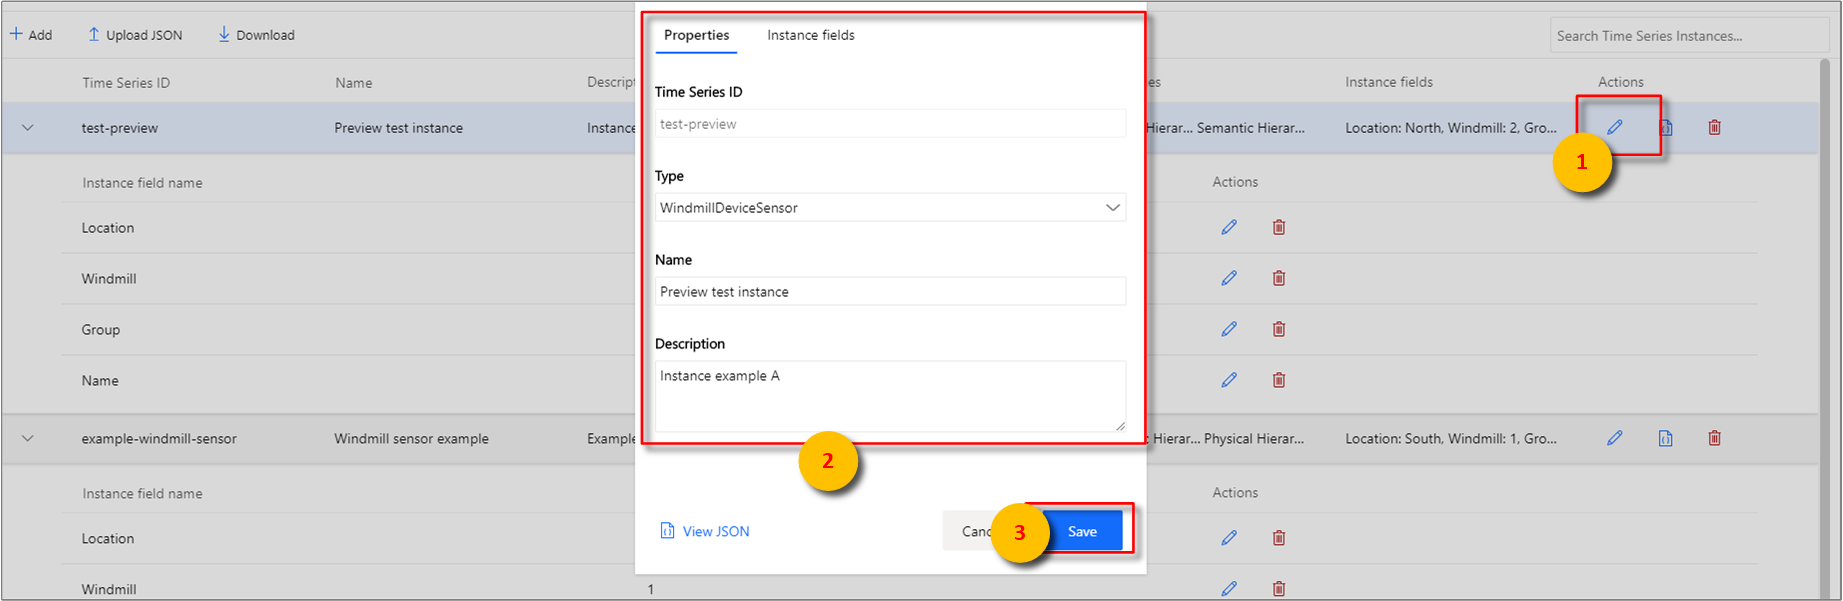
Edit a single instance
Select the instance, and select the edit or pencil icon.
Make the required changes, and select Save.

Delete an instance
Select the instance, and select the delete or waste bin icon.
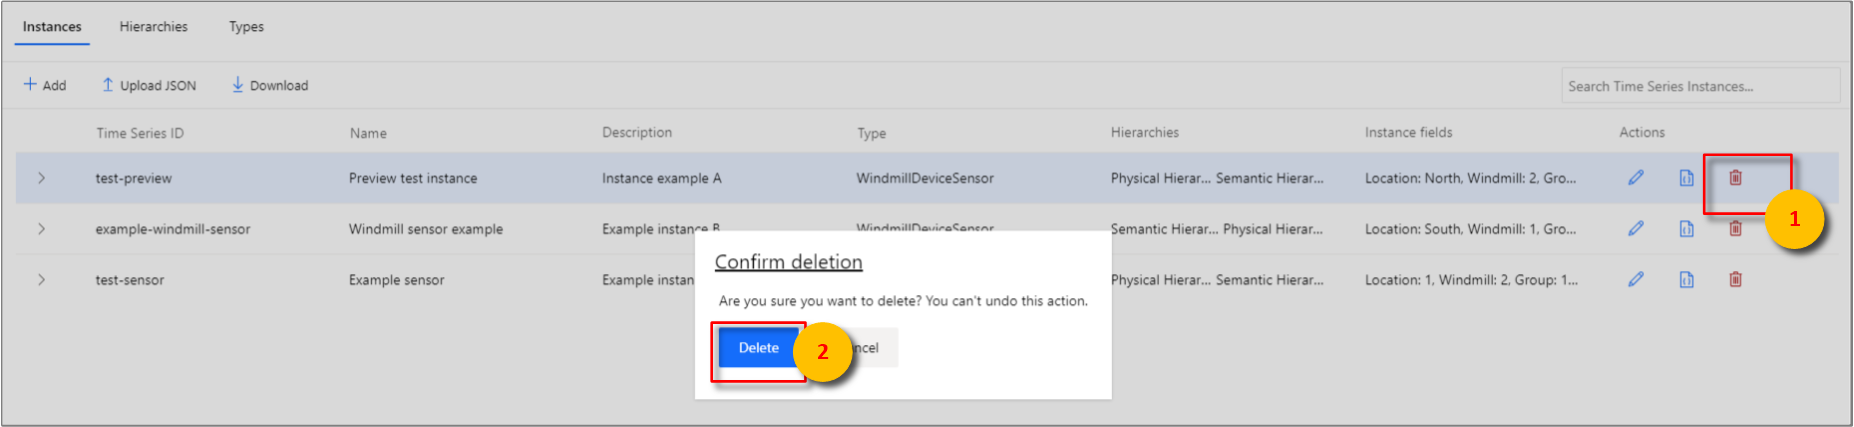
Confirm deletion by selecting Delete.

Note
An instance must successfully pass a field validation check to be deleted.
Hierarchies
The Azure Time Series Insights explorer supports Hierarchy CREATE, READ, UPDATE, and DELETE operations within the browser.
To begin, select the Model view from the Azure Time Series Insights explorer Analyze view.
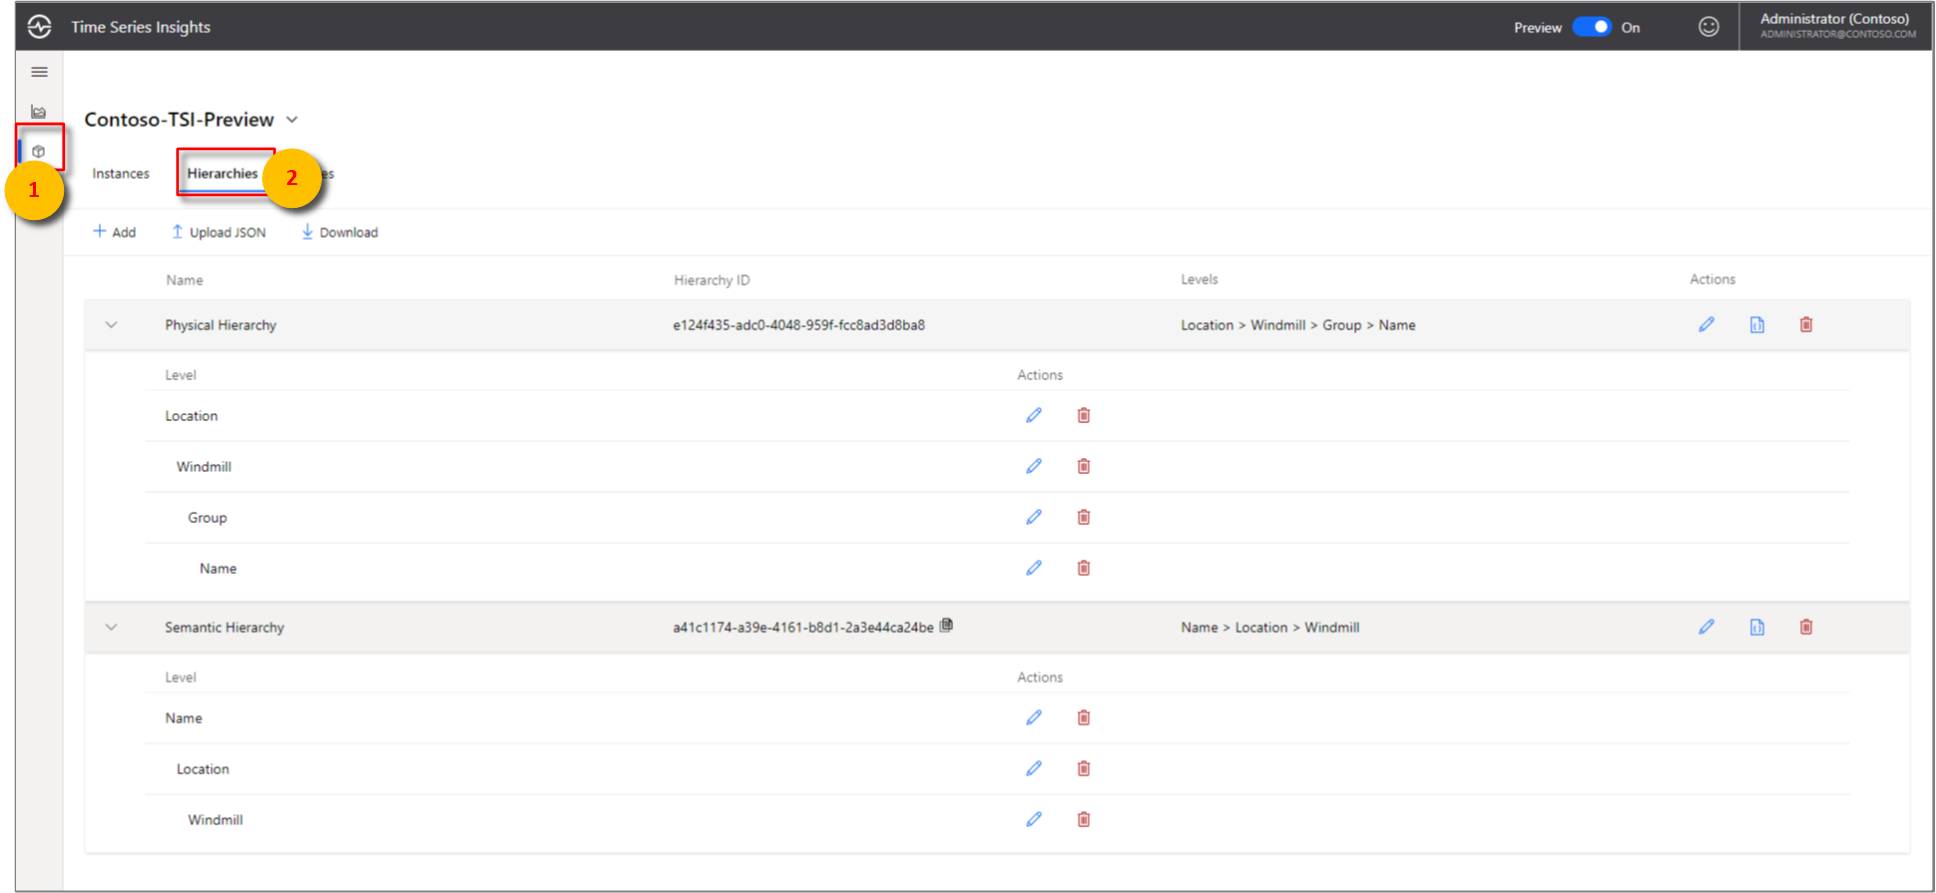
Create a single hierarchy
Go to the Time Series Model selector panel, and select Hierarchies from the menu. All hierarchies associated with your selected Azure Time Series Insights environment will be displayed.
Select + Add.
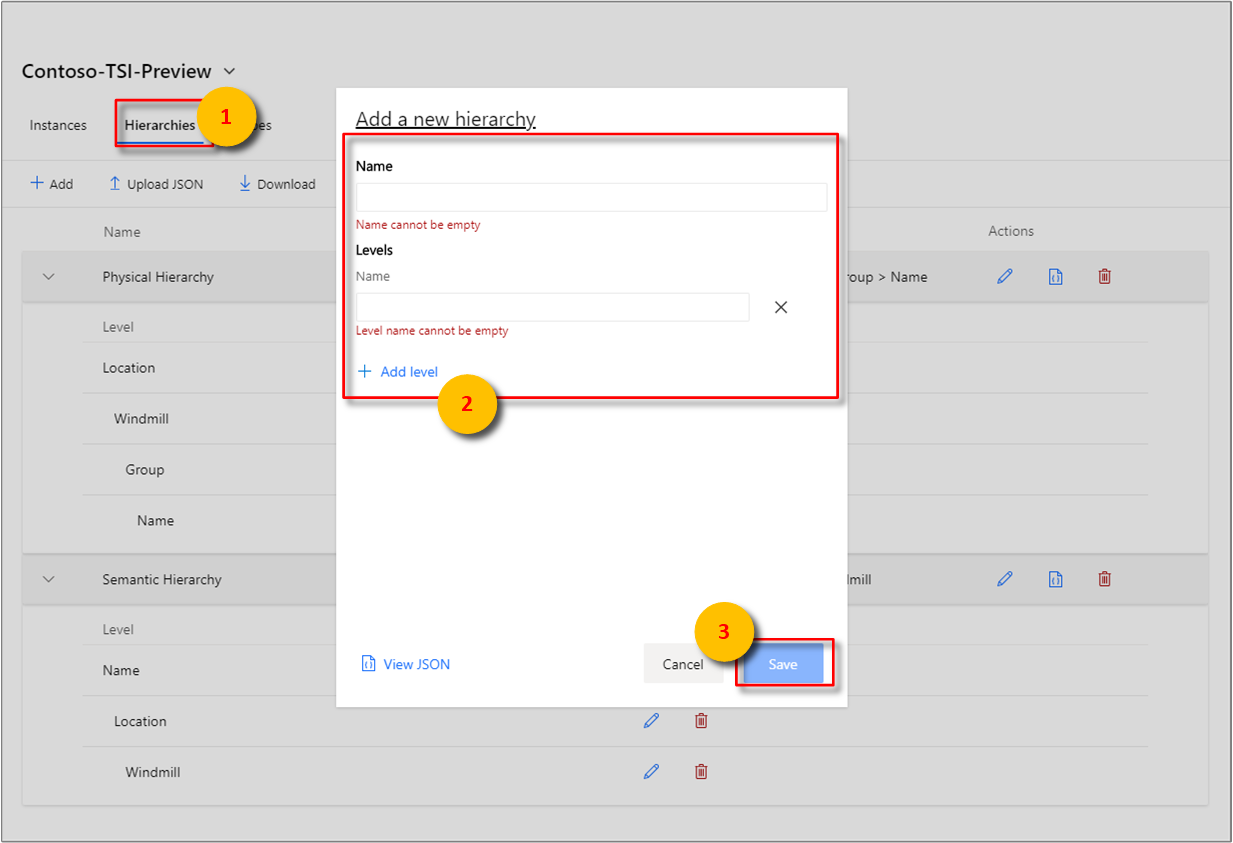
Select + Add level in the right pane.

Enter the hierarchy details, and select Save.


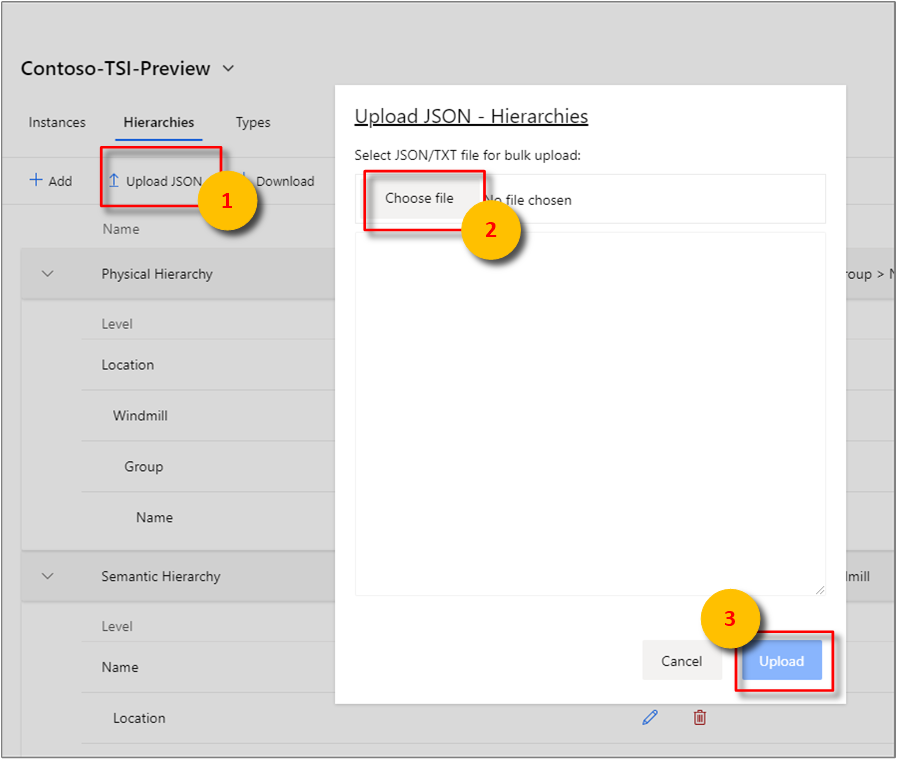
Bulk upload one or more hierarchies
Tip
You may save your hierarchies to your desktop in JSON.The downloaded JSON file can then be uploaded through the following steps.
Select Upload JSON.
Select the file that contains the hierarchy payload.
Select Upload.

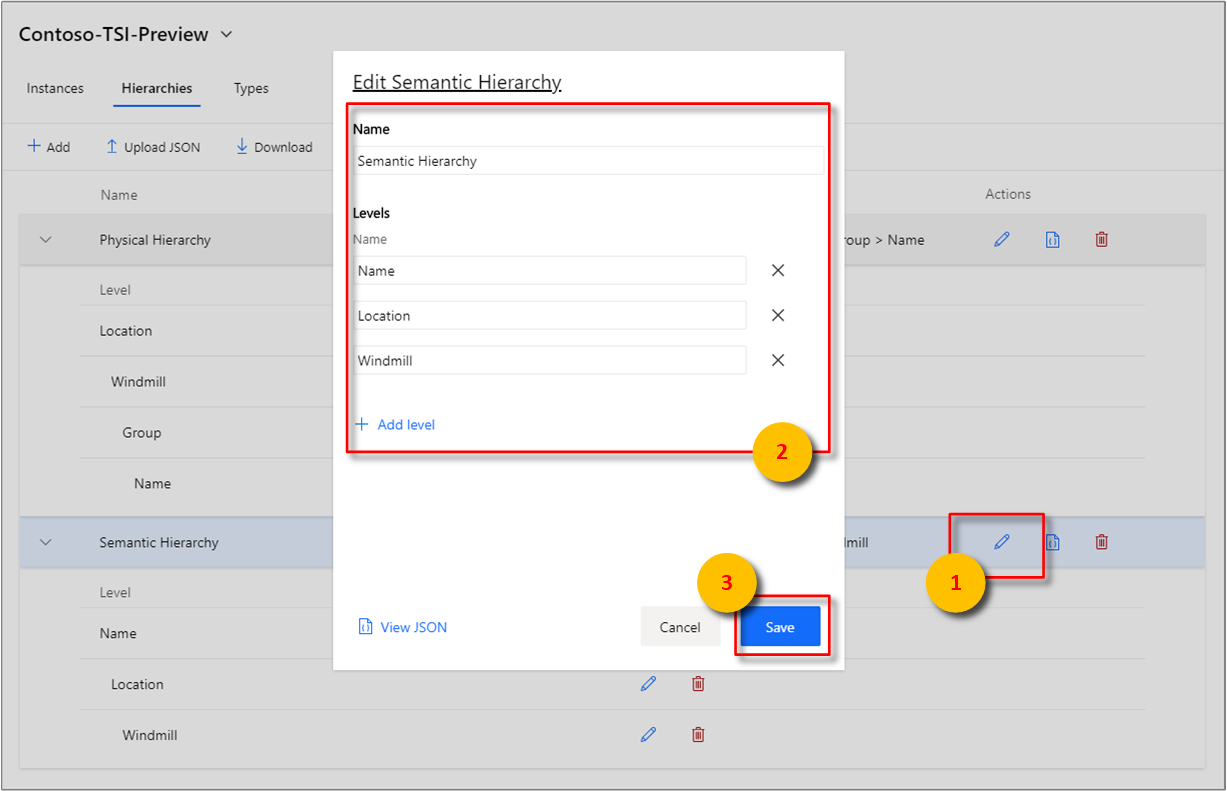
Edit a single hierarchy
Select the hierarchy, and select the edit or pencil icon.
Make the required changes, and select Save.

Delete a hierarchy
Select the hierarchy, and select the delete or waste bin icon.
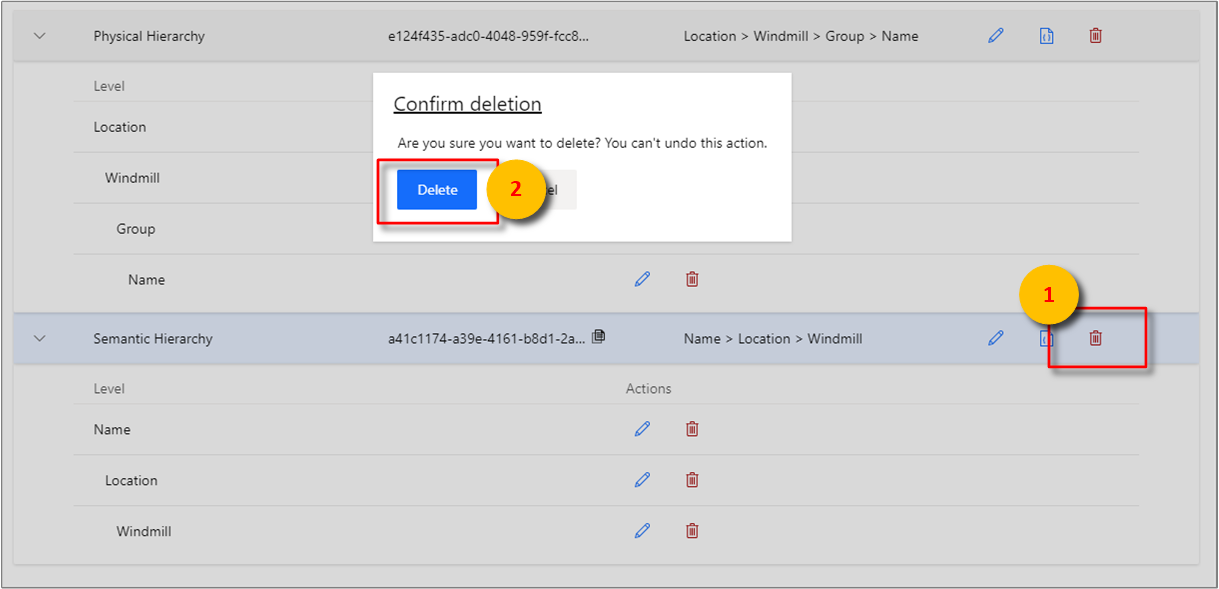
Confirm deletion by selecting Delete.

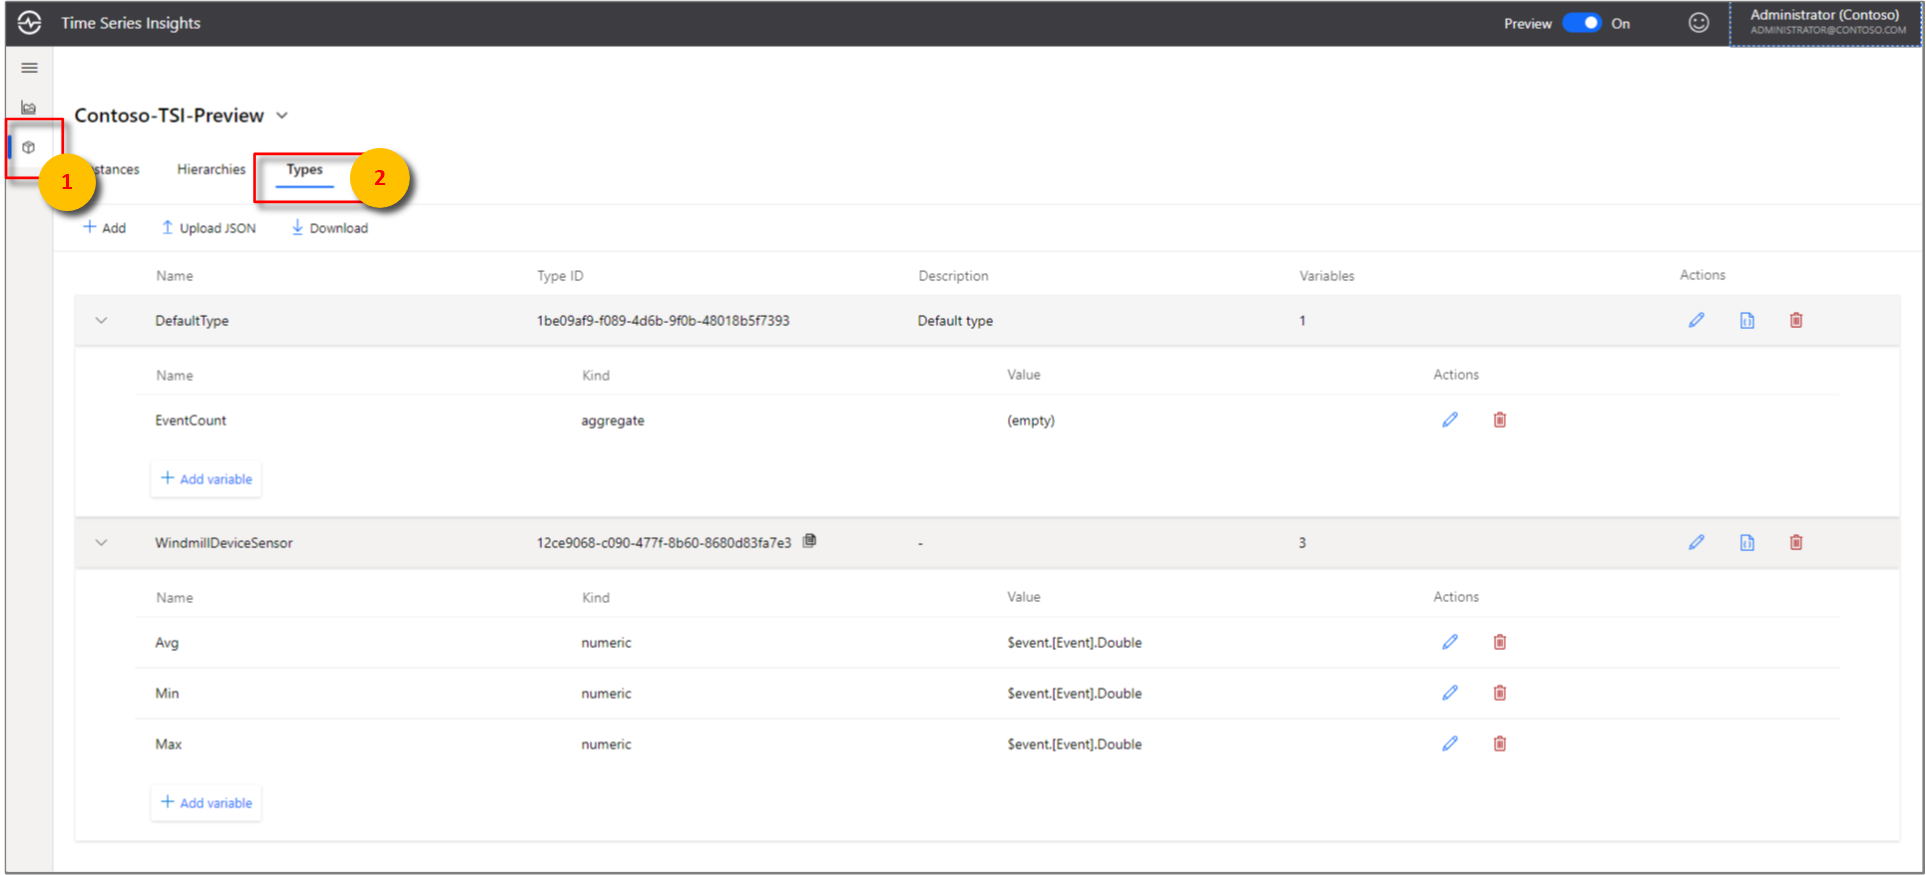
Types
The Azure Time Series Insights explorer supports Type CREATE, READ, UPDATE, and DELETE operations within the browser.
To begin, select the Model view from the Azure Time Series Insights explorer Analyze view.
Create a single type
Go to the Time Series Model selector panel, and select Types from the menu. All types associated with your selected Azure Time Series Insights environment will be displayed.
Select + Add to display the Add a new type popup modal.
Enter properties and variables for your type. Once entered, select Save.


Bulk upload one or more types
Tip
You may save your types to your desktop in JSON.The downloaded JSON file can then be uploaded through the following steps.
Select Upload JSON.
Select the file that contains the type payload.
Select Upload.


Edit a single type
Select the type, and select the edit or pencil icon.
Make the required changes, and select Save.


Delete a type
Select the type, and select the delete or waste bin icon.
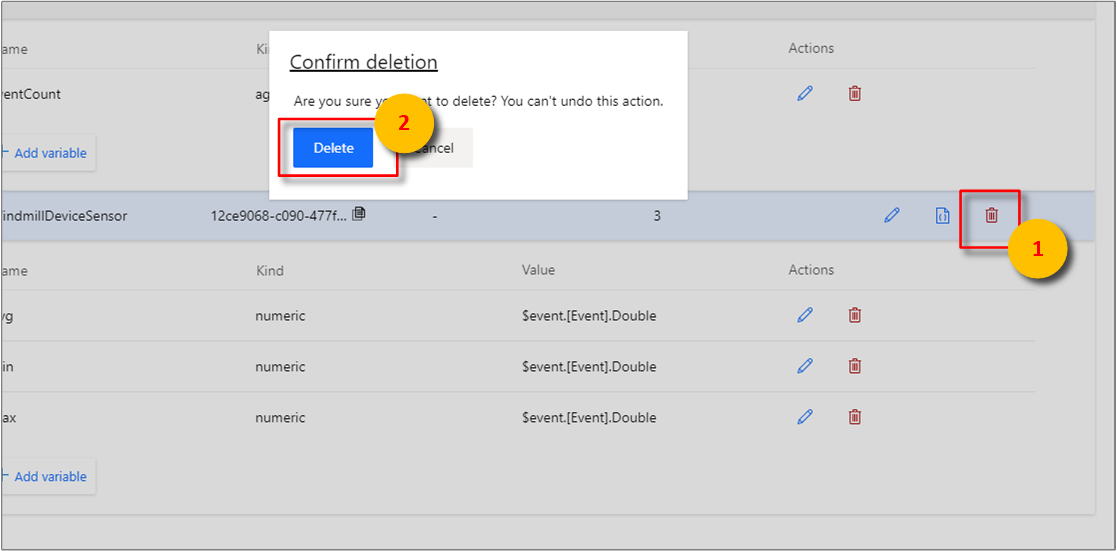
Confirm deletion by selecting Delete.

Next steps
For more information about Time Series Model, read Data modeling.
To learn more about the Gen2, read Visualize data in the Azure Time Series Insights Gen2 explorer.
To learn about supported JSON shapes, read Supported JSON shapes.
Feedback
Coming soon: Throughout 2024 we will be phasing out GitHub Issues as the feedback mechanism for content and replacing it with a new feedback system. For more information see: https://aka.ms/ContentUserFeedback.
Submit and view feedback for