Apple account management
When developing a .NET Multi-platform App UI (.NET MAUI) iOS app it's essential to test it by deploying it to a device, prior to uploading it to the App Store for distribution. Both of these tasks require you to have an Apple ID, and have enrolled your Apple ID in the Apple Developer Program.
The Apple account management interface in Visual Studio enables you to add your Apple ID, and provides the ability to view information about development teams associated with the Apple ID, view signing certificates and provisioning profiles, create new signing certificates, and download existing provisioning profiles.
Important
Adding an Apple account that uses federated credentials isn't possible in Visual Studio.
Add an Apple Developer Account
Before you begin, ensure that you've accepted any user license agreements in your Apple Developer Account and App Store Connect.
If you have an individual Apple Developer account, as opposed to an enterprise account, you'll also need to create an App Store Connect API key. For information about creating an App Store Connect API key, see Creating API Keys for App Store Connect API on developer.apple.com.
To add your Apple account to Visual Studio:
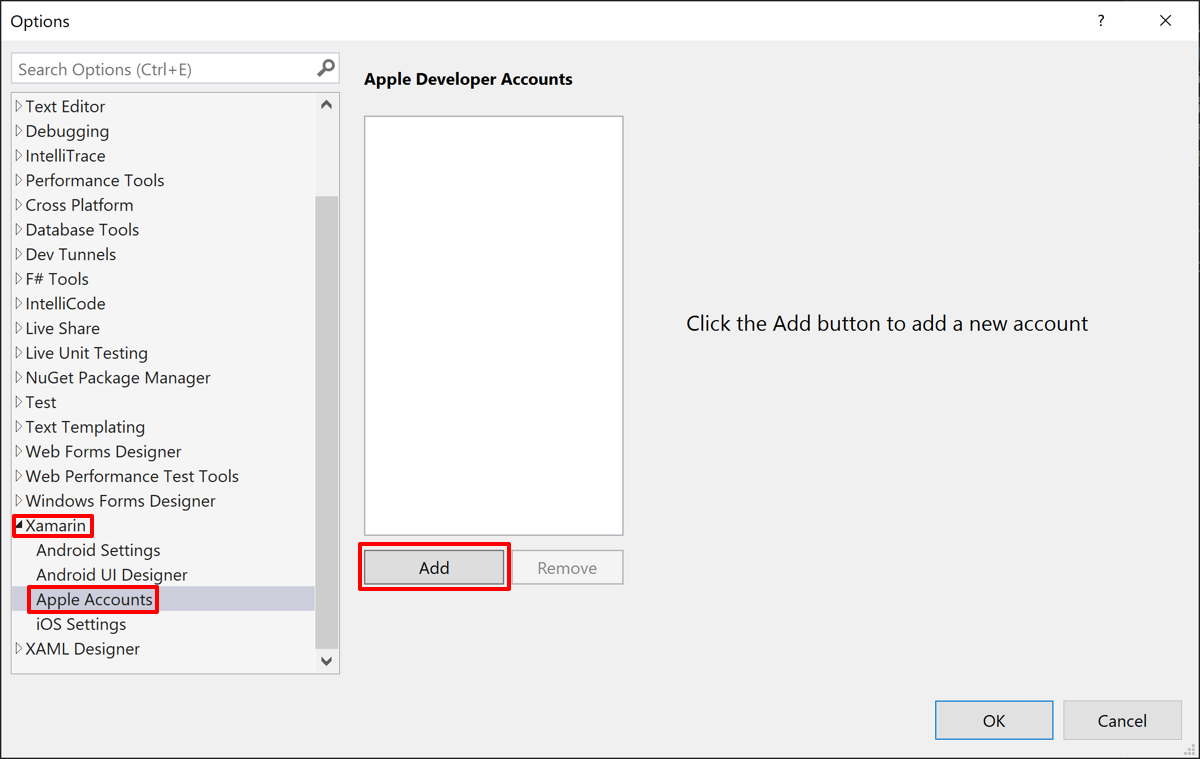
In Visual Studio, go to Tools > Options > Xamarin > Apple Accounts, click on the Add button and select Individual Account... or Enterprise Account...:

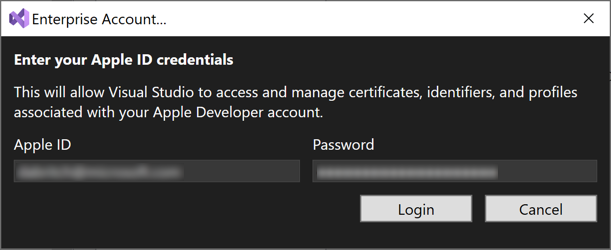
To add an enterprise account, in the Enterprise Account... dialog, enter your Apple ID and password, and click the Login button:

Provided that your account details are valid, your Apple Developer Account will be added to Visual Studio.
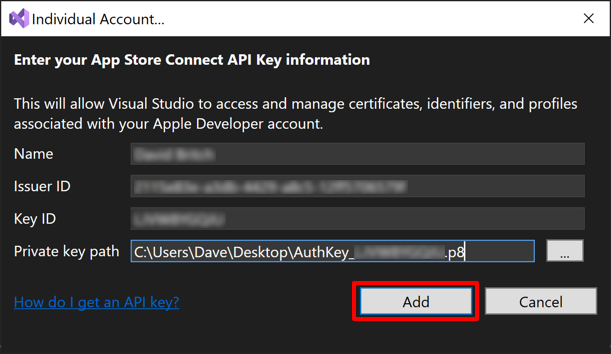
To add an individual account, in the Individual Account... dialog, enter your App Store Connect API key data and click the Add button:

The Name, Issuer ID, and Key ID data can be found in App Store Connect by selecting Users and Access and then the Keys tab. The Private key can also be downloaded from this location:
Provided that your account details are valid, your Apple Developer Account will be added to Visual Studio.
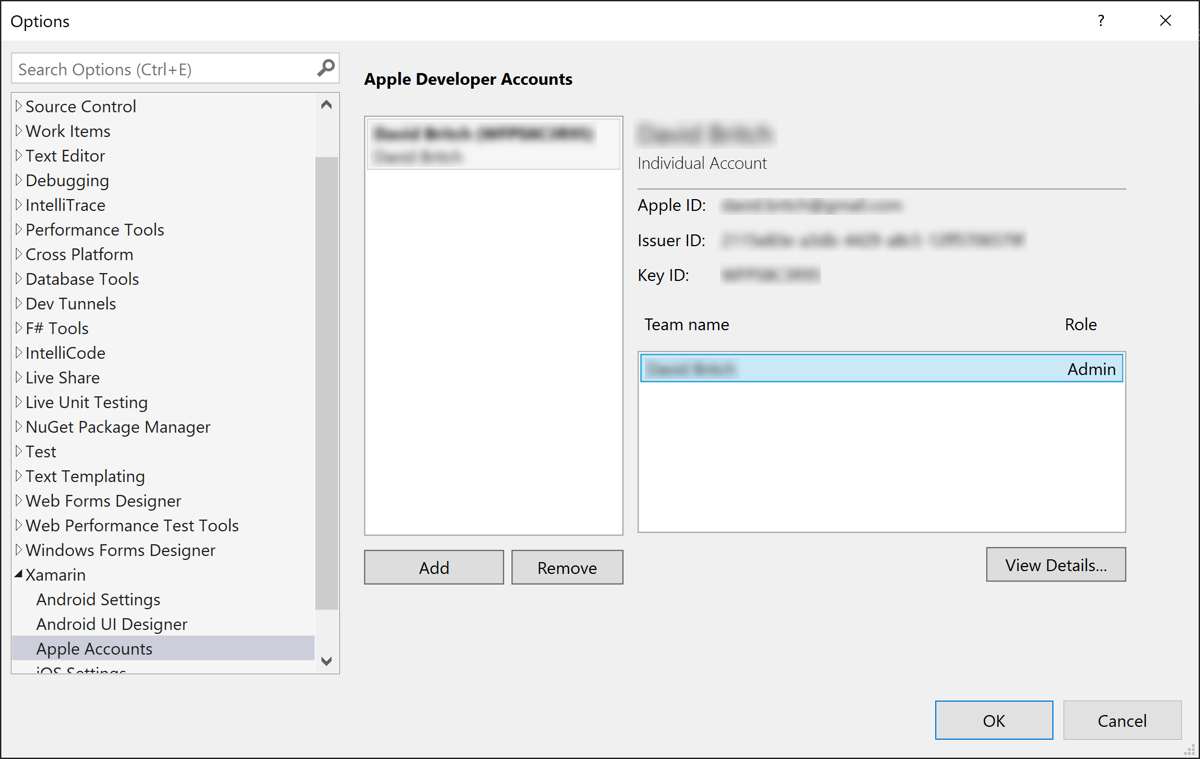
Once your account has been added successfully, you'll see your Apple ID and any teams that your Apple ID is part of:

View signing certificates and provisioning profiles
When you select an Apple Developer Account and a Team name, the View Details... button becomes enabled. Clicking it opens the team details dialog that displays a list of signing identifies and provisioning profiles that are installed on your machine. This dialog organizes the signing identities by type, with the Status column advising you if the certificate is:
- Valid. The signing identity (both the certificate and the private key) is installed on your machine and has not expired.
- Not in Keychain. Apple holds a valid signing identity. To install this on your machine, it must be exported from another machine. You cannot download the signing identity from your Apple Developer Account as it doesn't contain the private key.
- Private key is missing. A certificate with no private key is installed in the keychain.
- Expired. The certificate is expired. You should remove this from your keychain.
Create a signing certificate
To create a new signing identity, in the team details dialog, click Create Certificate to open the drop-down menu and select the certificate type that you want to create. If you have the correct permissions a new signing identity will appear after a few seconds.
If an option in the drop-down is greyed out and unselected, it means that you don't have the correct team permissions to create this type of certificate.
Download provisioning profiles
The team details dialog also displays a list of all provisioning profiles associated with your Apple Developer Account. You can download all provisioning profiles to your local machine by clicking the Download all Profiles button.

