Note
Access to this page requires authorization. You can try signing in or changing directories.
Access to this page requires authorization. You can try changing directories.
Important
- This is a production-ready preview feature.
- Production-ready previews are subject to supplemental terms of use.
Applies to Dynamics 365 Project Operations Integrated with ERP and Dynamics 365 Project Operations for manufacturing
Note
Community interest groups have now moved from Yammer to Microsoft Viva Engage. To join the Expense Management Viva Engage community and take part in the latest discussions, click here and request for access.
Important
- This feature is a production-ready preview.
- Production-ready previews are subject to supplemental terms of use.
You can configure the Expense Agent by using certain parameters based on your organization's needs.
Expense Agent Configuration
To setup the parameters for the Expense Agent, you need to go to Expense Management > Setup > General > Expense Management parameters > (Production ready preview) Expense Agent. These parameters are legal entity specific.
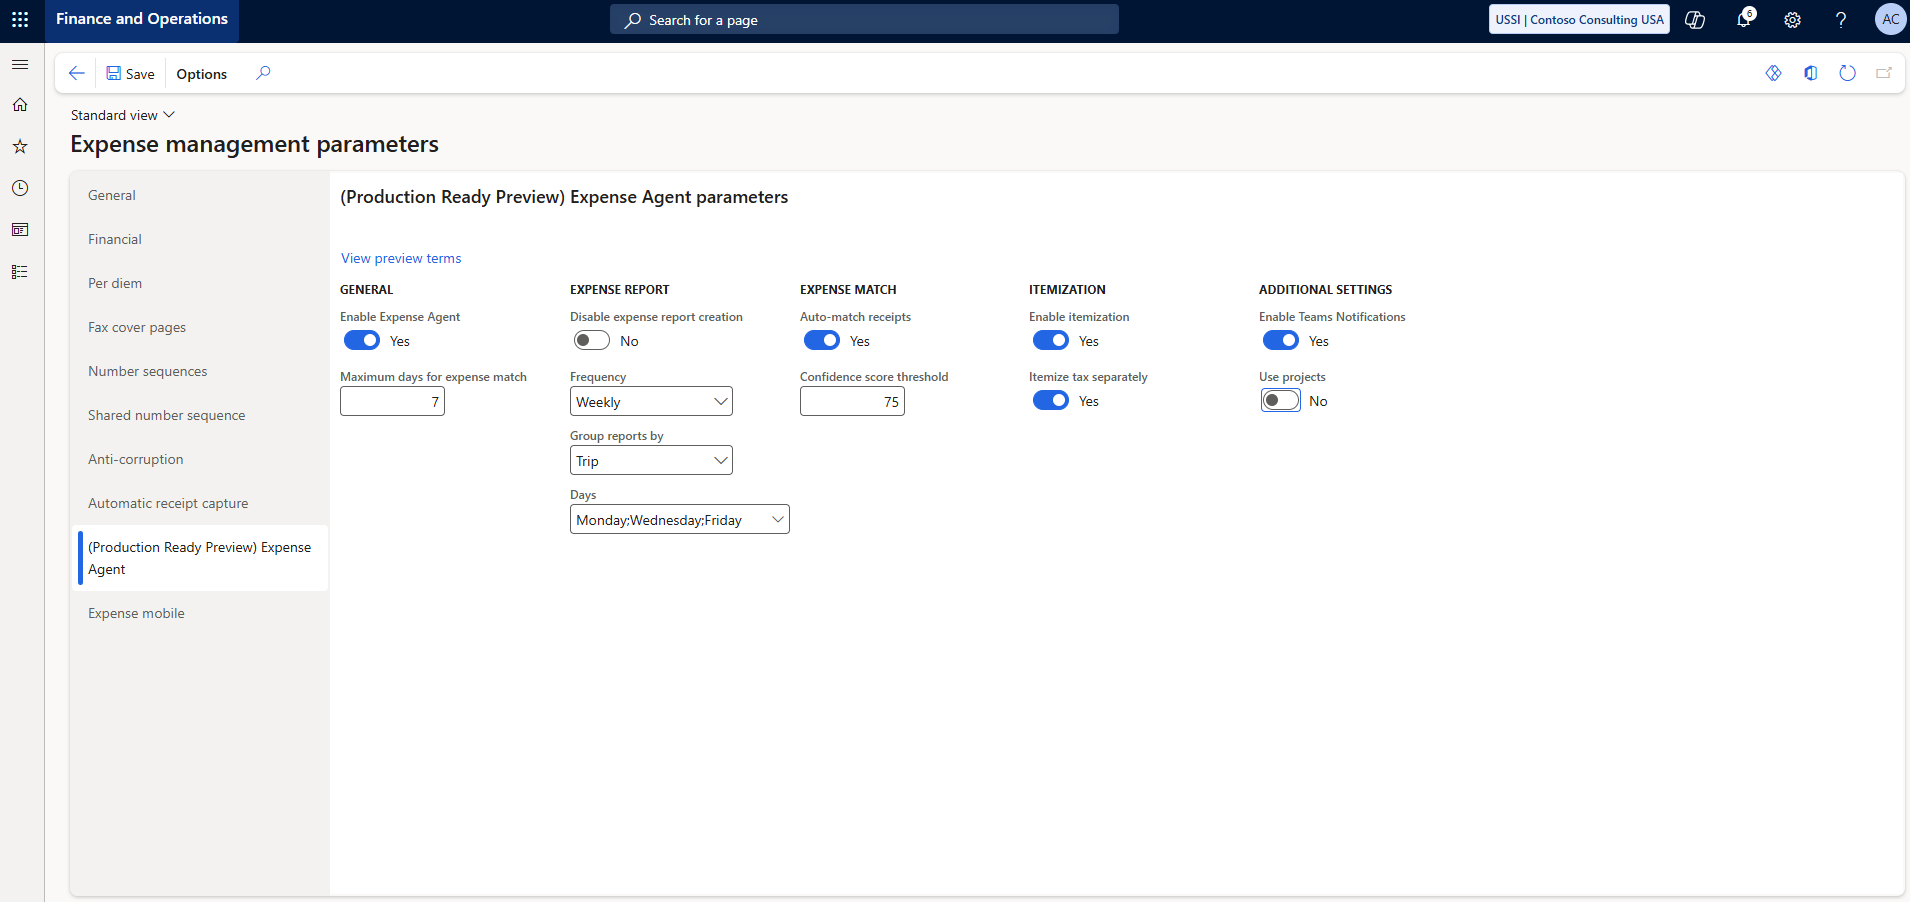
- Enable Expense Agent: This setting allows administrators to enable the Expense Agent for the selected legal entity. When enabled, the Expense Agent becomes available to users in the selected legal entity
- Maximum days for expense match: Enter the number of days the Expense Agent should look back when matching receipts to transactions. The value must be between 1 and 90. For example, if you set this to 7, the Expense Agent considers only receipts (images or files) uploaded in the last seven days for expense line creation and Auto‑Match. Any receipts older than this period are ignored.
- Disable expense report creation: Enable this option to prevent the Expense Agent from creating expense reports. When enabled, expenses aren't grouped into an expense report and remain as individual expense entries.
- Frequency: Specify how often the Expense Agent should run to create or update expense reports. You can choose Daily or Weekly. For weekly runs, select the days of the week on which the agent should process expense reports using the Days field.
- Group reports by: Enter the criteria by which the Expense Agent should group the expenses. It could be based on Project or Trip.
- Auto-match receipts: Enable this option if you want the Expense Agent to automatch receipts with the credit card transactions uploaded into the system.
- Confidence score threshold: Set the minimum confidence score required for the expense agent to automatch receipts to expense lines. Value must be between 1 to 100.
- Enable itemization: Enable this option to allow the expense agent to automatically itemize receipts for all the supported expense categories.
- Itemize tax separately: Enable this option if you want to the expense agent to consolidate all tax itemizations into a single specified subcategory.
- Once enabled, you can also set the single subcategory as part of the Expense Category setup.
- Go to Expense Management > Setup > General > Expense Management parameters > Setup > General > Expense categories > Select the expense category > Expense > Default tax subcategory > Choose the subcategory
- Enable Teams Notifications: Enable this option if you want the expense agent to send notifications to users through Microsoft Teams.
Related Information
- Expense Agent overview
- Expense Agent Configuration
- Installation and Setup of the Expense Agent
- Expense Agent FAQs