Create an extractor in Microsoft Syntex
Applies to: ✓ Unstructured document processing
Before or after you create a classifier model to automate identification and classification of specific document types, you can optionally choose to add extractors to your model to pull out specific information from these documents. For example, you might want your model not only to identify all Contract Renewal documents added to your document library, but also to display the Service Start date for each document as a column value in the document library.
You need to create an extractor for each entity in the document that you want to extract. In our example, we want to extract the Service Start Date for each Contract Renewal document that is identified by the model. We want to be able to see a view in the document library of all Contract Renewal documents, with a column that shows the Service Start date value of each document.
Note
To create an extractor, you use the same files you previously uploaded to train the classifier.
Name your extractor
From the model home page, in the Create and train extractors tile, select Train extractor.
On the New entity extractor screen, type the name of your extractor in the New extractor name field. For example, name it Service Start Date if you want to extract the service start date from each Contract Renewal document. You can also choose to reuse a previously created column (for example, a managed metadata column).
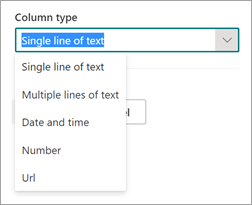
By default, the column type is Single line of text. If you want to change the column type, select Advanced settings > Column type, and then select the type you want to use.
Note
For extractors with the column type Single line of text, the maximum character limit is 255. Any characters that you select exceeding the limit get truncated. To select greater than 255 characters, choose the Multiple lines of text column type when creating the extractor.
By default, Multiple lines of text columns are created with a limit to the amount of text that can be added. In this case, extracted text might appear truncated. If this occurs, the column setting Allow unlimited length in document libraries can be used to remove the limit.
When you're done, select Create.
Add a label
The next step is to label the entity you want to extract in your example training files.
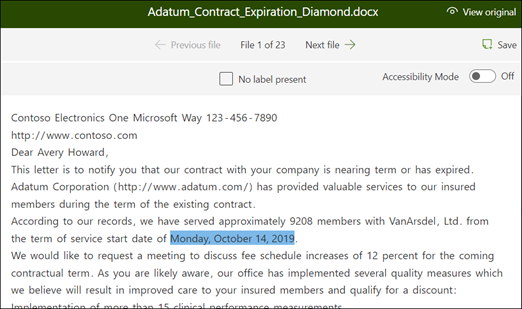
Creating the extractor opens the extractor page. Here you see a list of your sample files, with the first file on the list displayed in the viewer.
From the viewer, select the data that you want to extract from the files. For example, if you want to extract the Start Service Date, you highlight the date value in the first file (Monday, October 14, 2022). and then select Save. You should see the value display from the file in the Labeled examples list, under the Label column.
Select Next file to autosave and open the next file in the list in the viewer. Or select Save and then select another file from the Labeled examples list.
In the viewer, repeat steps 1 and 2, then repeat until you saved the label in all five files.
Once you labeled five files, a notification banner displays informing you to move to training. You can choose to more label more documents or advance to training.
Use Find to search your file
You can use the Find feature to search for an entity in your document that you want to label.
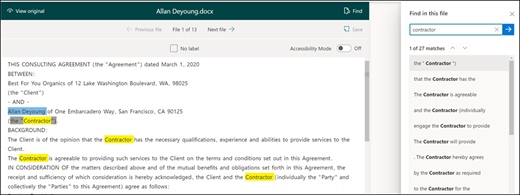
The Find feature is useful if you're searching a large document or if there are multiple instances of the entity in the document. If you find multiple instances, you can select the one you need in the search results to go to that location in the viewer to label it.
Add an explanation
For our example, we're going to create an explanation that provides a hint about the entity format itself and variations it might have in the sample documents. For example, a date value can be in several different formats, such as:
- 10/14/2022
- October 14, 2022
- Monday, October 14, 2022
To help identify the Service Start Date, you can create a pattern explanation.
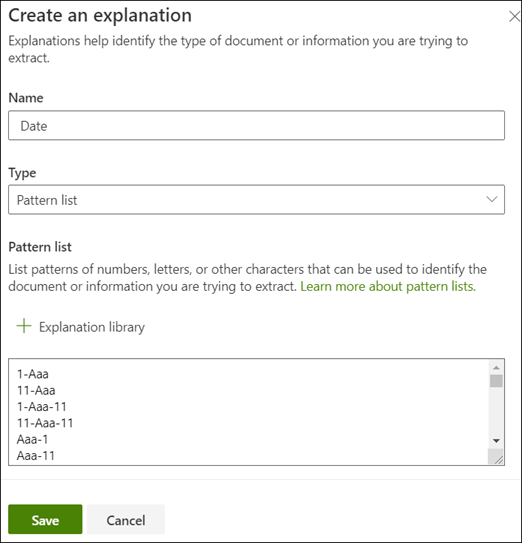
- In the Explanation section, select New and type a name (for example, Date).
- For Type, select Pattern list.
- For Value, provide the date variation as they appear in the sample files. For example, if you have date formats that appear as 0/00/0000, you enter any variations that appear in your documents, such as:
- 0/0/0000
- 0/00/0000
- 00/0/0000
- 00/00/0000
- Select Save.
Note
For more learn more about explanation types, see Explanation types.
Use the explanation library
For creating explanations for items such as dates, it's easier to use the explanation library than to manually enter all variations. The explanation library is a set of pre-built phrase and pattern explanations. The library tries to provide all formats for common phrase or pattern lists, such as dates, phone numbers, zip codes, and many others.
For the Service Start Date sample, it's more efficient to use the pre-built explanation for Date in the explanation library:
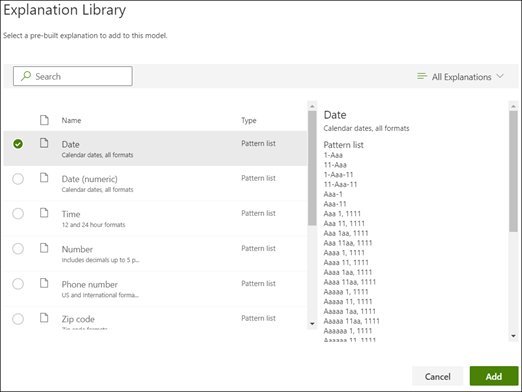
In the Explanation section, select New, and then select From explanation library.
From the explanation library, select Date. You can view all variations of date that are recognized.
Select Add.
On the Create an explanation page, the Date information from the explanation library auto fills the fields. Select Save.
Train the model
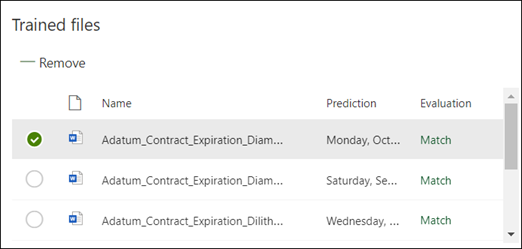
Saving your explanation starts the training. If your model has enough information to extract the data from your labeled example files, you'll see each file labeled with Match.
If the explanation doesn't have enough information to find the data you want to extract, each file will be labeled with Mismatch. You can select Mismatched files to see more information about why there was a mismatch.
Add another explanation
Often the mismatch is an indication that the explanation we provided didn't provide enough information to extract the service start date value to match our labeled files. You might need to edit it, or add another explanation.
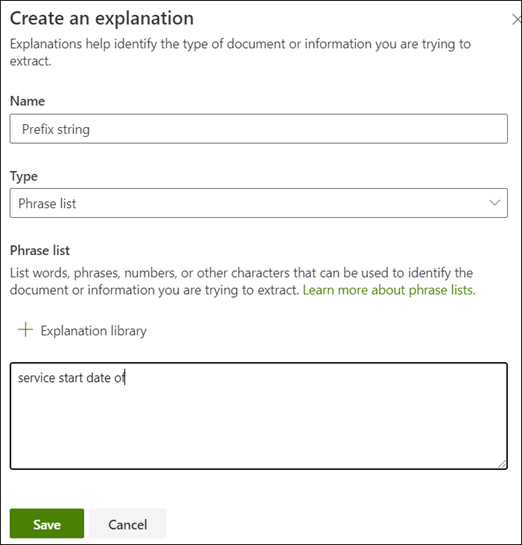
For our example, notice that the text string Start Service date of always precedes the actual value. To help identify the Service Start Date, you need to create a phrase explanation.
In the Explanation section, select New, and then type a name (for example, Prefix String).
For the Type, select Phrase list.
Use Service Start Date of as the value.
Select Save.
Train the model again
Saving the explanation starts the training again, this time using both explanations in the example. If your model has enough information to extract the data from the labeled example files, you see each file labeled with Match.
If you again receive a Mismatch on your labeled files, you likely need to create another explanation to provide the model more information to identify the document type, or consider making changes to your existing ones.
Test your model
If you receive a match on your labeled sample files, you can now test your model on the remaining unlabeled example files. This step is optional, but useful to evaluate the "fitness" or readiness of the model before using it, by testing it on files the model hasn't seen before.
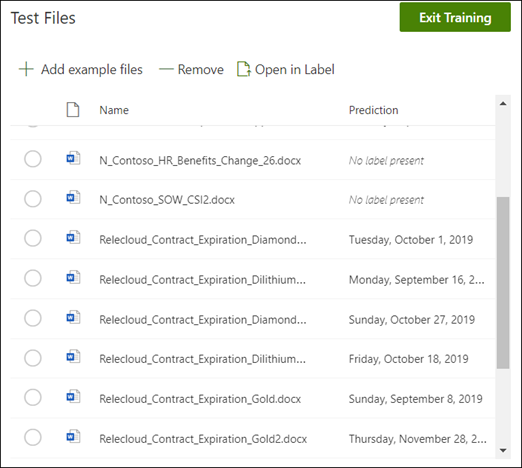
From the model home page, select the Test tab. This will run the model on your unlabeled sample files.
In the Test files list, your example files display to show if the model is able to extract the information you need. Use this information to help determine the effectiveness of your classifier in identifying your documents.
Further refine an extractor
If you have duplicate entities and want to extract only one value or a certain number of values, you can set a rule to specify how you want it processed. To add a rule to refine extracted information, follow these steps:
From the model home page, in the Entity extractors section, select the extractor you want to refine, and then select Refine extracted info.
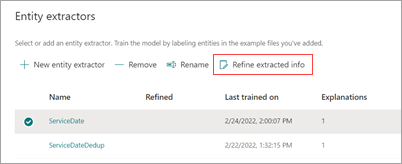
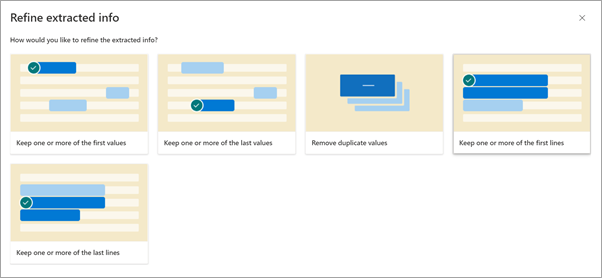
On the Refine extracted info page, select one of the following rules:
- Keep one or more of the first values
- Keep one or more of the last values
- Remove duplicate values
- Keep one or more of the first lines
- Keep one or more of the last lines
Enter the number of lines or values you want to use, and then select Refine.
If you want to edit a rule by changing the number of lines or values, select the extractor you want to edit, select Refine extracted info, change the number, and then select Save.
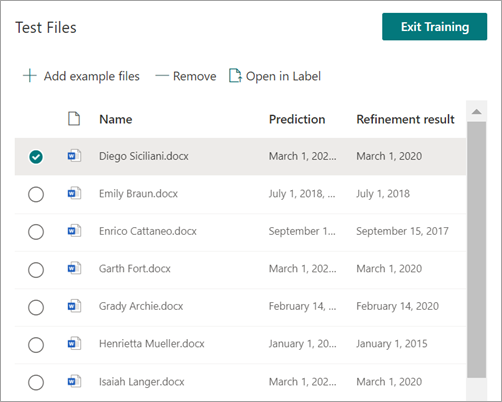
When you test the extractor, you'll be able to see the refinement in the Refinement result column of the Test Files list.
If you want to delete a refinement rule on an extractor, select the extractor from which you want to remove the rule, select Refine extracted info, and then select Delete.
See also
Feedback
Coming soon: Throughout 2024 we will be phasing out GitHub Issues as the feedback mechanism for content and replacing it with a new feedback system. For more information see: https://aka.ms/ContentUserFeedback.
Submit and view feedback for