Note
Access to this page requires authorization. You can try signing in or changing directories.
Access to this page requires authorization. You can try changing directories.
Note
This article reflects the new experiences for creating agents and workflows in Microsoft Copilot Studio. The new agent experience is currently available as a production-ready preview. Learn about the two agent experiences in Classic vs. new agent experience. The new workflows experience is in public preview. Learn about the two workflows experiences in Workflows overview.
- Public preview features aren't meant for production use and might have restricted functionality.
- Production-ready and public previews are subject to supplemental terms of use.
- Some capabilities available in the classic experience aren't yet available in the new experience.
- Agents and workflows created in the new experience can't be converted to the classic experience.
Important
This natural language creation experience uses Anthropic models. It's available only in environments where access to Anthropic models is turned on. Contact your administrator for more information. Learn more in Allow external language models for generative responses.
By using Copilot Studio, you can quickly and easily create automated solutions through a guided, no-code graphical experience. You don't need data scientists or developers.
This quickstart shows you how to create a solution in the new experience for the first time. Learn how to:
- Get a solution started with natural language instructions.
- Add knowledge to an agent.
- Test content changes in real time.
- Publish your solution so that you can share it with others.
Create an automated solution using natural language
Copilot Studio helps you solve real business problems—from automating repetitive processes to building intelligent conversational agents—without writing a single line of code. Describe what you want to accomplish and Copilot Studio determines and builds the right solution for you, whether it's a deterministic workflow, a conversational agent, or some combination of both.
Note
The natural language chat is only compatible with agents and artifacts that are built in the new Copilot Studio experience.
Sign in to Copilot Studio, or sign up. You land on the Home page.
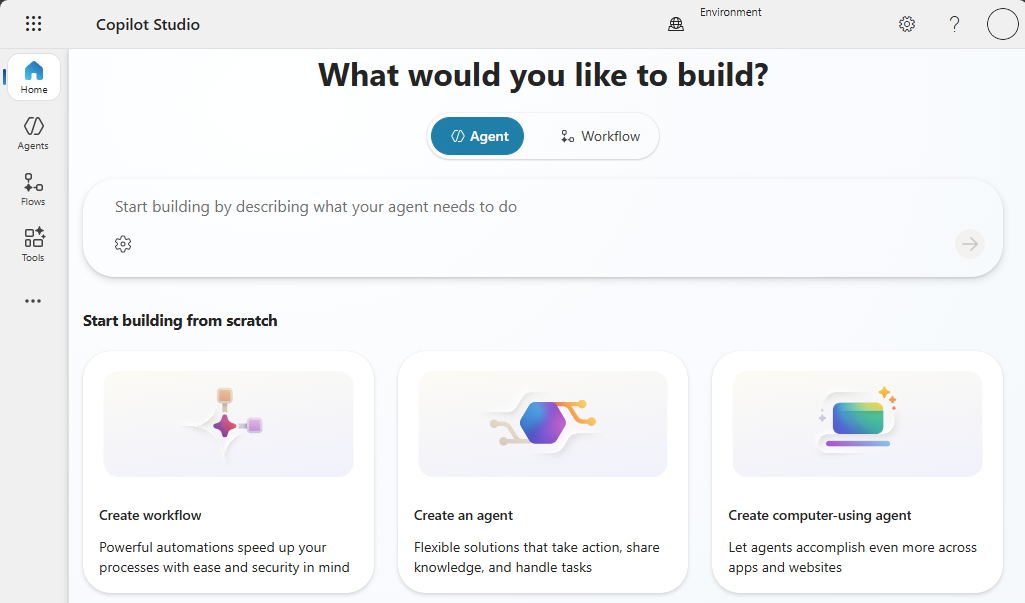
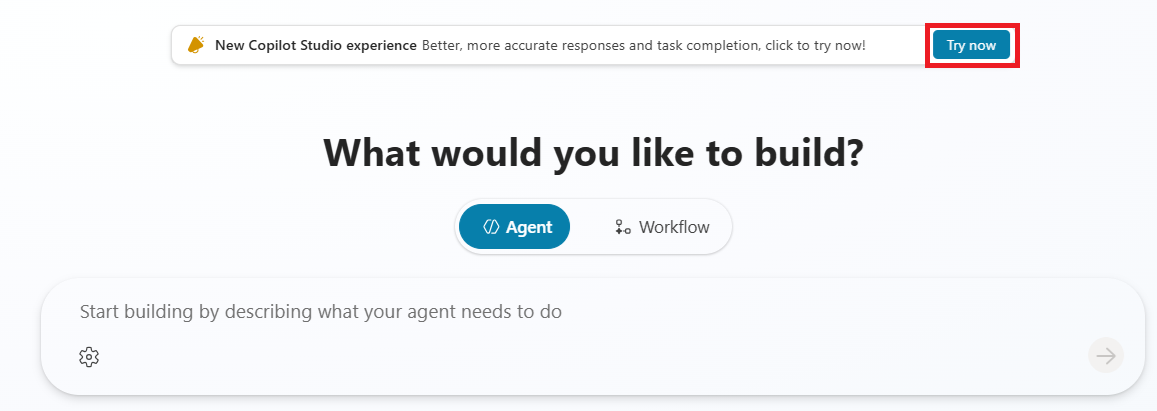
Go to the new experience by selecting Try now at the top of the Home page.
You're taken to the new Copilot Studio experience.
If you aren't already on the Home page, select Home in the side pane. The Home page appears.
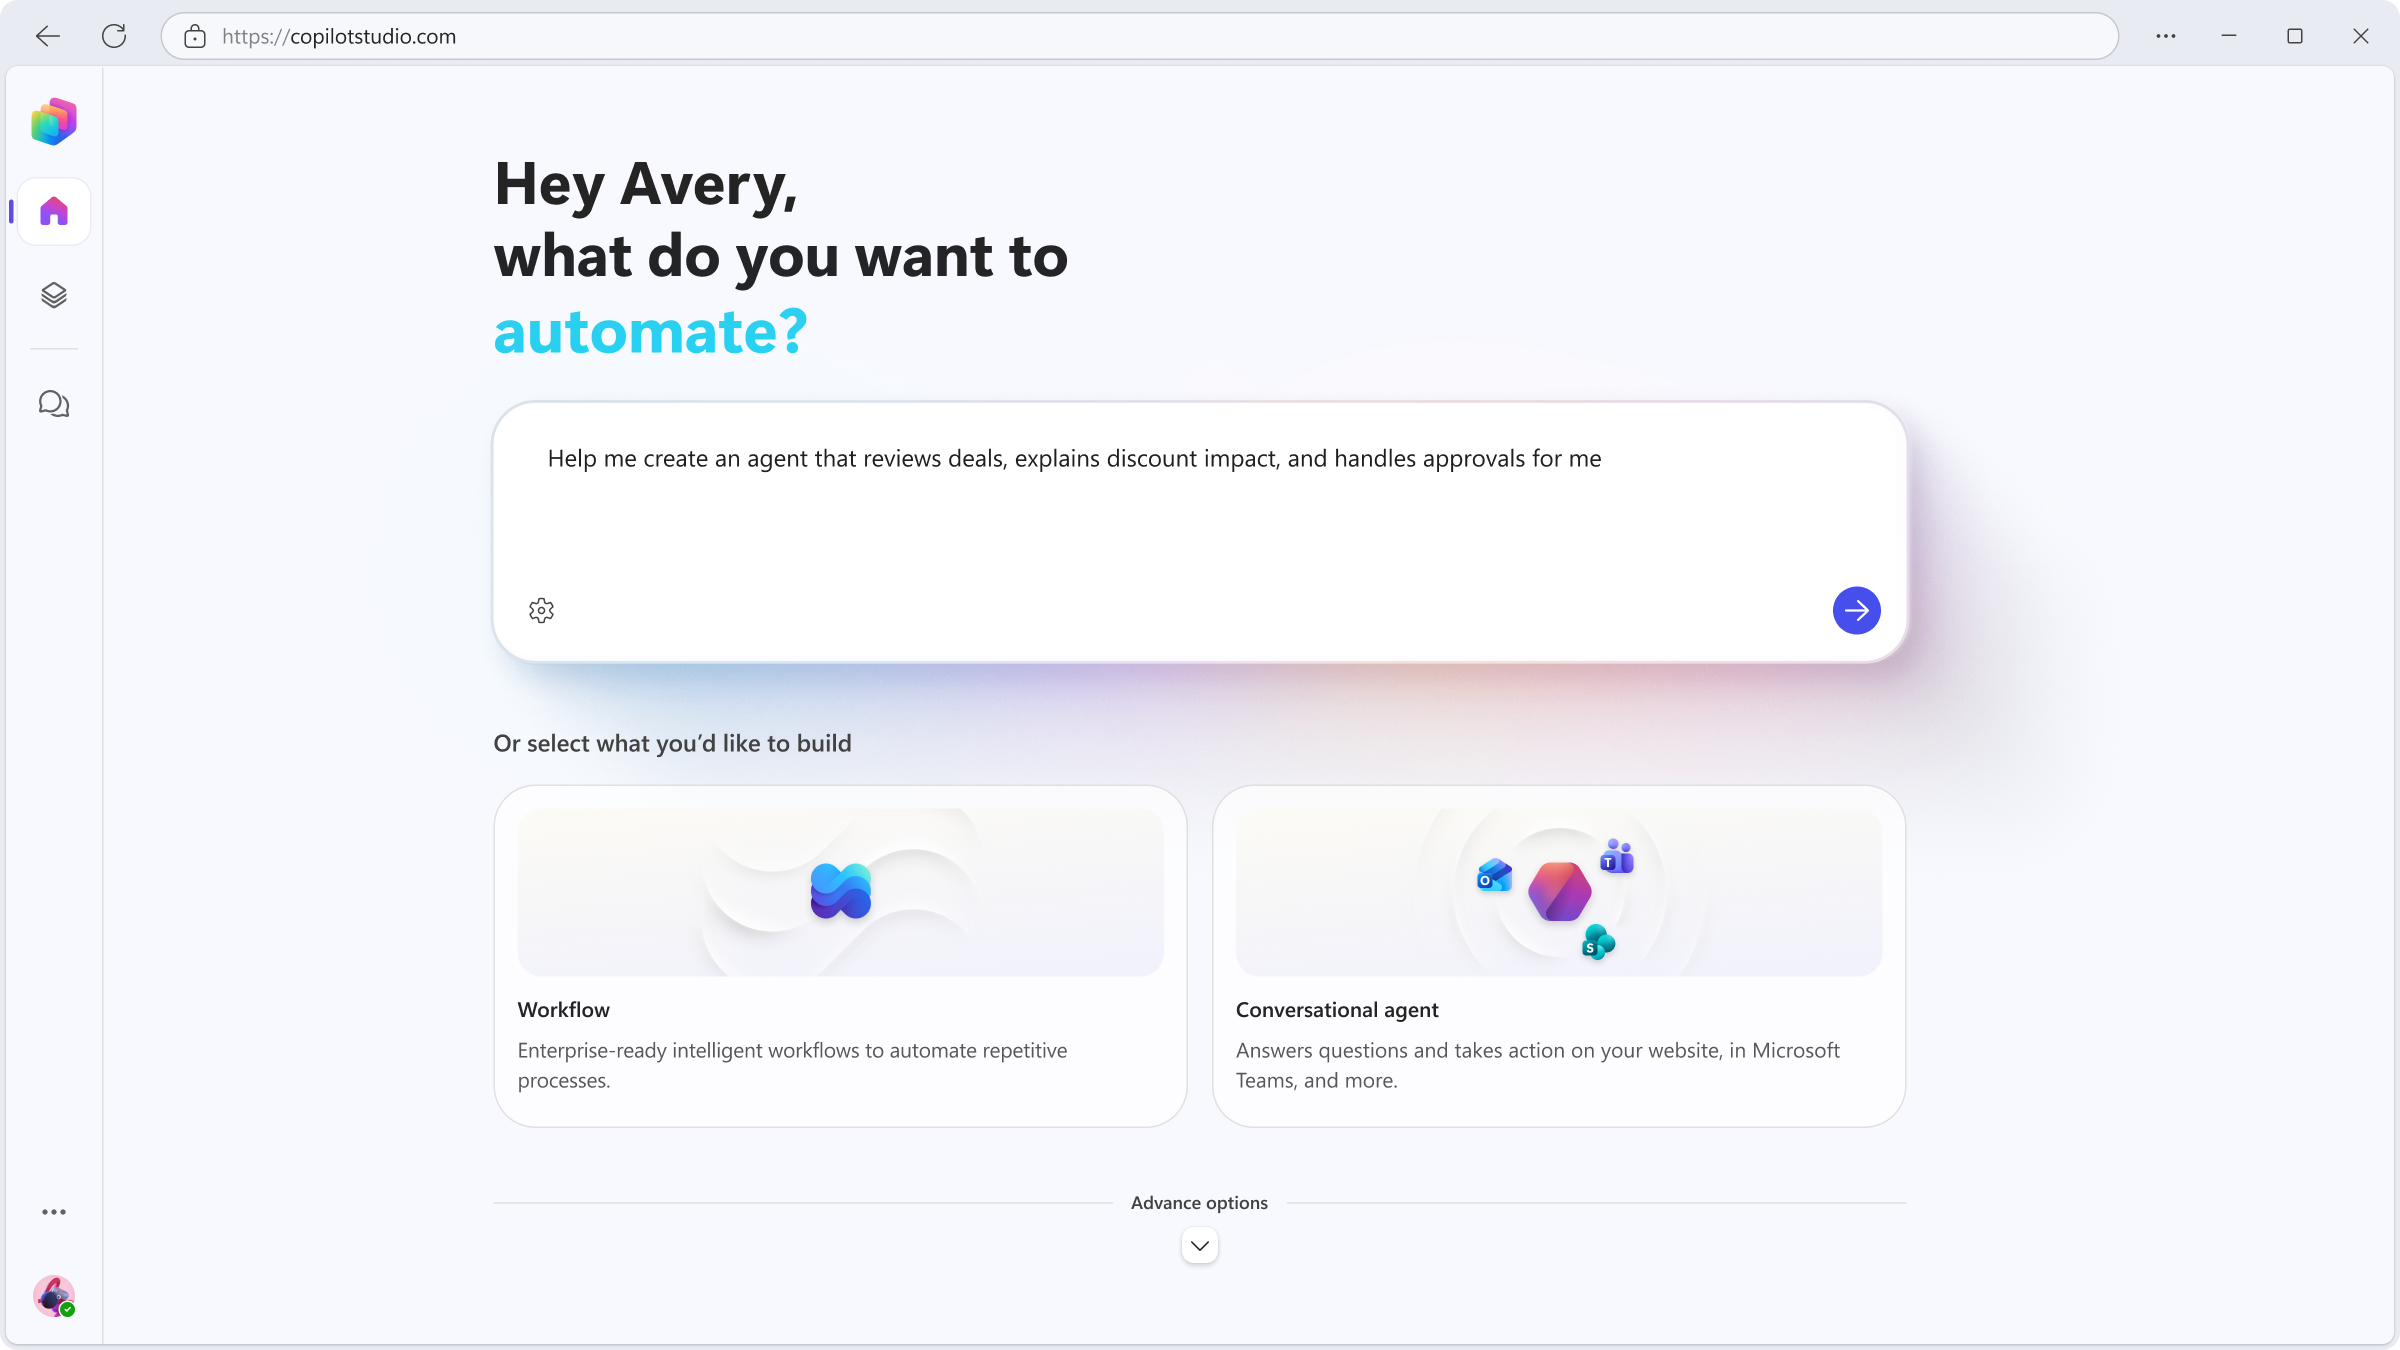
In the input box, describe the enterprise process, system, or problem you want to automate or optimize. Be as specific as you like. For example:
"Automate our employee onboarding process: send welcome emails, provision accounts, assign training, notify the manager, and follow up until all steps are complete"The more context you provide, the better Copilot Studio can tailor the solution to your needs.
If you already know what you want to build, select Workflow to automate a repetitive process, or Conversational agent to build an agent that answers questions and takes action across Microsoft Teams, websites, and more.
Select the arrow to submit. Copilot Studio opens a full-page chat experience and analyzes your request to determine the best agentic solution:
- A deterministic workflow
- A conversational agent
- A combination of both
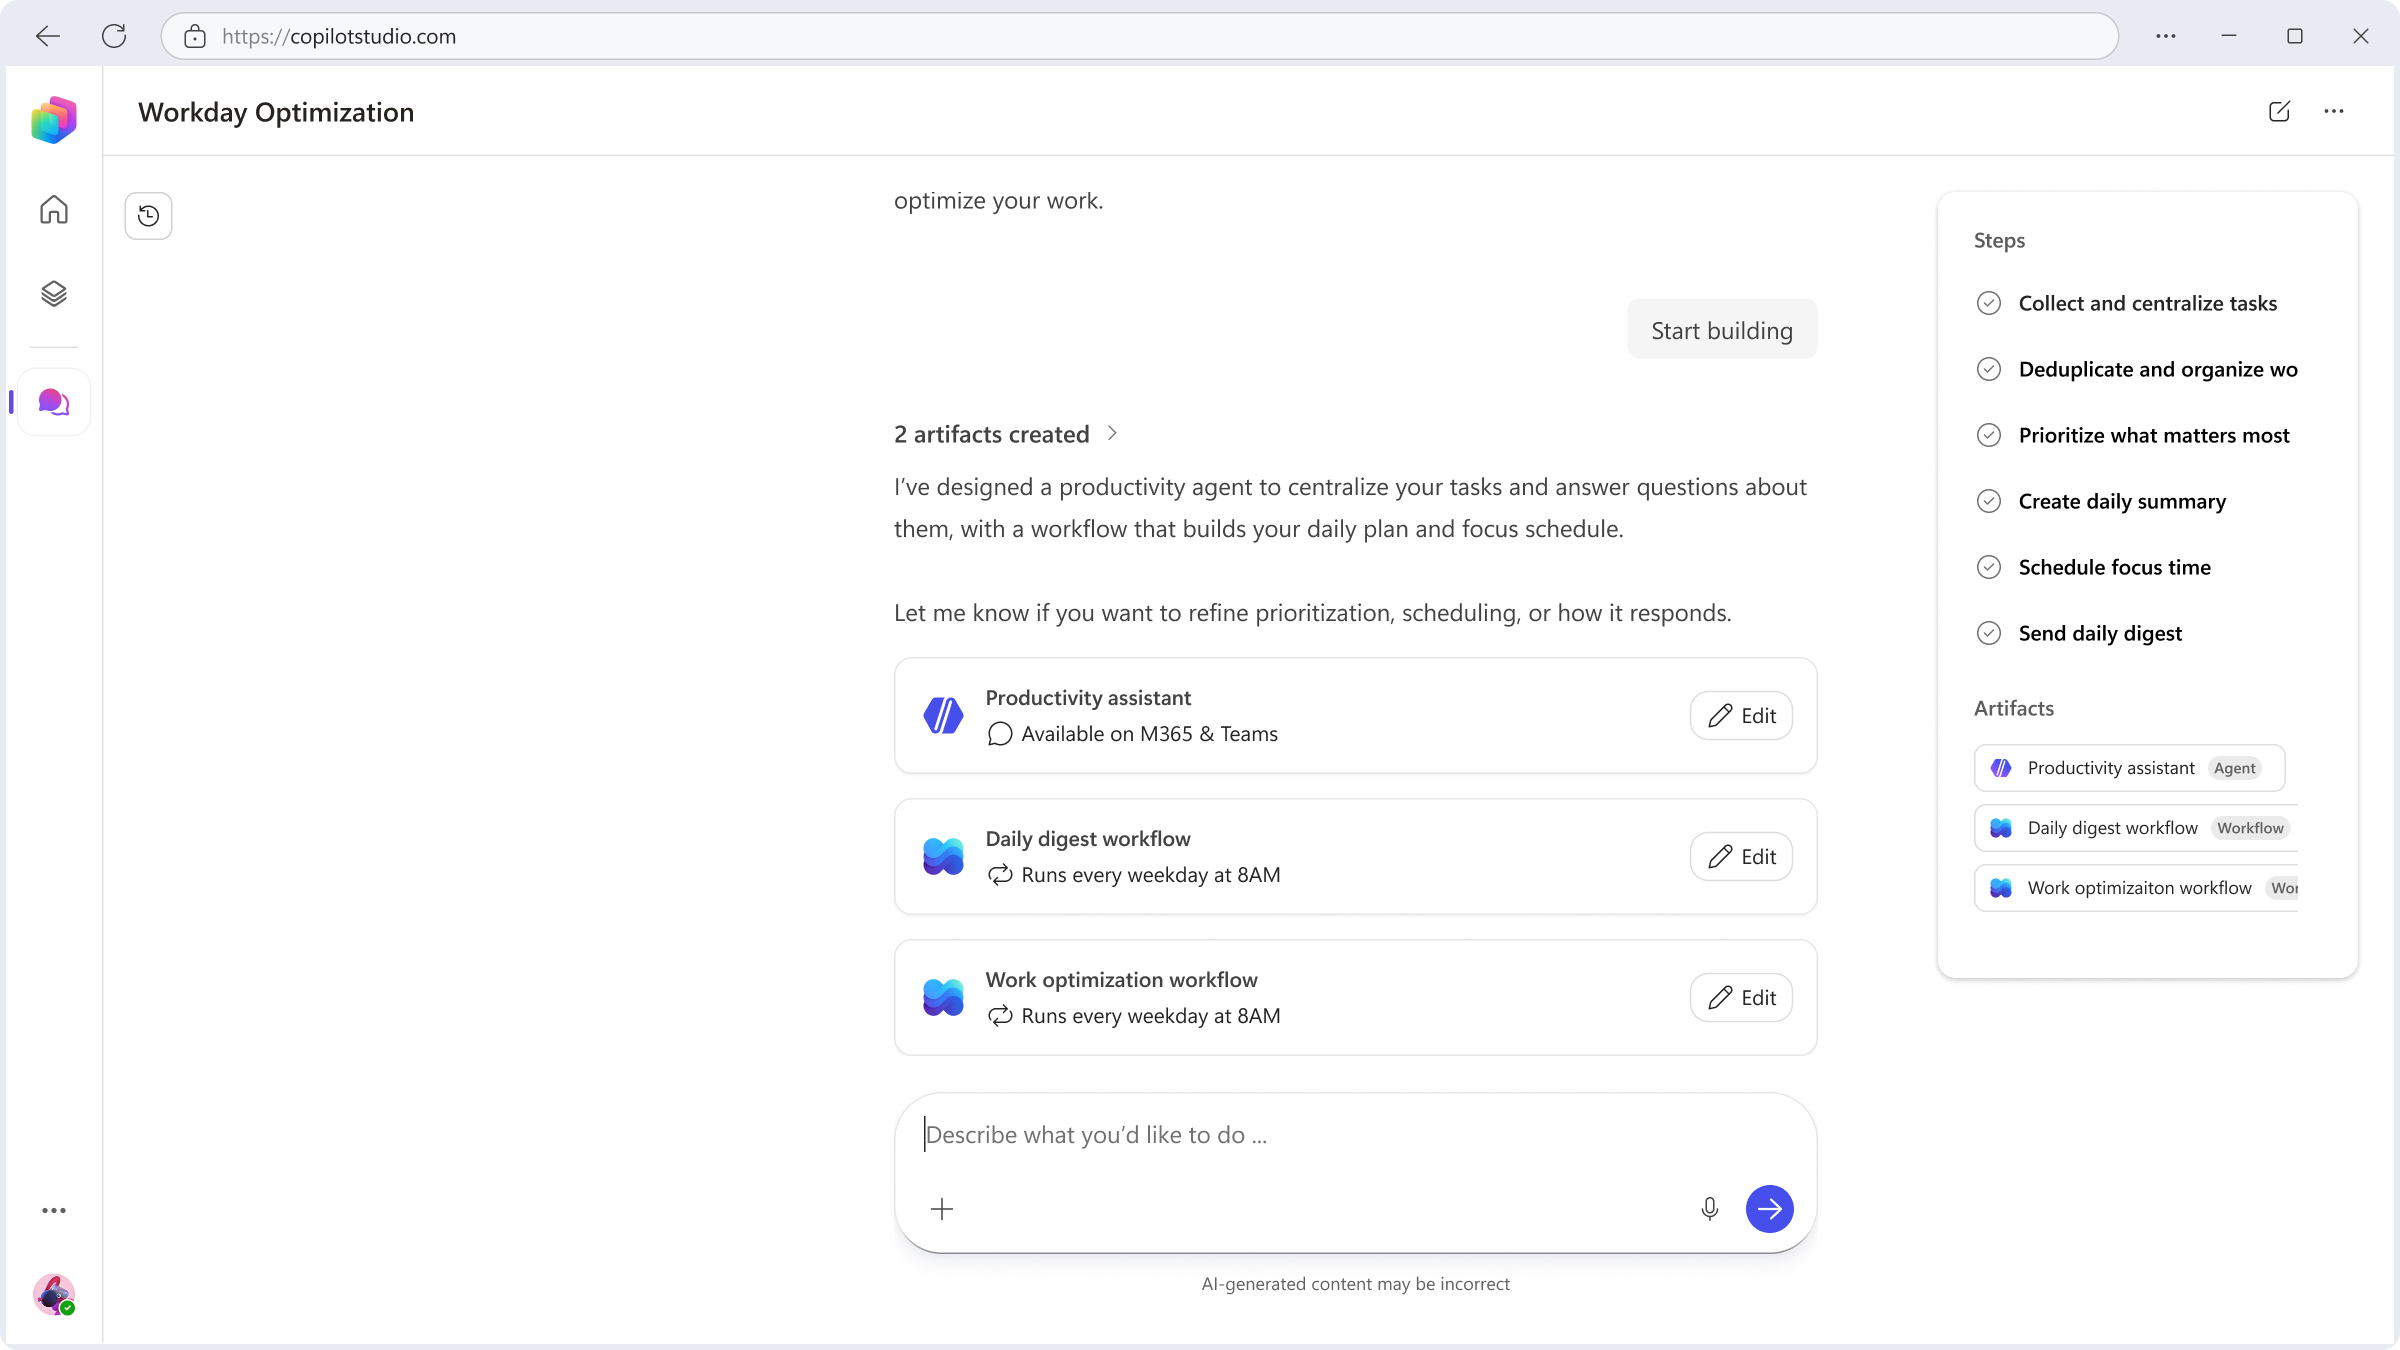
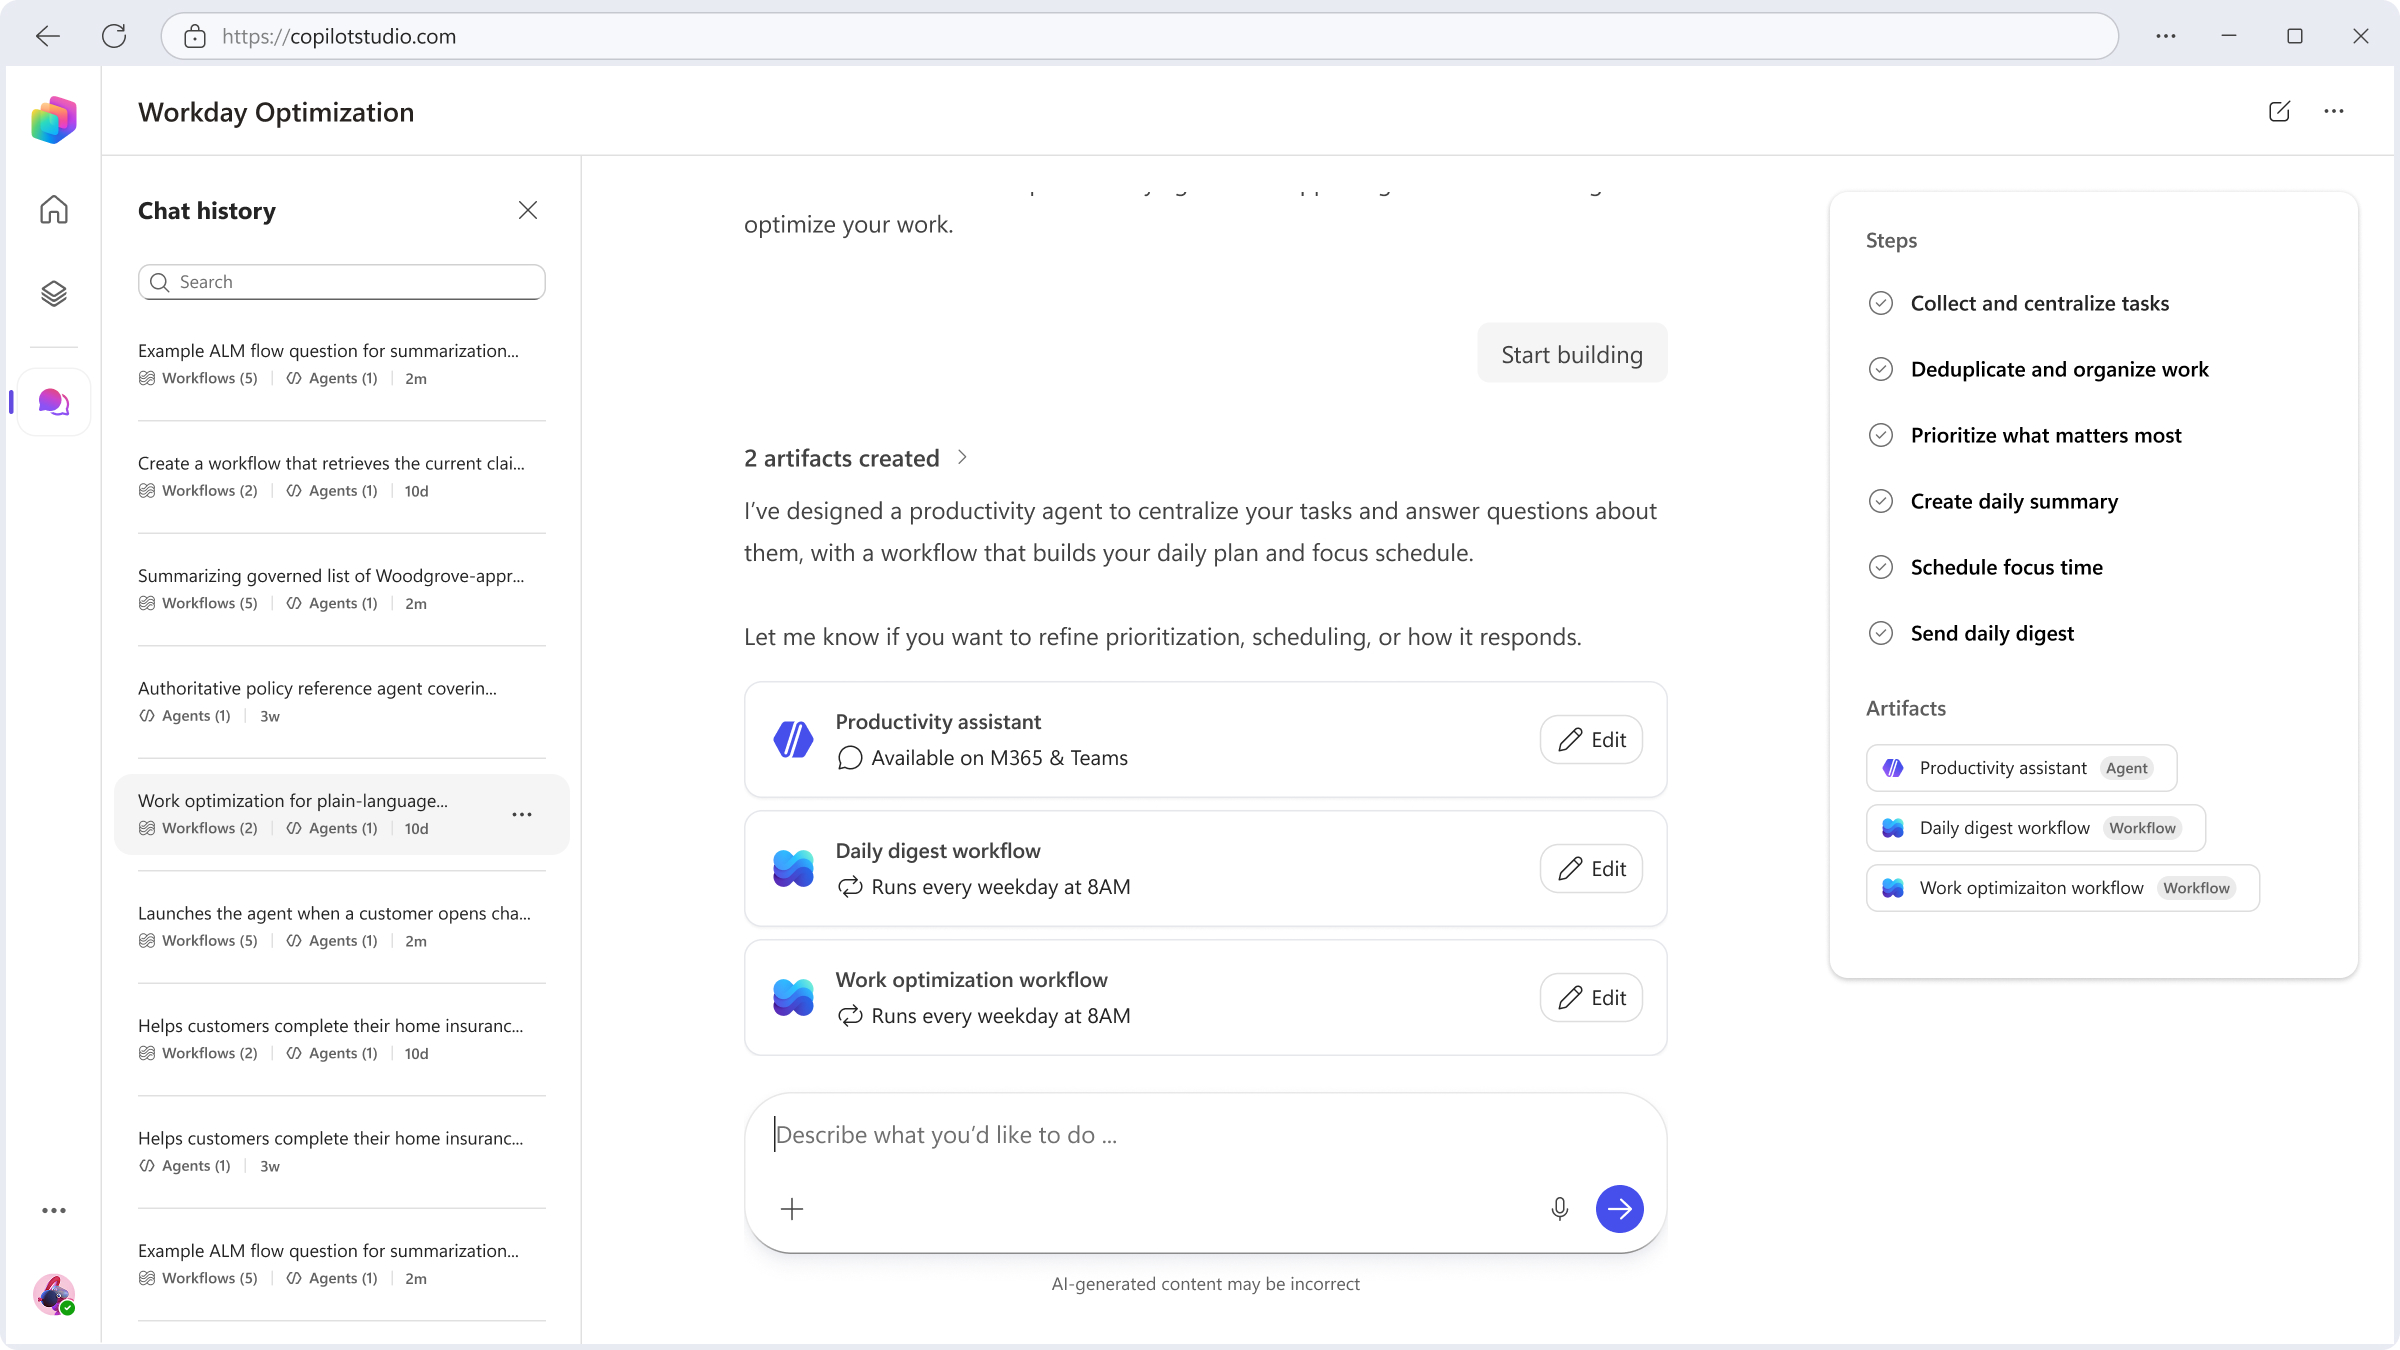
Copilot Studio guides you through a series of clarifying questions as it builds your solution. Watch your artifacts take shape in real time in the Steps and Artifacts panel on the side.
Note
Copilot Studio might prompt you to configure a connection if your solution requires access to a data source or system that isn't currently connected. For example, if your solution needs to send emails but you haven't connected an email account, Copilot Studio prompts you to set up permissions with your email provider.
When Copilot Studio finishes, your artifacts appear as cards in the chat. Select Edit on any card to open it in the canvas and view or customize it. You can also continue editing and refining your artifacts directly in the chat. You can go back and forth between the chat and the canvas at any time.
Tip
To return to the chat at any time, select the breadcrumb link in the top-left corner. From the chat, you can create more artifacts, refine existing ones, or start a new conversation to tackle a new task.
To access past conversations, navigate to the Chat tab and select the Chat history button in the top left corner. You can jump back into any previous conversation to keep editing artifacts or start new ones. Past conversations are currently retained for 22 hours.
Test your agents and workflows in the canvas before publishing.
Improve your solution
Now that you have a solution, you can test how changes to different parts of your solution affect its behavior and improves it. Test it. Make some changes. Test it again. Repeat.
The details depend on the type of solution you created, but here are some ideas to get you started.
Test out your agent
If your solution created an agent, open the agent and select the Preview tab to open a test chat. Use the chat to test how any agentic component currently responds in the test chat. Ask your agent some questions.
Go to the agent Build tab and experiment with the agent instructions. Update the instructions for your agent to use a different tone, for example, "talk to users like Jane Austen." How do the responses change? Try out different styles and tones to find the one that best fits your needs.
Test your agent's new instructions with another question. How has the response changed?
Select Save to save your changes
Test out your workflow
- If your solution includes a workflow, open the workflow and make some changes to the workflow steps in the canvas. You can change the order of steps, add new steps, or remove steps.
- After making changes, test your workflow by selecting the Test button in the top right corner of the canvas. Follow the prompts to test your workflow with different inputs and scenarios.
- Review the test results and make other changes as needed to improve your workflow's performance and accuracy.
Publish your solution
Note
The trial license gives you access to Copilot Studio to create agents. You can test your agents using the test chat panel. However, you can't publish the agent.
When you're satisfied with your solution, publish it to a live or demo website. This step depends on the platforms and channels you can access. You might need to change the authentication for your demo website, depending on who you want to access your agent. Learn more in Key concepts - Publish and deploy your agent and Publish an agent to a live or demo website.
Publish your agent to a demo website
Open your agent, and select the chevron next to Publish. The Publish agent dialog opens.
Select Demo website in the list of available channels.
Select Save and publish. Copilot Studio publishes your agent to a demo website. A URL is displayed.
Copy the URL and send it to others to demonstrate the agent.
Publish your workflow
To publish your workflow, open your workflow, and select the Publish button on the canvas.
What's next?
You created a solution, tested its components, and published them. Congratulations! Your solution, whether agentic, workflow, or a combination of both, has many more capabilities, so try it out and explore the advanced features.
For questions not covered in the documentation or for feature ideas, visit our community and post questions.