Note
Access to this page requires authorization. You can try signing in or changing directories.
Access to this page requires authorization. You can try changing directories.
In the previous tutorial, you added a list to a page; however, users wouldn't be able to view any data. Power Pages has security enabled by default to protect your business data. This tutorial explains how to create table permissions and associate them with web roles so visitors to your site can only interact with the information you allow.
In this tutorial, you learn how to:
- Create table permissions
- Set access type and privileges
- Add web roles
Prerequisites
- A Power Pages subscription or trial. Get a Power Pages trial here.
- A Power Pages site created. Create a Power Pages site.
- Complete the Add and design a page tutorial.
- Complete the Add a list to a page tutorial.
Create table permissions
This video provides an overview of the steps to create table permissions.
To learn how to configure table permissions to view data:
Go to Power Pages.
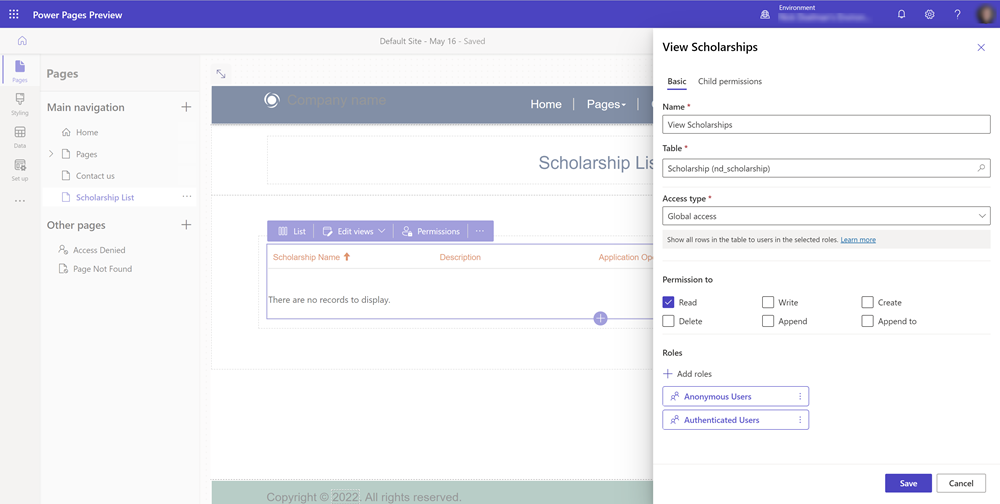
In the pages workspace, on the page with a list component, select the component and choose the Permissions button.
Select New table permissions.
Give table permission a name.
Select a Dataverse table.
Set the access type to Global.
Warning
In this example, the goal is to make the list of all scholarship records accessible to anyone visiting your site, so using the global option is appropriate. However, in other situations, be cautious about the permissions you grant to tables. For example, if a site visitor is signed into your site and needs to view and update their contact information, use a different access type. Self access restricts users to only viewing and updating their own contact information.
Set the permissions to Read.
Choose Anonymous and Authorized user for the web roles.
Now that table permissions are set, view the page by selecting Preview.
You should now see a list of Dataverse records on the page.
Note
You can give the table permission any name, but ideally it should be descriptive.
Set access type and privileges
When you configure a list or a form in Power Pages, by default, users don't have access to the information in Dataverse. Sometimes, you might want to limit what data a particular set of users can access. You can do control access with a combination of table permissions and security roles.
If your table in Dataverse has a relationship with a Contact or Account table, you can filter the records based on that relationship.
In the following example, we created a table that has a lookup to the contact table.
This video provides an overview of the steps to set access types and privileges.
Create a page with a list showing records that have a relationship to the contact table.
Note
Go to Tutorial: Add list to a page for details on how to a list to page. Create a table with a lookup to the contact table.
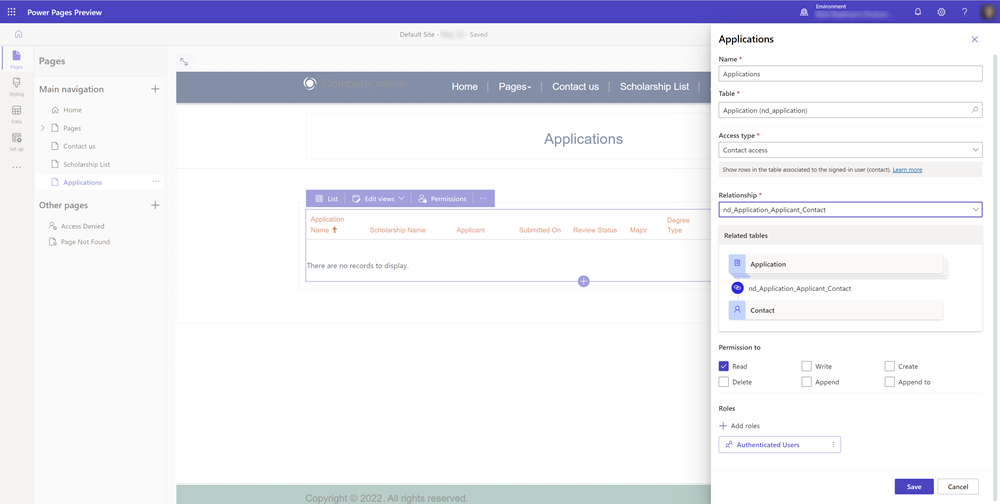
From the list on the page, choose on the Permission button.
Select to create a new table permission.
Give the table permission a name and choose Table.
Select Access type Global access.
Set permissions to Read.
Assign the Table permission to the Authenticated user web role.
Select Save.

Preview the site and sign-in. For purposes of this tutorial, you can sign in using Microsoft Entra ID.
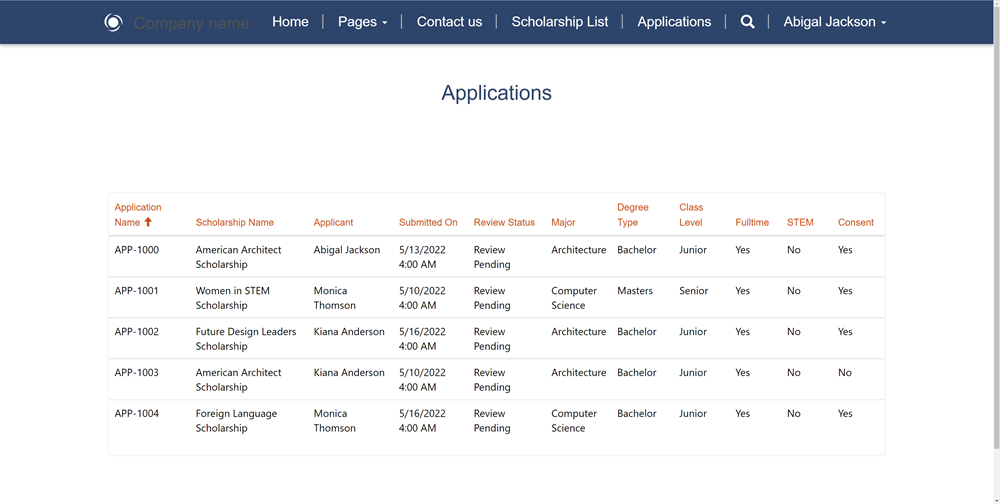
View the page on the site. When any user signs in, they should see all the data in the table.
In our example, we would only want to show records that related to the currently signed-in user. Return to the design studio, select the list on the page and select permissions.
Modify the existing table permission and change the Access Type to Contact Access.
You need to specify the relationship between your table and the contact table.
Note
If you don't see a relationship, you need to define a lookup to the contact table using the Data workspace. Create or update some records that are related to the contact record you're using to sign-in to the site.
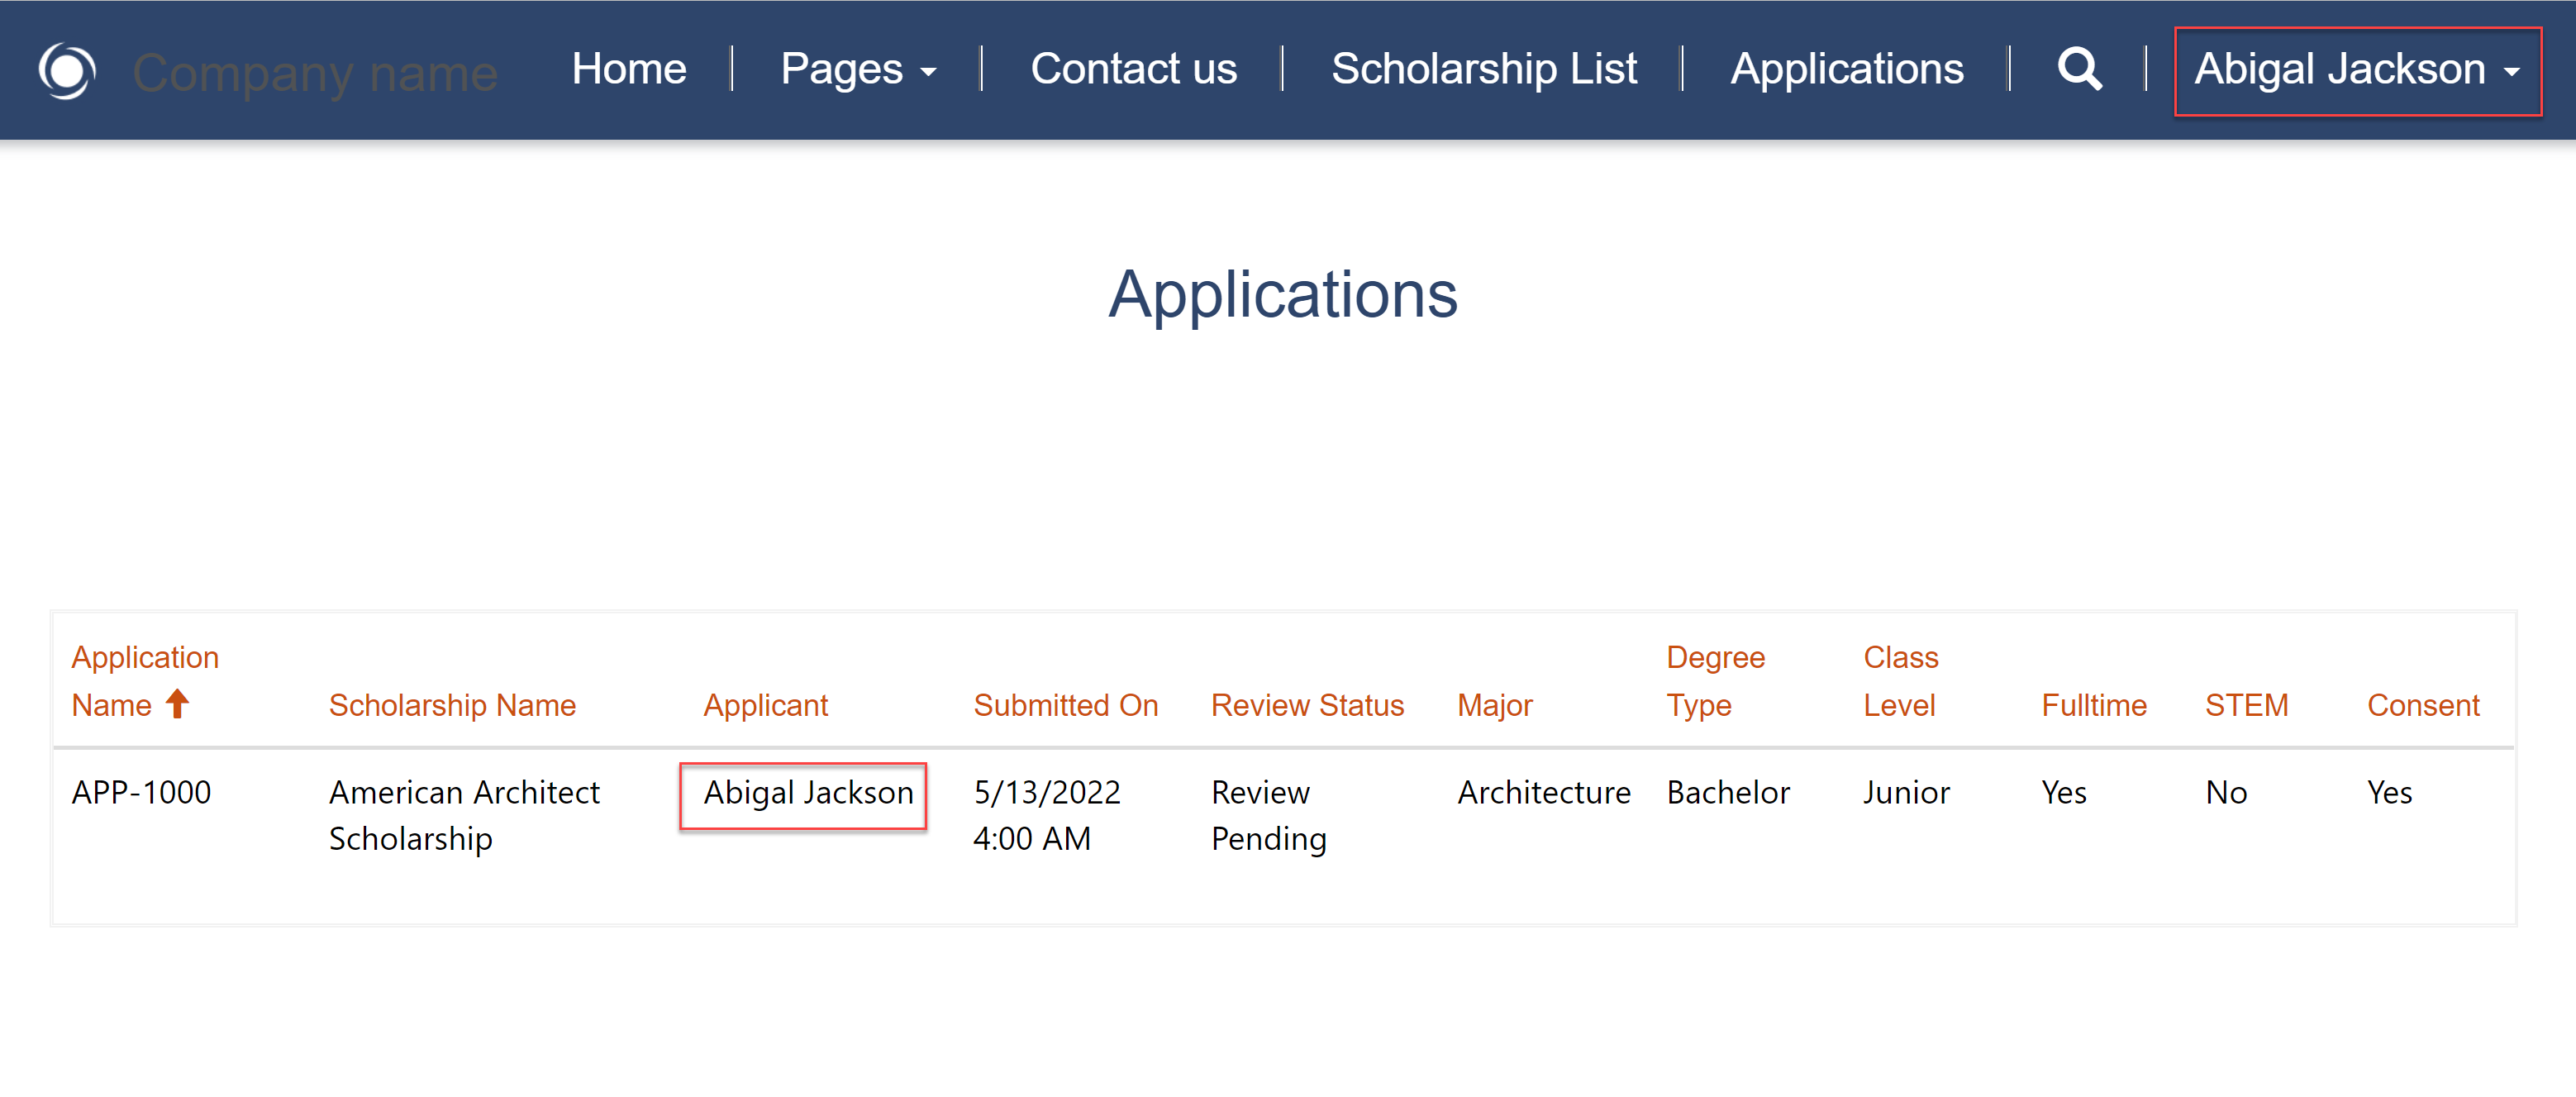
Preview the site and sign-in. You now should only see records that are related to the contact that signed in to the site.
More information
There are several different access types and privileges in Power Pages.
For more information, see:
Add web roles
In our examples so far, we assigned the table permissions to the default Authenticated Users and Anonymous Users web roles.
This video provides an overview of using web roles.
We can also create our own custom web roles to further limit access to data and pages to certain site visitors.
In the design studio, select the ellipses ... from the side menu and select Portal Management to open the Portal Management app.
In the Portals Management app, under the Security section, select Web Roles.
Select New to create a new web role and give it a descriptive name. Leave the Authenticated Users and the Anonymous Users roles set to No.
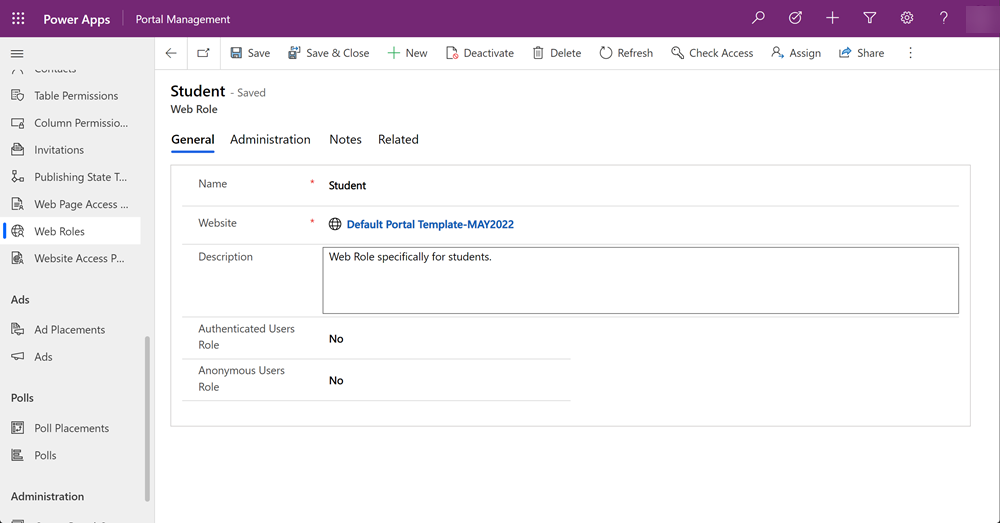
Save the web role record.
Select Related and choose Contacts. Select Add existing contacts choose a few contacts.
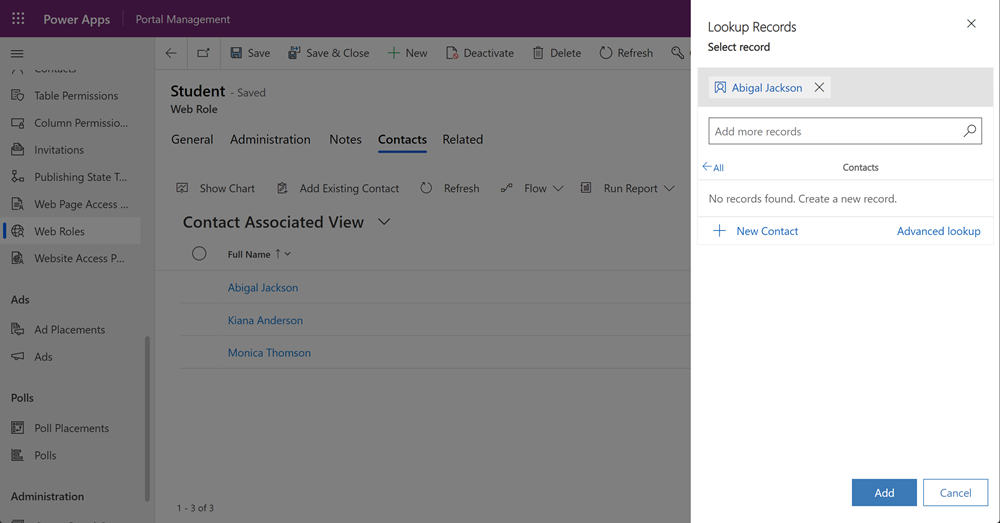
Note
Site users are stored as Contacts records.
Within the design studio on a list or a form, choose the permissions button and select a table permission, then assign the custom web role.
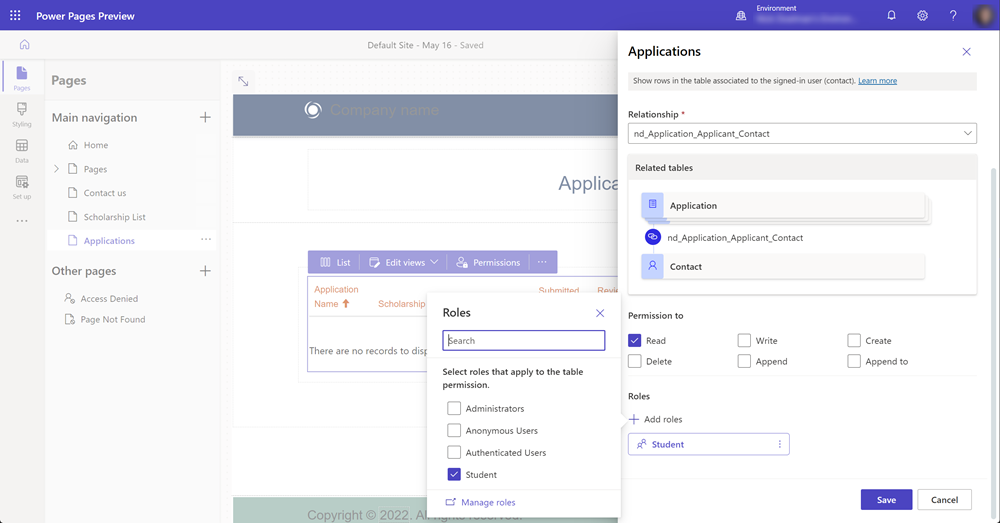
Note
You need to restart the design studio or clear the browser cache (ctrl + F5) to see the new web role.
Preview the site and note that only users logged in are able to view the data on a form or list.
Next steps
Showing data in a list view to the correct audience is an important feature of Power Pages. The next tutorial will cover adding a form to a page to allow users to create and edit business data.