Denodo
Note
The following connector article is provided by Denodo, the owner of this connector and a member of the Microsoft Power Query Connector Certification Program. If you have questions regarding the content of this article or have changes you would like to see made to this article, visit the Denodo website and use the support channels there.
Summary
| Item | Description |
|---|---|
| Release State | General Availability |
| Products | Power BI (Semantic models) Power BI (Dataflows) Fabric (Dataflow Gen2) |
| Authentication Types Supported | Basic Windows |
Note
Some capabilities may be present in one product but not others due to deployment schedules and host-specific capabilities.
Prerequisites
To use this connector, you must have installed the Denodo platform, and configured and started its service. In case of a connection using an ODBC DSN, you must have correctly configured the connection in the ODBC Data Source Administrator.
Capabilities supported
- Import
- DirectQuery (Power BI Semantic models)
Connect to an ODBC data source from Power Query Desktop
To make the connection, take the following steps:
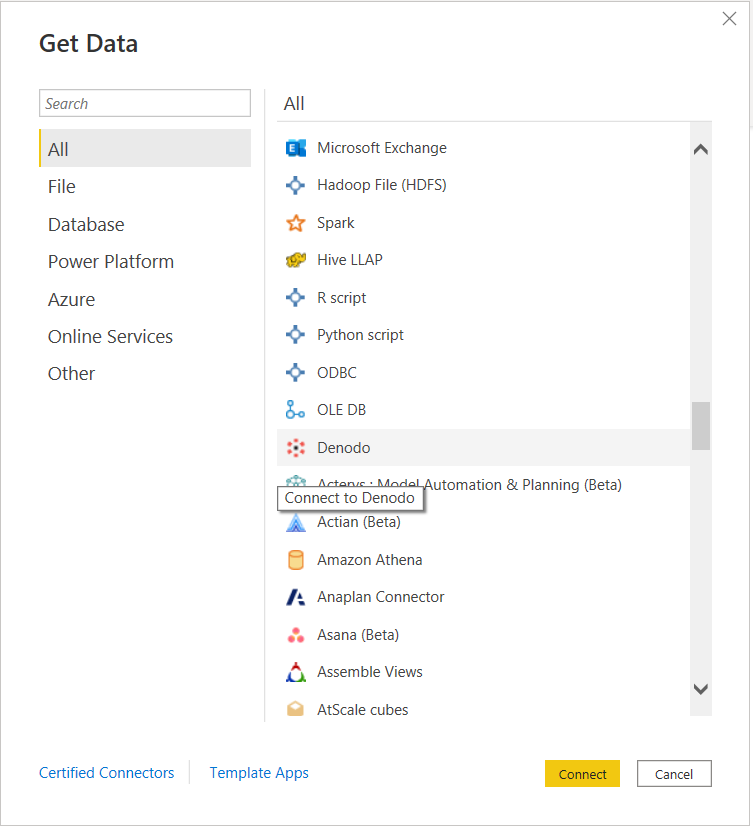
In order to connect to data, select Get Data from the Home ribbon and select Denodo in the Database section.
There are two ways to connect to the data source of your choice:
- Through DSN (ODBC data source name)
- Using a connection string
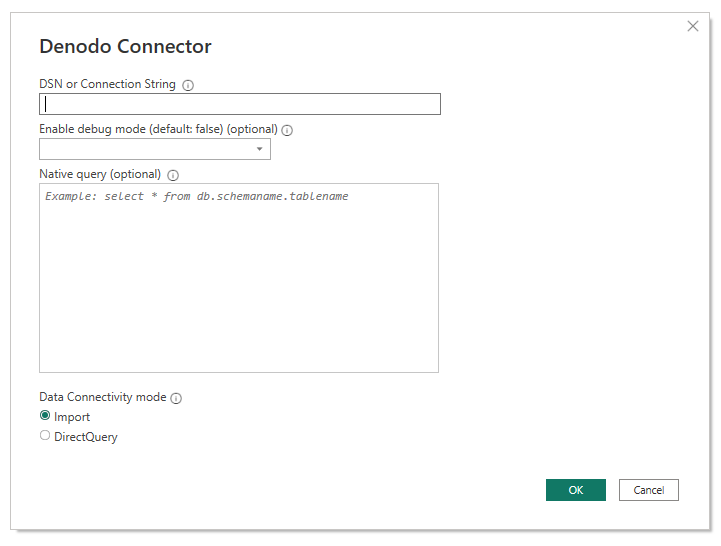
In the DSN or Connection String section of the Denodo Connector dialog box, provide the Data source name (DSN) or the Connection String depending on the type of connection you prefer.
When creating a Denodo-compatible connection string, you must take into account that the Driver field must be omitted, as this is transparently set at connection time by the connector itself.
The connection string must contain three mandatory parameters: SERVER, PORT and DATABASE:
SERVER=<Server name>;PORT=<Port number>;DATABASE=<Database name>Additionally, it can contain an optional parameter: SSLmode:
SERVER=<Server name>;PORT=<Port number>;DATABASE=<Database name>;SSLmode=<SSL mode>Authentication parameters must be omitted, as authentication is configured in later steps.
Note
When writing the connection string, it must be taken into account:
- The connection string must keep the correct order of its parameters: SERVER, PORT, DATABASE and SSLMode.
- The name of these parameters must always be written in the same way. For example, if you choose to write them in upper case, they must always be written in upper case; if you decide to write them capitalized (writing the first letter of a word in uppercase and the rest of the letters in lowercase) they must always be written that way.
Doing otherwise could prevent Power BI from recognizing different Denodo data sets in a report as belonging to the same Denodo data source and, as a consequence, request separate authentication credentials for each of them.
The second section, Enable debug mode, is an optional field that allows you to add trace information to log files. These files are created by Power BI Desktop when you enable tracing in the application using the Diagnostics tab in the Options menu. Note that the default value for Enable debug mode is false, and in this scenario, there will be no trace data in the log files from Denodo Power BI custom connector.
The third section, Native Query, is an optional field where you can enter a query. If this query field is used, the resulting data set will be the result of the query instead of a table or a set of tables.
You can write a query that queries only one of the databases that the datasource is associated with.
SELECT title, name FROM film JOIN language ON film.language_id = language.language_id WHERE film.language_id = 1If you want to write a query that queries more than one database, you have to specify in the query the database that owns each table.
SELECT i_item_sk, country FROM sakila.country, ewd.itemThe last section in Denodo Connector is Data connectivity mode, where you can choose between Import mode or DirectQuery mode.
Once you're done, select OK.
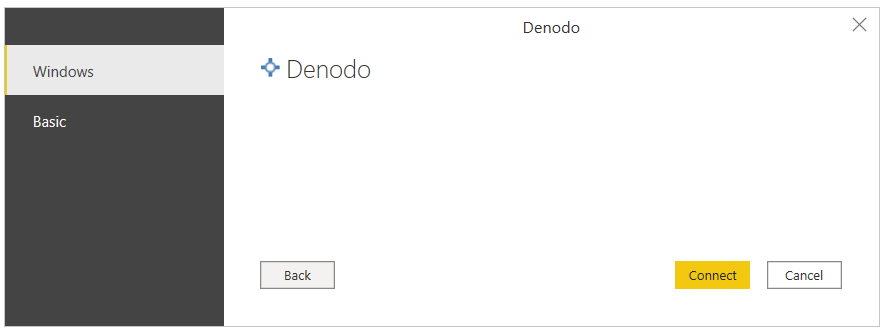
Before showing the navigator window that displays a preview of the available data in Denodo Virtual DataPort, you'll be asked for authentication. The Denodo Power BI custom connector supports two authentication types: Windows and Basic.
Windows: When you choose to use Windows authentication, Power BI Desktop connects to Virtual DataPort using Kerberos authentication.
In this case:
Kerberos authentication must be enabled in the Virtual DataPort server.
The Denodo Virtual DataPort database that the data source connects to must be configured with the option ODBC/ADO.net authentication type set to Kerberos.
Power BI Desktop must be running in the Windows domain, because the ODBC driver requests the Kerberos ticket from the operating system's ticket cache.
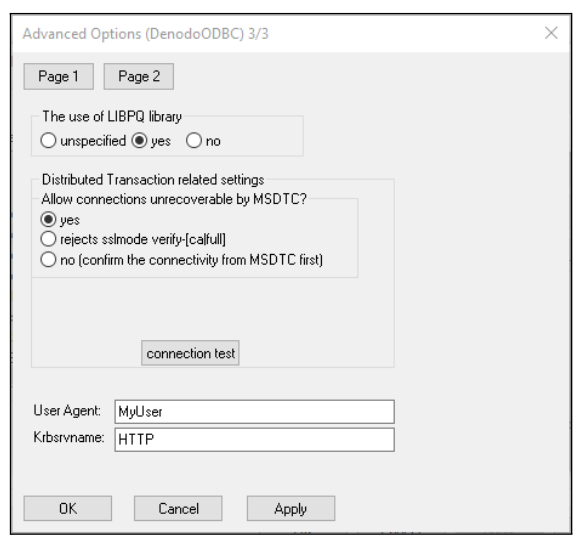
Make sure the Advanced Options page of the DSN configuration contains all the needed configuration for using Kerberos as an authentication method.
Basic: This authentication type allows you to connect Power BI Desktop to your Virtual DataPort data using your Virtual DataPort server credentials.
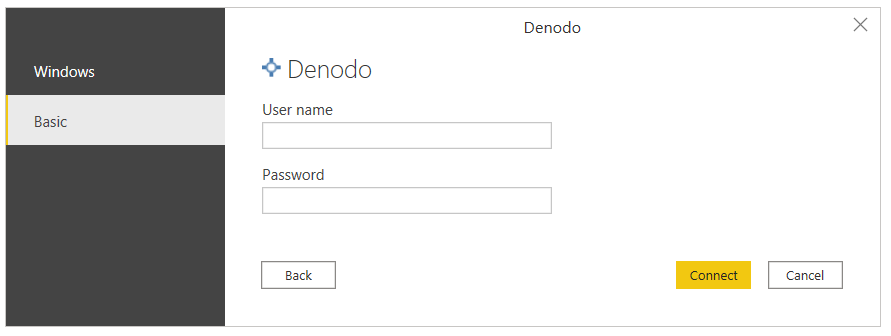
Once you're done, select Connect.
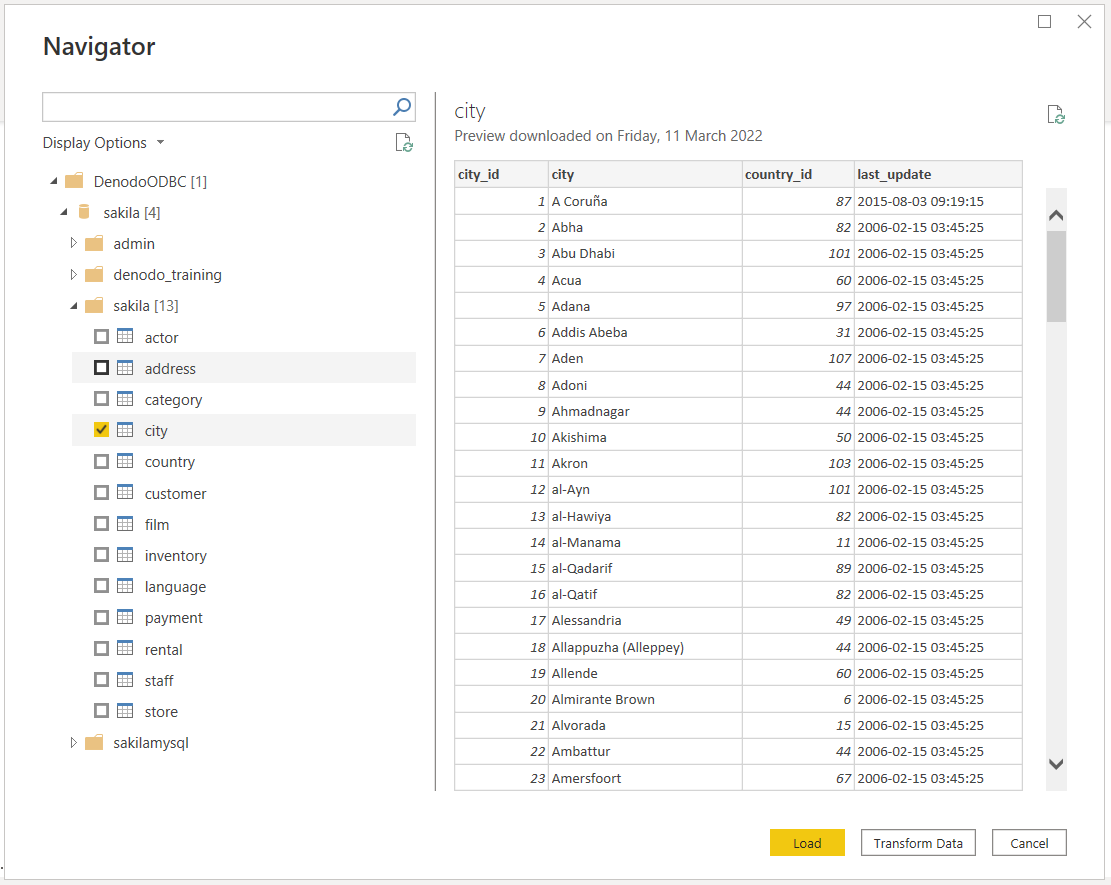
In Navigator, select the data you need from the database you want and choose Load, or choose Transform Data if you're going to modify the incoming data.
Connect to an ODBC data source from Power BI service using the on-premises data gateway
To make the connection, take the following steps:
Configure the on-premises data gateway (enterprise gateway) that acts as a bridge, providing quick and secure data transfer between on-premises data (data in your Power BI Desktop application, not in the cloud) and the Power BI service.
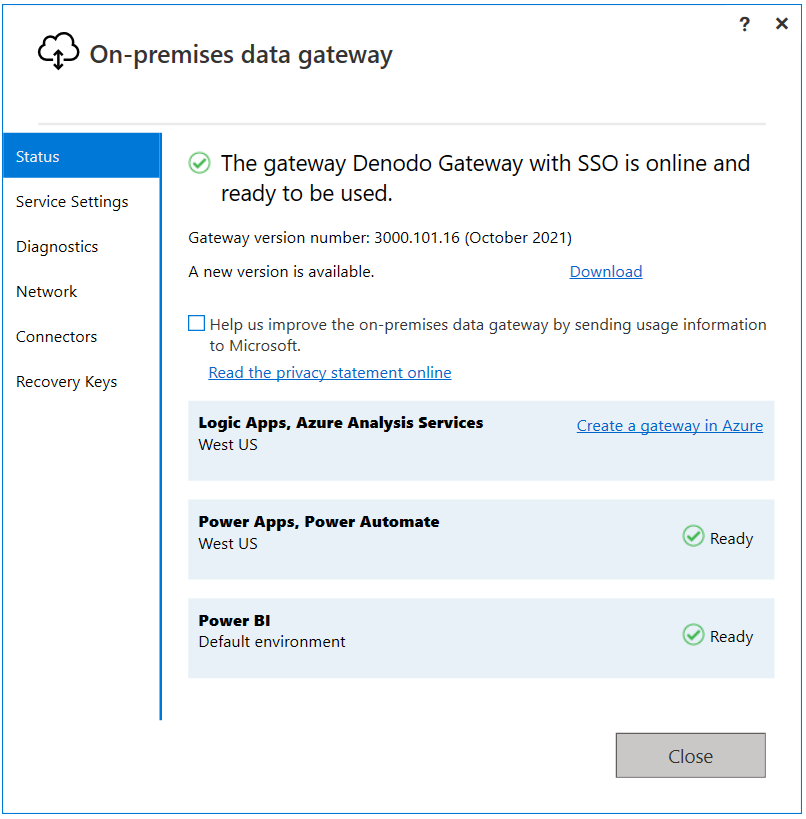
Sign in and register your gateway. In the on-premises data gateway app, select the Status tab to verify that your gateway is online and ready to be used.
Using the gateway settings page in Power BI service, create a data source for the Denodo Power BI custom connector.
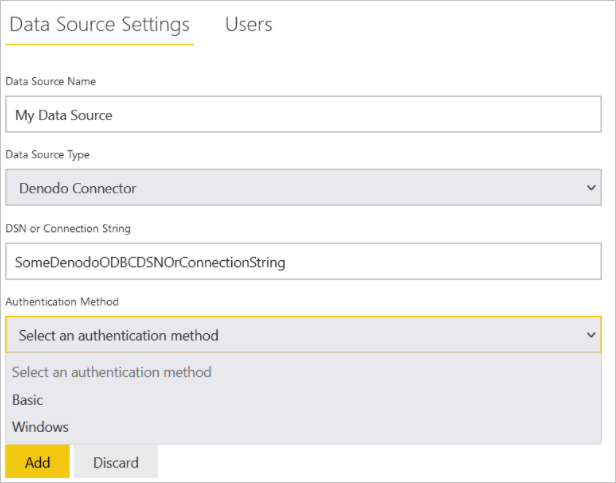
In order to create the data source, you have to specify the way to connect to the data source of your choice:
- Through DSN
- Using a connection string
You also have to specify the authentication mode. The available authentication methods are:
Windows: When you choose to use Windows authentication, Power BI service connects to Virtual DataPort using Kerberos authentication. You need:
In Data Source Settings, enter the username and password to create the Kerberos ticket.
Kerberos authentication must be enabled in the Virtual DataPort server.
The Denodo Virtual DataPort database that the data source connects to must be configured with the option ODBC/ADO.net authentication type set to Kerberos.
Make sure the Advanced Options page of the DSN configuration contains all the needed configuration for using Kerberos as an authentication method.
Basic: This authentication type allows you to create a data source in Power BI service to connect to your Virtual DataPort data using your Virtual DataPort server credentials.
If you use Windows authentication, under Advanced settings for the data source you can enable the single sign-on (SSO) authentication schema in order to use the same credentials of the user accessing your reports in Power BI for accessing the required data in Denodo.
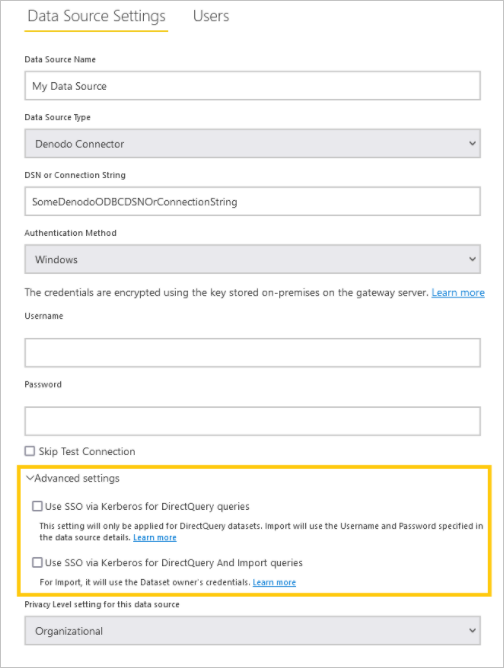
There are two options for enabling SSO: Use SSO via Kerberos for DirectQuery queries and Use SSO via Kerberos for DirectQuery And Import queries. If you're working with DirectQuery based reports, both options use the SSO credentials of the user that signs in to the Power BI service. The difference comes when you work with Import based reports. In this scenario, the former option uses the credentials entered in the data source page (Username and Password fields), while the latter uses the credentials of the data set owner.
It's important to note that there are particular prerequisites and considerations that you must take into account in order to use the Kerberos-based SSO. Some of these essential requirements are:
Kerberos constrained delegation must be enabled for the Windows user running the Microsoft Power BI Gateway, and configuration of both the local Active Directory and Microsoft Entra ID environments should be performed according to the instructions offered by Microsoft for this purpose.
By default, the Microsoft Power BI Gateway sends the user principal name (UPN) when it performs an SSO authentication operation. Therefore, you'll need to review the attribute that you'll use as a login identifier in Denodo Kerberos Authentication and, if it's different from
userPrincipalName, adjust the gateway settings according to this value.The Microsoft Power BI Gateway configuration file called
Microsoft.PowerBI.DataMovement.Pipeline.GatewayCore.dll.config, stored at\Program Files\On-premises data gatewayhas two properties calledADUserNameLookupPropertyandADUserNameReplacementPropertythat allow the gateway to perform local Microsoft Entra ID lookups at runtime. TheADUserNameLookupPropertymust specify against which attribute of the local AD it must map the user principal name that comes from Microsoft Entra ID. So, in this scenario,ADUserNameLookupPropertyshould beuserPrincipalName. Then, once the user is found, theADUserNameReplacementPropertyvalue indicates the attribute that should be used to authenticate the impersonated user (the attribute that you'll use as the login identifier in Denodo).You should also take into account that changes in this configuration file are at the gateway level, and therefore will affect any source with which SSO authentication is done through the Microsoft Power BI Gateway.
Once a data source is created for the Denodo connector, you can refresh Power BI reports. To publish a report on powerbi.com, you need to:
- Open the report in Power BI Desktop.
- Select File > Publish > Publish to Power BI.
- Save the report on the computer.
- Select the workspace where you want to publish.
Troubleshooting
Loading data when a field in a Denodo view has more than 42 relations with other views.
If a Denodo view being imported as a data source into Power BI has more than 42 relations with other views, Power BI might display the following error when accessing the data transformation window:
Preview.Error: The type of the current preview value is too complex to display.
This error is due to a limitation in the Microsoft Power Query platform. In order to work around it, select the failing data source (query) in the data transformation window and access the advanced editor with View > Advanced Editor. Then edit the data source expression in M language adding the following property to the options argument of the Denodo.Contents function call:
CreateNavigationProperties=false
So your call would look similar to:
Source = Denodo.Contents(<dsn>, null, [CreateNavigationProperties=false])
This property will instruct Power BI not to try and generate navigation properties from the relationships registered for the Denodo view accessed in this data source. So if you need some of these relationships to be actually present in your Power BI data model, you will need to manually register them afterwards.
Feedback
Coming soon: Throughout 2024 we will be phasing out GitHub Issues as the feedback mechanism for content and replacing it with a new feedback system. For more information see: https://aka.ms/ContentUserFeedback.
Submit and view feedback for