Note
Access to this page requires authorization. You can try signing in or changing directories.
Access to this page requires authorization. You can try changing directories.
Power Query can connect to many different data sources so you can work with the data you need. This article walks you through the steps for bringing in data to Power Query either in Power Query Desktop or Power Query Online.
Connecting to a data source with Power Query follows a standard set of stages before landing the data at a destination. This article describes each of these stages.
Important
In some cases, a connector might have all stages of the get data experience, and in other cases a connector might have just a few of them. For more information about the experience of a specific connector, go to the documentation available for the specific connector by searching on the Connectors in Power Query article.
Power Query Desktop experience
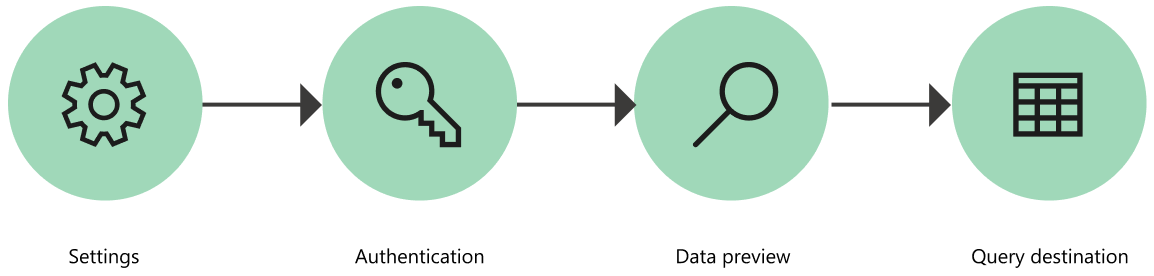
The stages for getting data in the Power Query Desktop experiences are:
Connection settings
Authentication
Data preview
Query destination
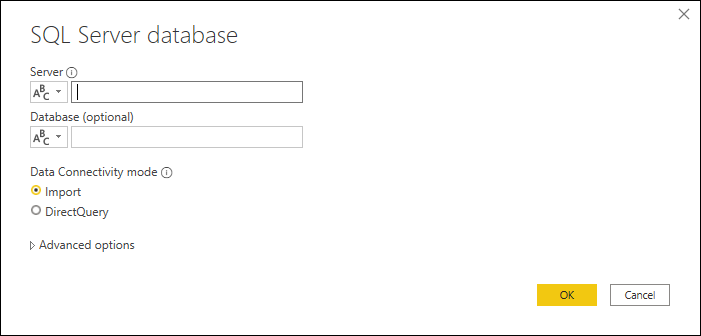
1. Connection settings
Most connectors initially require at least one parameter to initialize a connection to the data source. For example, the SQL Server connector requires at least the host name to establish a connection to the SQL Server database.
In comparison, when trying to connect to an Excel file, Power Query requires that you use the file path to find the file you want to connect to.
The connector parameters are commonly used to establish a connection to a data source, and they—in conjunction with the connector used—define a data source path.
Note
Some connectors don't require you to enter any parameters at all. These connectors are called singleton connectors and only have one data source path available per environment. Some examples are Adobe Analytics, MailChimp, and Google Analytics.
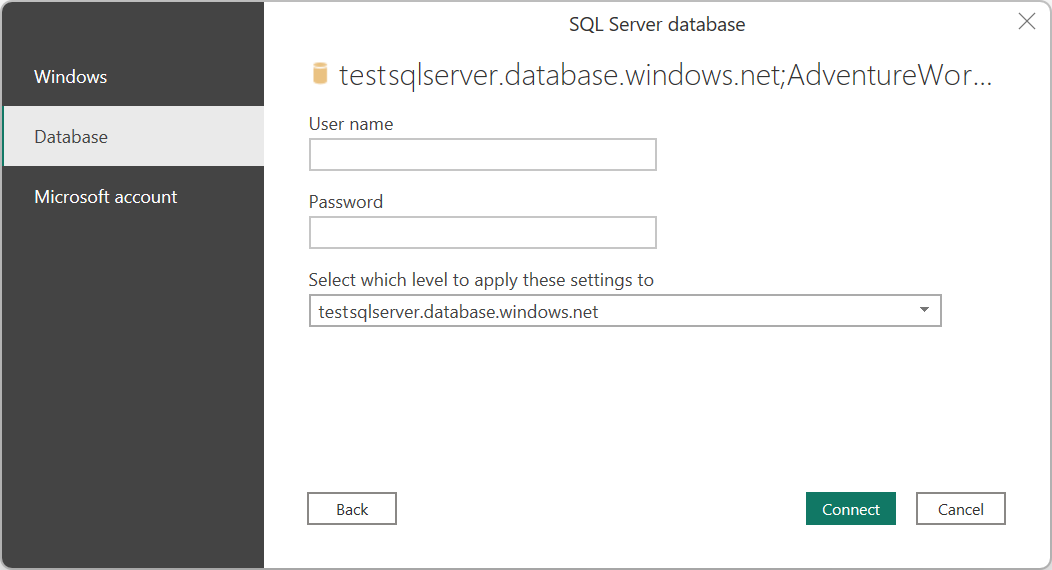
2. Authentication
Every single connection made in Power Query has to be authenticated. The authentication methods vary from connector to connector, and some connectors might offer multiple methods of authentication.
The currently available methods of authentication for Power Query are:
- Anonymous: Commonly used when connecting to a data source that doesn't require user authentication, such as a webpage or a file available over public HTTP.
- API Key: A single API key is accepted for authentication.
- Basic: A username and password sent in base64 encoding are accepted for authentication.
- Database: This method is only available in some database connectors.
- Organizational account or Microsoft account: This method is also known as OAuth 2.0.
- Service Principal: Uses Microsoft Entra ID for authentication.
- Windows: Can be implicit or explicit.
For example, the available authentication methods for the SQL Server database connector are Windows, Database, and Microsoft account.
3. Data preview
The goal of the data preview stage is to provide you with a user-friendly way to preview and select your data.
Depending on the connector that you use, you can preview data by using either:
- Navigator window
- Table preview dialog box
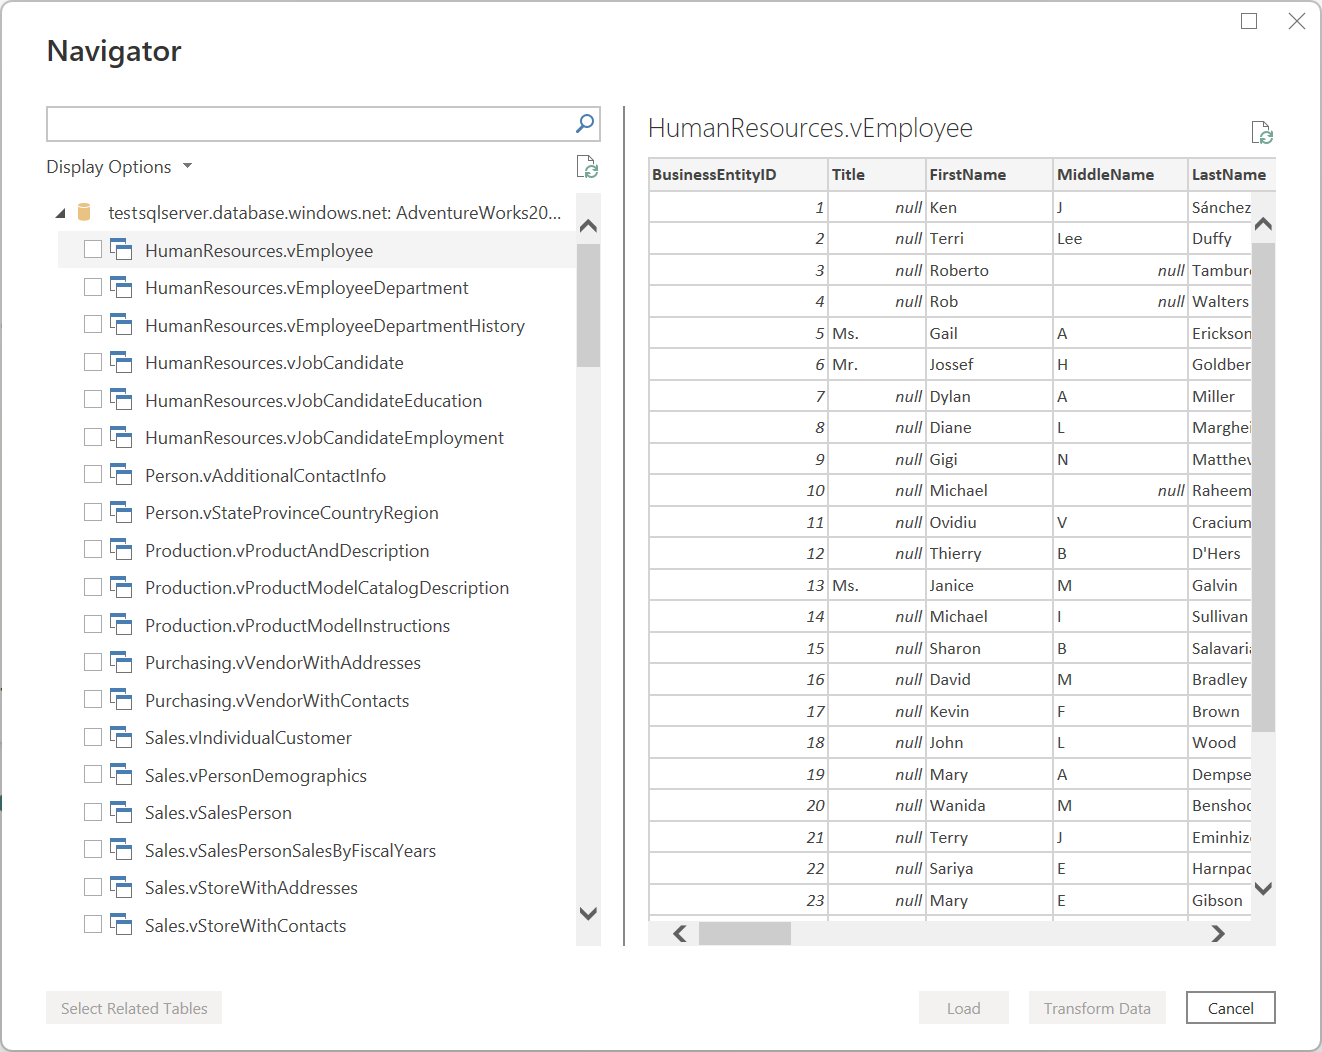
Navigator window (navigation table)
The Navigator window consists of two main sections:
The object selection pane is displayed on the left side of the window. The user can interact with and select these objects.
Note
For Power Query in Excel, select the Select multiple items option from the upper-left corner of the navigation window to select more than one object at a time in the object selection pane.
Note
The list of objects in Power Query Desktop is limited to 10,000 items. This limit doesn't exist in Power Query Online. For a workaround in Power Query Desktop, go to Object limitation workaround.
The data preview pane on the right side of the window shows a preview of the data from the object you selected.

Object limitation workaround
There’s a fixed limit of 10,000 objects in the Navigator in Power Query Desktop. This limit doesn't occur in Power Query Online. The Power Query Online UI is eventually going to replace the one in the desktop.
In the interim, you can use the following workaround:
Right-click on the root node of the Navigator, and then select Transform Data.
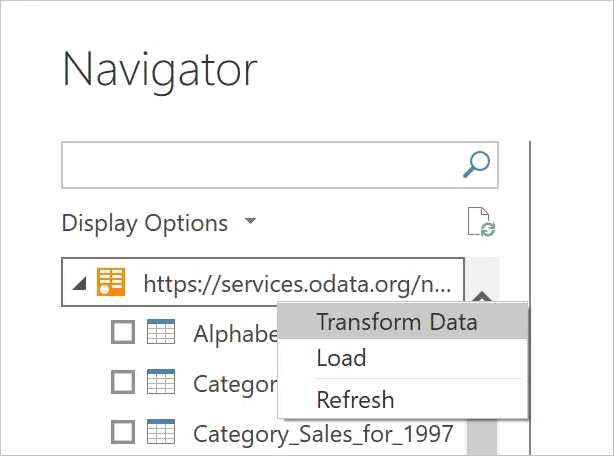
The Power Query editor then opens with the full navigation table in the table preview area. This view doesn't have a limit on the number of objects, and you can use filters or any other Power Query transforms to explore the list and find the rows you want (for example, based on the Name column).
Upon finding the item you want, you can get at the contents by selecting the data link (such as the Table link in the following image).
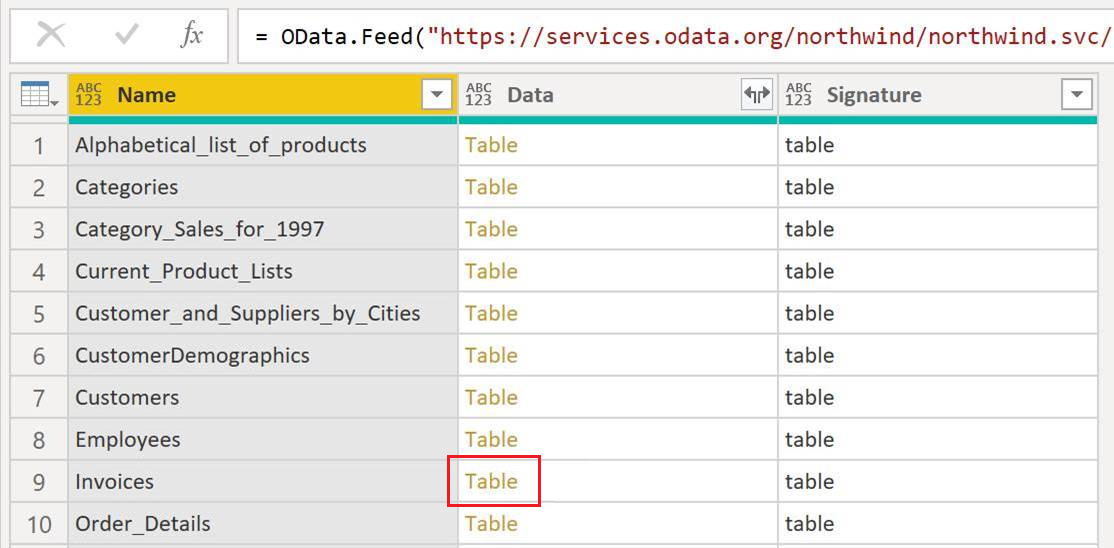
Table preview dialog box
The table preview dialog box consists of only one section for the data preview. An example of a connector that provides this experience and window is the Folder connector.

4. Query destination
At this stage, you specify where to load the query. The options vary from integration to integration, but the one option that's always available is Transform data, which loads data to the Power Query editor to further transform and enrich the query.

Power Query Online experience
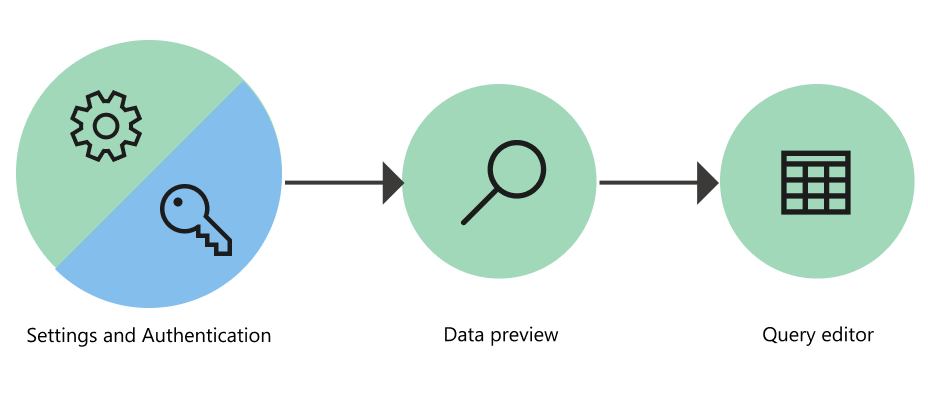
The stages for getting data in Power Query Online are:
Connection settings and Authentication
Data preview
Query editor
1. Connection settings and authentication
In the Power Query Online experience, you begin with the Connect to data source page where you enter values in two distinct sections:
Connection settings
Connection credentials
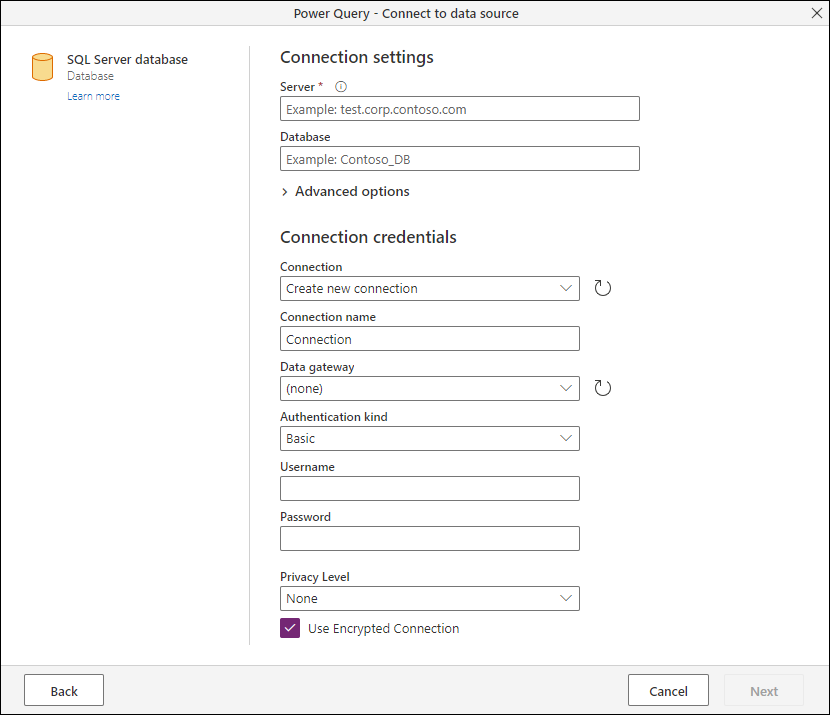
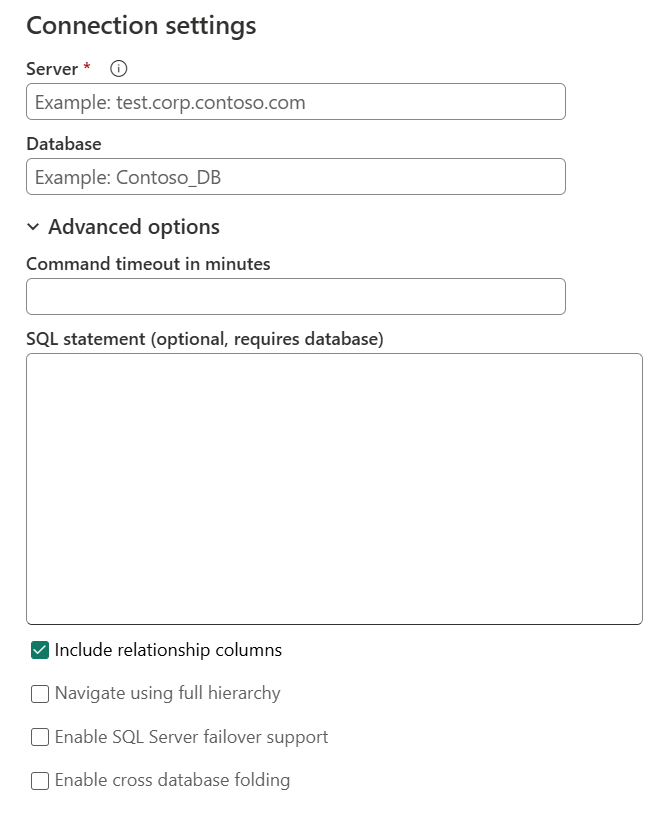
Connection settings
In the connection settings section, you define the information needed to establish a connection to your data source. Depending on your connector, that information could be the name of the server, the name of a database, a folder path, a file path, or other information required by the connector to establish a connection to your data source. Some connectors also enable specific subsections or advanced options to give you more control and options when connecting to your data source.
Connection credentials
The first time you use Power Query to connect to a specific data source, you're required to create a new connection associated with that data source. A connection is the full definition of the gateway, credentials, privacy levels, and other connector-specific fields that make up the connection credentials required to establish a connection to your data source.
Note
Some connectors offer specific fields inside the connection credentials section to enable or define any sort of security related to the connection that needs to be established. For example, the Amazon Redshift connector offers the Use Encrypted Connection field.
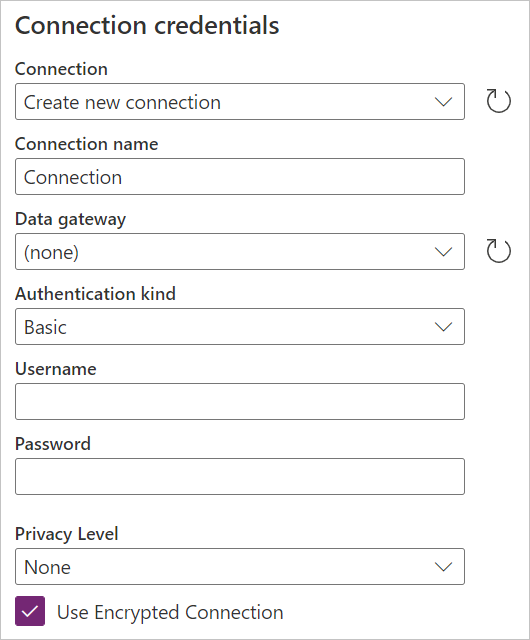
The primary information required by all connectors to define a connection are:
- Connection name: The name that you can define to uniquely identify your connections. You can't duplicate the name of a connection in your environment.
- Data gateway: If your data source requires a data gateway, select the gateway using the dropdown list from this field.
- Authentication kind and credentials: Depending on the connector, you're presented with multiple authentication kind options that are available to establish a connection, and fields where you enter your credentials. For example, if the Windows authentication kind is selected, the Username and Password fields that need to be filled in to establish a connection are displayed.
- Privacy level: You can define the privacy level for your data source to be either None, Private, Organizational, or Public.
Note
To learn more about what data gateways are and how to register a new gateway for your environment or tenant, go to Using on-premises data gateway.
Important
Some Power Query integrations don't currently enable a defined connection or a privacy level. But, all Power Query Online experiences do provide a way to define the data gateway, authentication kind, and the credentials needed to establish a connection with your data source.
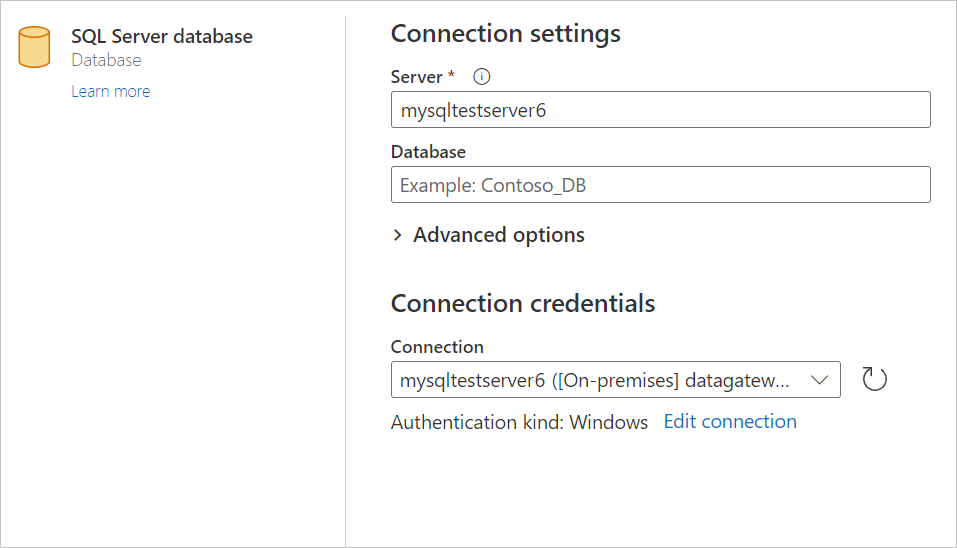
Once a connection in Power Query Online is defined, you can reuse the same connection later on without reentering all this information again. The Connection field offers a dropdown menu where you select your already defined connections. Once you select your already defined connection, you don't need to enter any other details before selecting Next.
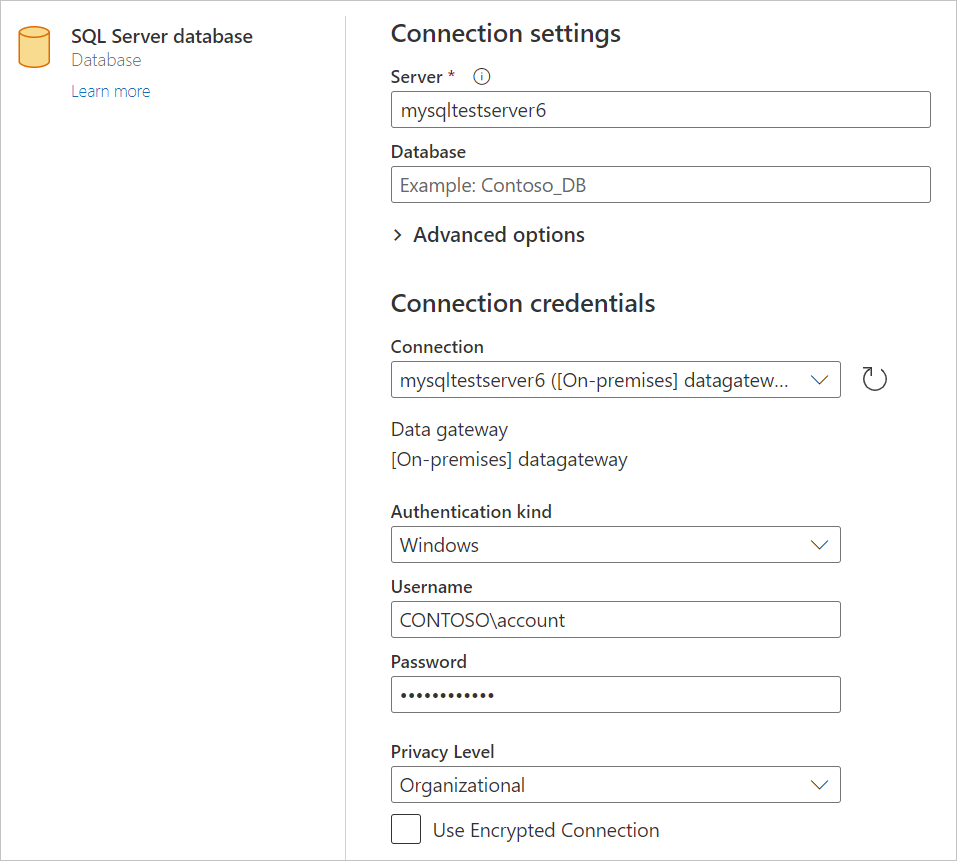
After you select a connection from this menu, you can also make changes to the credentials, privacy level, the data gateway, and other connector-specific fields for your data source in your project. Select Edit connection, then under Connection, select Create new connection. Then change any of the provided fields.
2. Data preview
The goal of the data preview stage is to provide you with a user-friendly way to preview and select your data.
Depending on the connector that you're using, you can preview data by using either:
- Navigator window
- Table preview dialog box
Navigator window (navigation table) in Power Query Online
The Navigator window consists of two main sections:
The object selection pane is displayed on the left side of the window. The user can interact with and select these objects.
The data preview pane on the right side of the window shows a preview of the data from the object you selected.


Table preview dialog box in Power Query Online
The table preview dialog box consists of only one section for the data preview. An example of a connector that provides this experience and window is the Folder connector.
3. Query editor
For Power Query Online, you're required to load the data into the Power Query editor. In the editor, you can further transform and enrich the query if you choose to do so.

Additional information
To better understand how to get data using the different product integrations of Power Query, go to Where to get data.