Troubleshoot commonly encountered errors while validating input parameters
This article describes the errors that might occur while validating input parameters and how to resolve them.
If you encounter any issues while creating on-premises parameters, use this script for assistance.
This script is designed to help troubleshoot and resolve issues related to on-premises parameter creation. Access the script and utilize its functionalities to address any difficulties you might encounter during the creation of on-premises parameters.
Follow these steps to run the script:
- Download the script and run it with the -Help option to get the parameters.
- Sign in with domain credentials to a domain joined machine. The machine must be in a domain used for SCOM Managed Instance. After you sign in, run the script with the specified parameters.
- If any validation fails, take the corrective actions as suggested by the script and rerun the script until it passes all the validations.
- Once all the validations are successful, use the same parameters used in the script, for instance creation.
Validation checks and details
| Validation | Description |
|---|---|
| Azure input validation checks | |
| Setting up prerequisites on the test machine | 1. Install AD PowerShell module. 2. Install Group Policy PowerShell module. |
| Internet connectivity | Checks if outbound internet connectivity is available on the test servers. |
| SQL MI connectivity | Checks if the provided SQL MI is reachable from the network on which the test servers are created. |
| DNS Server connectivity | Checks if the provided DNS Server IP is reachable and resolved to a valid DNS Server. |
| Domain connectivity | Checks if the provided domain name is reachable and resolved to a valid domain. |
| Domain join validation | Checks if domain join succeeds using provided OU Path and domain credentials. |
| Static IP and LB FQDN association | Checks if a DNS record has been created for the provided static IP against the provided DNS name. |
| Computer group validations | Checks if the provided computer group is managed by the provided domain user, and the manager can update group membership. |
| gMSA account validations | Checks if the provided gMSA: - Is enabled. - Has its DNS Host Name set to the provided DNS name of the LB. - Has a SAM Account Name length of 15 characters or less. - Has the right SPNs' set. The password can be retrieved by members of the provided computer group. |
| Group policy validations | Checks if the domain (or the OU Path, which hosts the management servers) is affected by any group policy, which will alter the local Administrators group. |
| Post validation clean-up | Unjoin from the domain. |
General guidelines for running validation script
During the onboarding process, a validation is conducted at the validation stage/tab. If all the validations are successful, you can proceed to the final stage of creating SCOM Managed Instance. However, if any validations fails, you can't proceed with the creation.
In cases where multiple validations fail, the best approach is to address all the issues at once by manually running a validation script on a test machine.
Important
Initially, create a new test Windows Server (2022/2019) virtual machine (VM) in the same subnet selected for SCOM Managed Instance creation. Subsequently, both your AD admin and Network admin can individually utilize this VM to verify the effectiveness of their respective changes. This approach significantly saves time spent on back-and-forth communication between the AD admin and Network admin.
Follow these steps to run the validation script:
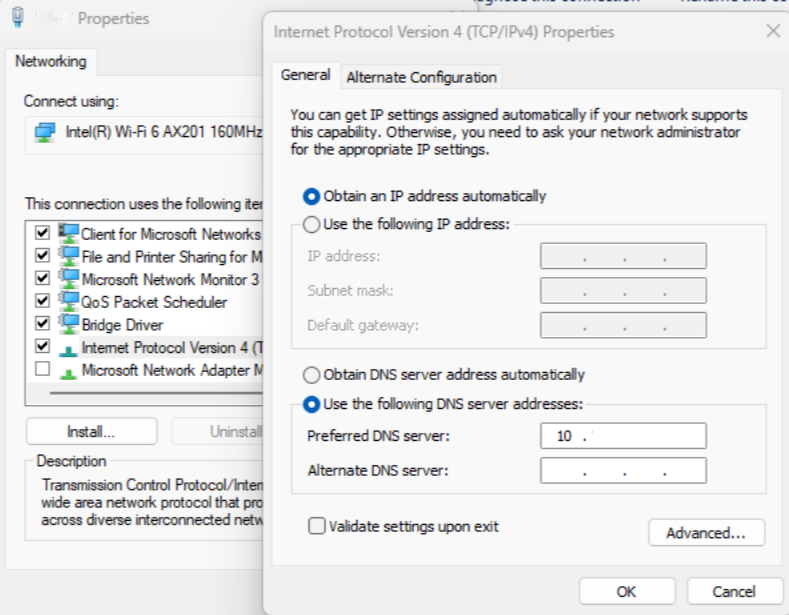
Generate a new virtual machine (VM) running on Windows Server 2022 or 2019 within the chosen subnet for SCOM Managed Instance creation. Sign in to the VM and configure its DNS server to use the same DNS IP that was utilized during the creation of the SCOM Managed Instance. For example, see below:
Download the validation script to the test VM and extract. It consists of five files:
- ScomValidation.ps1
- RunValidationAsSCOMAdmin.ps1
- RunValidationAsActiveDirectoryAdmin.ps1
- RunValidationAsNetworkAdmin.ps1
- Readme.txt
Follow the steps mentioned in the Readme.txt file to run the RunValidationAsSCOMAdmin.ps1. Ensure to fill the settings value in RunValidationAsSCOMAdmin.ps1 with applicable values before running it.
# $settings = @{
#   Configuration = @{
#         DomainName="test.com"
#         OuPath= "DC=test,DC=com"
#         DNSServerIP = "190.36.1.55"
#         UserName="test\testuser"
#         Password = "password"
#         SqlDatabaseInstance= "test-sqlmi-instance.023a29518976.database.windows.net"
#         ManagementServerGroupName= "ComputerMSG"
#         GmsaAccount= "test\testgMSA$"
#         DnsName= "lbdsnname.test.com"
#         LoadBalancerIP = "10.88.78.200"
#     }
# }
# Note : Before running this script, please make sure you have provided all the parameters in the settings
$settings = @{
Configuration = @{
DomainName="<domain name>"
OuPath= "<OU path>"
DNSServerIP = "<DNS server IP>"
UserName="<domain user name>"
Password = "<domain user password>"
SqlDatabaseInstance= "<SQL MI Host name>"
ManagementServerGroupName= "<Computer Management server group name>"
GmsaAccount= "<GMSA account>"
DnsName= "<DNS name associated with the load balancer IP address>"
LoadBalancerIP = "<Load balancer IP address>"
}
}
In general, RunValidationAsSCOMAdmin.ps1 runs all the validations. If you wish to run a specific check, then open ScomValidation.ps1 and comment all other checks, which are at the end of the file. You can also add break point in the specific check to debug the check and understand the issues better.
        # Default mode is - SCOMAdmin, by default if mode is not passed then it will run all the validations

    # adding all the checks to result set

    try {

        # Connectivity checks

        $validationResults += Invoke-ValidateStorageConnectivity $settings

        $results = ConvertTo-Json $validationResults -Compress


        $validationResults += Invoke-ValidateSQLConnectivity $settings

        $results = ConvertTo-Json $validationResults -Compress


        $validationResults += Invoke-ValidateDnsIpAddress $settings

        $results = ConvertTo-Json $validationResults -Compress


        $validationResults += Invoke-ValidateDomainControllerConnectivity $settings

        $results = ConvertTo-Json $validationResults -Compress


        # Parameter validations

        $validationResults += Invoke-ValidateDomainJoin $settings

        $results = ConvertTo-Json $validationResults -Compress


        $validationResults += Invoke-ValidateStaticIPAddressAndDnsname $settings

        $results = ConvertTo-Json $validationResults -Compress


        $validationResults += Invoke-ValidateComputerGroup $settings

        $results = ConvertTo-Json $validationResults -Compress


        $validationResults += Invoke-ValidategMSAAccount $settings

        $results = ConvertTo-Json $validationResults -Compress


        $validationResults += Invoke-ValidateLocalAdminOverideByGPO $settings

        $results = ConvertTo-Json $validationResults -Compress

    }

    catch {

        Write-Verbose -Verbose  $_

    }
The validation script displays all the validation checks and their respective errors, which will help resolving the validation issues. For fast resolution, run the script in PowerShell ISE with break point, which can speed up the debugging process.
If all the checks pass successfully, return to the onboarding page and restart the onboarding process again.
Internet connectivity
Issue: Outbound internet connectivity doesn't exist on the test servers
Cause: Occurs due to an incorrect DNS Server IP or an incorrect network configuration.
Resolution:
- Check the DNS Server IP, and ensure that DNS Server is up and running.
- Ensure that the VNet, which is being used for SCOM Managed Instance creation has line-of-sight to the DNS Server.
Issue: Unable to connect to the storage account to download SCOM Managed Instance product bits
Cause: Occurs due to a problem with your internet connectivity.
Resolution: Verify that the VNet being used for SCOM Managed Instance creation has outbound internet access by creating test virtual machine on the same subnet as SCOM Managed Instance and test outbound connectivity from test virtual machine.
Issue: Internet connectivity test failed. Required endpoints are not reachable from the VNet
Cause: Occurs due to an incorrect DNS Server IP or an incorrect network configuration.
Resolution:
Check the DNS Server IP, and ensure that the DNS Server is up and running.
Ensure that the VNet, which is being used for SCOM Managed Instance creation has line-of-sight to the DNS Server.
Ensure that the SCOM Managed Instance has outbound Internet access and NSG/Firewall is properly configured to allow access to the required endpoints as described in firewall requirements.
General troubleshooting steps for internet connectivity
Generate a new virtual machine (VM) running on Windows Server 2022 or 2019 within the chosen subnet for SCOM Managed Instance creation. Sign in to the VM and configure its DNS server to use the same DNS IP that was utilized during the creation of the SCOM Managed Instance.
You can either follow the step-by-step instructions provided below, or if you're familiar with PowerShell, execute the specific check called
Invoke-ValidateStorageConnectivityin the ScomValidation.ps1 script. For more information on running the validation script independently on your test machine, see General guidelines for running the validation script.Open the PowerShell ISE in admin mode and set Set-ExecutionPolicy as Unrestricted.
To check the Internet connectivity, run the following command:
Test-NetConnection www.microsoft.com -Port 80This command verifies the connectivity to www.microsoft.com on port 80. If this fails, it indicates an issue with outbound internet connectivity.
To verify the DNS settings, run the following command:
Get-DnsClientServerAddressThis command retrieves the DNS server IP addresses configured on the machine. Ensure that the DNS settings are correct and accessible.
To check the network configuration, run the following command:
Get-NetIPConfigurationThis command displays the network configuration details. Verify that the network settings are accurate and match your network environment.
SQL MI connectivity
Issue: Outbound Internet connectivity doesn't exist on the test servers
Cause: Occurs due to an incorrect DNS Server IP, or an incorrect network configuration.
Resolution:
- Check the DNS Server IP and ensure that the DNS Server is up and running.
- Ensure that the VNet, which is being used for SCOM Managed Instance creation has line-of-sight to the DNS Server.
Issue: Failed to configure DB login for MSI on SQL managed instance
Cause: Occurs when MSI is not properly configured to access SQL managed instance.
Resolution: Check if MSI is configured as Microsoft Entra Admin on SQL managed instance. Ensure that required Microsoft Entra ID permissions are provided to SQL managed instance for MSI authentication to work.
Issue: Failed to connect to SQL MI from this instance
Cause: Occurs as the SQL MI VNet isn't delegated or isn't properly peered with the SCOM Managed Instance VNet.
Resolution:
- Verify that the SQL MI is correctly configured.
- Ensure that the VNet, which is being used for SCOM Managed Instance creation has line-of-sight to the SQL MI, either by being in the same VNet or by VNet peering.
General troubleshooting steps for SQL MI connectivity
Generate a new virtual machine (VM) running on Windows Server 2022 or 2019 within the chosen subnet for SCOM Managed Instance creation. Sign in to the VM and configure its DNS server to use the same DNS IP that was utilized during the creation of the SCOM Managed Instance.
You can either follow the step-by-step instructions provided below, or if you're familiar with PowerShell, execute the specific check called
Invoke-ValidateSQLConnectivityin the ScomValidation.ps1 script. For more information on running the validation script independently on your test machine, see General guidelines for running the validation script.Open the PowerShell ISE in admin mode and set Set-ExecutionPolicy as Unrestricted.
To check the outbound internet connectivity, run the following command:
Test-NetConnection -ComputerName "www.microsoft.com" -Port 80This command verifies the outbound internet connectivity by attempting to establish a connection to www.microsoft.com on port 80. If the connection fails, it indicates a potential issue with the internet connectivity.
To verify the DNS settings and network configuration, ensure that the DNS server IP addresses are correctly configured and validate the network configuration settings on the machine where the validation is being performed.
To test the SQL MI connection, run the following command:
Test-NetConnection -ComputerName $sqlMiName -Port 1433Replace
$sqlMiNamewith the name of the SQL MI host name.This command tests the connection to the SQL MI instance. If the connection is successful, it indicates that the SQL MI is reachable.
DNS Server connectivity
Issue: DNS IP provided (<DNS IP>) is incorrect, or the DNS Server isn't reachable
Resolution: Check the DNS Server IP, and ensure that DNS Server is up and running.
General troubleshooting for DNS server connectivity
Generate a new virtual machine (VM) running on Windows Server 2022 or 2019 within the chosen subnet for SCOM Managed Instance creation. Sign in to the VM and configure its DNS server to use the same DNS IP that was utilized during the creation of the SCOM Managed Instance.
You can either follow the step-by-step instructions provided below, or if you're familiar with PowerShell, execute the specific check called
Invoke-ValidateDnsIpAddressin the ScomValidation.ps1 script. For more information on running the validation script independently on your test machine, see General guidelines for running the validation script.Open the PowerShell ISE in admin mode and set Set-ExecutionPolicy as Unrestricted.
To check the DNS resolution for the specified IP address, run the following command:
Resolve-DnsName -Name $ipAddress -IssueAction SilentlyContinueReplace
$ipAddresswith the IP address you want to validate.This command checks the DNS resolution for the provided IP address. If the command doesn't return any results or throws an error, it indicates a potential issue with DNS resolution.
To verify the network connectivity to the IP address, run the following command:
Test-NetConnection -ComputerName $ipAddress -Port 80Replace
$ipAddresswith the IP address you want to test.This command checks the network connectivity to the specified IP address on port 80. If the connection fails, it suggests a network connectivity issue.
Domain connectivity
Issue: Domain controller for domain <domain name> isn't reachable from this network, or port isn't open on at least one domain controller
Cause: Occurs due to an issue with the provided DNS Server IP or your network configuration.
Resolution:
- Check the DNS Server IP and ensure that DNS Server is up and running.
- Ensure that the domain name resolution is correctly directed to the designated Domain Controller (DC) configured for either Azure or SCOM Managed Instance. Confirm that this DC is listed at the top among the resolved DCs. If the resolution is directed to different DC servers, it indicates a problem with AD domain resolution.
- Check the domain name and ensure that domain controller configure for Azure and SCOM Managed Instance is up and running.
Note
Ports 9389, 389/636, 88, 3268/3269, 135, 445 should be open on DC configured for Azure or SCOM Managed Instance, and all services on the DC should be running.
General troubleshooting steps for domain connectivity
Generate a new virtual machine (VM) running on Windows Server 2022 or 2019 within the chosen subnet for SCOM Managed Instance creation. Sign in to the VM and configure its DNS server to use the same DNS IP that was utilized during the creation of the SCOM Managed Instance.
You can either follow the step-by-step instructions provided below, or if you're familiar with PowerShell, execute the specific check called
Invoke-ValidateDomainControllerConnectivityin the ScomValidation.ps1 script. For more information on running the validation script independently on your test machine, see General guidelines for running the validation script.Open the PowerShell ISE in admin mode and set Set-ExecutionPolicy as Unrestricted.
To check the domain controller reachability, run the following command:
Resolve-DnsName -Name $domainNameReplace
$domainNamewith the name of the domain you want to test.Ensure that the domain name resolution is correctly directed to the designated Domain Controller (DC) configured for either Azure or SCOM Managed Instance. Confirm that this DC is listed at the top among the resolved DCs. If the resolution is directed to different DC servers, it indicates a problem with AD domain resolution.
To verify DNS server settings:
- Ensure that the DNS server settings on the machine running the validation are correctly configured.
- Verify if the DNS server IP addresses are accurate and accessible.
To validate network configuration:
- Verify the network configuration settings on the machine where the validation is being performed.
- Ensure that the machine is connected to the correct network and has the necessary network settings to communicate with the domain controller.
To test the required port on the domain controller, run the following command:
Test-NetConnection -ComputerName $domainName -Port $portToCheckReplace
$domainNamewith the name of the domain you want to test, and$portToCheckwith each port from the following list number:- 389/636
- 88
- 3268/3269
- 135
- 445
Execute the provided command for all the above ports.
This command checks if the specified port is open on the designated domain controller that is configured for Azure or SCOM Managed Instance creation. If the command shows a successful connection, it indicates that the necessary ports are open.
Domain join validation
Issue: Test management servers failed to join the domain
Cause: Occurs because of an incorrect OU path, incorrect credentials, or a problem in the network connectivity.
Resolution:
- Check the credentials created in your Key vault. The username and password secret must reflect the correct username and format of the username value must be domain\username and password, which have permissions to join a machine to the domain. By default, user accounts can only add up to 10 computers to the domain. To configure, see Default limit to number if workstations a user can join to the domain.
- Verify that the OU Path is correct and doesn't block new computers from joining the domain.
General troubleshooting steps for Domain join validation
Generate a new virtual machine (VM) running on Windows Server 2022 or 2019 within the chosen subnet for SCOM Managed Instance creation. Sign in to the VM and configure its DNS server to use the same DNS IP that was utilized during the creation of the SCOM Managed Instance.
You can either follow the step-by-step instructions provided below, or if you're familiar with PowerShell, execute the specific check called
Invoke-ValidateDomainJoinin the ScomValidation.ps1 script. For more information on running the validation script independently on your test machine, see General guidelines for running the validation script.Open the PowerShell ISE in admin mode and set Set-ExecutionPolicy as Unrestricted.
Join the VM to a domain using the domain account that is used in SCOM Managed Instance creation. For joining the domain to a machine using credentials, run the following command:
$domainName = "<domainname>"


$domainJoinCredentials = New-Object pscredential -ArgumentList ("<username>", (ConvertTo-SecureString "password" -AsPlainText -Force))


$ouPath = "<OU path>"
if (![String]::IsNullOrWhiteSpace($ouPath)) {
$domainJoinResult = Add-Computer -DomainName $domainName -Credential $domainJoinCredentials -OUPath $ouPath -Force -WarningAction SilentlyContinue -ErrorAction SilentlyContinue
}
else {
$domainJoinResult = Add-Computer -DomainName $domainName -Credential $domainJoinCredentials -Force -WarningAction SilentlyContinue -ErrorAction SilentlyContinue
}
Replace the username, password, $domainName, $ouPath with the right values.
After you run the above command, run the following command to check if the machine joined the domain successfully:
Get-WmiObject -Class Win32_ComputerSystem | Select-Object -ExpandProperty PartOfDomain
Static IP and LB FQDN association
Issue: Tests couldn't be run since the servers failed to join the domain
Resolution: Ensure that the machines can join the domain. Follow the troubleshooting steps from the Domain join validation section.
Issue: DNS Name <DNS Name> couldn't be resolved
Resolution: The DNS Name provided doesn't exist in the DNS records. Check the DNS name and ensure it is correctly associated with the Static IP provided.
Issue: The provided static IP <static IP> and Load Balancer DNS <DNS Name> doesn't match
Resolution: Check the DNS records and provide the correct DNS Name/Static IP combination. For more information, see Create a static IP and configure the DNS name.
General troubleshooting steps for Static IP and LB FQDN association
Generate a new virtual machine (VM) running on Windows Server 2022 or 2019 within the chosen subnet for SCOM Managed Instance creation. Sign in to the VM and configure its DNS server to use the same DNS IP that was utilized during the creation of the SCOM Managed Instance.
You can either follow the step-by-step instructions provided below, or if you're familiar with PowerShell, execute the specific check called
Invoke-ValidateStaticIPAddressAndDnsnamein the ScomValidation.ps1 script. For more information on running the validation script independently on your test machine, see General guidelines for running the validation script.Open the PowerShell ISE in admin mode and set Set-ExecutionPolicy as Unrestricted.
Join the virtual machine to a domain using the domain account that is used in SCOM Managed Instance creation. To join the virtual machine to domain, follow the steps provided in the Domain join validation section.
Get IP address and associated DNS name and run the following commands to see if they match. Resolve the DNS name and fetch the actual IP address:
$DNSRecord = Resolve-DnsName -Name $DNSName
$ActualIP = $DNSRecord.IPAddress
If the DNS name can't be resolved, ensure that the DNS name is valid and associated with the actual IP address.
Computer group validations
Issue: Test couldn't be run since the servers failed to join the domain
Resolution: Ensure that the machines can join the domain. Follow the troubleshooting steps specified in the Domain join validation section.
Issue: Computer group with name <computer group name> couldn't be found in your domain
Resolution: Verify the existence of the group and check the name provided or create a new one if not created already.
Issue: The input computer group <computer group name> isn't managed by the user <domain username>
Resolution: Navigate to the group properties and set this user as the manager. For more information, see Create and configure a computer group.
Issue: The manager <domain username> of the input computer group <computer group name> doesn't have the necessary permissions to manage group membership
Resolution: Navigate to the Group properties and check the Manage can update membership list checkbox. For more information, see Create and configure a computer group.
General troubleshooting steps for Computer group validations
Generate a new virtual machine (VM) running on Windows Server 2022 or 2019 within the chosen subnet for SCOM Managed Instance creation. Sign in to the VM and configure its DNS server to use the same DNS IP that was utilized during the creation of the SCOM Managed Instance.
You can either follow the step-by-step instructions provided below, or if you're familiar with PowerShell, execute the specific check called
Invoke-ValidateComputerGroupin the ScomValidation.ps1 script. For more information on running the validation script independently on your test machine, see General guidelines for running the validation script.Join the VM to a domain using the domain account that is used in SCOM Managed Instance creation. To join the virtual machine to domain, follow the steps provided in the Domain join validation section.
Open the PowerShell ISE in admin mode and set Set-ExecutionPolicy as Unrestricted.
Run the following command to import modules:
Add-WindowsFeature RSAT-AD-PowerShell -ErrorAction SilentlyContinue
Add-WindowsFeature GPMC -ErrorAction SilentlyContinue
To verify if the VM is joined to the domain, run the following command:
Get-WmiObject -Class Win32_ComputerSystem | Select-Object -ExpandProperty PartOfDomainTo verify the domain existence and if the current machine is already joined- to the domain, run the following command:
$domainJoinCredentials = New-Object pscredential -ArgumentList ("<username>", (ConvertTo-SecureString "password" -AsPlainText -Force))
$Domain = Get-ADDomain -Current LocalComputer -Credential $domainUserCredentials
Replace
$username,passwordwith applicable values.To verify the existence of the user in the domain, run the following command:
$DomainUser = Get-ADUser -Identity $username -Credential $domainUserCredentialsReplace
$username,$domainUserCredentialswith applicable valuesTo verify the existence of the computer group in the domain, run the following command:
$ComputerGroup = Get-ADGroup -Identity $computerGroupName -Properties ManagedBy,DistinguishedName -Credential $domainUserCredentialsReplace
$computerGroupName,$domainUserCredentialswith applicable values.If the user and computer group exist, determine if the user is the manager of the computer group.
Import-Module ActiveDirectory
  	$DomainDN = $Domain.DistinguishedName
  $GroupDN = $ComputerGroup.DistinguishedName
 $RightsGuid = [GUID](Get-ItemProperty "AD:\CN=Self-Membership,CN=Extended-Rights,CN=Configuration,$DomainDN" -Name rightsGuid -Credential $domainUserCredentials | Select-Object -ExpandProperty rightsGuid)

  # Run Get ACL under the give credentials
  $job = Start-Job -ScriptBlock {
      param (
          [Parameter(Mandatory = $true)]
          [string] $GroupDN,
          [Parameter(Mandatory = $true)]
          [GUID] $RightsGuid
      )

  Import-Module ActiveDirectory
  $AclRule = (Get-Acl -Path "AD:\$GroupDN").GetAccessRules($true,$true,[System.Security.Principal.SecurityIdentifier]) |  Where-Object {($_.ObjectType -eq $RightsGuid) -and ($_.ActiveDirectoryRights -like '*WriteProperty*')}
      return $AclRule

  } -ArgumentList $GroupDN, $RightsGuid -Credential $domainUserCredentials

  $timeoutSeconds = 20
  $jobResult = Wait-Job $job -Timeout $timeoutSeconds

  # Job did not complete within the timeout
  if ($null -eq $jobResult) {
      Write-Host "Checking permissions, timeout after 10 seconds."
      Remove-Job $job -Force
  } else {
      # Job completed within the timeout
      $AclRule = Receive-Job $job
      Remove-Job $job -Force
  }

  $managerCanUpdateMembership = $false
  if (($null -ne $AclRule) -and ($AclRule.AccessControlType -eq 'Allow') -and ($AclRule.IdentityReference -eq $DomainUser.SID)) {
      $managerCanUpdateMembership = $true
If
managerCanUpdateMembershipis True, then the domain user has update membership permission on the computer group. IfmanagerCanUpdateMembershipis False, then give the computer group manage permission to the domain user.
gMSA account validations
Issue: Test doesn't run since the servers failed to join the domain
Resolution: Ensure that the machines can join the domain. Follow the troubleshooting steps specified in the Domain join validation section.
Issue: Computer group with name <computer group name> isn't found in your domain. The members of this group must be able to retrieve the gMSA password
Resolution: Verify the existence of the group and check the name provided.
Issue: gMSA with name <domain gMSA> couldn't be found in your domain
Resolution: Verify the existence of the gMSA account and check the name provided or create a new one if it hasn't been created already.
Issue: gMSA <domain gMSA> isn't enabled
Resolution: Enable it using the following command:
Set-ADServiceAccount -Identity <domain gMSA> -Enabled $true
Issue: gMSA <domain gMSA> needs to have its DNS Host Name set to <DNS Name>
Resolution: The gMSA doesn't have the DNSHostName property set correctly. Set the DNSHostName property using the following command:
Set-ADServiceAccount -Identity <domain gMSA> -DNSHostName <DNS Name>
Issue: The Sam Account Name for gMSA <domain gMSA> exceeds the limit of 15 characters
Resolution: Set the SamAccountName using the following command:
Set-ADServiceAccount -Identity <domain gMSA> -SamAccountName <shortname$>
Issue: Computer Group <computer group name> needs to be set as the PrincipalsAllowedToRetrieveManagedPassword for gMSA <domain gMSA>
Resolution: The gMSA doesn't have PrincipalsAllowedToRetrieveManagedPassword set correctly. Set the PrincipalsAllowedToRetrieveManagedPassword using the following command:
Set-ADServiceAccount -Identity <domain gMSA> - PrincipalsAllowedToRetrieveManagedPassword <computer group name>
Issue: The SPNs haven't been set correctly for the gMSA <domain gMSA>
Resolution: The gMSA doesn't have correct Service Principal Names set. Set the Service Principal Names using the following command:
Set-ADServiceAccount -Identity <domain gMSA> -ServicePrincipalNames <set of SPNs>
General troubleshooting steps for gMSA account validations
Generate a new virtual machine (VM) running on Windows Server 2022 or 2019 within the chosen subnet for SCOM Managed Instance creation. Sign in to the VM and configure its DNS server to use the same DNS IP that was utilized during the creation of the SCOM Managed Instance.
You can either follow the step-by-step instructions provided below, or if you're familiar with PowerShell, execute the specific check called
Invoke-ValidategMSAAccountin the ScomValidation.ps1 script. For more information on running the validation script independently on your test machine, see General guidelines for running the validation script.Join the VM to a domain using the domain account that is used in SCOM Managed Instance creation. To join the virtual machine to domain, follow the steps provided in the Domain join validation section.
Open the PowerShell ISE in admin mode and set Set-ExecutionPolicy as Unrestricted.
Run following command to import modules:
Add-WindowsFeature RSAT-AD-PowerShell -ErrorAction SilentlyContinue
Add-WindowsFeature GPMC -ErrorAction SilentlyContinue
To verify that the servers have successfully joined the domain, run the following command:
(Get-WmiObject -Class Win32_ComputerSystem).PartOfDomainTo check the existence of the computer group, run the following command:
$Credentials = New-Object pscredential -ArgumentList ("<username>", (ConvertTo-SecureString "password" -AsPlainText -Force))
$adGroup = Get-ADGroup -Identity $computerGroupName -Properties ManagedBy,DistinguishedName -Credential $Credentials
Replace username, password and computerGroupName with applicable values.
To check the existence of the gMSA account, run the following command:
$adServiceAccount = Get-ADServiceAccount -Identity gMSAAccountName -Properties DNSHostName,Enabled,PrincipalsAllowedToRetrieveManagedPassword,SamAccountName,ServicePrincipalNames -Credential $CredentialsTo validate the gMSA account properties, check if the gMSA account is enabled:
(Get-ADServiceAccount -Identity <GmsaAccount>).EnabledIf the command returns False, enable the account in the domain.
To verify that the DNS Host Name of the gMSA account matches the provided DNS name (LB DNS name), run the following commands:
(Get-ADServiceAccount -Identity <GmsaAccount>).DNSHostNameIf the command doesn't return the expected DNS name, update the DNS Host Name of gMsaAccount to LB DNS name.
Ensure that the Sam Account Name for the gMSA account doesn't exceed the limit of 15 characters:
(Get-ADServiceAccount -Identity <GmsaAccount>).SamAccountName.LengthTo validate the
PrincipalsAllowedToRetrieveManagedPasswordproperty, run the following commands:Check if the Computer Group specified is set as the `PrincipalsAllowedToRetrieveManagedPassword`` for the gMSA account:
(Get-ADServiceAccount -Identity <GmsaAccount>).PrincipalsAllowedToRetrieveManagedPassword -contains (Get-ADGroup -Identity <ComputerGroupName>).DistinguishedNameReplace
gMSAAccountandComputerGroupNamewith applicable values.To validate the Service Principal Names (SPNs) for the gMSA account, run the following command:
$CorrectSPNs = @("MSOMSdkSvc/$dnsHostName", "MSOMSdkSvc/$dnsName", "MSOMHSvc/$dnsHostName", "MSOMHSvc/$dnsName")
(Get-ADServiceAccount -Identity <GmsaAccount>).ServicePrincipalNames
Check if the results have Correct SPNs. Replace
$dnsNamewith LB DNS name given in the SCOM Managed Instance creation. Replace$dnsHostNamewith LB DNS short name. For example: MSOMHSvc/ContosoLB.domain.com, MSOMHSvc/ContosoLB, MSOMSdkSvc/ContosoLB.domain.com, and MSOMSdkSvc/ContosoLB are service principal names.
Group policy validations
Important
To fix GPO policies, collaborate with your active directory admin and exclude System Center Operations Manager from the below policies:
- GPOs that modify or override local administrator group configurations.
- GPOs that deactivate network authentication.
- Evaluate GPOs impeding remote sign in for local administrators.
Issue: This test couldn't be run since the servers failed to join the domain
Resolution: Ensure that the machines join the domain. Follow the troubleshooting steps from the Domain join validation section.
Issue: gMSA with name <domain gMSA> couldn't be found in your domain. This account needs to be a local administrator on the server
Resolution: Verify the existence of the account and ensure that the gMSA and domain user are part of local administrator group.
Issue: The accounts <domain username> and <domain gMSA> couldn't be added to the local Administrators group on the test management servers or didn't persist in the group after group policy update
Resolution: Ensure that the domain username and gMSA inputs provided are correct, including the full name (domain\account). Also check if there are any group policies on your test machine overriding the local Administrators group because of policies created at OU or Domain level. gMSA and domain user must be a part of the local administrator group for SCOM Managed Instance to work. SCOM Managed Instance machines must be excluded from any policy overriding the local administrator group (work with AD admin).
Issue: SCOM Managed Instance failed
Cause: A group policy in your domain (name: <group policy name>) is overriding the local Administrators group on test management servers, either on the OU containing the servers or the root of the domain.
Resolution: Ensure that the OU for SCOM Managed Instance Management Servers (<OU Path>) isn't affected by no policies override the group.
General troubleshooting steps for Group policy validations
Generate a new virtual machine (VM) running on Windows Server 2022 or 2019 within the chosen subnet for SCOM Managed Instance creation. Sign in to the VM and configure its DNS server to use the same DNS IP that was utilized during the creation of the SCOM Managed Instance.
You can either follow the step-by-step instructions provided below, or if you're familiar with PowerShell, execute the specific check called
Invoke-ValidateLocalAdminOverideByGPOin the ScomValidation.ps1 script. For more information on running the validation script independently on your test machine, see General guidelines for running the validation script.Join the VM to a domain using the domain account that is used in SCOM Managed Instance creation. To join the virtual machine to domain, follow the steps provided in the Domain join validation section.
Open the PowerShell ISE in admin mode and set Set-ExecutionPolicy as Unrestricted.
Run the following commands to import modules:
Add-WindowsFeature RSAT-AD-PowerShell -ErrorAction SilentlyContinue
Add-WindowsFeature GPMC -ErrorAction SilentlyContinue
To verify if the servers have successfully joined the domain, run the following command:
(Get-WmiObject -Class Win32_ComputerSystem).PartOfDomainThe command must return True.
To check the existence of the gMSA account, run the following command:
Get-ADServiceAccount -Identity <GmsaAccount>To validate the presence of user accounts in the local Administrators group, run the following command:
$domainJoinCredentials = New-Object pscredential -ArgumentList ("<username>", (ConvertTo-SecureString "password" -AsPlainText -Force))
$addToAdminResult = Add-LocalGroupMember -Group "Administrators" -Member $userName, $gMSAccount -ErrorAction SilentlyContinue
$gpUpdateResult = gpupdate /force
$LocalAdmins = Get-LocalGroupMember -Group 'Administrators' | Select-Object -ExpandProperty Name
Replace the
<UserName>and<GmsaAccount>with the actual values.To determine the domain and organizational unit (OU) details, run the following command:
Get-ADOrganizationalUnit -Filter "DistinguishedName -like '$ouPathDN'" -Properties CanonicalName -Credential $domainUserCredentialsReplace the <OuPathDN> with the actual OU path.
To get the GPO (Group Policy Object) report from the domain and check for overriding policies on the local Administrators group, run the following command:
 [xml]$gpoReport = Get-GPOReport -All -ReportType Xml -Domain <domain name>
 foreach ($GPO in $gpoReport.GPOS.GPO) {
     # Check if the GPO links to the entire domain, or the input OU if provided
     if (($GPO.LinksTo.SOMPath -eq $domainName) -or ($GPO.LinksTo.SOMPath -eq $ouPathCN)) {
         # Check if there is a policy overriding the Local Users and Groups
         if ($GPO.Computer.ExtensionData.Extension.LocalUsersAndGroups.Group) {
         $GroupPolicy = $GPO.Computer.ExtensionData.Extension.LocalUsersAndGroups.Group | Select-Object @{Name='RemoveUsers';Expression={$_.Properties.deleteAllUsers}},@{Name='RemoveGroups';Expression={$_.Properties.deleteAllGroups}},@{Name='GroupName';Expression={$_.Properties.groupName}}
         # Check if the policy is acting on the BUILTIN\Administrators group, and whether it is removing other users or groups
         if (($GroupPolicy.groupName -eq "Administrators (built-in)") -and (($GroupPolicy.RemoveUsers -eq 1) -or ($GroupPolicy.RemoveGroups -eq 1))) {
          $overridingPolicyFound = $true
          $overridingPolicyName = $GPO.Name
             }
         }
     }
 }
 if($overridingPolicyFound) {
  Write-Warning "Validation failed. A group policy in your domain (name: $overridingPolicyName) is overriding the local Administrators group on this machine. This will cause SCOM MI installation to fail. Please ensure that the OU for SCOM MI Management Servers is not affected by this policy"
 }
 else {
  Write-Output "Validation suceeded. No group policy found in your domain which overrides local Administrators. "
 }
If the script execution gives a warning as Validation Failed, then there is policy (name as in the warning message) that overrides local administrator group. Check with active directory administrator and exclude the System Center Operations Manager management server from the policy.
Feedback
Coming soon: Throughout 2024 we will be phasing out GitHub Issues as the feedback mechanism for content and replacing it with a new feedback system. For more information see: https://aka.ms/ContentUserFeedback.
Submit and view feedback for