Deploy Azure Key Vault with security controls
Most Key Vault security problems don't start with a misconfigured access policy or an overly permissive network rule. They start at creation, when the team deploying the vault didn't set the properties that are hardest to add later. Three settings govern your vault's security posture from the moment it exists: the SKU, the deletion protection properties, and public network access. Getting the settings right at deployment time is cheaper, more reliable, and more enforceable than retrofitting them.
Choose the right SKU for your compliance requirements
Azure Key Vault comes in two tiers: Standard and Premium. Both tiers protect keys and secrets at rest and in transit, but they differ in how key material is stored and processed.
Standard tier protects keys using software-based encryption. The key material never leaves Azure, but isn't backed by dedicated hardware. For most workloads—application secrets, connection strings, API keys—Standard provides appropriate protection.
Premium tier backs keys with a hardware security module (HSM) validated to Federal Information Processing Standard (FIPS) 140-3 Level 3. The private key material is created inside the HSM and never exported in unencrypted form. If your compliance framework—PCI DSS, HIPAA, FedRAMP High, or a heavily regulated industry standard—mandates HSM-protected keys for cryptographic operations, Premium is the required choice. The decision isn't a performance consideration; it's a compliance boundary.
For Contoso Health, encryption keys that protect patient data are high-value assets. A compliance assessment determines whether the regulatory framework requires HSM backing—and if it does, that determination should appear in the vault's deployment specification, not as an afterthought after audit.
Set security-critical properties at deployment time
Three vault properties define your baseline security posture. Two of them can't be reversed once configured. The third defaults to an open posture you should close before the vault goes into service.
Soft delete preserves deleted vault objects—keys, secrets, and certificates—in a recoverable state for a configurable period of 7 to 90 days. The default retention is 90 days. During that window, deleted objects remain recoverable, giving your team time to detect accidental or malicious deletion and restore what was lost. Soft delete is enabled by default on all new vaults and can't be disabled after creation. The retention period can only be set at creation time, so consider your recovery SLAs before accepting the default.
Purge protection is the harder enforcement layer. A purge is a permanent, irrecoverable deletion of a soft-deleted object or vault. Without purge protection, any identity with sufficient permissions can delete an object and then immediately purge it—bypassing the "soft delete" retention window entirely. With purge protection enabled, no one can purge a soft-deleted object until the retention period expires, regardless of their permissions. Even subscription owners are blocked. The block matters for encryption-at-rest scenarios: if the key protecting your data is permanently destroyed, the data becomes unreadable.
Important
Purge protection can't be disabled once enabled. Plan for purge protection before deployment. Most Azure services that integrate with Key Vault—including Azure Storage for customer-managed keys—require purge protection to function correctly.
At Contoso Health, the audit found vaults deployed without purge protection. That gap means a developer with Key Vault Administrator and enough determination could destroy an encryption key in seconds, with no recovery path. Enabling purge protection at creation time closes that vector.
Public network access defaults to enabled on new vaults, which means any internet IP address can attempt to authenticate. Authentication still requires a valid Microsoft Entra token and the appropriate role assignment, so the vault isn't unprotected—but exposing the endpoint to the public internet unnecessarily expands your attack surface. You lock down network access in a later unit, but the vault-level setting is where you set the direction: disabled means private-only by default, with controlled exceptions.
Configure soft delete and purge protection at key vault creation
In the Azure portal, these settings appear on the Recovery tab of the Key Vault creation wizard. When creating a new vault:
- Complete the Basics tab—subscription, resource group, vault name, and SKU.
- Select the Recovery tab.
- Soft delete is always enabled—there's no toggle to disable it. Set Days to retain deleted vaults to match your recovery SLA. The default is 90 days and this value can only be set at creation time.
- Under Purge protection, select Enable purge protection.
- Complete the remaining tabs and select Review + create.
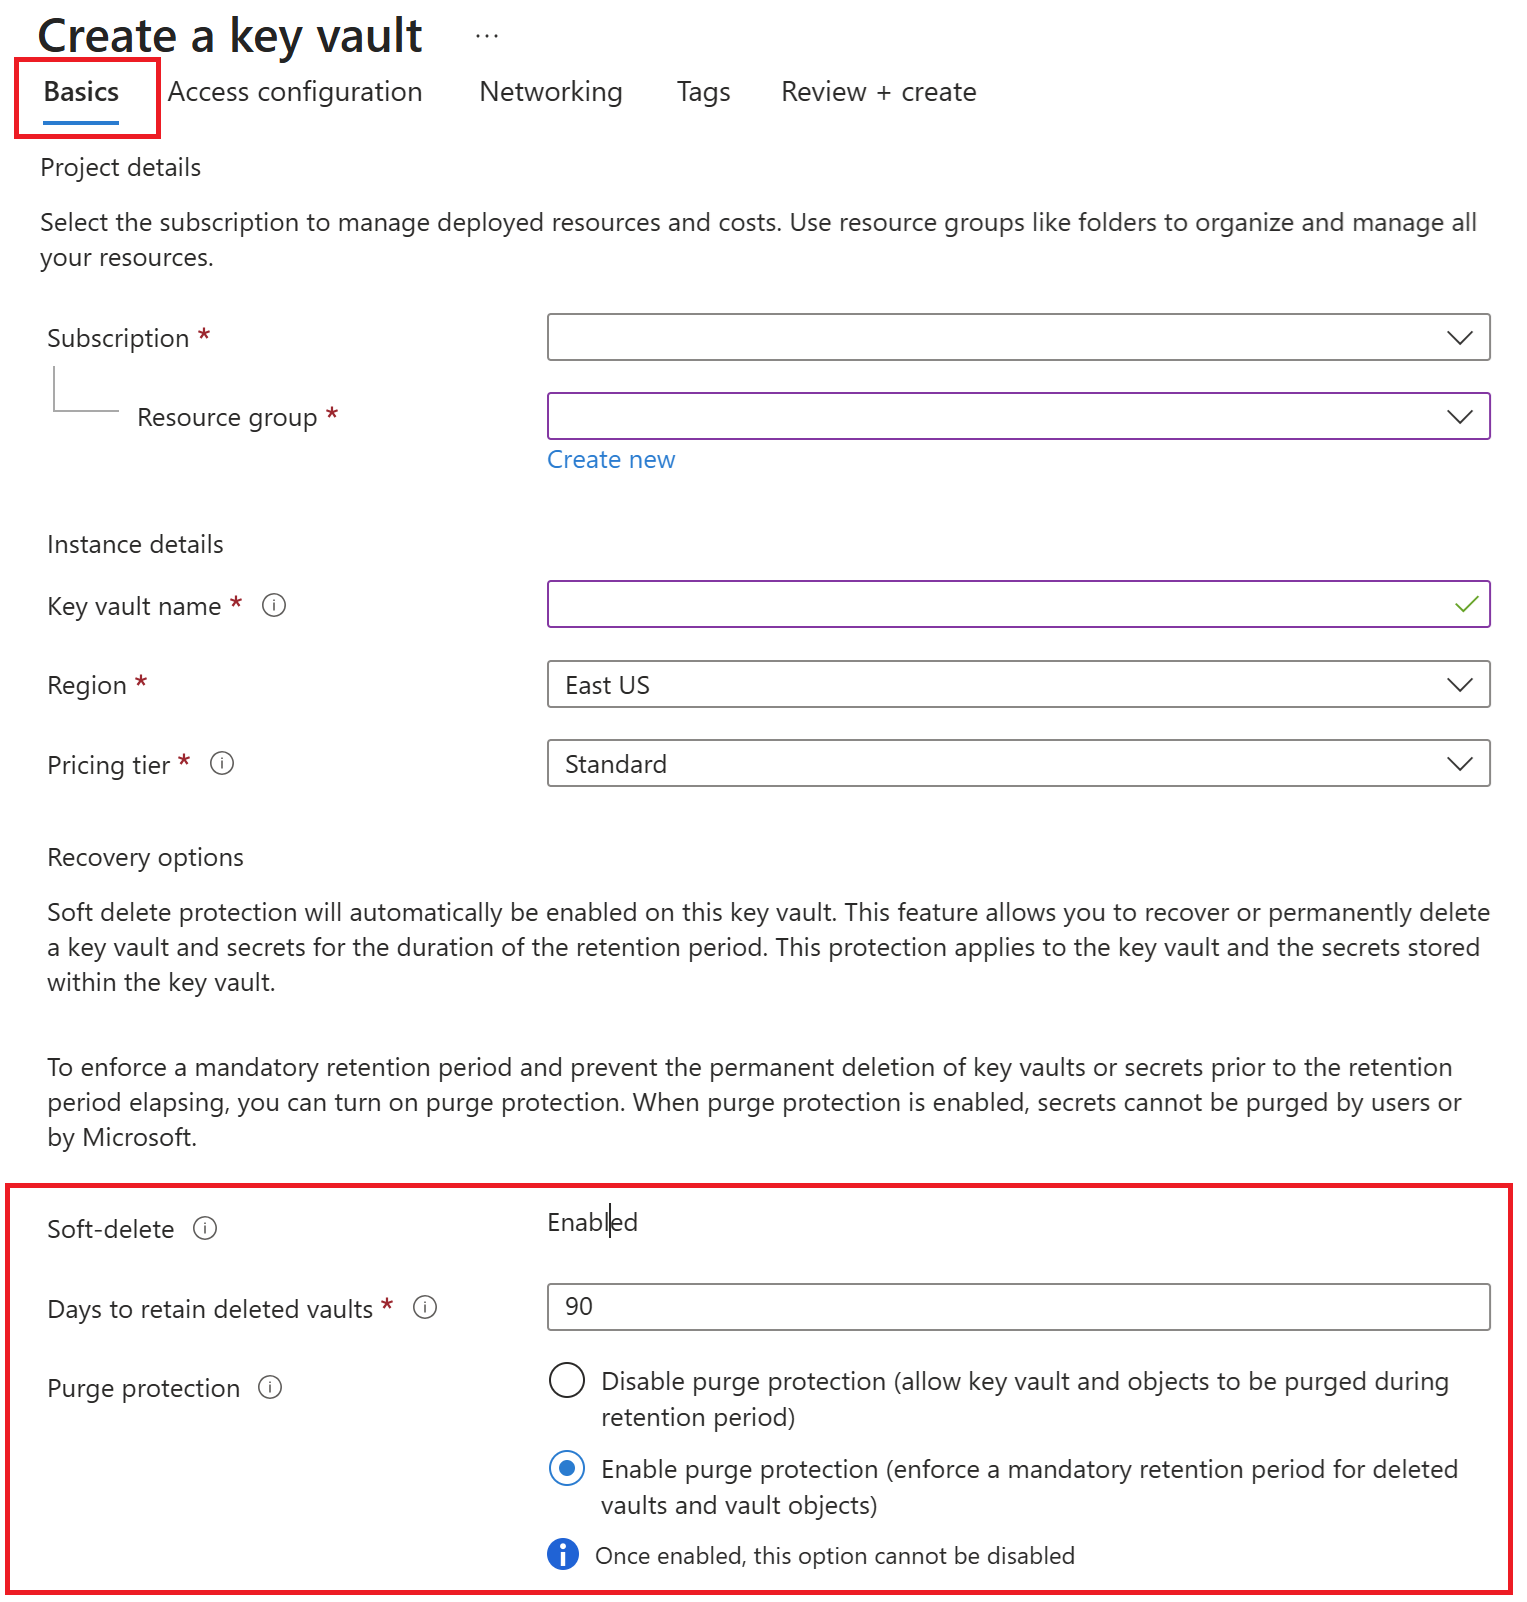
If you're deploying via the Azure CLI, set both properties at creation time:
az keyvault create \
  --name <vault-name> \
  --resource-group <resource-group> \
  --location <location> \
  --sku premium \
  --retention-days 90 \
  --enable-purge-protection true
Soft delete is always on for new vaults and can't be disabled. --retention-days sets the retention window; --enable-purge-protection locks against permanent deletion and has no off switch after creation.
Enforce vault configuration at scale with Azure Policy
Creating a single vault with the right settings isn't the challenge. Ensuring that every vault across every team in your organization meets those settings—including ones deployed last year—is the operational problem.
Azure Policy provides two built-in policies that address required settings directly:
- Key vaults should have soft delete enabled - audit vaults and identify vaults without soft delete configured. Use the audit to identify legacy vaults that need remediation.
- Key vaults should have deletion protection enabled - audits existing vaults and can be set to
Denyto block creation of new vaults without purge protection enabled.
Assign these policies at the subscription or management group scope. Policies ensure every vault—regardless of which team deployed it—meets your baseline security requirements, and that any new misconfigured vault is caught before it can be used.
Combine policy assignment with a remediation task to bring existing noncompliant vaults into compliance without requiring manual intervention across your estate.
To assign these policies in the Azure portal:
- Go to Policy > Authoring > Definitions and search for the policy name.
- Select the policy and choose Assign.
- Set Scope to the subscription or management group that covers all Key Vault deployments in your organization.
- For Key vaults should have deletion protection enabled, expand Parameters and set the Effect to Deny to block creation of noncompliant vaults going forward.
- Select Review + create to activate the assignment.
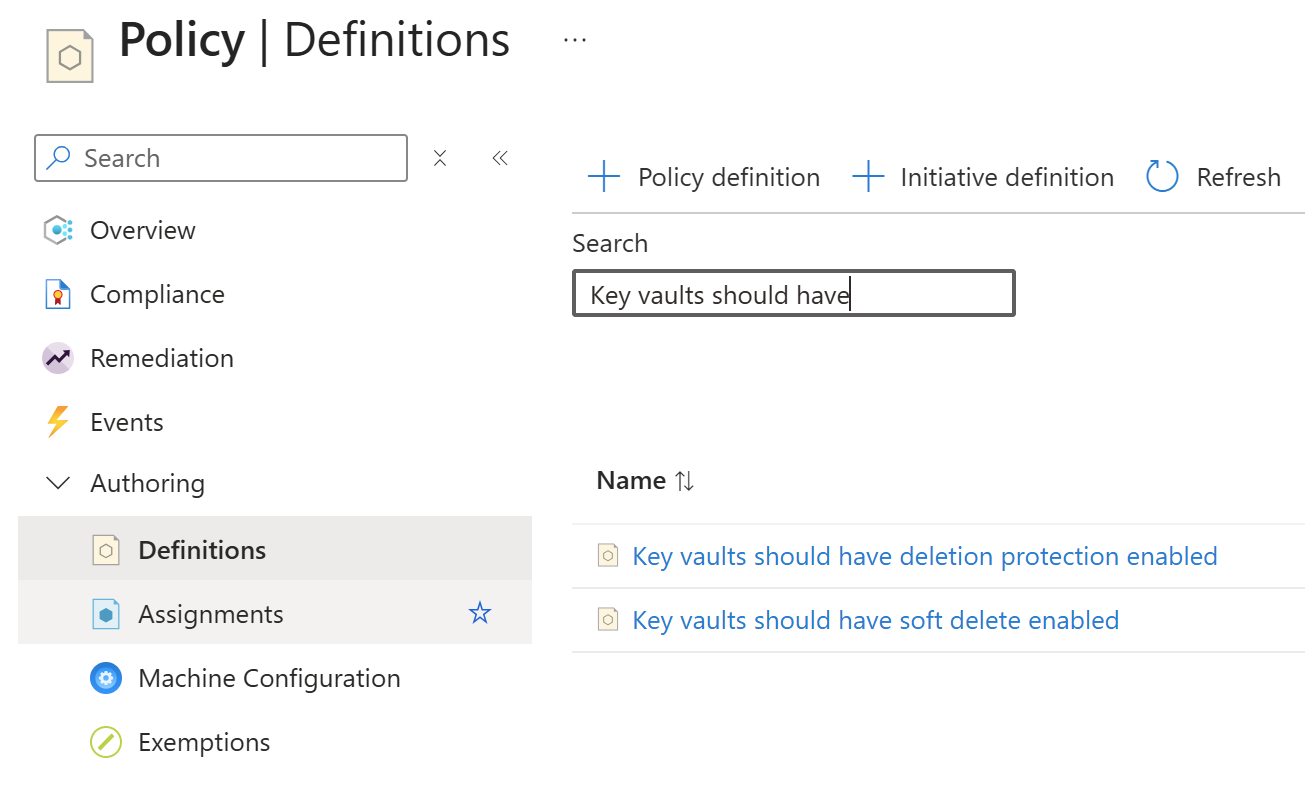
For vaults already out of compliance, return to Policy > Assignments, select the assignment, and choose Create remediation task to evaluate and flag existing vaults.
With your vault deployed with the right SKU, protected against purge, and tracked by policy, you're ready to configure who and what can access it.
Tip
For the full set of Azure Policy built-in definitions available for Key Vault, see Azure Policy built-in definitions for Azure Key Vault.