Enable Trusted Launch on new and existing Gen2 VMs
Enabling Trusted Launch on a new Gen2 virtual machine is largely automatic—Azure defaults Trusted Launch as the security type. Upgrading an existing Gen2 VM requires a few deliberate steps. Gen1 migration and final configuration verification are covered in the next unit.
| Scenario | VM Generation | Process Complexity | Downtime Required |
|---|---|---|---|
| New VM deployment | Gen2 | Low (automatic) | N/A |
| Existing Gen2 upgrade | Gen2 | Medium (manual) | Yes (deallocate) |
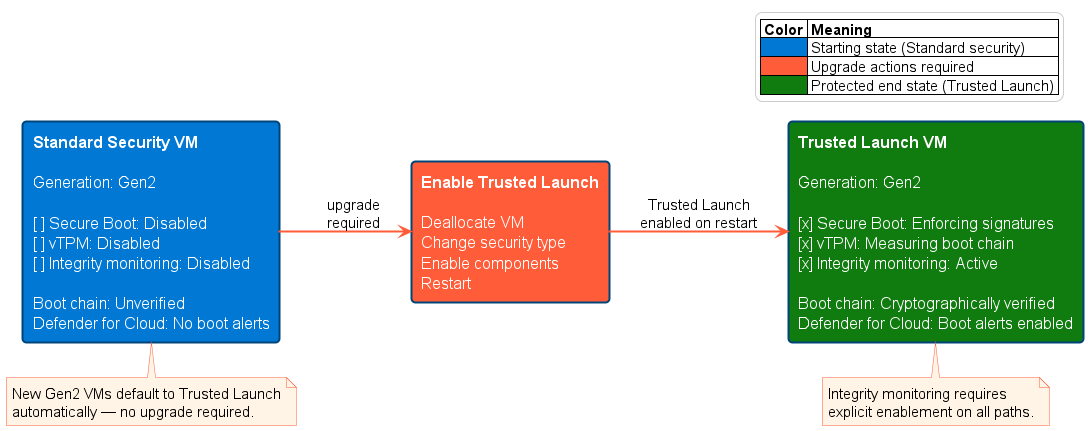
Enable Trusted Launch on new virtual machines
When you create a new Gen2 virtual machine through the Azure portal, Trusted Launch is automatically selected as the security type. The portal defaults Secure Boot and vTPM to enabled value. Integrity monitoring requires explicit enablement by selecting the Integrity monitoring checkbox during VM creation.
During VM creation, on the Basics tab under Instance details, locate the Security type field. Verify that Trusted launch is selected and confirm the checkboxes:
- Enable Secure Boot: Enforces signature validation for boot components
- Enable vTPM: Activates the virtual Trusted Platform Module
- Integrity monitoring: Must be explicitly selected to install the Guest Attestation extension
You can disable individual components if your application has compatibility issues, but this reduces boot integrity protection. For Contoso Manufacturing's new factory floor VMs, keeping all three components enabled ensures consistent security posture across the entire production environment.
After the VM deploys, the Guest Attestation extension installs automatically if integrity monitoring is enabled. The extension begins sending boot measurements to Azure's attestation service within minutes of first boot. You can verify extension installation by navigating to the VM's Extensions + applications screen in the Azure portal.
Upgrade an existing Gen2 VM to Trusted Launch
Existing Gen2 virtual machines with Standard security can be upgraded to Trusted Launch without migrating to a new VM. This in-place upgrade changes the security type while preserving the VM's identity, disks, and network configuration.
Before upgrading, verify that the VM meets all prerequisites. The VM must use an operating system that supports Trusted Launch—most modern Windows Server and Linux distributions qualify. The VM size must support Trusted Launch—most current-generation VM sizes do, but legacy sizes can’t. Check the Trusted Launch documentation for the current compatibility matrix.
If the VM uses Azure Backup, verify that it uses an Enhanced backup policy rather than a Standard backup policy. The Trusted Launch security type can't be enabled for VMs configured with Standard policy backup protection via the Azure portal—you must upgrade the backup policy before enabling Trusted Launch. Standard policy now supports Trusted Launch VMs for new backups via Azure CLI (v2.73.0+), PowerShell (Az 14.0.0+), and REST API (v2025-01-01+), but the portal experience requires Enhanced policy.
The upgrade process requires stopping and deallocating the VM. For Contoso Manufacturing, this means scheduling the upgrade during a planned maintenance window to avoid disrupting production systems. Coordinate with operations teams to ensure no active production jobs are running when the upgrade begins.
To upgrade the VM through the Azure portal:
- Navigate to the virtual machine and select Stop to deallocate the VM
- After the VM status shows Stopped (deallocated), select Configuration from the left navigation
- Under Security type, change the dropdown from Standard to Trusted launch
- Enable the three security components:
- Enable Secure Boot
- Enable vTPM
- Integrity monitoring
- Select Save to apply the configuration
- Start the VM
The VM restarts with Trusted Launch enabled. During the first boot, the vTPM measures the boot chain and establishes the baseline measurements. The Guest Attestation extension installs automatically if integrity monitoring is enabled. Within 10-15 minutes, the VM appears in Defender for Cloud with boot integrity monitoring active.
You can also perform this upgrade using Azure CLI or PowerShell, which is useful when scripting upgrades across multiple VMs.
After the upgrade completes, verify the configuration by reviewing the VM's Overview page. The Properties section displays the security type as Trusted Launch. Check the Extensions + applications tab to confirm that the Guest Attestation extension shows a Provisioning succeeded status.