Enable workload protection plans in Environment Settings
Microsoft Defender for Cloud includes over a dozen workload protection plans, but every plan is disabled by default until you actively enable it. For Contoso Financial Services, this means navigating to Environment Settings in the Azure portal and making strategic choices about which plans to turn on and which service tiers to select. Here, you learn how to access the Defender plans configuration page. Then you decide between enabling all plans at once or selectively enabling individual plans. Finally, you explore subscription-level and resource-level scope, and choose the right plan for production workloads.
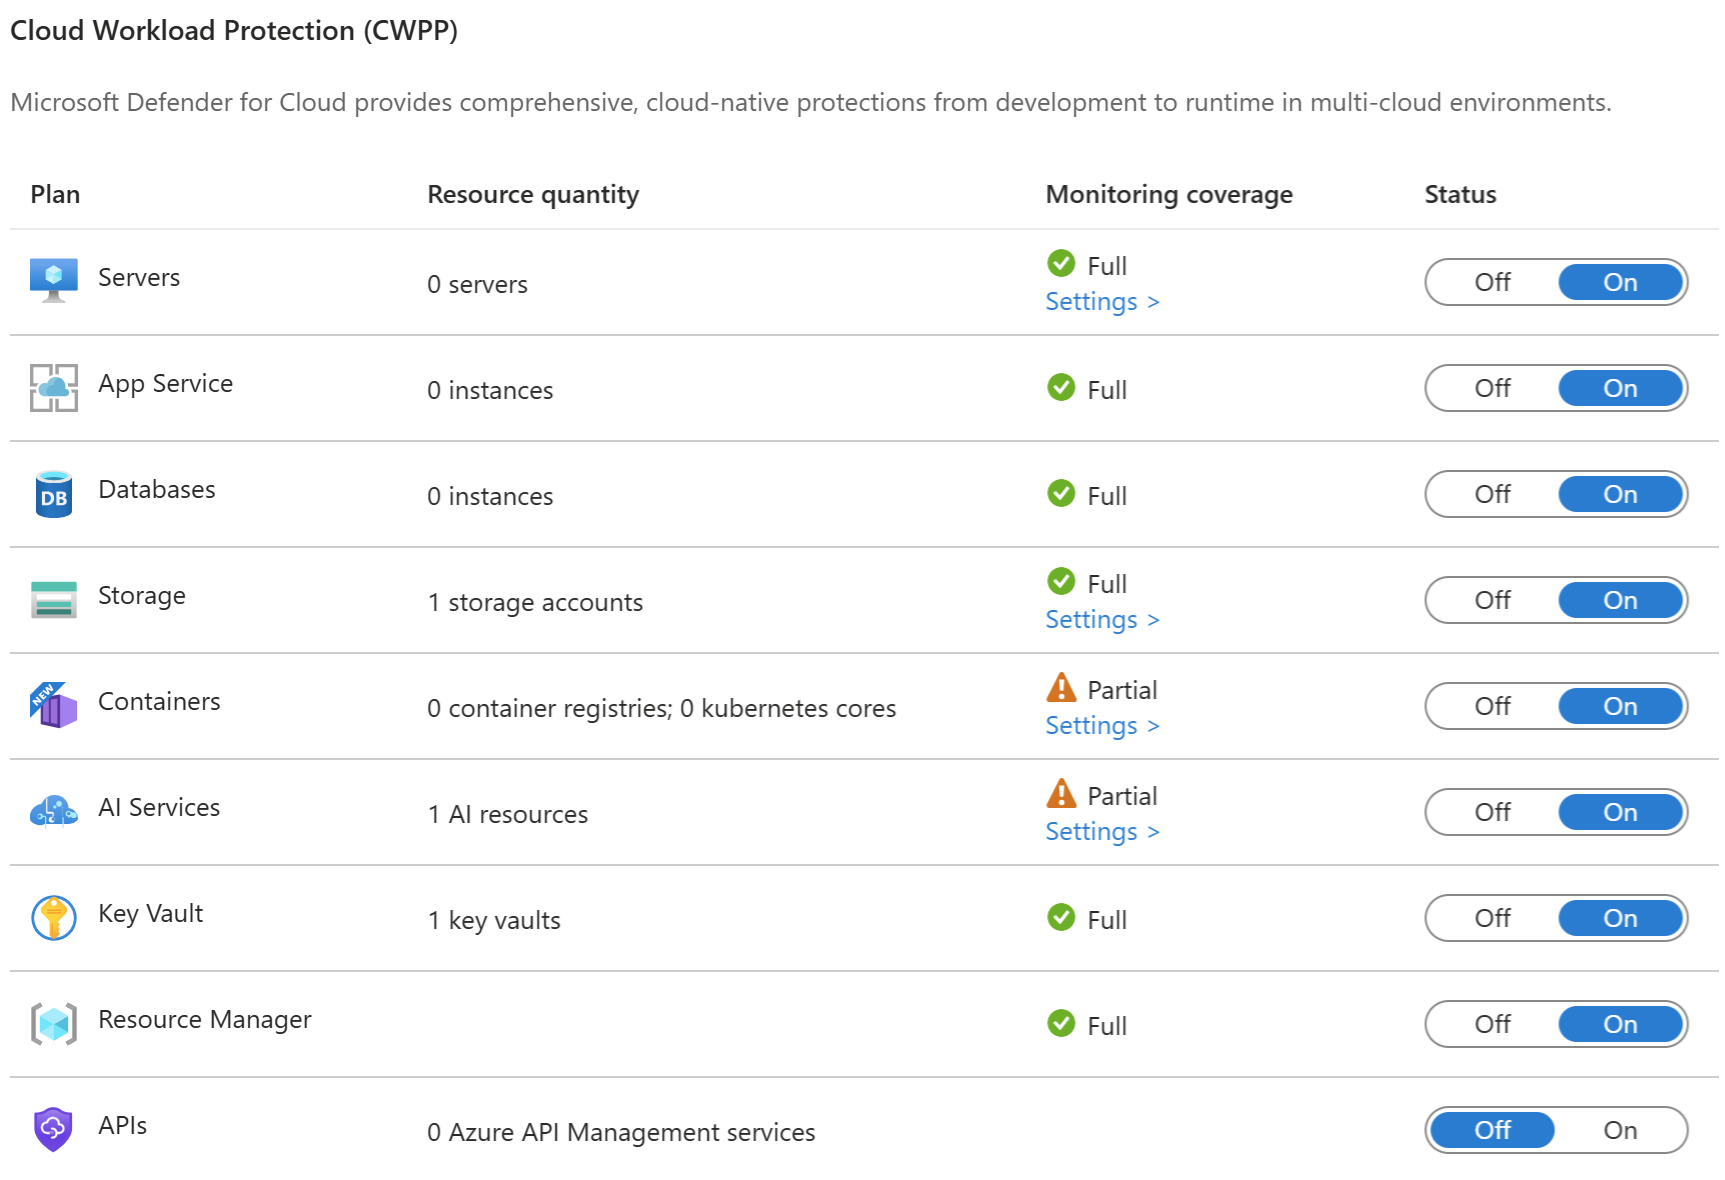
Navigate to the Defender plans page
The Defender plans configuration interface lives within Environment Settings, where you control protection settings at the subscription level. To reach this page, follow these steps:
- In the Azure portal, navigate to Microsoft Defender for Cloud.
- In the left navigation, select Environment settings.
- Select the subscription you want to configure.
- The Defender plans page opens, showing all available workload protection plans with toggle switches. Plans with more configuration options show a Settings button in the row.
Tip
For most plans, configure at the subscription level to ensure consistent protection across all resources. Some plans—including Defender for Storage and Defender for SQL—also support resource-level enablement for selective coverage without requiring a subscription-level setting first.
Enable all plans or select individually
The Defender plans page provides two approaches to enabling protection: the Enable all button at the top of the page, or individual toggle switches for each plan. Each approach serves different organizational needs based on environment scope, threat model, and coverage requirements.
Tip
Before enabling all plans on a production subscription, confirm you have resources of each type in scope—enabling plans for resource types that don't exist in your environment provides no security value. Review the Microsoft Defender for Cloud pricing page to understand billing models for plans you intend to use.
After you select your plans and configure any plan-specific settings, select Save at the top of the page. Defender for Cloud deploys the necessary monitoring components automatically, which typically takes a few minutes. You don't need to manually install agents or configure data collection for most plans.
Compare subscription-level and resource-level scope
Most Defender for Cloud plans operates at the subscription level, meaning you enable the plan once and it protects all resources of that type within the subscription. However, several plans support resource-level scope, which lets you enable or disable protection for individual resources.
Defender for Servers provides the most flexible scoping options, with different capabilities for Plan 1 and Plan 2. These scoping rules let you align protection depth with risk classification—applying Plan 2 capabilities to production workloads processing sensitive data while applying a lighter footprint to dev/test systems with a lower threat exposure.
| Scope | Plan 1 | Plan 2 |
|---|---|---|
| Enable for a subscription | Yes | Yes |
| Enable for individual resource | Yes | No |
| Disable for individual resource | Yes | Yes |
Plan 1 allows both enabling and disabling at the resource level, giving you complete flexibility to protect specific virtual machines without enabling the plan at the subscription level. Plan 2 requires subscription-level enablement but allows you to exclude specific resources by disabling protection at the resource level.
Defender for Storage and Defender for SQL also support resource-level enablement. When you enable Defender for Storage at the subscription level, it protects all storage accounts. Alternatively, you can enable protection selectively on storage accounts that contain sensitive or regulated data—ensuring your highest-risk resources receive full coverage while lower-risk accounts receive a baseline configuration.
Evaluate Defender for Servers Plan 1 and Plan 2
Defender for Servers offers two service tiers with different feature sets. Your choice should reflect the threat exposure of the workloads being protected, your compliance obligations, and any gaps in existing detective controls.
Plan 1 provides foundational server protection through Microsoft Defender for Endpoint integration, core vulnerability management capabilities, and security alerts for suspicious behavior. This plan suits development and test environments, or production workloads with limited internet exposure and an existing control stack that already covers file integrity and network visibility.
Plan 2 includes everything in Plan 1 plus advanced features designed for production workloads handling sensitive data: just-in-time VM access, file integrity monitoring, network map visualization, agentless disk scanning, and 500 MB of free daily data ingestion per server into Log Analytics.
| Feature | Plan 1 | Plan 2 |
|---|---|---|
| Microsoft Defender for Endpoint integration | Yes | Yes |
| Defender Vulnerability Management—core features | Yes | Yes |
| Defender Vulnerability Management—premium features | No | Yes |
| Security alerts and threat detection | Yes | Yes |
| Just-in-time VM access | No | Yes |
| Network map | No | Yes |
| File integrity monitoring | No | Yes |
| Free daily data ingestion (500 MB per server) | No | Yes |
| Agentless scanning | No | Yes |
Just-in-time VM access provides critical protection for internet-facing virtual machines by keeping management ports closed except when explicitly needed. With this feature enabled, Defender for Cloud blocks inbound traffic on SSH port 22 and RDP port 3389 by default. When an administrator needs to connect, they submit an access request through the Azure portal specifying the port, source IP addresses, and time window. Defender for Cloud evaluates the request against configured policies, and if approved, opens the requested port only for the approved source IPs and only for the approved time window.
File integrity monitoring tracks changes to critical operating system files, application binaries, Windows registry keys, and Linux system files. The feature establishes a baseline of known-good file states and generates alerts when it detects unauthorized modifications. These alerts help you identify potential malware infections, privilege escalation attempts, or configuration drift that could indicate a security compromise. For Contoso's production servers handling financial data, file integrity monitoring provides essential visibility into system-level changes that could indicate an active attack.
Note
File integrity monitoring is available in Plan 2 but isn't turned on by default. After enabling Plan 2, navigate to Environment settings → Settings for the Defender for Servers plan to enable it separately.
Enable plans and verify the configuration
After you evaluate which plans align with your workload types and risk tolerance, you implement the configuration and verify that protection activates successfully. The activation process requires just a few actions but has significant security implications.
On the Defender plans page, toggle each desired plan to On. For Defender for Servers, use the Select plan dropdown to choose between Plan 1 and Plan 2. If any plans display a Settings button, select it to review plan-specific options. Select Save at the top of the page. Defender for Cloud deploys monitoring components automatically—typically within 5 to 10 minutes. Once all toggled plans display On in the status column, protection is active and Defender for Cloud begins generating recommendations and alerts for covered resources.