Grant tenant-wide admin consent to applications
For applications your organization has developed or for those that are registered directly in your Microsoft Entra tenant, you can grant tenant-wide admin consent from App registrations in the Azure portal.
Warning
Granting tenant-wide admin consent to an application will grant the app and the app's publisher access to your organization's data. Carefully review the permissions the application is requesting before granting consent.
Granting tenant-wide admin consent requires you to sign in as a user that is authorized to consent on behalf of the organization. This includes Privileged Role Administrator. A user can also be authorized to grant tenant-wide consent if they're assigned a custom directory role that includes the permission to grant permissions to applications.
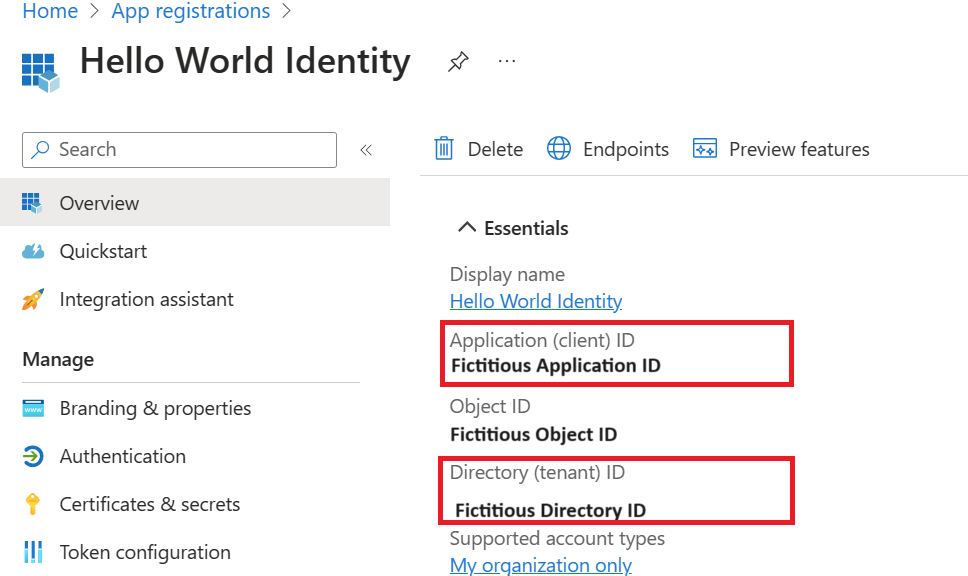
In a previous exercise, you created an app named Demo app. If necessary, in Microsoft Azure, browse to Microsoft Entra ID then App registrations then Demo app.
On the Demo app screen, locate and copy and save each Application (client) ID and Directory (tenant) ID values so that you can use them later.
In the left navigation, under Manage, select API permissions.
Under Configured permissions, select Grant admin consent.
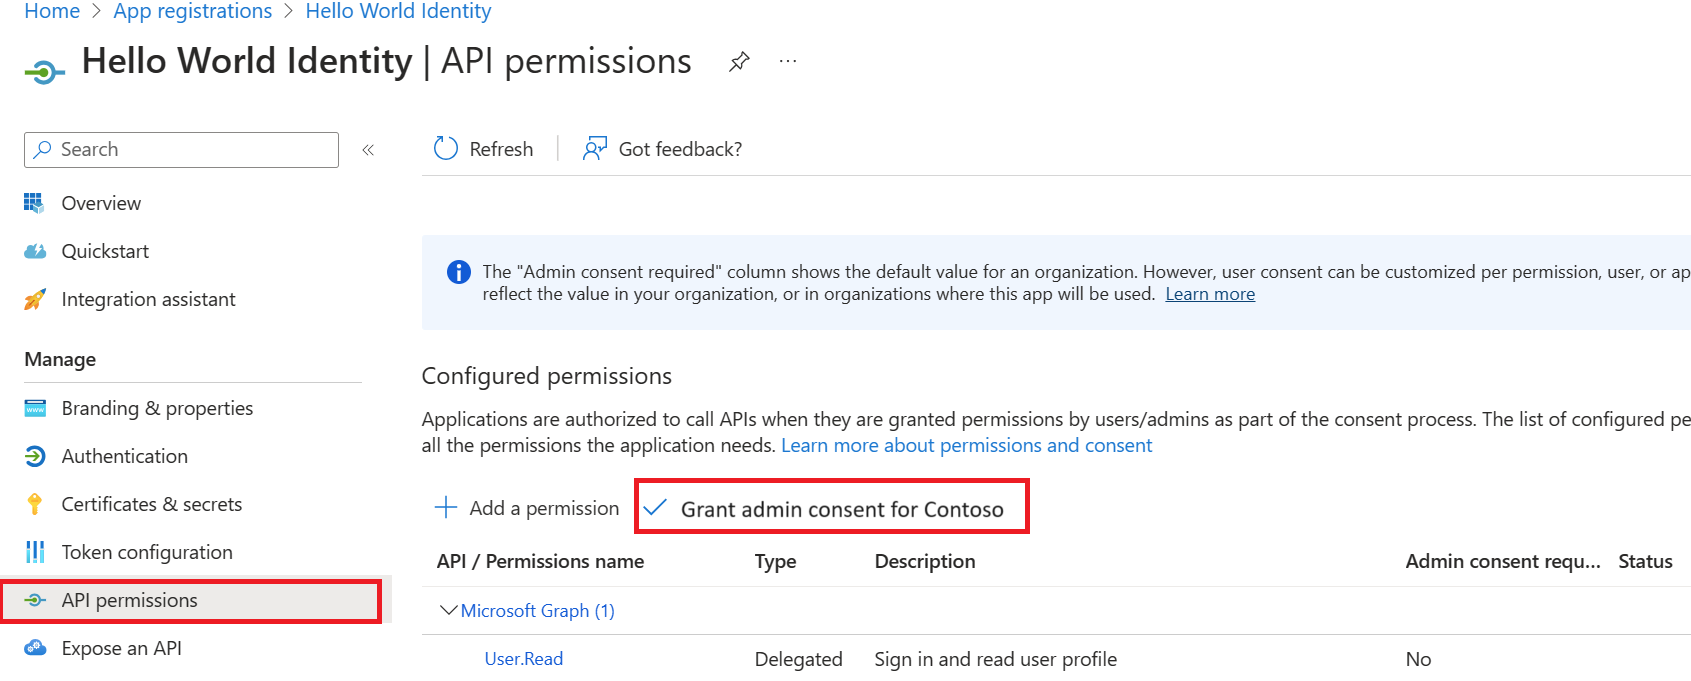
Review the dialogue box, and then select Yes.
Warning
Granting tenant-wide admin consent through App registrations will revoke any permissions that had previously been granted tenant-wide. Permissions previously granted by users on their own behalf won't be affected.
Grant admin consent in Enterprise apps
You can grant tenant-wide admin consent through Enterprise applications if the application has already been provisioned in your tenant.
In Microsoft Azure, browse to Microsoft Entra ID, then Enterprise applications, and then Demo app.
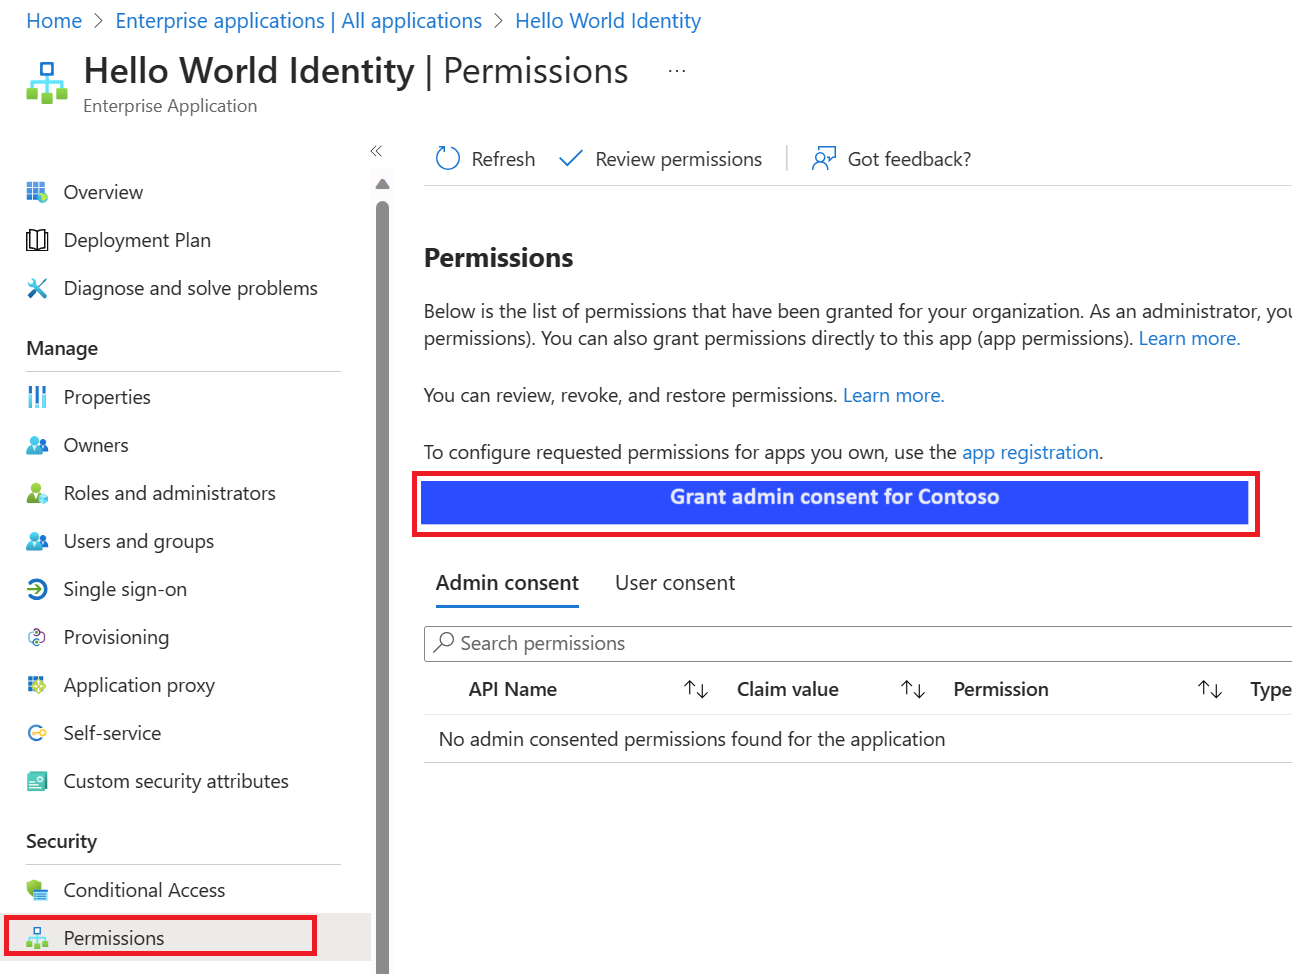
On the Demo app screen, in the left navigation, under Security, select Permissions.
Under Permissions, select Grant admin consent.
When prompted, sign in using your Privileged Role Administrator account.
In the Permissions requested dialog box, review the information and then select Accept.
Construct the URL for granting tenant-wide admin consent
When you're granting tenant-wide admin consent using either method described above, a window opens from the Azure portal to prompt for tenant-wide admin consent. If you know the client ID of the application (also known as the application ID), you can build the same URL to grant tenant-wide admin consent.
The tenant-wide admin consent URL follows the following format:
https://login.microsoftonline.com/{tenant-id}/adminconsent?client_id={client-id}where:{client-id}is the application's client ID (also known as app ID).{tenant-id}is your organization's tenant ID or any verified domain name.
As always, carefully review the permissions an application requests before granting consent.
Admin-restricted permissions
Some high-privilege permissions in the Microsoft ecosystem can be set to admin-restricted. Examples of these kinds of permissions include:
- Read all user's full profiles by using User.Read.All
- Write data to an organization's directory by using Directory.ReadWrite.All
- Read all groups in an organization's directory by using Groups.Read.All
Although a consumer user might grant an application access to this kind of data, organizational users are restricted from granting access to the same set of sensitive company data. If your application requests access to one of these permissions from an organizational user, the user receives an error message that says they're not authorized to consent to your app's permissions.
If your app requires access to admin-restricted scopes for organizations, you should request them directly from a company administrator, also by using the admin consent endpoint, described next.
If the application is requesting high-privilege delegated permissions and an administrator grants these permissions via the admin consent endpoint, consent is granted for all users in the tenant.
If the application is requesting application permissions and an administrator grants these permissions via the admin consent endpoint, this grant isn't given on behalf of any specific user. Instead, the client application is granted permissions directly. These types of permissions are only used by daemon services and other non-interactive applications that run in the background.
Using the admin consent endpoint
Note
After the admin grants admin consent using the admin consent endpoint, you've finished granting admin consent and users don't need to perform any further additional actions. After granting admin consent, users can get an access token via a typical auth flow, and the resulting access token will have the consented permissions.
When a Company Administrator uses your application and is directed to the authorized endpoint, Microsoft identity platform will detect the user's role and ask them if they would like to consent on behalf of the entire tenant for the permissions you've requested. However, there's also a dedicated admin consent endpoint you can use if you would like to proactively request that an administrator grants permission on behalf of the entire tenant. Using this endpoint is also necessary for requesting application permissions (which can't be requested using the authorized endpoint).
If you follow these steps, your app can request permissions for all users in a tenant, including admin-restricted scopes. This is a high-privilege operation and should only be done if necessary for your scenario.
Request the permissions in the app registration portal
Applications are able to note which permissions they require (both delegated and application) in the app registration portal. This allows use of the /.default scope and the Azure portal's "Grant admin consent" option. In general, it's best practice to ensure that the permissions statically defined for a given application are a superset of the permissions that it will be requesting dynamically/incrementally.
To configure the list of statically requested permissions for an application
- Go to your application in the Azure portal – App registrations experience, or create an app if you haven't already.
- Locate the API Permissions section, then select Add a permission.
- Select Microsoft Graph from the list of available APIs and then add the permissions that your app requires.
- Save the app registration.
Recommended: Sign the user into your app
Typically, when you build an application that uses the admin consent endpoint, the app needs a page or view in which the admin can approve the app's permissions. This page can be part of the app's sign-up flow, part of the app's settings, or a dedicated "connect" flow. In many cases, it makes sense for the app to show this "connect" view only after a user has signed in with a work or school Microsoft account.
When you sign the user into your app, you can identify the organization to which the admin belongs before asking them to approve the necessary permissions. Although not strictly necessary, it can help you create a more intuitive experience for your organizational users. To sign in the user, follow the Microsoft identity platform protocol tutorials.
Using permissions
After the user consents to permissions for your app, your app can acquire access tokens that represent your app's permission to access a resource in some capacity. An access token can be used only for a single resource, but encoded inside the access token is every permission that your app has been granted for that resource. When you're ready to request permissions from your organization's admin, you can redirect the user to the Microsoft identity platform admin consent endpoint. Line breaks are for legibility only.
GET https://login.microsoftonline.com/\{tenant\}/v2.0/adminconsent?

client_id=00001111-aaaa-2222-bbbb-3333cccc4444

state=12345

redirect_uri=http://localhost/myapp/permissions

scope=

    https://graph.microsoft.com/calendars.read

    https://graph.microsoft.com/mail.send
| Parameter | Condition | Description |
|---|---|---|
| tenant | Required | The directory tenant that you want to request permission from. Can be provided in GUID or friendly name format OR generically referenced with organizations as seen in the example. Don't use "common," as personal accounts can\t provide admin consent except in the context of a tenant. To ensure best compatibility with personal accounts that manage tenants, use the tenant ID when possible. |
| client_id | Required | The Application (client) ID that the Azure portal – App registrations experience assigned to your app. |
| redirect_uri | Required | The redirect URI where you want the response to be sent for your app to handle. It must exactly match one of the redirect URIs that you registered in the app registration portal. |
| state | Recommended | A value included in the request that will also be returned in the token response. It can be a string of any content you want. Use the state to encode information about the user's state in the app before the authentication request occurred, such as the page or view they were on. |
| scope | Required | Defines the set of permissions being requested by the application. This can be either static (using /.default) or dynamic scopes. This can include the OIDC scopes (openid, profile, email). |
At this point, Microsoft Entra ID requires a tenant administrator to sign in to complete the request. The administrator is asked to approve all the permissions that you've requested in the scope parameter.