✔️ Applies to: Classic NFS file shares created with the Microsoft.Storage resource provider
✔️ Applies to: NFS file shares created with the Microsoft.FileShares resource provider
✖️ Doesn't apply to: SMB file shares
The client operating system enforces permissions for NFS file shares, not the Azure Files service. Root squash is an administrative security feature in NFS that prevents unauthorized root-level access to the NFS server by client machines. This functionality is an important part of protecting user data and system settings from manipulation by untrusted or compromised clients.
Administrators should enable root squash in environments where multiple users or systems access the NFS share, especially in scenarios where client machines aren't fully trusted. By converting root users to anonymous users, root squash ensures that even if a client machine is compromised, the attacker can't exploit root privileges to access or modify critical files on the NFS server.
In this article, you learn how to configure and change root squash settings for NFS Azure file shares.
How root squash works with Azure Files
Root squash works by remapping the user ID (UID) and the group ID (GID) of the root user to a UID and GID belonging to the anonymous user on server. Root users accessing the file system are automatically converted to the anonymous, less-privileged user and group with limited permissions.
Although root squash is the default behavior in NFS, it's not the default option when creating an NFS Azure file share. You must explicitly enable root squash on the file share. You can do this when you create an NFS Azure file share, or later on.
Root squash settings
Choose from three root squash settings:
- No root squash: Turn off root squashing. This option is mainly useful for diskless clients or workloads as specified by workload documentation. This setting is the default when creating a new NFS Azure file share.
- All squash: Map all UIDs and GIDs to the anonymous user. Use this setting for shares that require read-only access by all clients.
- Root squash: Map requests from UID/GID 0 (root) to the anonymous UID/GID. This setting doesn't apply to any other UIDs or GIDs that might be equally sensitive, such as user bin or group staff.
The following table highlights the UID behavior observed from the server when you configure specific root squash options.
| Option |
Client UID |
Server UID |
| root_squash |
0 |
65534 |
| root_squash |
1000 |
1000 |
| no_root_squash |
0 |
0 |
| no_root_squash |
1000 |
1000 |
| all_squash |
0 |
65534 |
| all_squash |
1000 |
65534 |
For Azure classic file shares that use the Microsoft.Storage resource provider, you can configure root squash settings through the Azure portal, Azure PowerShell, or Azure CLI.
Sign in to the Azure portal and go to the FileStorage storage account that contains the NFS Azure file share.
In the service menu, under Data storage, select Classic file shares.
Select the file share for which you want to change the root squash setting.
In the service menu, select Properties. Then toggle the Root squash setting as desired.
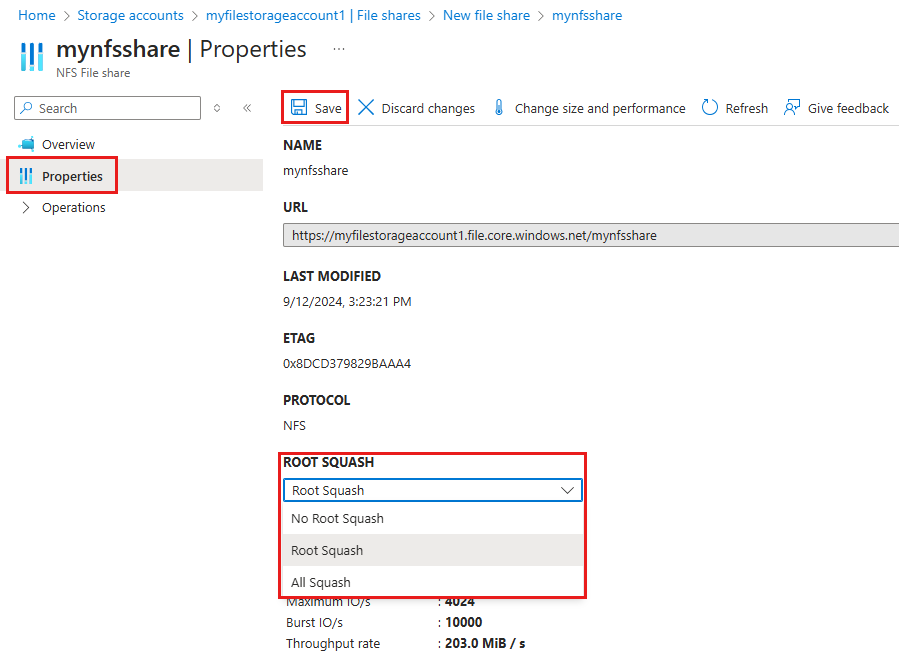
Select Save to update the root squash value.
Sign in to Azure and select your subscription.
Connect-AzAccount
Select-AzSubscription -SubscriptionId "<your-subscription-id>"
To enable root squash on the file share, run the following command. Replace <resource-group-name>, <storage-account-name>, and <file-share-name> with your own values.
Update-AzRmStorageShare `
  -ResourceGroupName <resource-group-name> `
  -StorageAccountName <storage-account-name> `
  -Name <file-share-name> `
  -RootSquash RootSquash
To disable root squash on the file share, run the following command. Replace <resource-group-name>, <storage-account-name>, and <file-share-name> with your own values.
Update-AzRmStorageShare `
  -ResourceGroupName <resource-group-name> `
  -StorageAccountName <storage-account-name> `
  -Name <file-share-name> `
  -RootSquash NoRootSquash
To force squash for all users, run the following command to map all user IDs to anonymous. Replace <resource-group-name>, <storage-account-name>, and <file-share-name> with your own values.
Update-AzRmStorageShare `
  -ResourceGroupName <resource-group-name> `
  -StorageAccountName <storage-account-name> `
  -Name <file-share-name> `
  -RootSquash AllSquash
To view the root squash property for a file share, run the following command. Replace <resource-group-name>, <storage-account-name>, and <file-share-name> with your own values.
Get-AzRmStorageShare `
  -ResourceGroupName <resource-group-name> `
  -StorageAccountName <storage-account-name> `
  -Name <file-share-name> | fl -Property ResourceGroupName, StorageAccountName, Name, QuotaGiB,AccessTier,EnabledProtocols,RootSquash
Sign in to Azure and set your subscription.
az login
az account set --subscription "<your-subscription-id>"
To enable root squash on the file share, run the following command. Replace <resource-group-name>, <storage-account-name>, and <file-share-name> with your own values.
az storage share-rm update \
  --resource-group <resource-group-name> \
  --storage-account <storage-account-name> \
  --name <file-share-name> \
  --root-squash RootSquash
To disable root squash on the file share, run the following command. Replace <resource-group-name>, <storage-account-name>, and <file-share-name> with your own values.
az storage share-rm update \
  --resource-group <resource-group-name> \
  --storage-account <storage-account-name> \
  --name <file-share-name> \
  --root-squash NoRootSquash
To force squash for all users, run the following command to map all user IDs to anonymous. Replace <resource-group-name>, <storage-account-name>, and <file-share-name> with your own values.
az storage share-rm update \
  --resource-group <resource-group-name> \
  --storage-account <storage-account-name> \
  --name <file-share-name> \
  --root-squash AllSquash
To view the root squash property for a file share, run the following command. Replace <resource-group-name>, <storage-account-name>, and <file-share-name> with your own values.
az storage share-rm show \
  --resource-group <resource-group-name> \
  --storage-account <storage-account-name> \
  --name <file-share-name>
For Azure file shares that use the Microsoft.FileShares resource provider, you can configure root squash settings by using the Azure portal, Azure PowerShell, or Azure CLI.
Sign in to the Azure portal and go to the file share.
In the service menu, under Settings, select Configuration.
Toggle the root squash setting as desired.
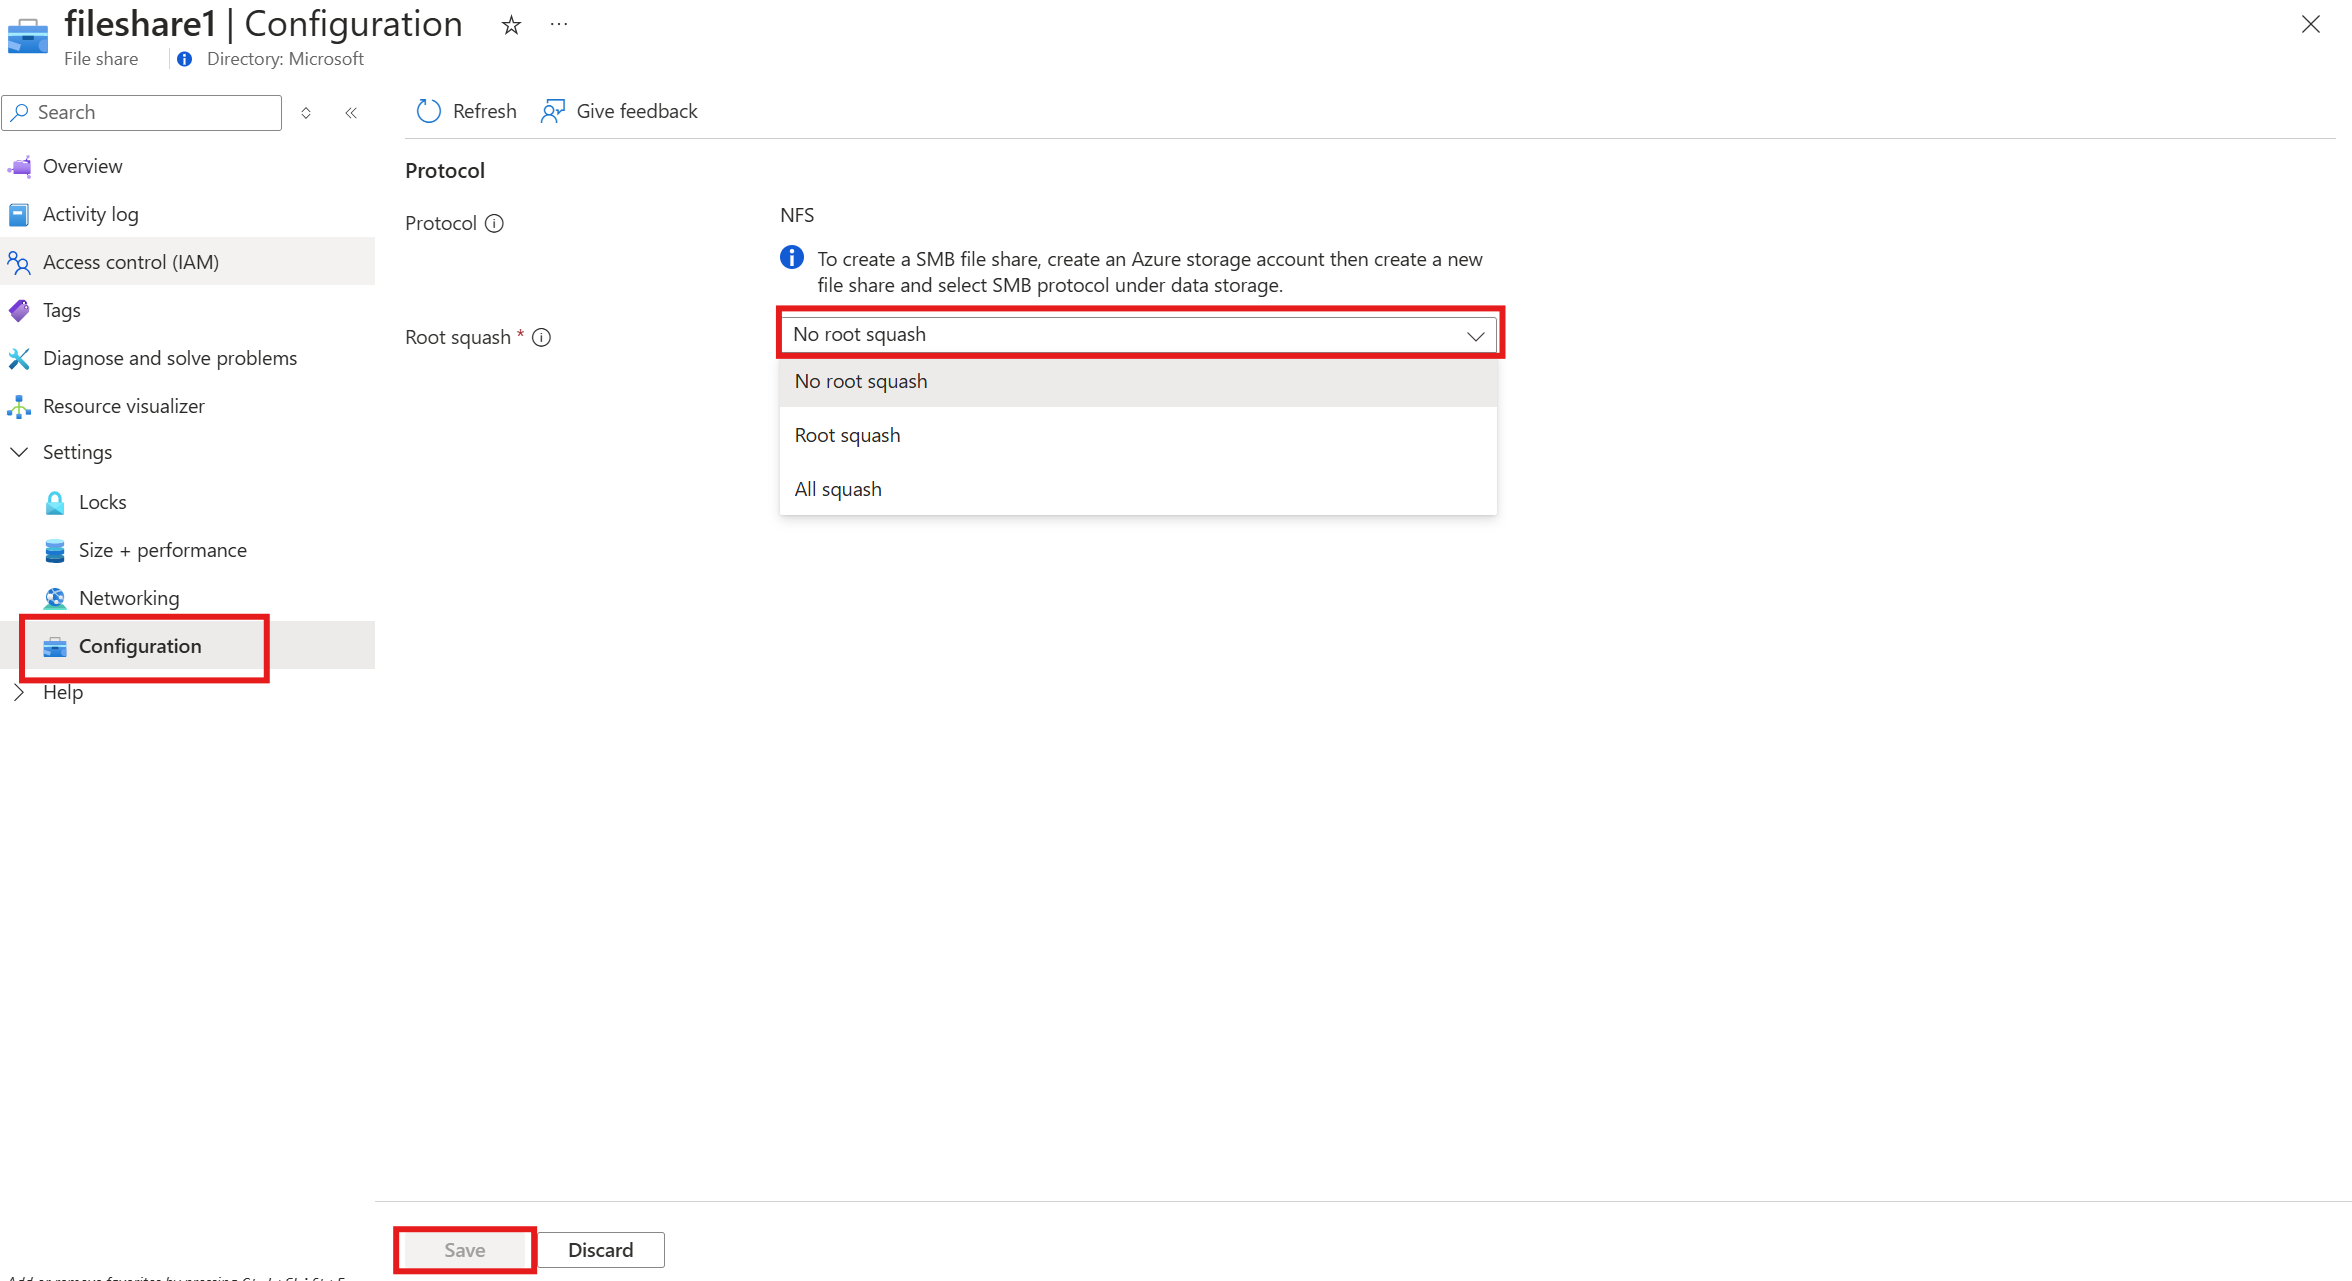
Select Save to update the root squash value.
To change the root squash setting on a file share (Microsoft.FileShares) by using Azure PowerShell, run the following commands. Replace the variables with your values. Allowed values for -RootSquash are AllSquash, NoRootSquash, and RootSquash.
# To learn more about the Az.FileShare module, see https://www.powershellgallery.com/packages/Az.FileShare/1.0.0
Install-Module -Name Az.FileShare -Repository PSGallery -RequiredVersion 1.0.0

$resourceGroup = "<your-resource-group-name>"
$shareName = "<your-file-share-name>"

Update-AzFileShare -ResourceName $shareName -ResourceGroupName $resourceGroup -RootSquash RootSquash
To change the root squash setting on a file share (Microsoft.FileShares) by using Azure CLI, run the following commands. Allowed values for --root-squash are AllSquash, NoRootSquash, and RootSquash.
# Install the fileshare extension
az extension add --name fileshare

# Specify your values
shareName="<your-file-share-name>"
resourceGroup="<your-resource-group-name>"

# Update the root squash setting
az fileshare update --name $shareName --resource-group $resourceGroup --root-squash RootSquash
See also
