Note
Access to this page requires authorization. You can try signing in or changing directories.
Access to this page requires authorization. You can try changing directories.
APPLIES TO: Developer | Basic | Standard | Premium
This article shows how to configure an open-source developer portal plugin (preview) to customize the API Management developer portal on WordPress. With the plugin, turn any WordPress site into a developer portal. Take advantage of site capabilities in WordPress to customize and add features to your developer portal including localization, collapsible and expandable menus, custom stylesheets, file downloads, and more.
In this article, you create a WordPress site on Azure App Service and configure the developer portal plugin on the WordPress site. Microsoft Entra ID is configured for authentication to the WordPress site and the developer portal.
Prerequisites
- An API Management instance. If needed, create an instance.
Note
Currently, the plugin isn't supported in the API Management v2 tiers.
- Enable and publish the developer portal. For steps, see Tutorial: Access and customize the developer portal.
- Permissions to create an app registration in a Microsoft Entra tenant associated with your Azure subscription.
- Installation files for the developer portal WordPress plugin and customized WordPress theme from the plugin repo. Download the following zip files from the dist folder in the repo:
apim-devportal.zip- Plugin filetwentytwentyfour.zip- Theme file
Step 1: Create WordPress on App Service
For this scenario, you create a managed WordPress site hosted on Azure App Service. The following are brief steps:
In the Azure portal, navigate to https://portal.azure.com/#create/WordPress.WordPress.
On the Create WordPress on App Service page, in the Basics tab, enter your project details, Web App details, and WordPress setup settings.
Store the WordPress admin username and password in a safe place. These credentials are required to sign into the WordPress admin site and install the plugin in a later step.
Caution
Avoid using the default WordPress
adminusername, and create a strong password. Learn more about WordPress password best practicesOn the Add-ins tab:
- Select the recommended default values for Email with Azure Communication Services, Azure Front Door, and Azure Blob Storage.
- In Virtual network, select either the New value or an existing virtual network.
On the Deployment tab, leave Add staging slot unselected.
Select Review + create to run final validation.
Select Create to complete app service deployment.
It can take several minutes for the app service to deploy.
Step 2: Create a new Microsoft Entra app registration
In this step, create a new Microsoft Entra app. In later steps, you configure this app as an identity provider for authentication to your app service and to the developer portal in your API Management instance.
In the Azure portal, navigate to App registrations > + New registration.
Provide the new app name, and in Supported account types, select Accounts in this organizational directory only. Select Register.
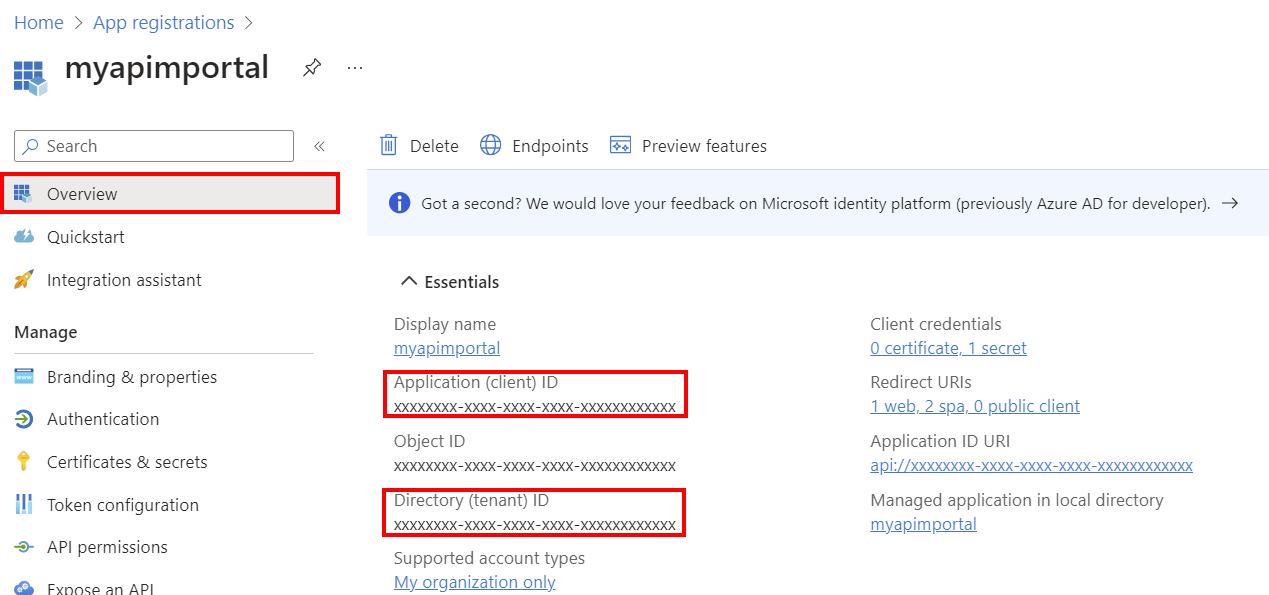
On the Overview page, copy and safely store the Application (client) Id and Directory (tenant) Id. You need these values in later steps to configure authentication to your API Management instance and app service.
In the left menu, under Manage, select Authentication > + Add a platform.
On the Configure platforms page, select Web.
On the Configure Web page, enter the following redirect URI, substituting the name of your app service, and select Configure:
https://app-service-name>.azurewebsites.net/.auth/login/aad/callbackSelect + Add a platform again. Select Single-page application.
On the Configure single-page application page, enter the following redirect URI, substituting the name of your API Management instance, and select Configure:
https://<apim-instance-name>.developer.azure-api.net/signinSelect + Add a platform again. Select Single-page application again.
On the Configure single-page application page, enter the following redirect URI, substituting the name of your API Management instance, and select Configure:
https://<apim-instance-name>.developer.azure-api.net/In the left menu, under Manage, select Token configuration > + Add optional claim.
On the Add optional claim page, select ID and then select the following claims: email, family_name, given_name, onprem_sid, preferred_username, upn. Select Add.
When prompted, select Turn on the Microsoft Graph email, profile permission. Select Add.
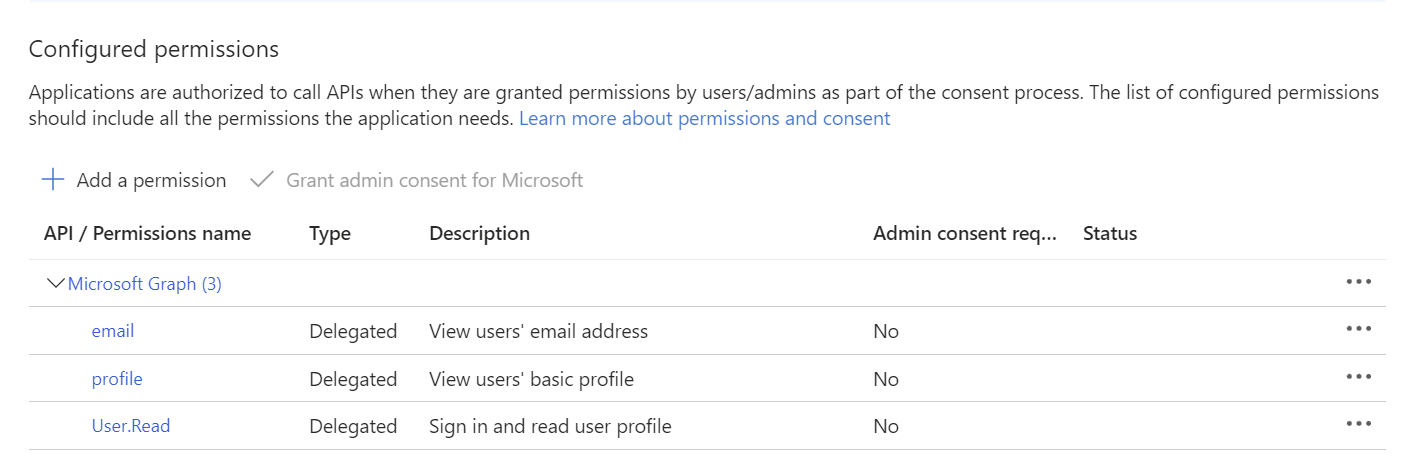
In the left menu, under Manage select API permissions and confirm that the following Microsoft Graph permissions are present: email, profile, User.Read.
In the left menu, under Manage, select Certificates & secrets > + New client secret.
Configure settings for the secret and select Add. Copy and safely store the secret's Value immediately after it's generated. You need this value in later steps to add the application to your API Management instance and app service for authentication.
In the left menu, under Manage, select Expose an API. Note the default Application ID URI. Optionally add custom scopes if needed.
Step 3: Enable authentication to the app service
In this step, add the Microsoft Entra app registration as an identity provider for authentication to the WordPress app service.
- In the portal, navigate to the WordPress app service.
- In the left menu, under Settings, select Authentication > Add identity provider.
- On the Basics tab, in Identity provider, select Microsoft.
- Under App registration, select Provide the details of an existing app registration.
- Enter the Application (client) Id and Client secret from the app registration that you created in the previous step.
- In Issuer URL, enter either of the following values for the authentication endpoint:
https://login.microsoftonline.com/<tenant-id>orhttps://sts.windows.net/<tenantid>. Replace<tenant-id>with the Directory (tenant) Id from the app registration.Important
Do not use the version 2.0 endpoint for the issuer URL (URL ending in
/v2.0).
- In Allowed token audiences, enter the Application ID URI from the app registration. Example:
api://<app-id>. - Under Additional checks, select values appropriate for your environment, or use the default values.
- Configure your desired the values for the remaining settings, or use the default values. Select Add.
Note
If you want to allow guest users as well as signed-in users to access the developer portal on WordPress, you can enable unauthenticated access. In Restrict access, select Allow unauthenticated access. Learn more
The identity provider is added to the app service.
Step 4: Enable authentication to the API Management developer portal
Configure the same Microsoft Entra app registration as an identity provider for the API Management developer portal.
In the portal, navigate to your API Management instance.
In the left menu, under Developer portal, select Identities > + Add.
On the Add identity provider page, select Azure Active Directory (Microsoft Entra ID).
Enter the Client Id, Client secret, and Signin tenant values from the app registration that you created in a previous step. The Signin tenant is the Directory (tenant) Id from the app registration.
In Client library, select MSAL.
Accept default values for the remaining settings and select Add.
Republish the developer portal to apply the changes.
Test the authentication by signing into the developer portal at the following URL, substituting the name of your API Management instance:
https://<apim-instance-name>.developer.azure-api.net/signin. Select the Azure Active Directory (Microsoft Entra ID) button at the bottom to sign in.When you open it for the first time, you may be prompted to consent to specific permissions.
Step 5: Configure developer portal settings in API Management
Update the settings of the developer portal in the API Management instance to enable CORS and to include the app service site as a portal origin.
- In the Azure portal, navigate to your API Management instance.
- In the left menu, under Developer portal, select Portal overview.
- On the Portal overview tab, select Enable CORS.
- In the left menu, under Developer portal, select Portal settings.
- On the Self-hosted portal configuration tab, enter the hostname of your WordPress on App Service site as a portal origin, substituting the name of your app service in the following URL:
https://<yourapp-service-name>.azurewebsites.net - Republish the developer portal to apply the changes.
Also, update the cors policy configuration in the API Management instance to add the app service site as an allowed origin. This value is needed to allow calls from the developer portal's test console on the WordPress site.
Add the following origin value in your cors policy configuration:
<cors ...>
    <allowed-origins>
        [...]
        <origin>https://<yourapp-service-name>.azurewebsites.net</origin>
    </allowed-origins>
</cors>
Learn more about how to set or edit policies.
Step 6: Navigate to WordPress admin site and upload the customized theme
In this step, you upload the customized theme for the API Management developer portal to the WordPress admin site.
Important
We recommend that you upload the theme provided in the plugin repo. The theme is based on the Twenty Twenty Four theme and is customized to support the developer portal functionality in WordPress. If you choose to use a different theme, some functionality may not work as expected or require additional customization.
Open the WordPress admin website at the following URL, substituting the name of your app service:
http://<app-service-name>.azurewebsites.net/wp-adminWhen you open it for the first time, you may be prompted to consent to specific permissions.
Sign into the WordPress admin site using the username and password that you entered while creating WordPress on App Service.
In the left menu, select Appearance > Themes and then Add New Theme.
Select Upload Theme. Select Choose File to upload the API Management developer portal theme zip file that you downloaded previously. Select Install Now.
In the next screen, select Replace active with uploaded.
If prompted, select Activate.
Note
If your WordPress site includes a caching plug-in, clear the cache after activating the theme to ensure that the changes take effect.
Step 7: Install the developer portal plugin
- In the WordPress admin site, in the left menu, select Plugins > Add New Plugin.
- Select Upload Plugin. Select Choose File to upload the API Management developer portal plugin zip file (
apim-devportal.zip) that you downloaded previously. Select Install Now. - After successful installation, select Activate Plugin.
- In the left menu, select Azure API Management Developer Portal.
- On the APIM Settings page, enter the following settings and select Save Changes:
- APIM service name - Name of your API Management instance
- Enable Create default pages and Create navigation menu
Step 8: Add a custom stylesheet
Add a custom stylesheet for the API Management developer portal.
In the WordPress admin site, in the left menu, select Appearance > Themes.
Select Customize and then navigate to Styles.
Select the pencil icon (Edit Styles).
In the Styles pane, select More (three dots) > Additional CSS.
In Additional CSS, enter the following CSS:
.apim-table {
  width: 100%;
  border: 1px solid #D1D1D1;
  border-radius: 4px;
  border-spacing: 0;
}

.apim-table th {
  background: #E6E6E6;
  font-weight: bold;
  text-align: left;
}

.apim-table th,
.apim-table td {
  padding: .7em 1em;
}

.apim-table td {
  border-top: #E6E6E6 solid 1px;
}

.apim-input,
.apim-button,
.apim-nav-link-btn {
    border-radius: .33rem;
    padding: 0.6rem 1rem;
}

.apim-button,
.apim-nav-link-btn {
    background-color: var(--wp--preset--color--contrast);
    border-color: var(--wp--preset--color--contrast);
    border-width: 0;
    color: var(--wp--preset--color--base);
    font-size: var(--wp--preset--font-size--small);
    font-weight: 500;
    text-decoration: none;
    cursor: pointer;
    transition: all .25s ease;
}

.apim-nav-link-btn:hover {
    background: var(--wp--preset--color--base);
    color: var(--wp--preset--color--contrast);
}

.apim-button:hover {
    background: var(--wp--preset--color--vivid-cyan-blue);
}

.apim-button:disabled {
    background: var(--wp--preset--color--contrast-2);
    cursor: not-allowed;
}

.apim-label {
    display: block;
    margin-bottom: 0.5rem;
}

.apim-input {
    border: solid 1px var(--wp--preset--color--contrast);
}

.apim-grid {
    display: grid;
    grid-template-columns: 11em max-content;
}

.apim-link,
.apim-nav-link {
    text-align: inherit;
    font-size: inherit;
    padding: 0;
    background: none;
    border: none;
    font-weight: inherit;
    cursor: pointer;
    text-decoration: none;
    color: var(--wp--preset--color--vivid-cyan-blue);
}

.apim-nav-link {
    font-weight: 500;
}

.apim-link:hover,
.apim-nav-link:hover {
    text-decoration: underline;
}

#apim-signIn {
    display: flex;
    align-items: center;
    gap: 24px;
}
Save the changes. Select Save again to save the changes to the theme.
Log Out of the WordPress admin site.
Step 9: Sign into the API Management developer portal deployed on WordPress
Access the WordPress site to see your new API Management developer portal deployed on WordPress and hosted on App Service.
- In a new browser window, navigate to your WordPress site, substituting the name of your app service in the following URL:
https://<yourapp-service-name>.azurewebsites.net. - When prompted, sign in using Microsoft Entra ID credentials for a developer account. If unauthenticated access to the developer portal is enabled, select Sign in on the home page of the developer portal.
Note
You can only sign in to the developer portal on WordPress using Microsoft Entra ID credentials. Basic authentication isn't supported.
You can now use the following features of the API Management developer portal:
- Sign into the portal
- See list of APIs
- Navigate to API details page and see list of operations
- Test the API using valid API keys
- See list of products
- Subscribe to a product and generate subscription keys
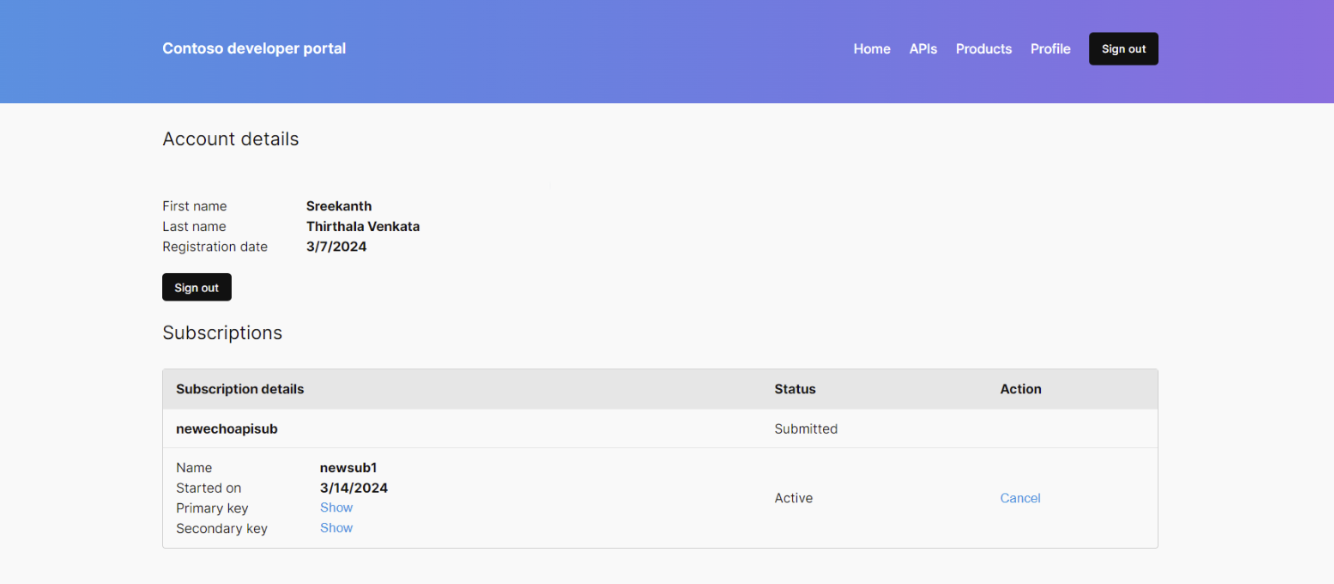
- Navigate to Profile tab with account and subscription details
- Sign out of the portal
The following screenshot shows a sample page of the API Management developer portal hosted on WordPress.
Troubleshooting
I don't see the latest developer portal pages on the WordPress site
If you don't see the latest developer portal pages when you visit the WordPress site, check that the developer portal plugin is installed, activated, and configured in the WordPress admin site. See Install the developer portal plugin for steps.
You might also need to clear the cache on your WordPress site or in Azure Front Door, if one is configured. Alternatively, you might need to clear the cache on your browser.
I'm having problems signing in or out of the developer portal
If you're having problems signing in or out of the developer portal, clear the browser cache, or view the developer portal site in a separate browser session (using incognito or private browsing mode).
I don't see a sign-in button on the developer portal navigation bar
If you're using a custom theme different from the one provided in the plugin repo, you may need to add the sign-in functionality to the navigation bar manually. On the Home page, add the following shortcode block: [SignInButton]. Learn more in the WordPress documentation.
You can also sign in or sign out manually by entering the following URLs in your browser:
- Sign in:
https://<app-service-name>.azurewebsites.net/.auth/login/aad - Sign out:
https://<app-service-name>.azurewebsites.net/.auth/logout