Tutorial: Assign custom roles with a function and Microsoft Graph (preview)
This article demonstrates how to use a function to query Microsoft Graph and assign custom roles to a user based on their Entra ID group membership.
In this tutorial, you learn to:
- Deploy a static web app.
- Create a Microsoft Entra app registration.
- Set up custom authentication with Microsoft Entra ID.
- Configure a serverless function that queries the user's Entra ID group membership and returns a list of custom roles.
Note
This tutorial requires you to use a function to assign roles. Function-based role management is currently in preview. The permission level required to complete this tutorial is "User.Read.All".
There's a function named GetRoles in the app's API. This function uses the user's access token to query Entra ID from Microsoft Graph. If the user is a member of any groups defined in the app, then the corresponding custom roles are mapped to the user.
| Requirement | Comments |
|---|---|
| Active Azure account | If you don't have one, you can create an account for free. |
| Microsoft Entra permissions | You must have sufficient permissions to create a Microsoft Entra application. |
Generate a repository based on the roles function template. Go to the following location to create a new repository.
Name your repository my-custom-roles-app.
Select Create repository from template.
In a new browser window, open the Azure portal.
From the top left corner, select Create a resource.
In the search box, type static web apps.
Select Static Web Apps.
Select Create.
Configure your static web app with the following information:
Setting Value Notes Subscription Select your Azure subscription. Resource group Create a new group named my-custom-roles-app-group. Name my-custom-roles-app Plan type Standard Customizing authentication and assigning roles using a function require the Standard plan. Region for API Select the region closest to you. In the Deployment details section:
Setting Value Source Select GitHub. Organization Select the organization where you generated the repository. Repository Select my-custom-roles-app. Branch Select main. In the Build Details section, add the configuration details for this app.
Setting Value Notes Build presets Select Custom. App location Enter /frontend. This folder contains the front end application. API location /api Folder in the repository containing the API functions. Output location Leave blank. This app has no build output. Select Review + create.
Select Create initiate the first deployment.
Once the process is complete, select Go to resource to open your new static web app.
In the overview section, locate your application's URL. Copy this value into a text editor to use in upcoming steps to set up Entra authentication.
In the Azure portal, search for and go to Microsoft Entra ID.
From the Manage menu, select App registrations.
Select New registration to open the Register an application window. Enter the following values:
Setting Value Notes Name Enter MyStaticWebApp. Supported account types Select Accounts in this organizational directory only. Redirect URI Select Web and enter the Microsoft Entra authentication callback URL of your static web app. Replace <YOUR_SITE_URL>in<YOUR_SITE_URL>/.auth/login/aad/callbackwith the URL of your static web app.This URL is what you copied to a text editor in an earlier step. 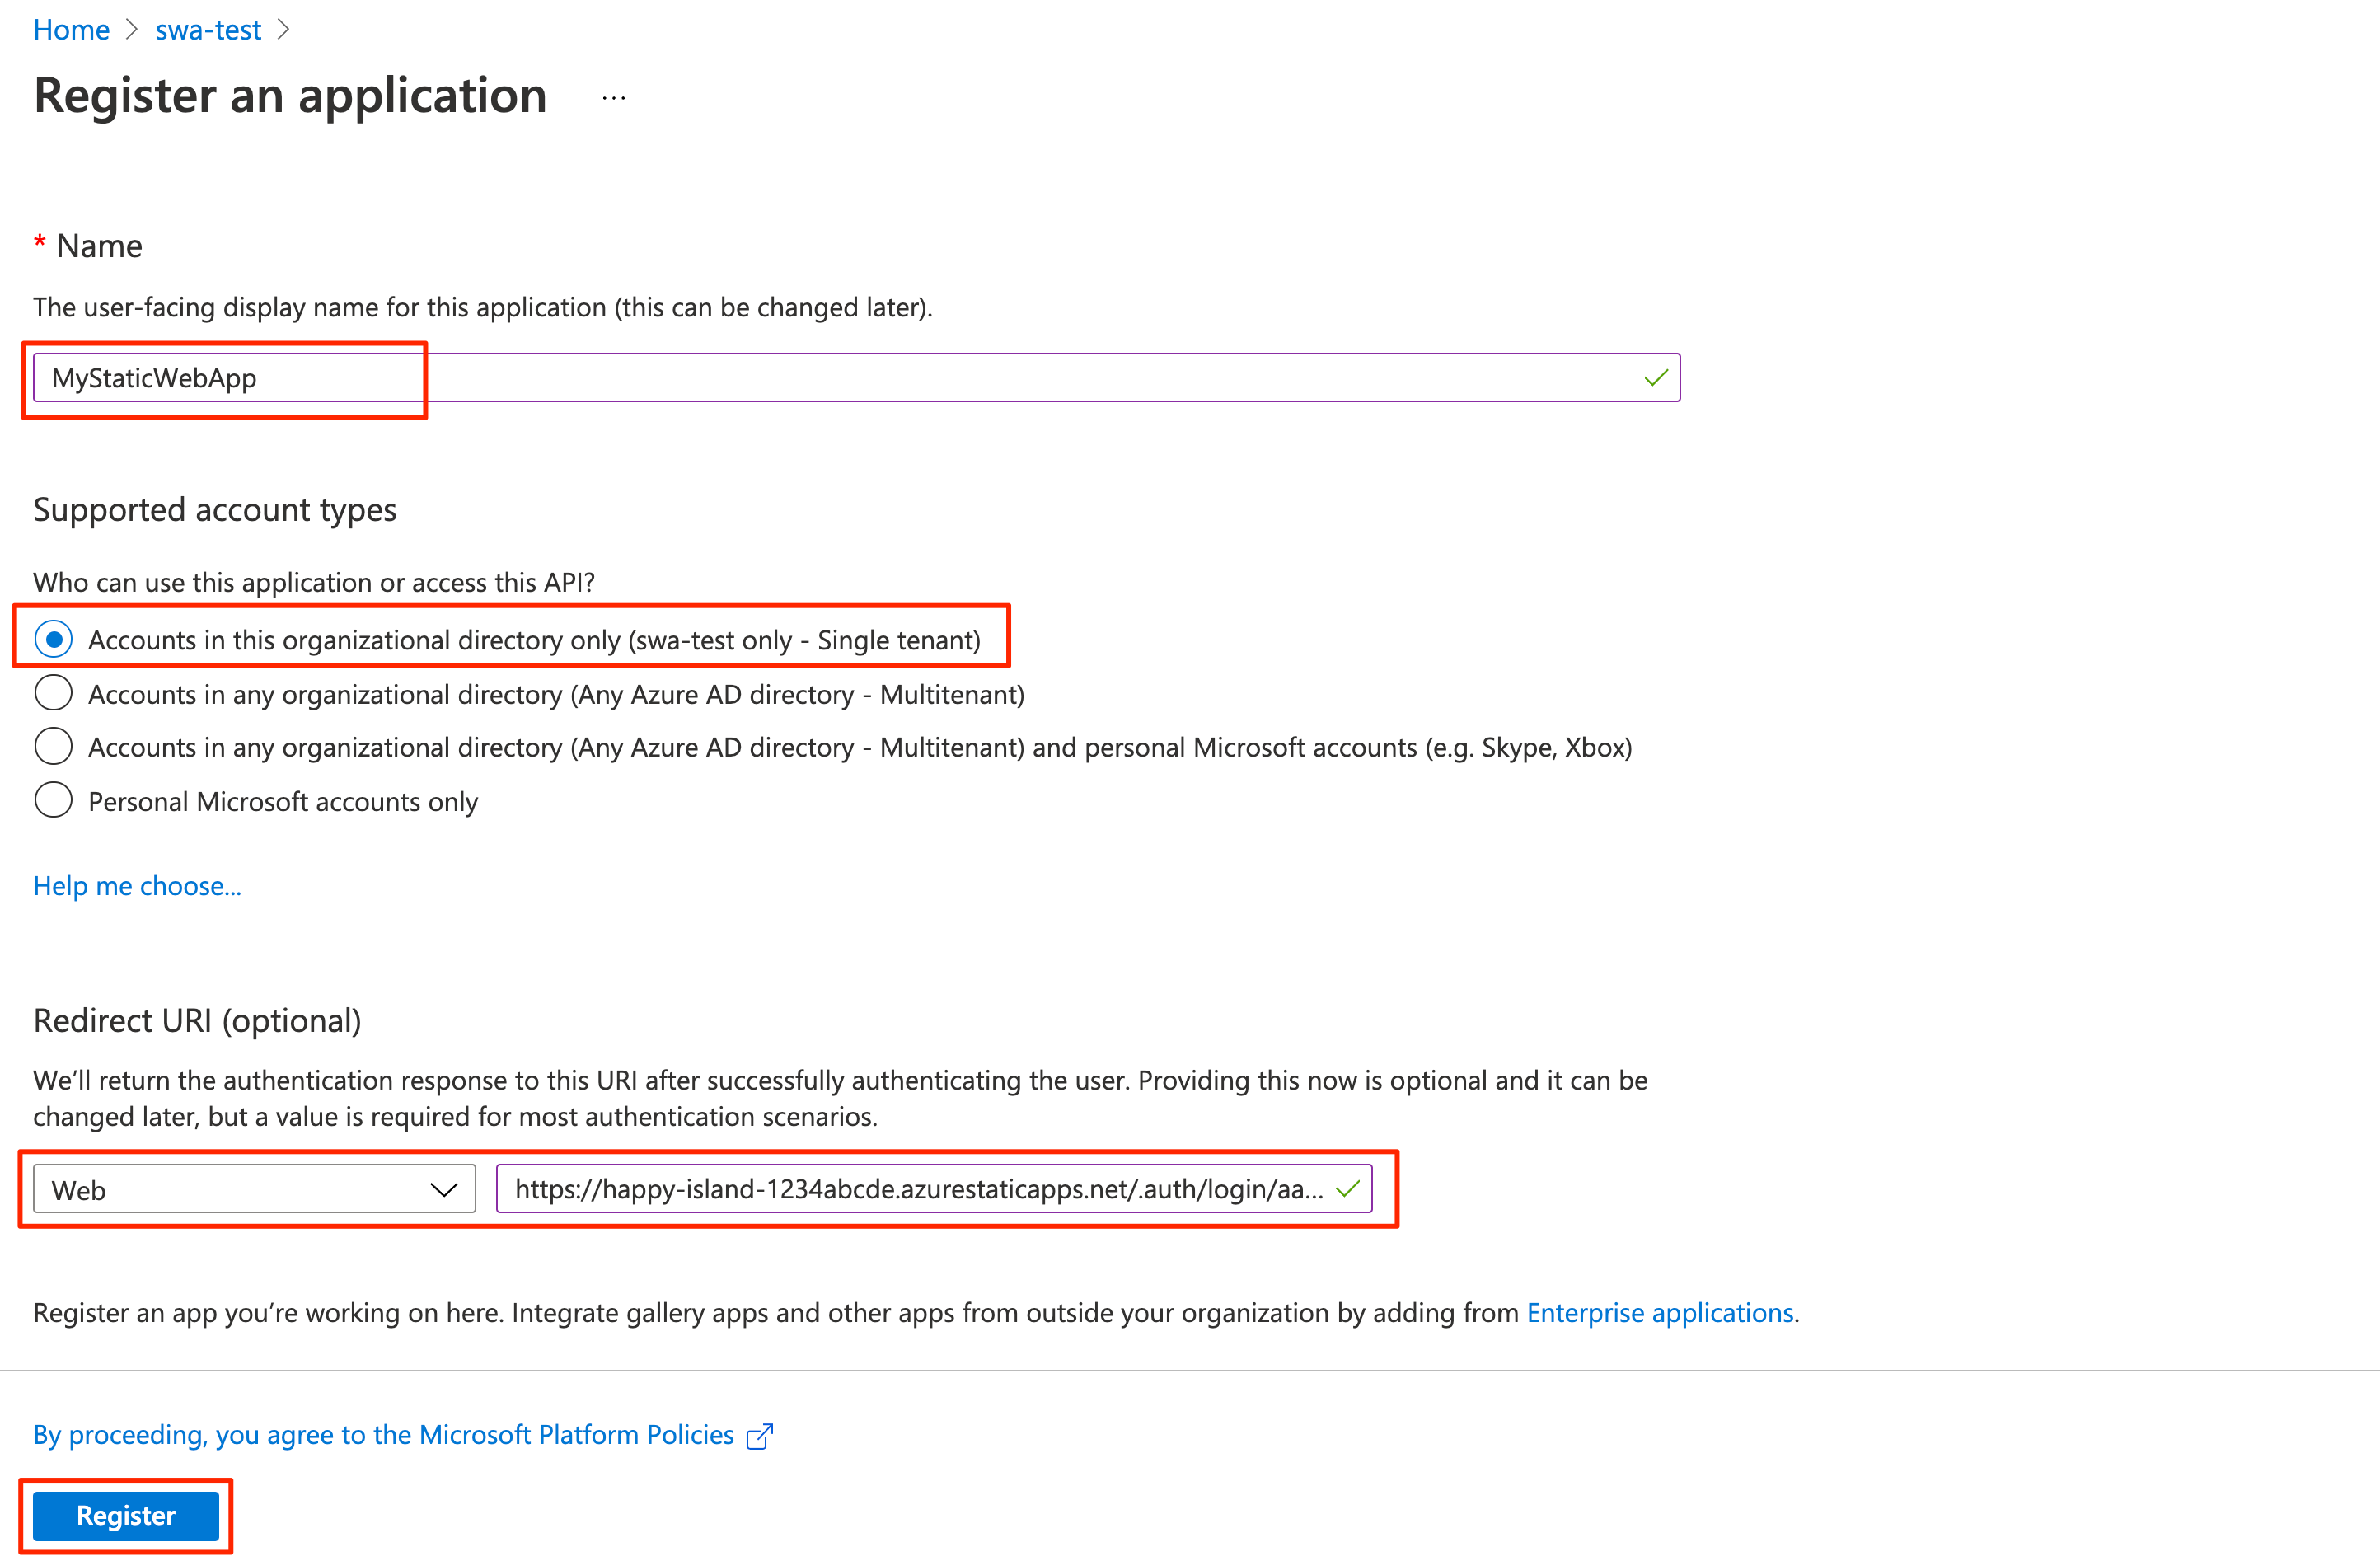
Select Register.
After the app registration is created, copy the Application (client) ID and Directory (tenant) ID in the Essentials section to a text editor.
You need these values to configure Entra ID authentication in your static web app.
From the app registration settings, select Authentication under Manage.
In the Implicit grant and hybrid flows section, select ID tokens (used for implicit and hybrid flows).
The Static Web Apps runtime requires this configuration to authenticate your users.
Select Save.
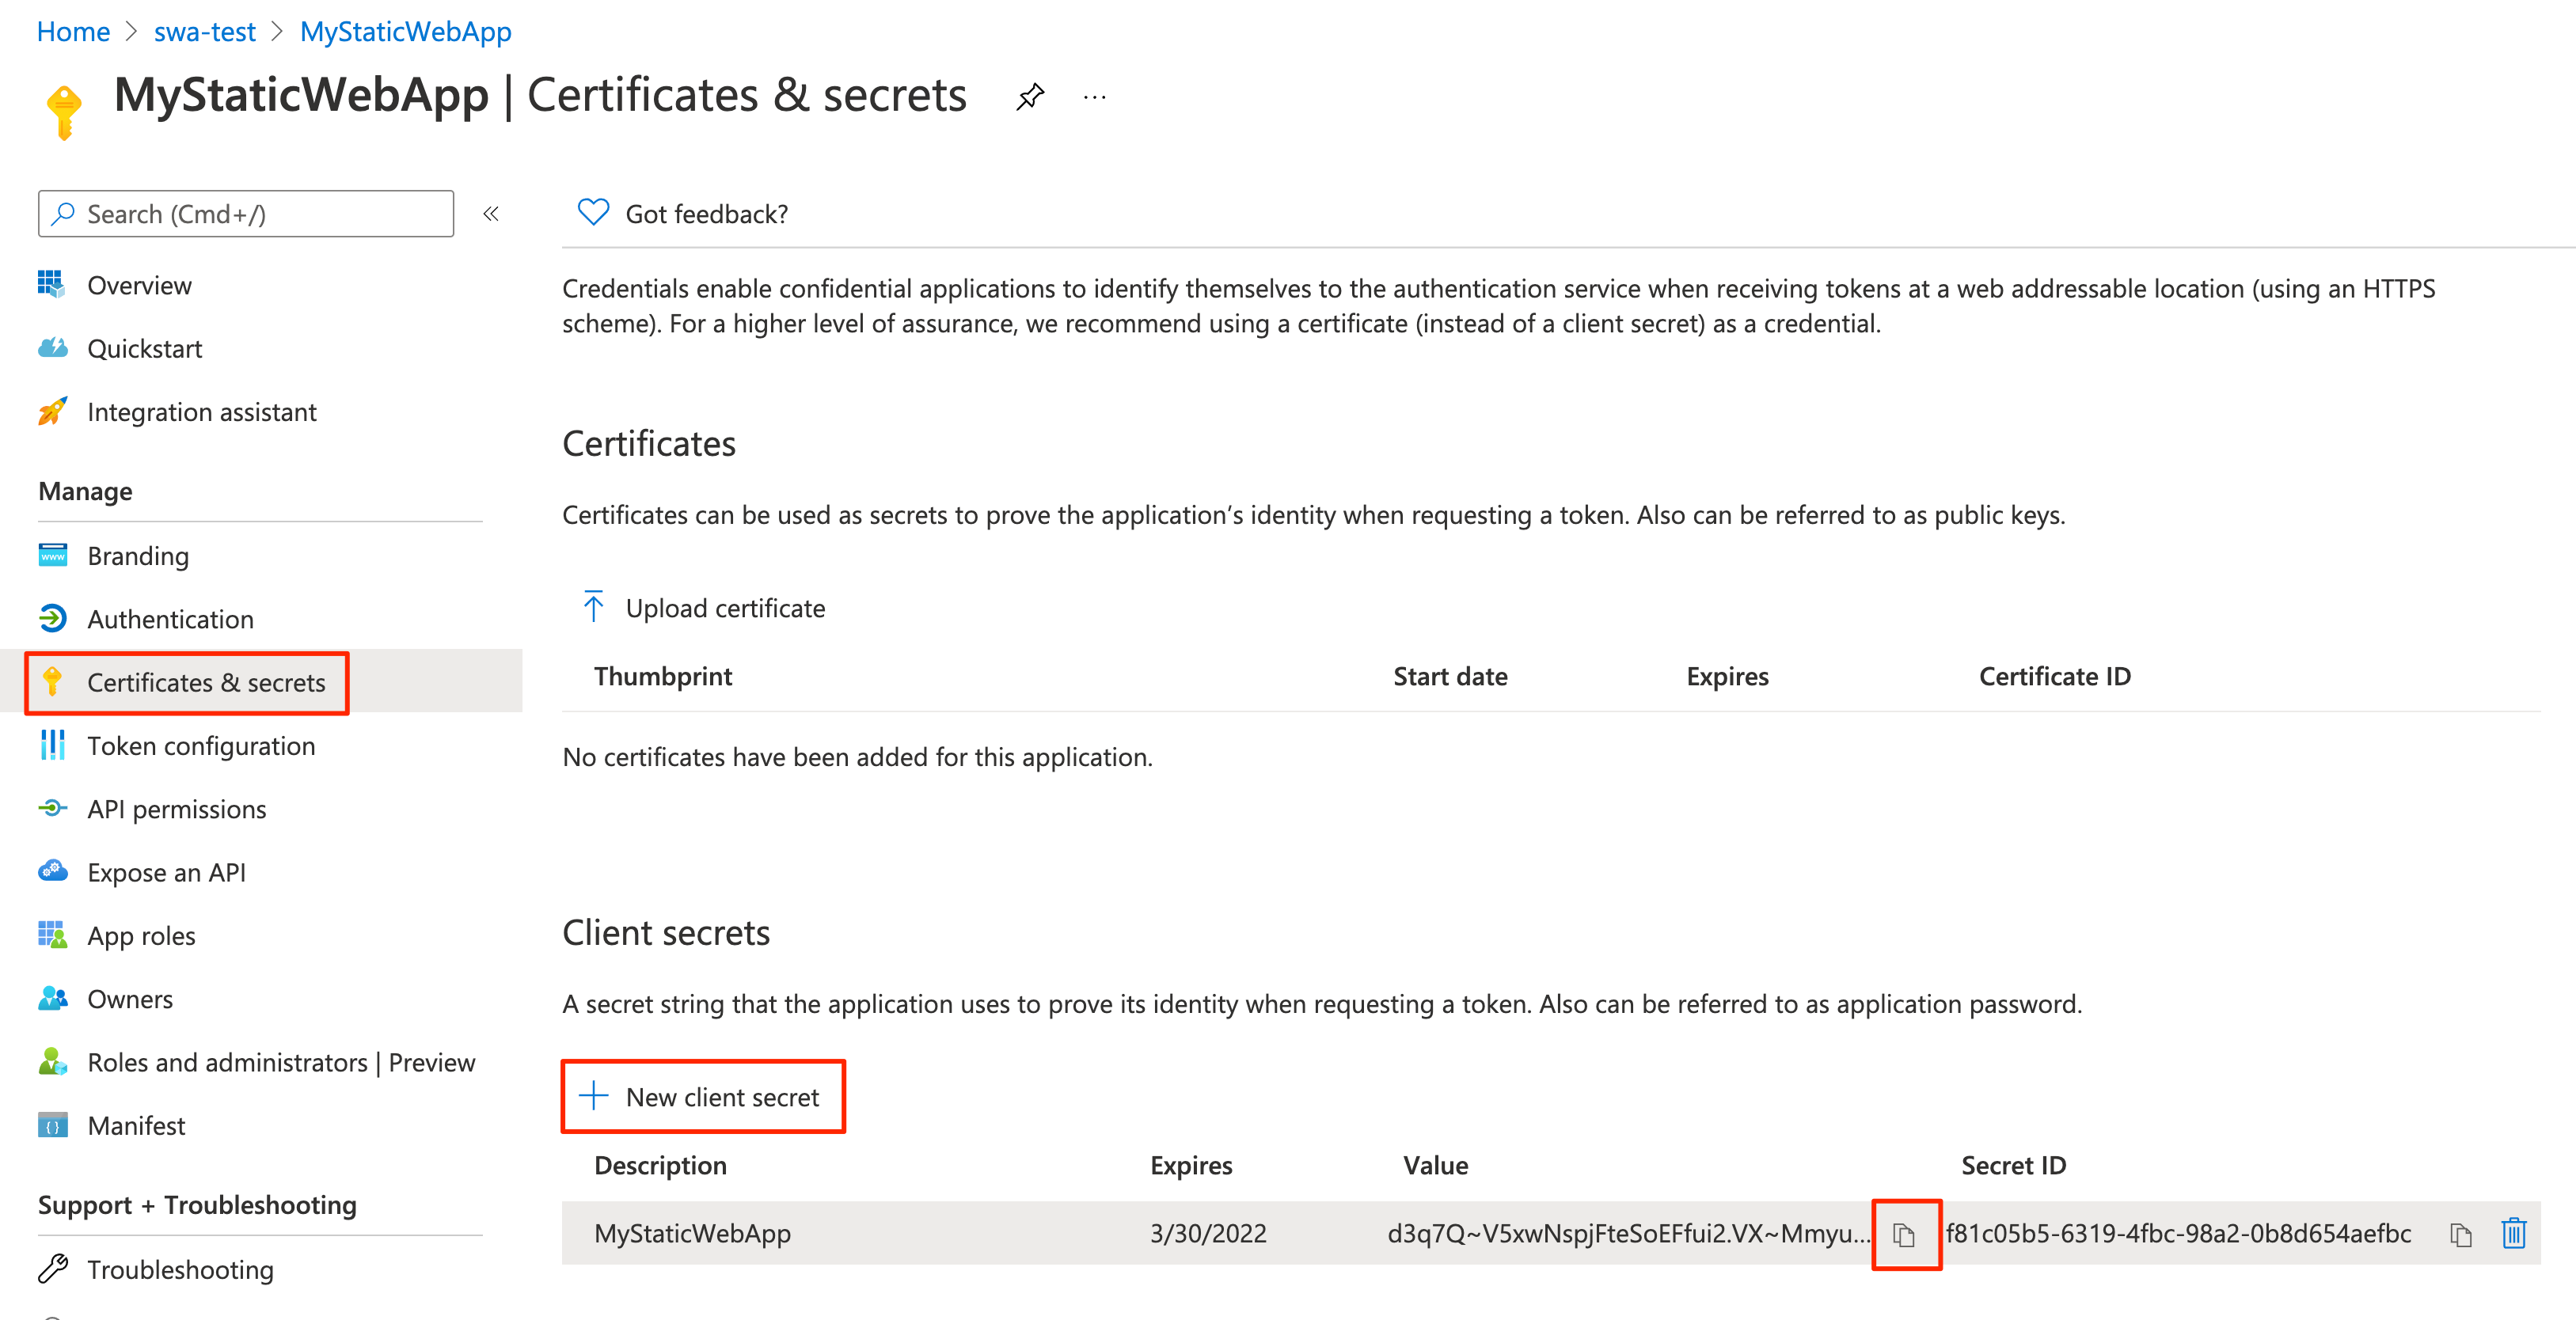
In the app registration settings, select Certificates & secrets under Manage.
In the Client secrets section, select New client secret.
For the Description field, enter MyStaticWebApp.
For the Expires field, leave the default value of 6 months.
Note
You must rotate the secret before the expiration date by generating a new secret and updating your app with its value.
Select Add.
Copy the Value of the client secret you created to a text editor.
You need this value to configure Entra ID authentication in your static web app.
In a browser, open the GitHub repository containing the static web app you deployed.
Go to the app's configuration file at frontend/staticwebapp.config.json. This file contains the following section:
"auth": {
  "rolesSource": "/api/GetRoles",
  "identityProviders": {
    "azureActiveDirectory": {
      "userDetailsClaim": "http://schemas.xmlsoap.org/ws/2005/05/identity/claims/name",
      "registration": {
        "openIdIssuer": "https://login.microsoftonline.com/<YOUR_ENTRA_TENANT_ID>",
        "clientIdSettingName": "ENTRA_CLIENT_ID",
        "clientSecretSettingName": "ENTRA_CLIENT_SECRET"
      },
      "login": {
        "loginParameters": [
          "resource=https://graph.microsoft.com"
        ]
      }
    }
  }
},
This configuration is made up of the following settings:
Properties Description rolesSourceThe URL where the login process gets a list of available roles. For the sample application the URL is /api/GetRoles.userDetailsClaimThe URL of the schema used to validate the login request. openIdIssuerThe Microsoft Entra login route, appended with your tenant ID. clientIdSettingNameYour Microsoft Entra client ID. clientSecretSettingNameYour Microsoft Entra client secret value. loginParametersTo obtain an access token for Microsoft Graph, the loginParametersfield must be configured withresource=https://graph.microsoft.com.Select Edit to update the file.
Update the openIdIssuer value of
https://login.microsoftonline.com/<YOUR_ENTRA_TENANT_ID>by replacing<YOUR_ENTRA_TENANT_ID>with the directory (tenant) ID of your Microsoft Entra ID.Select Commit changes....
Enter a commit message, and select Commit changes.
Committing these changes initiates a GitHub Actions run to update the static web app.
Go to your static web app resource in the Azure portal.
Select Configuration in the menu bar.
In the Application settings section, add the following settings:
Name Value ENTRA_CLIENT_IDYour Entra ID application (client) ID. ENTRA_CLIENT_SECRETYour Entra application client secret value. Select Save.
Open you Entra ID app registration in the Azure portal.
Under Manage, select App roles.
Select Create app role and enter the following values:
Setting Value Display name Enter admin. Allowed member types Select Users/Groups. Value Enter admin. Description Enter Administrator. Check the box for Do you want to enable this app role?
Select Apply.
Now repeat the same process for a role named reader.
Copy the ID values for each role and set them aside in a text editor.
The sample application contains an API function (api/GetRoles/index.js) that queries Microsoft Graph to determine if a user is in a predefined group.
Based on the user's group memberships, the function assigns custom roles to the user. The application is configured to restrict certain routes based on these custom roles.
In your GitHub repository, go to the GetRoles function located at api/GetRoles/index.js.
Near the top, there's a
roleGroupMappingsobject that maps custom user roles to Microsoft Entra groups.Select Edit.
Update the object with group IDs from your Microsoft Entra tenant.
For instance, if you have groups with IDs
6b0b2fff-53e9-4cff-914f-dd97a13bfbd6andb6059db5-9cef-4b27-9434-bb793aa31805, you would update the object to:const roleGroupMappings = { 'admin': '6b0b2fff-53e9-4cff-914f-dd97a13bfbd6', 'reader': 'b6059db5-9cef-4b27-9434-bb793aa31805' };The GetRoles function is called whenever a user is successfully authenticated with Microsoft Entra ID. The function uses the user's access token to query their Entra group membership from Microsoft Graph. If the user is a member of any groups defined in the
roleGroupMappingsobject, then the corresponding custom roles are returned.In the above example, if a user is a member of the Entra ID group with ID
b6059db5-9cef-4b27-9434-bb793aa31805, they're granted thereaderrole.Select Commit changes....
Add a commit message and select Commit changes.
Making these changes initiates a build in to update the static web app.
When the deployment is complete, you can verify your changes by navigating to the app's URL.
Sign in to your static web app using Microsoft Entra ID.
When you're logged in, the sample app displays the list of roles that you're assigned based on your identity's Entra ID group membership.
Depending on these roles, you're permitted or prohibited to access some of the routes in the app.
Note
Some queries against Microsoft Graph return multiple pages of data. When more than one query request is required, Microsoft Graph returns an @odata.nextLink property in the response which contains a URL to the next page of results. For more information, see Paging Microsoft Graph data in your app
Clean up the resources you deployed by deleting the resource group.
From the Azure portal, select Resource group from the left menu.
Enter the resource group name in the Filter by name field.
Select the resource group name you used in this tutorial.
Select Delete resource group from the top menu.