Note
Access to this page requires authorization. You can try signing in or changing directories.
Access to this page requires authorization. You can try changing directories.
Install and configure SharePoint Server Subscription Edition (SE) to host the Microsoft Identity Manager (MIM) Portal page. SharePoint SE is the recommended version for new MIM deployments.
Important
SharePoint Server 2019 reaches end of support on July 14, 2026. If you're currently using SharePoint Server 2019, plan your migration to SharePoint Server Subscription Edition. For more information, see SharePoint Server 2019 lifecycle information. If you still need to set up SharePoint Server 2019, see Set up an identity management server: SharePoint.
Note
This walkthrough uses sample names and values from a company called Contoso. Replace these with your own. For example:
- Domain controller name - corpdc
- Domain name - contoso
- MIM Service Server name - corpservice
- MIM Sync Server name - corpsync
- SQL Server name - corpsql
- Password - Pass@word1
Prerequisites
Before you start, verify that you have:
- A domain account with local admin privileges on the corpservice server and sysadmin access on the SQL database server (for example, contoso\miminstall)
- An internet connection on the server, or an extra network interface that provides internet connectivity for prerequisite downloads (you can disable it after installation)
- Completion of Set up a server for identity management: SQL Server
Install SharePoint Server Subscription Edition
SharePoint Server SE uses the same installation process as SharePoint Server 2019. After you finish installation, the server restarts.
Launch PowerShell as a domain account with local admin privileges on corpservice and sysadmin access on the SQL database server (for example, contoso\miminstall).
Change to the directory where SharePoint was unpacked.
Run the prerequisite installer:
.\prerequisiteinstaller.exeAfter the prerequisites install, run SharePoint setup:
.\setup.exeSelect the complete server type.
After the install completes, run the wizard.
Configure SharePoint with the Products Configuration Wizard
Follow the steps in the SharePoint Products Configuration Wizard to configure SharePoint to work with MIM.
On the Connect to a server farm tab, select the option to create a new server farm.
Specify the database server (for example, corpsql) for the configuration database, and specify Contoso\SharePoint as the database access account for SharePoint.
Create a password for the farm security passphrase.
In the configuration wizard, select MinRole type of Front-end.
When the configuration wizard completes configuration task 10 of 10, select Finish. A web browser opens.
If prompted, authenticate as Contoso\miminstall (or your equivalent administrator account) to proceed.
In the web wizard (within the web app), select Cancel/Skip.
Configure local security policies
SharePoint Server SE requires specific local security policies for the application pool and SQL Server accounts.
Launch the Local Security Policy program.
Navigate to Local Policies > User Rights Assignment.
Add your AppPool account to these policies:
- Act as part of the operating system
- Impersonate a client after authentication
Prepare SharePoint to host the MIM Portal
The following procedures create the SharePoint web application and site collection that host the MIM Portal.
Note
Initially, SSL isn't configured. Configure SSL or equivalent before you enable access to this portal.
Create the web application
Launch SharePoint Management Shell and run the following PowerShell script to create a SharePoint Web Application:
New-SPManagedAccount ##Will prompt for new account enter contoso\mimpool
$dbManagedAccount = Get-SPManagedAccount -Identity contoso\mimpool
New-SpWebApplication -Name "MIM Portal" -ApplicationPool "MIMAppPool" -ApplicationPoolAccount $dbManagedAccount -AuthenticationMethod "Kerberos" -Port 80 -URL http://mim.contoso.com
Note
A warning message appears saying that Windows Classic authentication method is being used. It might take several minutes for the final command to return. When completed, the output indicates the URL of the new portal. Keep the SharePoint Management Shell window open for later steps.
Create the site collection and unblock ASHX files
In the same SharePoint Management Shell, run the following PowerShell script to create a SharePoint Site Collection:
$t = Get-SPWebTemplate -compatibilityLevel 15 -Identity "STS#1"
$w = Get-SPWebApplication http://mim.contoso.com/
New-SPSite -Url $w.Url -Template $t -OwnerAlias contoso\miminstall -CompatibilityLevel 15 -Name "MIM Portal"
$s = SpSite($w.Url)
$s.CompatibilityLevel
Note
Verify that the result of the CompatibilityLevel variable is "15". If the result isn't "15", delete the site collection and recreate it.
Unblock ASHX files used by the MIM Portal. SharePoint Server SE and SharePoint Server 2019 both use a web application property that blocks certain file extensions. Run these three commands to unblock ASHX files:
$w.BlockedASPNetExtensions.Remove("ashx")
$w.Update()
$w.BlockedASPNetExtensions
Note
Verify that the BlockedASPNetExtensions list no longer contains the ASHX extension. If ASHX is still listed, several MIM Portal pages fail to render correctly.
Disable server-side viewstate and health analysis
Disable SharePoint Server-Side Viewstate and the SharePoint task "Health Analysis Job (Hourly, Microsoft SharePoint Foundation Timer, All Servers)" by running the following PowerShell commands:
$contentService = [Microsoft.SharePoint.Administration.SPWebService]::ContentService;
$contentService.ViewStateOnServer = $false;
$contentService.Update();
Get-SPTimerJob hourly-all-sptimerservice-health-analysis-job | disable-SPTimerJob
Important
Applicable to MIM builds prior to 4.6.673.0 only. If you deploy on SharePoint with September 2023 updates or later, also run the following commands from the SharePoint Management Shell:
$f = get-spfarm
$f.AddGenericAllowedListValue("WebPartSupportedBoundPropertyNames","data-title-text")
$f.AddGenericAllowedListValue("WebPartSupportedBoundPropertyNames","data-link-to-tab-text")
$f.update()
iisreset
Verify the MIM Portal
Open a web browser tab and navigate to
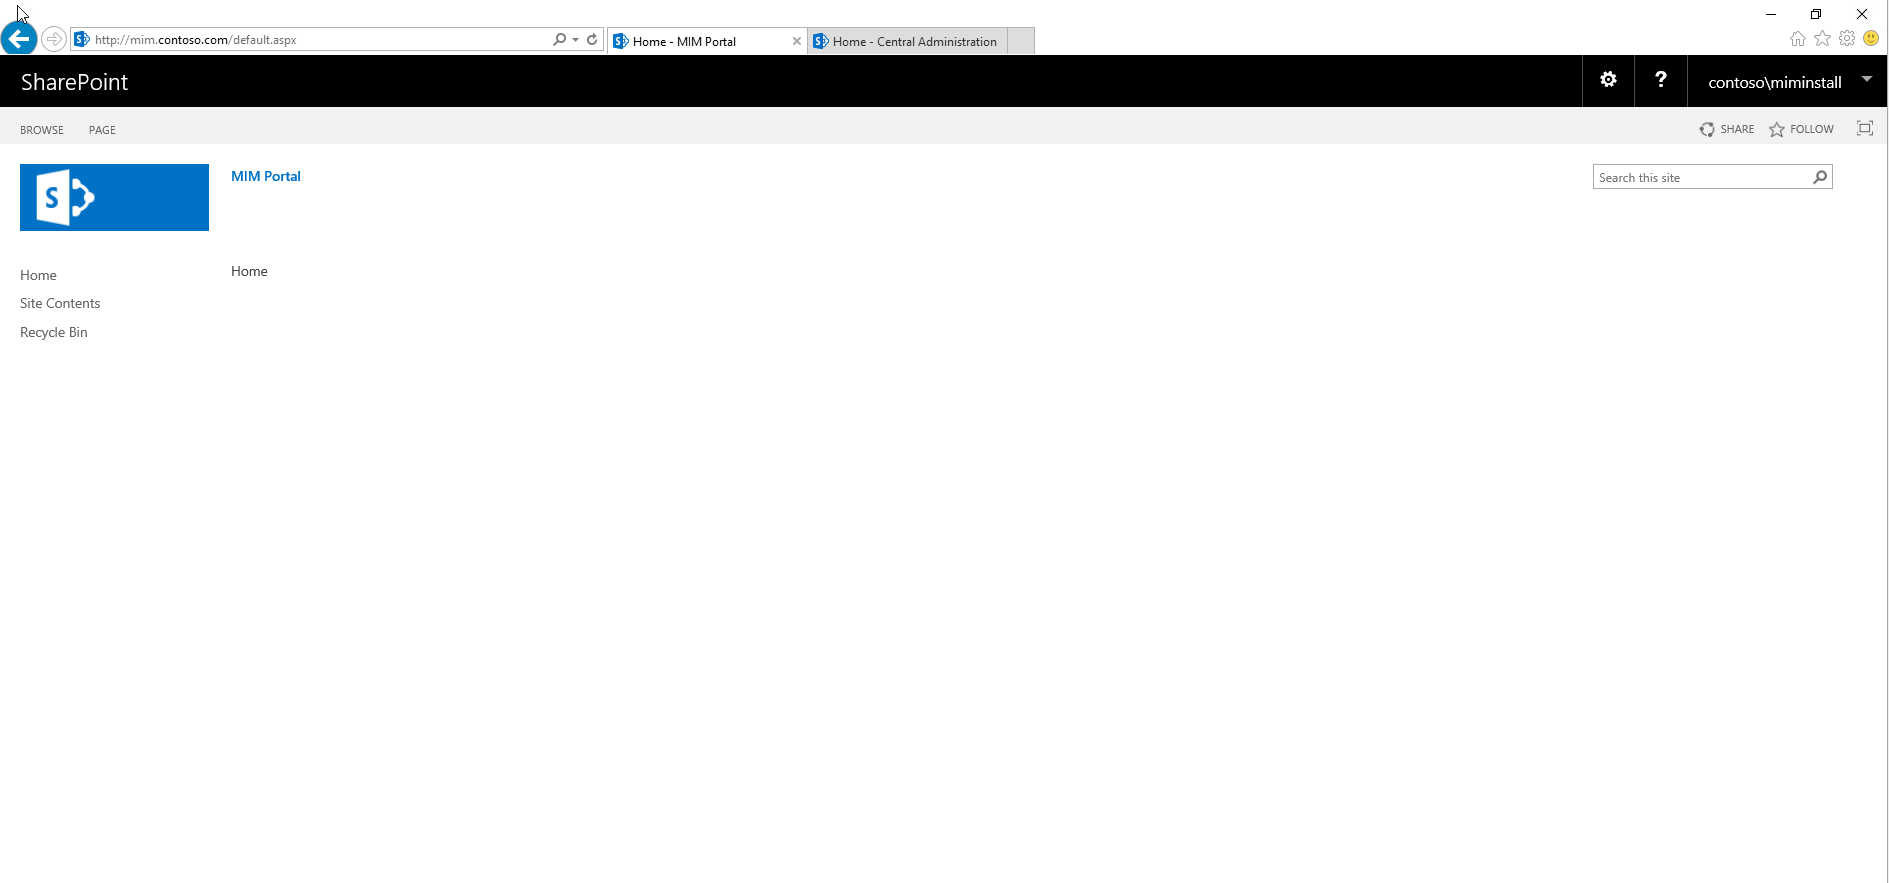
http://mim.contoso.com/.Sign in as contoso\miminstall. An empty SharePoint site named MIM Portal appears.
Copy the URL, then in Internet Explorer, open Internet Options, change to the Security tab, select Local intranet, and select Sites.
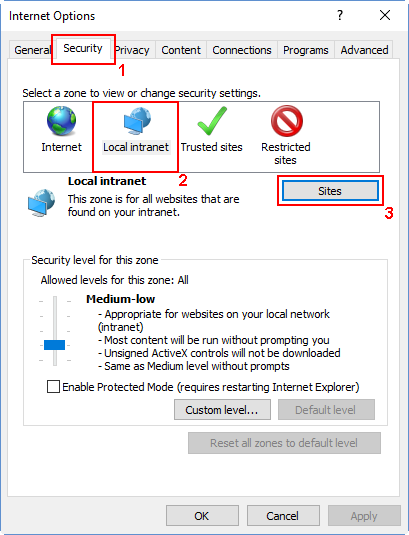
In the Local intranet window, select Advanced and paste the copied URL in the Add this website to the zone text box. Select Add then close the windows.
Open Administrative Tools, navigate to Services, locate the SharePoint Administration service, and start it if it isn't already running.