Note
Access to this page requires authorization. You can try signing in or changing directories.
Access to this page requires authorization. You can try changing directories.
Azure Key Vault is a cloud service that provides a secure store for secrets. You can securely store keys, passwords, certificates, and other secrets. In this tutorial, you create a key vault and use it to import a certificate. For more information about Key Vault, see the overview.
The tutorial shows you how to:
- Create a key vault.
- Import a certificate in Key Vault using the portal.
- Import a certificate in Key Vault using the CLI.
- Import a certificate in Key Vault using PowerShell.
Before you begin, read Key Vault basic concepts.
If you don't have an Azure subscription, create a free account before you begin.
Sign in to Azure
Sign in to the Azure portal.
Create a key vault
Create a key vault using one of these three methods:
- Create a key vault using the Azure portal
- Create a key vault using the Azure CLI
- Create a key vault using Azure PowerShell
Import a certificate to your key vault
Note
By default, imported certificates have exportable private keys. You can use the SDK, Azure CLI, or PowerShell to define policies that prevent the private key from being exported.
To import a certificate to the vault, you need a PEM or PFX certificate file on disk. If the certificate is in PEM format, the PEM file must contain the key and the x509 certificates. This operation requires the certificates/import permission (or the Key Vault Certificates Officer role when the vault uses Azure RBAC).
Important
Key Vault supports the PFX and PEM certificate formats.
- A
.pemfile contains one or more X509 certificate files. - A
.pfxfile is an archive format that stores several cryptographic objects in a single file, such as a server certificate, its matching private key, and (optionally) an intermediate CA.
In this example, you import a certificate named ExampleCertificate from the path /path/to/cert.pem. You can import a certificate from the Azure portal, the Azure CLI, or Azure PowerShell.
- On the page for your key vault, select Certificates.
- Select Generate/Import.
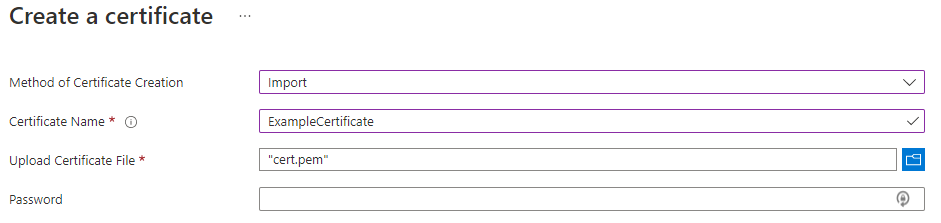
- On the Create a certificate screen, choose the following values:
- Method of Certificate Creation: Import.
- Certificate Name:
ExampleCertificate. - Upload Certificate File: Select the certificate file from disk.
- Password: If the certificate file is password protected, enter the password. Otherwise, leave it blank. After the certificate is imported, Key Vault removes the password.
- Select Create.
When importing a .pem file, check if the format is the following:
-----BEGIN CERTIFICATE-----
MIID2TCCAsGg...
-----END CERTIFICATE-----
-----BEGIN PRIVATE KEY-----
MIIEvQIBADAN...
-----END PRIVATE KEY-----
When you import a certificate, Key Vault automatically populates certificate parameters such as validity period, issuer name, and activation date.
After you see the message that the certificate imported successfully, select it in the list to view its properties.
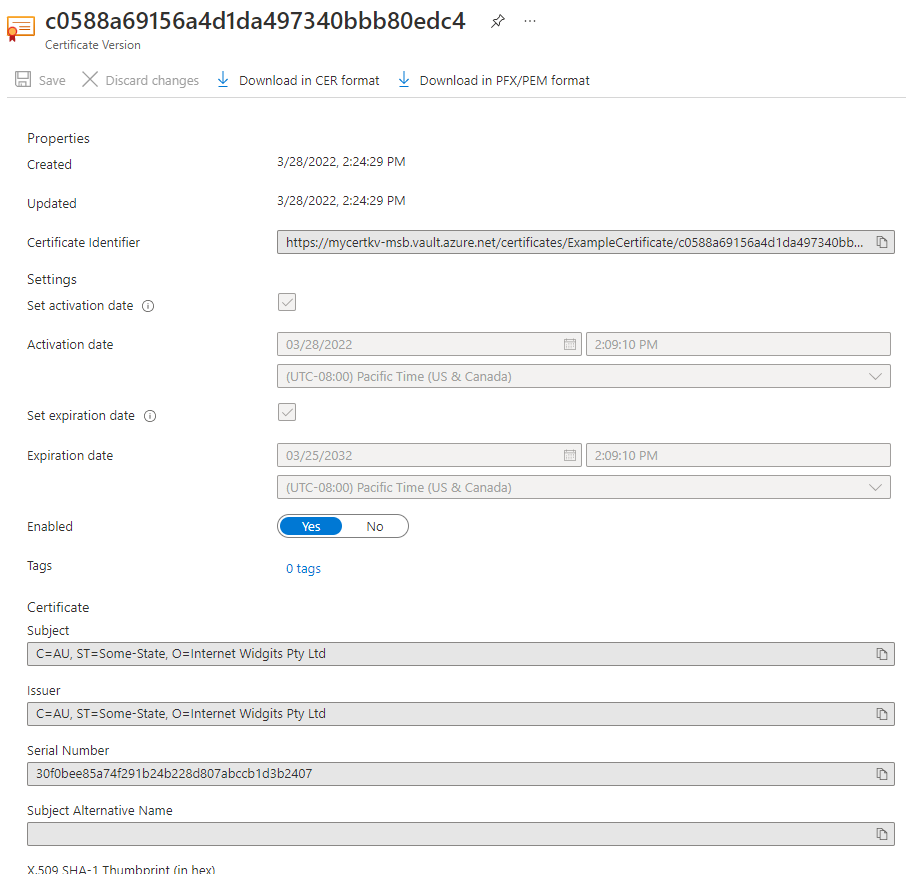
You created a key vault, imported a certificate, and viewed the certificate's properties.
Clean up resources
Other Key Vault quickstarts and tutorials build on this tutorial. If you plan to work with them, leave these resources in place. When you no longer need the resources, delete the resource group. Deleting the resource group deletes the key vault and any related resources. To delete the resource group in the portal:
- Enter the resource group name in the search box at the top of the portal, and select it from the results.
- Select Delete resource group.
- In the TYPE THE RESOURCE GROUP NAME: box, enter the resource group name and select Delete.
Next steps
In this tutorial, you created a key vault and imported a certificate. To learn more about Key Vault and integrate it with your applications, see: