Note
Access to this page requires authorization. You can try signing in or changing directories.
Access to this page requires authorization. You can try changing directories.
Azure Key Vault helps you provision, manage, and deploy digital certificates. Certificates can be public or private TLS/SSL certificates signed by a certificate authority (CA), or self-signed. Key Vault can also request and renew certificates through partnerships with CAs, which provides a full certificate lifecycle management solution.
For an overview of autorotation across different asset types in Azure Key Vault, see Understanding autorotation in Azure Key Vault.
In this tutorial, you update a certificate's validity period, autorotation frequency, and CA attributes.
- Manage a certificate by using the Azure portal.
- Add a CA provider account.
- Update the certificate's validity period.
- Update the certificate's auto-rotation frequency.
- Update the certificate's attributes by using Azure PowerShell.
Before you begin, read Key Vault basic concepts.
If you don't have an Azure subscription, create a free account before you begin.
Sign in to Azure
Sign in to the Azure portal.
Create a vault
Create a key vault using one of these three methods:
- Create a key vault using the Azure portal
- Create a key vault using the Azure CLI
- Create a key vault using Azure PowerShell
Create a certificate in Key Vault
Create a certificate or import a certificate into the key vault (see Steps to create a certificate in Key Vault). This tutorial uses a certificate named ExampleCertificate.
Update certificate lifecycle attributes
In Azure Key Vault, you can update a certificate's lifecycle attributes at the time of creation or afterward.
A certificate created in Key Vault can be:
- A self-signed certificate.
- A certificate created with a CA that's partnered with Key Vault.
- A certificate created with a CA that isn't partnered with Key Vault.
Key Vault currently has these partnered CAs:
- DigiCert: Key Vault offers OV or EV TLS/SSL certificates.
- GlobalSign: Key Vault offers OV or EV TLS/SSL certificates.
Key Vault autorotates certificates through its CA partnerships. Because Key Vault automatically requests and renews certificates through the partnership, autorotation doesn't apply to certificates created with non-partnered CAs.
Note
An account admin for a CA provider creates credentials that Key Vault uses to create, renew, and use TLS/SSL certificates.
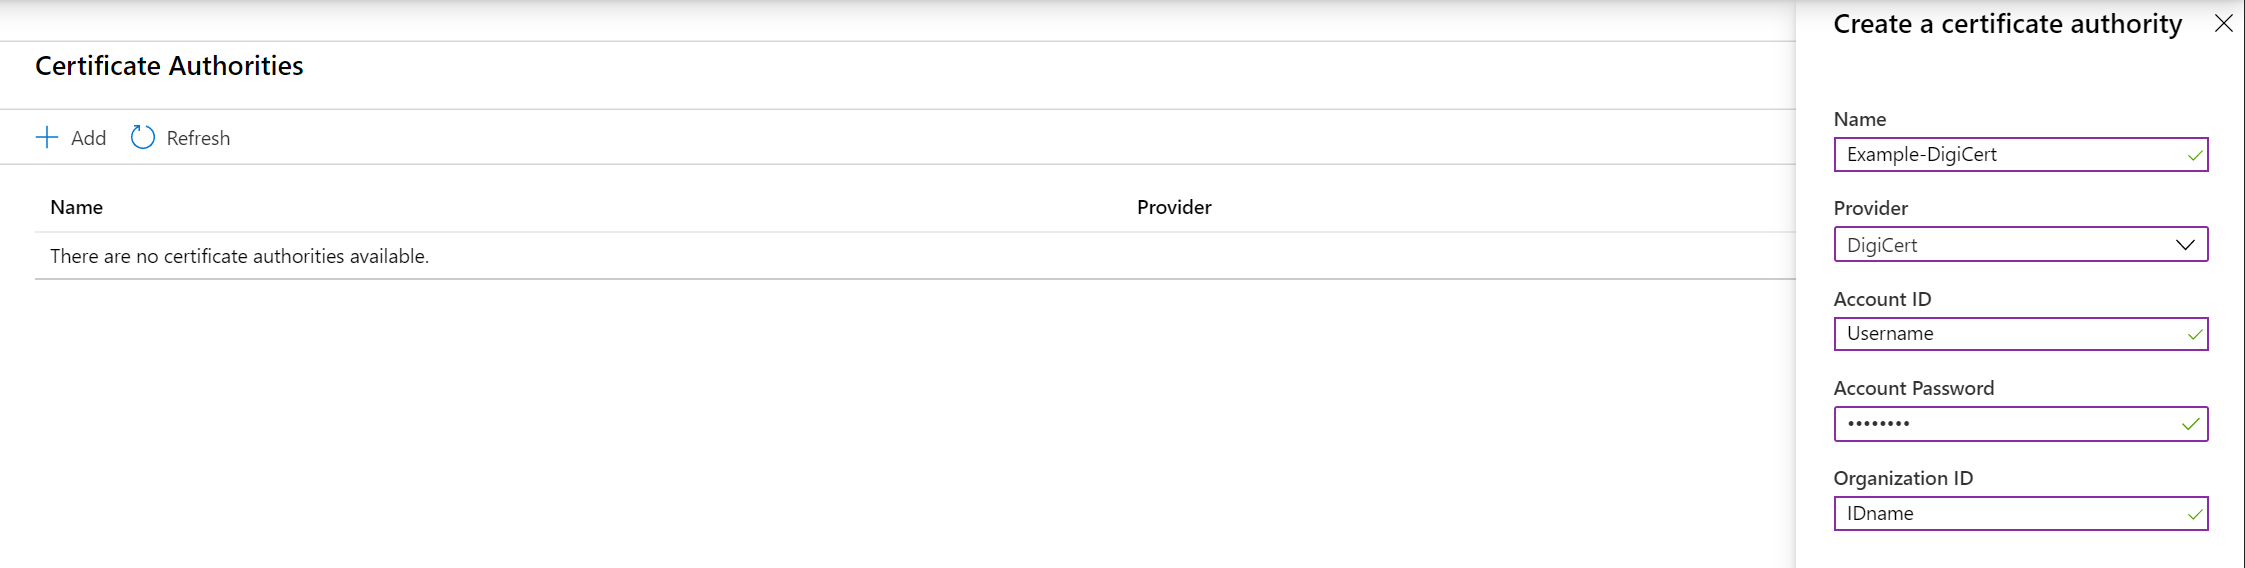
Update certificate lifecycle attributes at the time of creation
On the Key Vault properties pages, select Certificates.
Select Generate/Import.
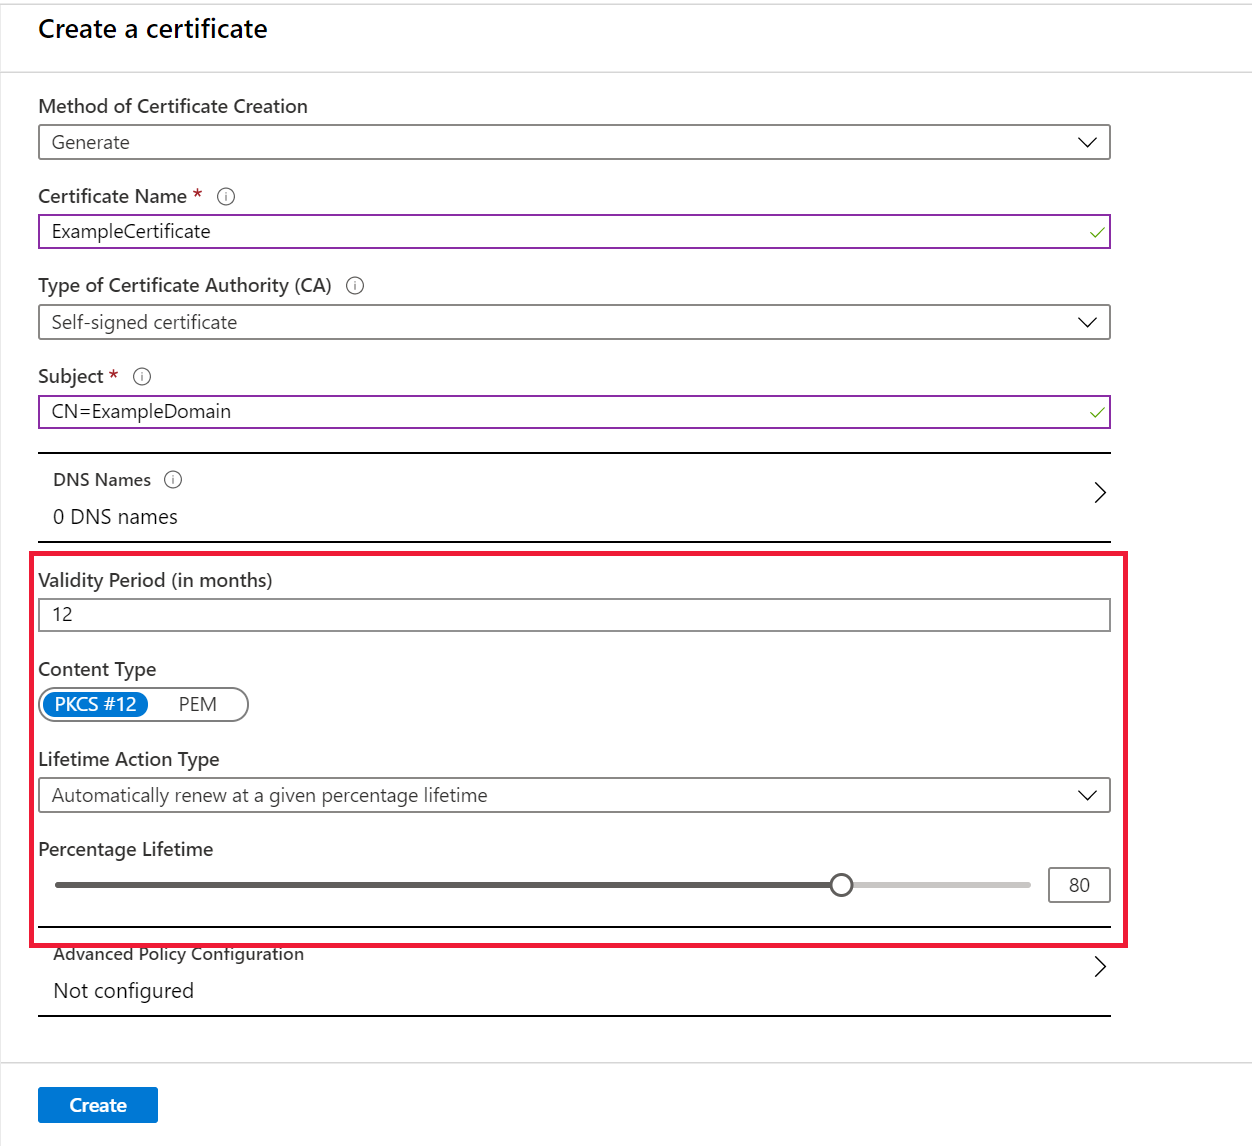
On the Create a certificate screen, update the following values:
Validity Period: Enter the value in months. Short-lived certificates are a security best practice. By default, a newly created certificate has a 12-month validity period.
Lifetime Action Type: Select the certificate's autorenewal and alerting action, then update percentage lifetime or Number of days before expiry. By default, autorenewal is set at 80 percent of the certificate lifetime. From the dropdown menu, select one of the following options.
Automatically renew at a given time Email all contacts at a given time Turns on autorotation. Doesn't autorotate; only alerts the contacts. For more information, see Get notified about certificate expiration.
Select Create.
Update lifecycle attributes of a stored certificate
Select the key vault.
On the Key Vault properties pages, select Certificates.
Select the certificate you want to update. This tutorial uses a certificate named ExampleCertificate.
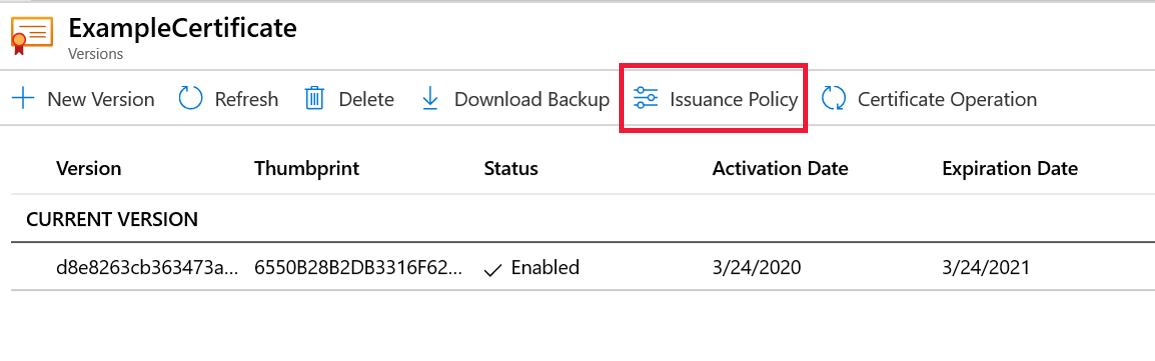
On the top menu bar, select Issuance Policy.
On the Issuance Policy screen, update the following values:
- Validity Period: Update the value in months.
- Lifetime Action Type: Select the certificate's autorenewal and alerting action, then update percentage lifetime or Number of days before expiry.
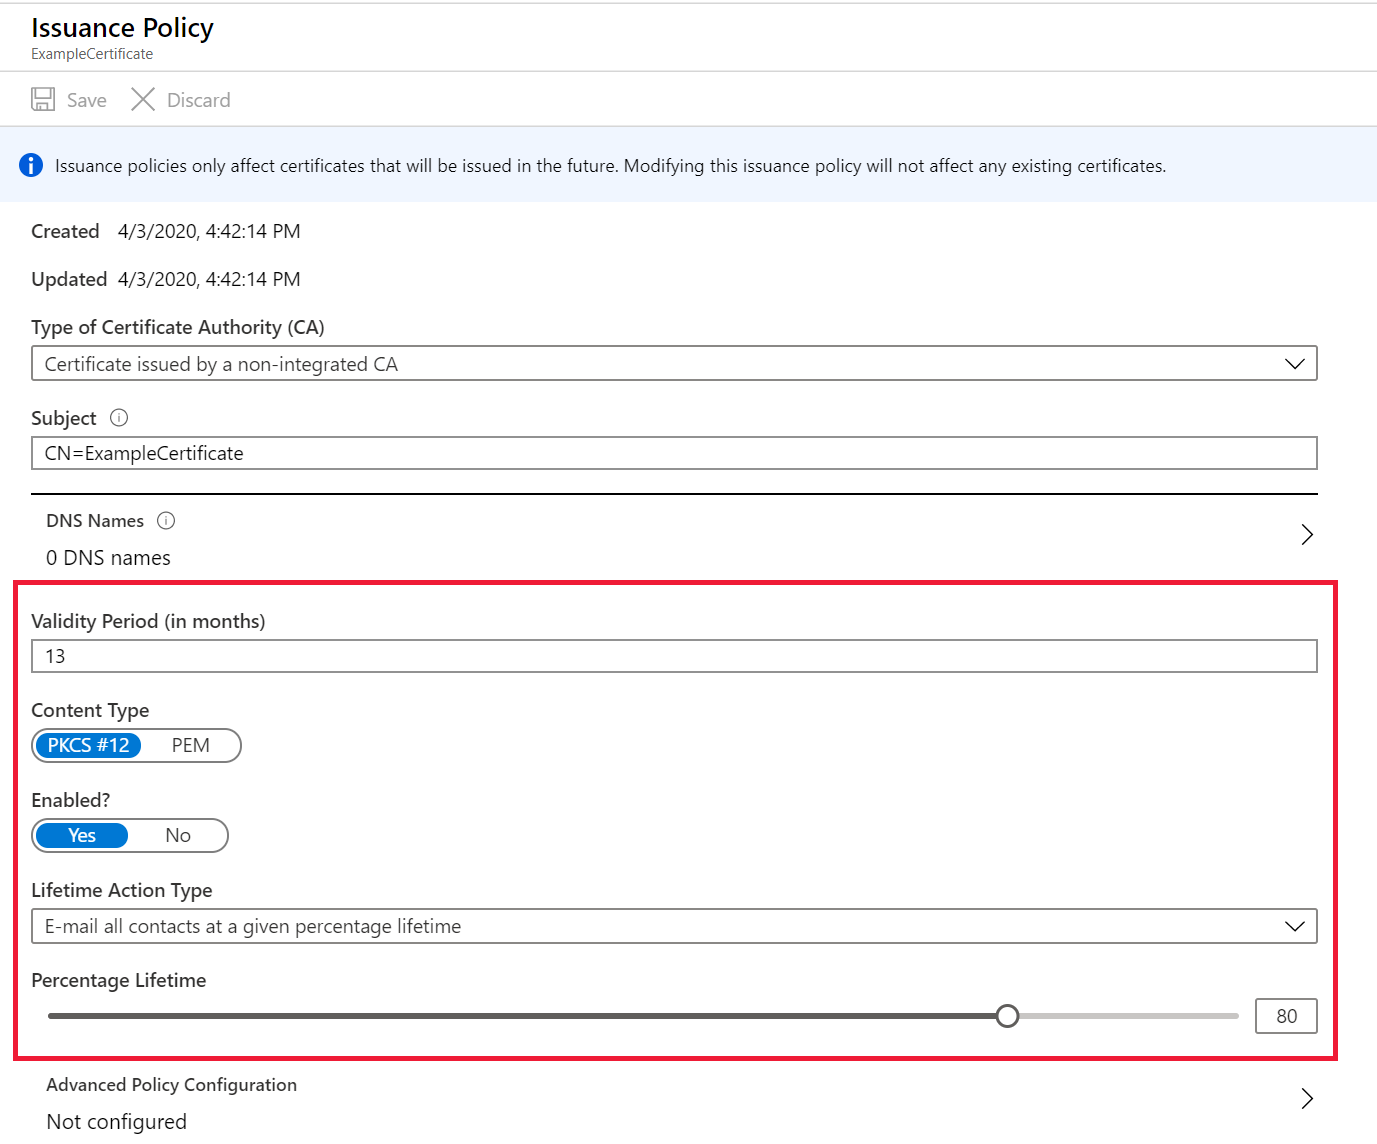
Select Save.
Important
Changing the Lifetime Action Type for a certificate applies to the existing certificate immediately.
Update certificate attributes by using PowerShell
Set-AzKeyVaultCertificatePolicy -VaultName $vaultName `
                                -Name $certificateName `
                                -RenewAtNumberOfDaysBeforeExpiry [276 or appropriate calculated value]
Tip
To modify the renewal policy for a list of certificates, enter File.csv containing
VaultName,CertName as in the following example:
vault1,Cert1
vault2,Cert2
$file = Import-CSV C:\Users\myfolder\ReadCSVUsingPowershell\File.csv
foreach($line in $file)
{
Set-AzKeyVaultCertificatePolicy -VaultName $vaultName -Name $certificateName -RenewAtNumberOfDaysBeforeExpiry [276 or appropriate calculated value]
}
To learn more about the parameters, see az keyvault certificate.
Clean up resources
Other Key Vault tutorials build on this one. If you plan to work with them, leave the resources in place. When you no longer need them, delete the resource group. Deleting the resource group deletes the key vault and related resources.
To delete the resource group in the portal:
- Enter the resource group name in the Search box at the top of the portal, and select it from the results.
- Select Delete resource group.
- In the TYPE THE RESOURCE GROUP NAME: box, enter the resource group name, then select Delete.
Next steps
In this tutorial, you updated a certificate's lifecycle attributes. To learn more about Key Vault and how to integrate it with your applications, see: