Tutorial - Prepare an application for Azure Kubernetes Service (AKS)
In this tutorial, part one of seven, you prepare a multi-container application to use in Kubernetes. You use existing development tools like Docker Compose to locally build and test the application. You learn how to:
- Clone a sample application source from GitHub.
- Create a container image from the sample application source.
- Test the multi-container application in a local Docker environment.
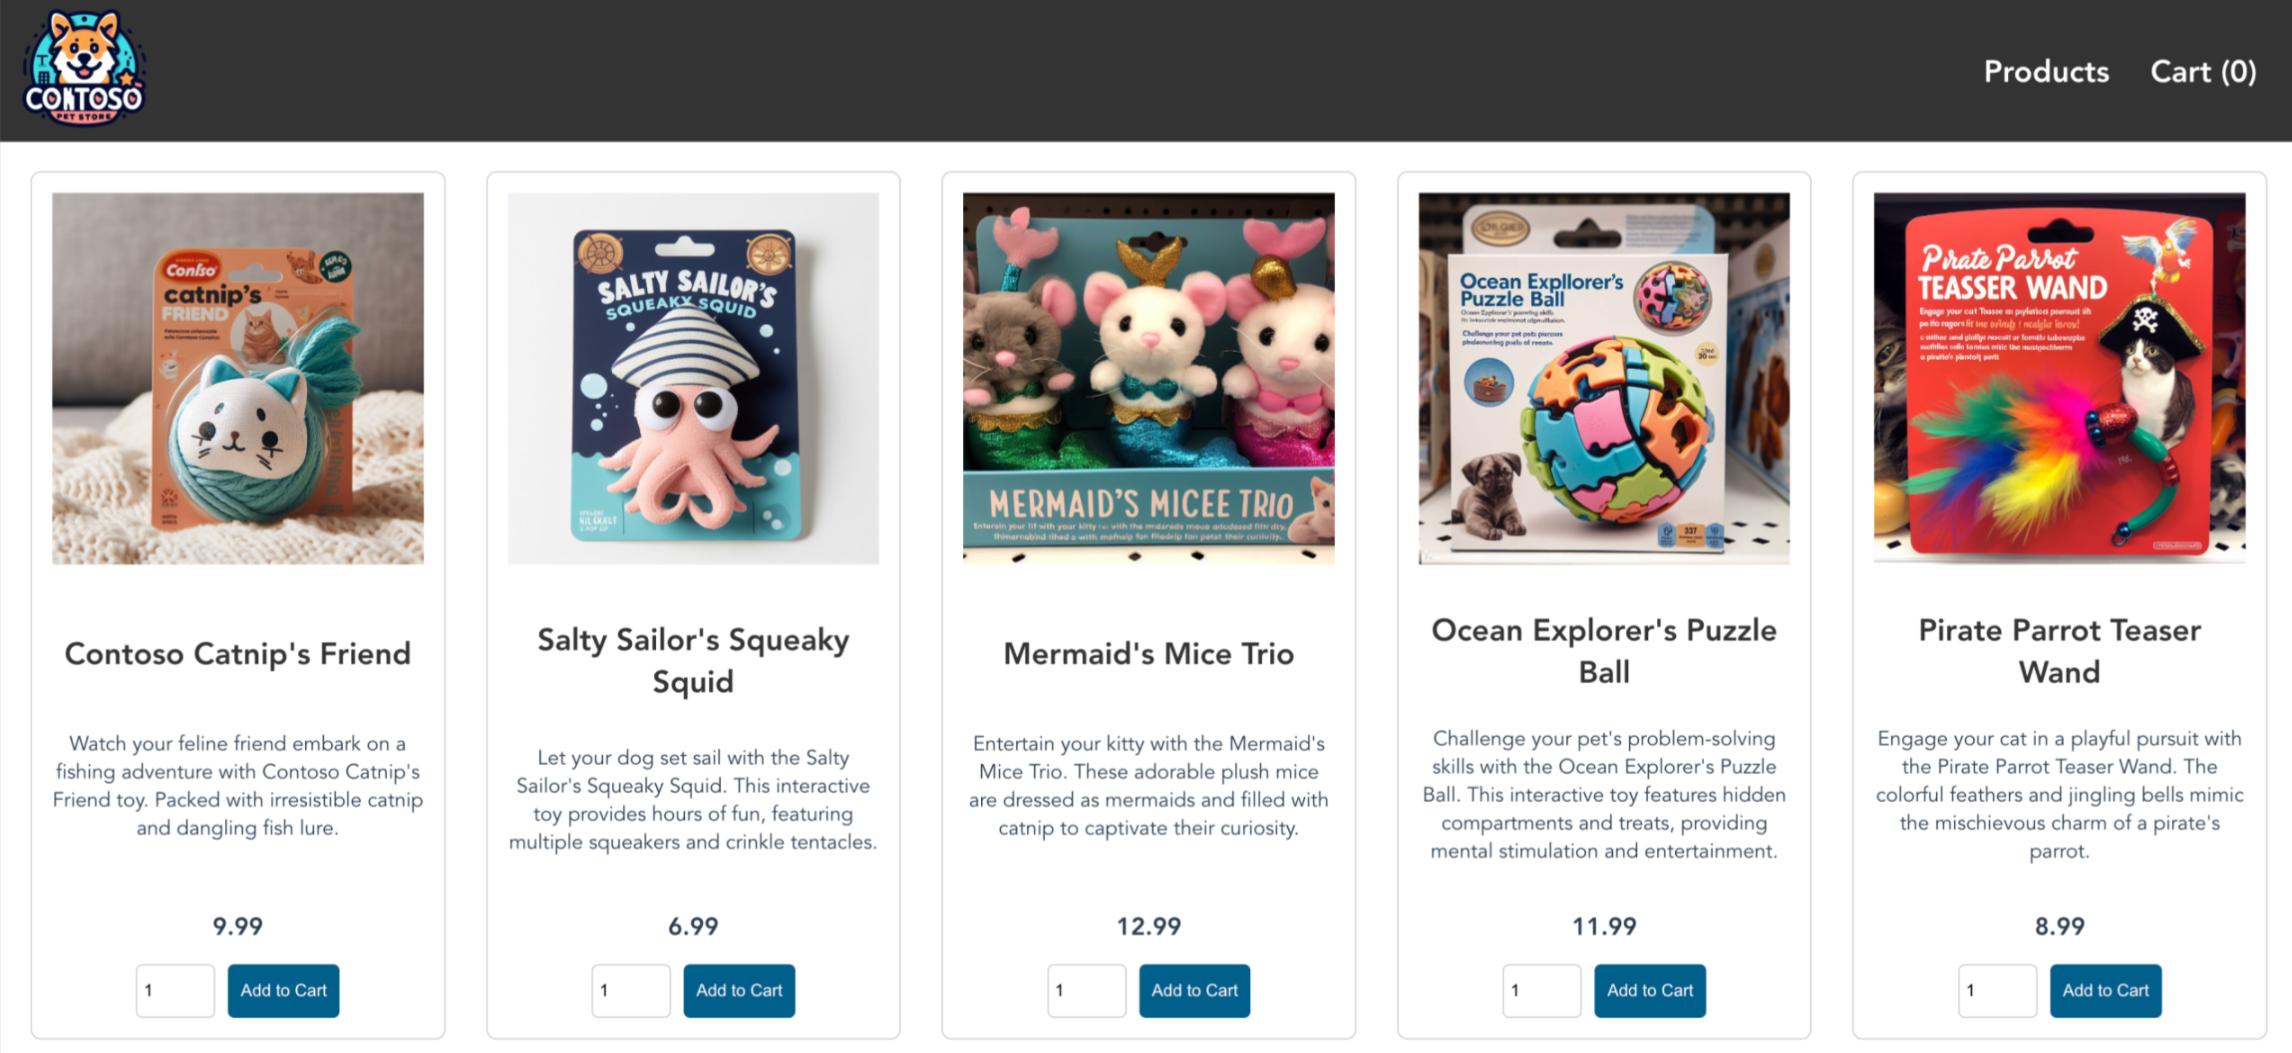
Once completed, the following application runs in your local development environment:
In later tutorials, you upload the container image to an Azure Container Registry (ACR), and then deploy it into an AKS cluster.
Before you begin
This tutorial assumes a basic understanding of core Docker concepts such as containers, container images, and docker commands. For a primer on container basics, see Get started with Docker.
To complete this tutorial, you need a local Docker development environment running Linux containers. Docker provides packages that configure Docker on a Mac, Windows, or Linux system.
Note
Azure Cloud Shell doesn't include the Docker components required to complete every step in these tutorials. Therefore, we recommend using a full Docker development environment.
Get application code
The sample application used in this tutorial is a basic store front app including the following Kubernetes deployments and services:
- Store front: Web application for customers to view products and place orders.
- Product service: Shows product information.
- Order service: Places orders.
- Rabbit MQ: Message queue for an order queue.
Use git to clone the sample application to your development environment.
git clone https://github.com/Azure-Samples/aks-store-demo.gitChange into the cloned directory.
cd aks-store-demo
Review Docker Compose file
The sample application you create in this tutorial uses the docker-compose-quickstart YAML file from the repository you cloned.
services:
  rabbitmq:
    image: rabbitmq:3.13.2-management-alpine
    container_name: 'rabbitmq'
    restart: always
    environment:
      - "RABBITMQ_DEFAULT_USER=username"
      - "RABBITMQ_DEFAULT_PASS=password"
    ports:
      - 15672:15672
      - 5672:5672
    healthcheck:
      test: ["CMD", "rabbitmqctl", "status"]
      interval: 30s
      timeout: 10s
      retries: 5
    volumes:
      - ./rabbitmq_enabled_plugins:/etc/rabbitmq/enabled_plugins
    networks:
      - backend_services
  order-service:
    build: src/order-service
    container_name: 'order-service'
    restart: always
    ports:
      - 3000:3000
    healthcheck:
      test: ["CMD", "wget", "-O", "/dev/null", "-q", "http://order-service:3000/health"]
      interval: 30s
      timeout: 10s
      retries: 5
    environment:
      - ORDER_QUEUE_HOSTNAME=rabbitmq
      - ORDER_QUEUE_PORT=5672
      - ORDER_QUEUE_USERNAME=username
      - ORDER_QUEUE_PASSWORD=password
      - ORDER_QUEUE_NAME=orders
      - ORDER_QUEUE_RECONNECT_LIMIT=3
    networks:
      - backend_services
    depends_on:
      rabbitmq:
        condition: service_healthy
  product-service:
    build: src/product-service
    container_name: 'product-service'
    restart: always
    ports:
      - 3002:3002
    healthcheck:
      test: ["CMD", "wget", "-O", "/dev/null", "-q", "http://product-service:3002/health"]
      interval: 30s
      timeout: 10s
      retries: 5
    environment:
      - AI_SERVICE_URL=http://ai-service:5001/
    networks:
      - backend_services
  store-front:
    build: src/store-front
    container_name: 'store-front'
    restart: always
    ports:
      - 8080:8080
    healthcheck:
      test: ["CMD", "wget", "-O", "/dev/null", "-q", "http://store-front:80/health"]
      interval: 30s
      timeout: 10s
      retries: 5
    environment:
      - VUE_APP_PRODUCT_SERVICE_URL=http://product-service:3002/
      - VUE_APP_ORDER_SERVICE_URL=http://order-service:3000/
    networks:
      - backend_services
    depends_on:
      - product-service
      - order-service
networks:
  backend_services:
    driver: bridge
Create container images and run application
You can use Docker Compose to automate building container images and the deployment of multi-container applications.
Docker
Create the container image, download the RabbitMQ image, and start the application using the
docker composecommand:docker compose -f docker-compose-quickstart.yml up -dView the created images using the
docker imagescommand.docker imagesThe following condensed example output shows the created images:
REPOSITORY                        TAG                          IMAGE ID
aks-store-demo-product-service    latest                       72f5cd7e6b84
aks-store-demo-order-service      latest                       54ad5de546f9
aks-store-demo-store-front        latest                       1125f85632ae
...
View the running containers using the
docker pscommand.docker psThe following condensed example output shows four running containers:
CONTAINER ID        IMAGE
f27fe74cfd0a        aks-store-demo-product-service
df1eaa137885        aks-store-demo-order-service
b3ce9e496e96        aks-store-demo-store-front
31df28627ffa        rabbitmq:3.13.2-management-alpine
Test application locally
To see your running application, navigate to http://localhost:8080 in a local web browser. The sample application loads, as shown in the following example:
On this page, you can view products, add them to your cart, and then place an order.
Clean up resources
Since you validated the application's functionality, you can stop and remove the running containers. Do not delete the container images - you use them in the next tutorial.
Stop and remove the container instances and resources using the
docker-compose downcommand.docker compose down
Next steps
In this tutorial, you created a sample application, created container images for the application, and then tested the application. You learned how to:
- Clone a sample application source from GitHub.
- Create a container image from the sample application source.
- Test the multi-container application in a local Docker environment.
In the next tutorial, you learn how to store container images in an ACR.
Azure Kubernetes Service


