Training
Certification
Microsoft Certified: Azure Developer Associate - Certifications
Build end-to-end solutions in Microsoft Azure to create Azure Functions, implement and manage web apps, develop solutions utilizing Azure storage, and more.
This browser is no longer supported.
Upgrade to Microsoft Edge to take advantage of the latest features, security updates, and technical support.
Important
Azure Stack Edge Pro FPGA devices reached end-of-life in February 2024.
This article describes how to manage compute on your Azure Stack Edge Pro FPGA. You can manage the compute via the Azure portal or via the local web UI. Use the Azure portal to manage modules, triggers, and compute configuration, and the local web UI to manage compute settings.
In this article, you learn how to:
Events are things that happen within your cloud environment or on your device that you might want to take action on. For example, when a file is created in a share, it is an event. Triggers raise the events. For your Azure Stack Edge Pro FPGA, triggers can be in response to file events or a schedule.
Take the following steps in the Azure portal to create a trigger.
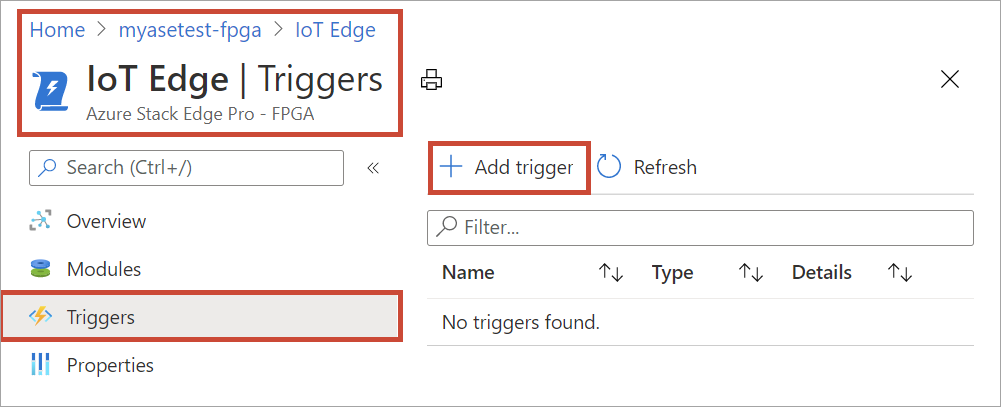
In the Azure portal, go to your Azure Stack Edge resource and then go to IoT Edge > Triggers. Select + Add trigger on the command bar.
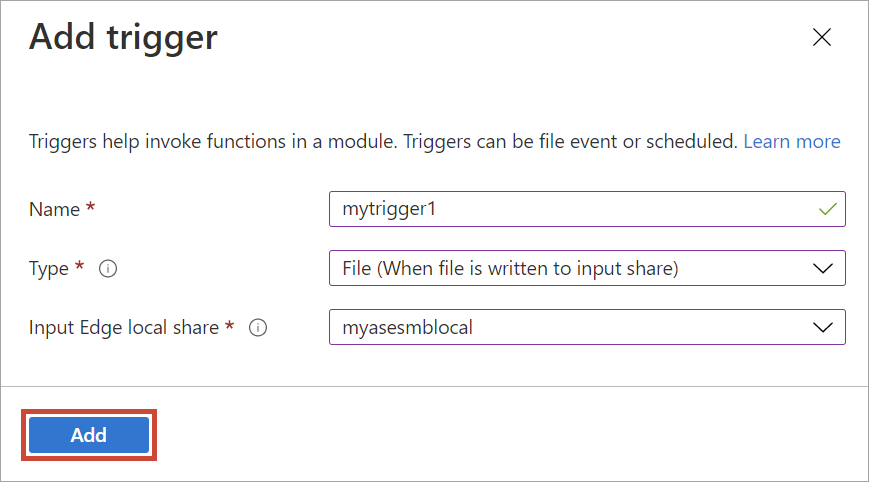
In Add trigger blade, provide a unique name for your trigger.
Select a Type for the trigger. Choose File when the trigger is in response to a file event. Select Scheduled when you want the trigger to start at a defined time and run at a specified repeat interval. Depending on your selection, a different set of options is presented.
File trigger - Choose from the dropdown list a mounted share. When a file event is fired in this share, the trigger would invoke an Azure Function.
Scheduled trigger - Specify the start date/time, and the repeat interval in hours, minutes, or seconds. Also, enter the name for a topic. A topic will give you the flexibility to route the trigger to a module deployed on the device.
An example route string is: "route3": "FROM /* WHERE topic = 'topicname' INTO BrokeredEndpoint("modules/modulename/inputs/input1")".
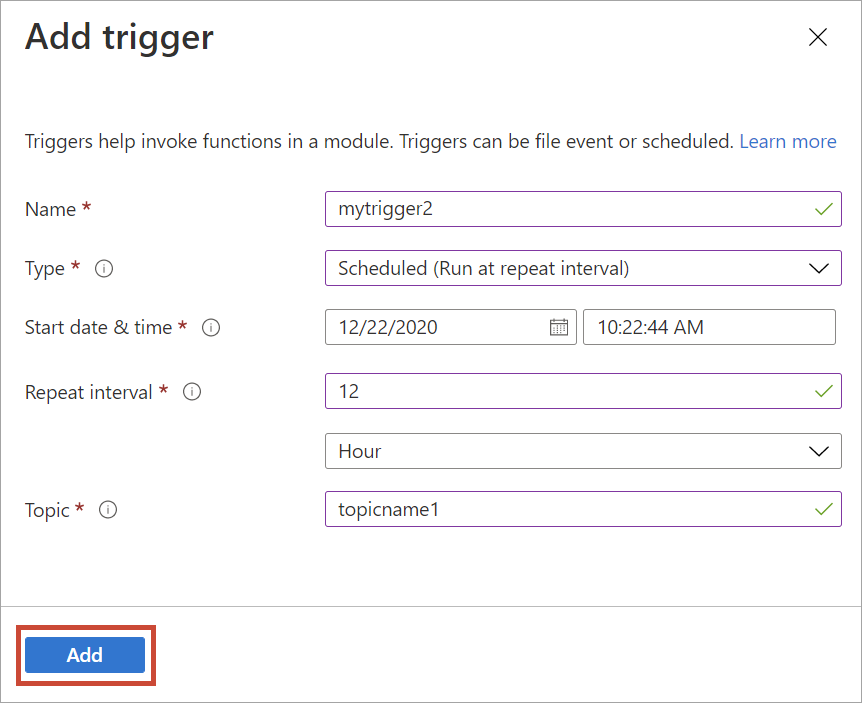
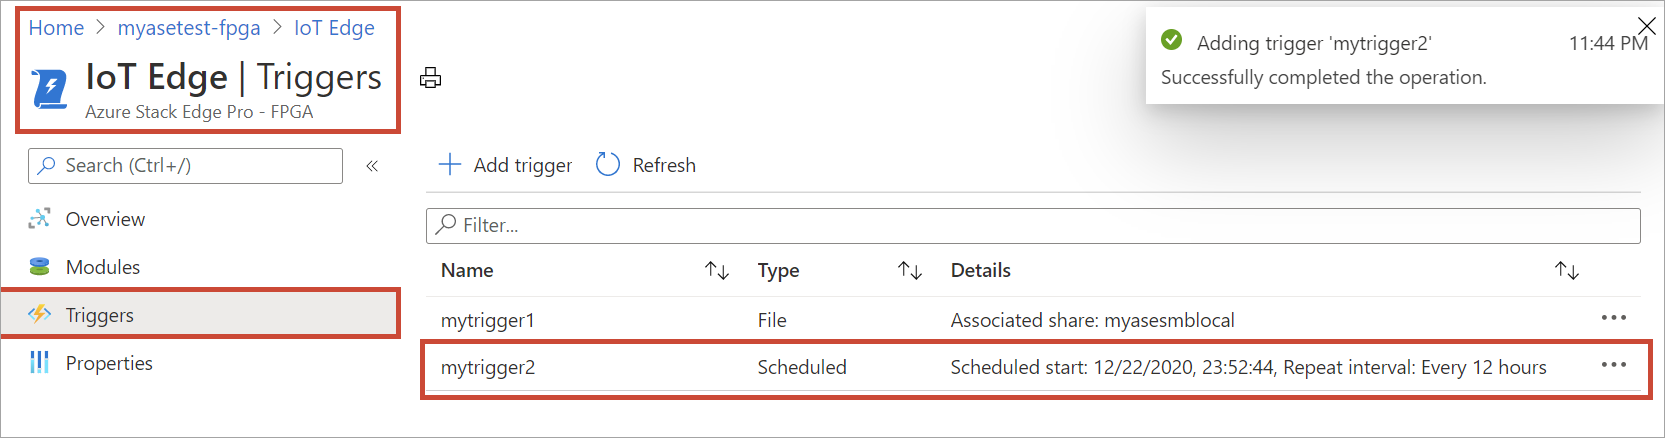
Select Add to create the trigger. A notification shows that the trigger creation is in progress. After the trigger is created, the blade updates to reflect the new trigger.
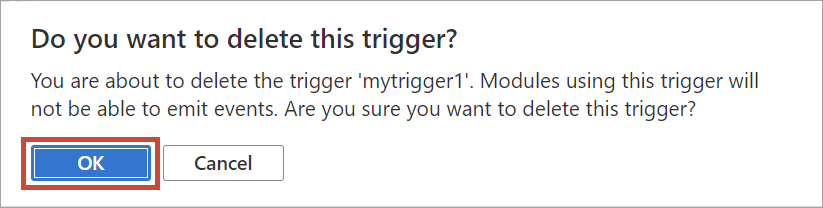
Take the following steps in the Azure portal to delete a trigger.
From the list of triggers, select the trigger that you want to delete.

Right-click and then select Delete.
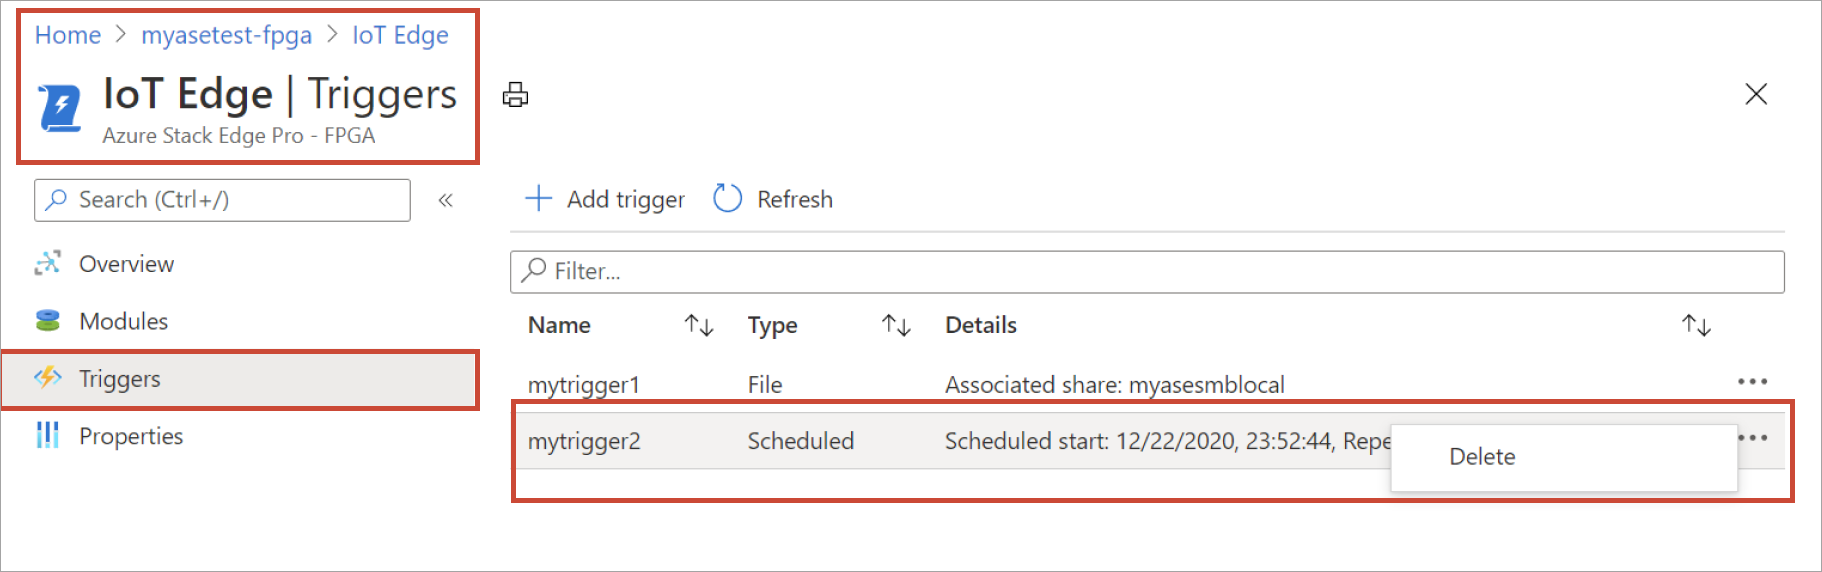
When prompted for confirmation, click Yes.
The list of triggers updates to reflect the deletion.
Use the Azure portal to view the compute configuration, remove an existing compute configuration, or to refresh the compute configuration to sync up access keys for the IoT device and IoT Edge device for your Azure Stack Edge Pro FPGA.
Take the following steps in the Azure portal to view the compute configuration for your device.
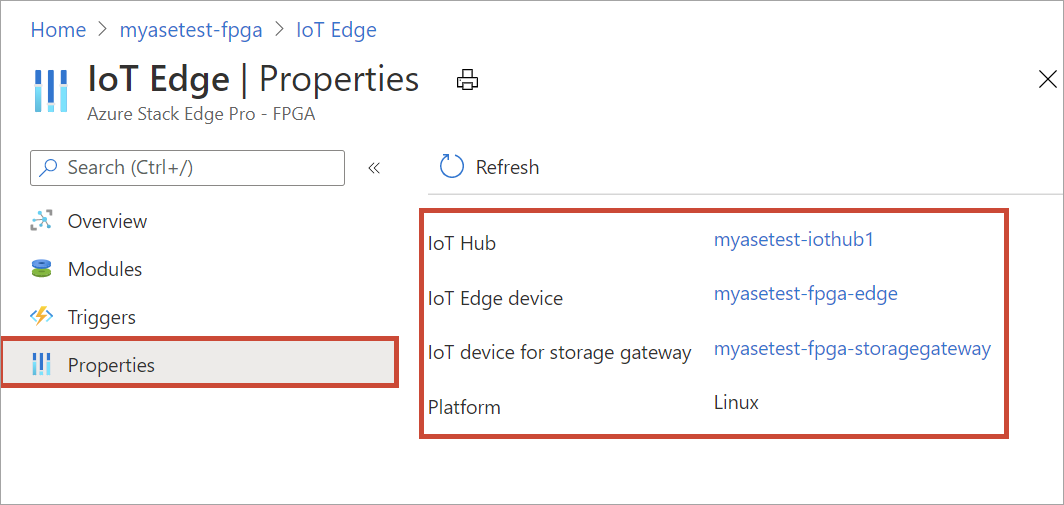
In the Azure portal, go to your Azure Stack Edge resource and then go to IoT Edge > Overview.
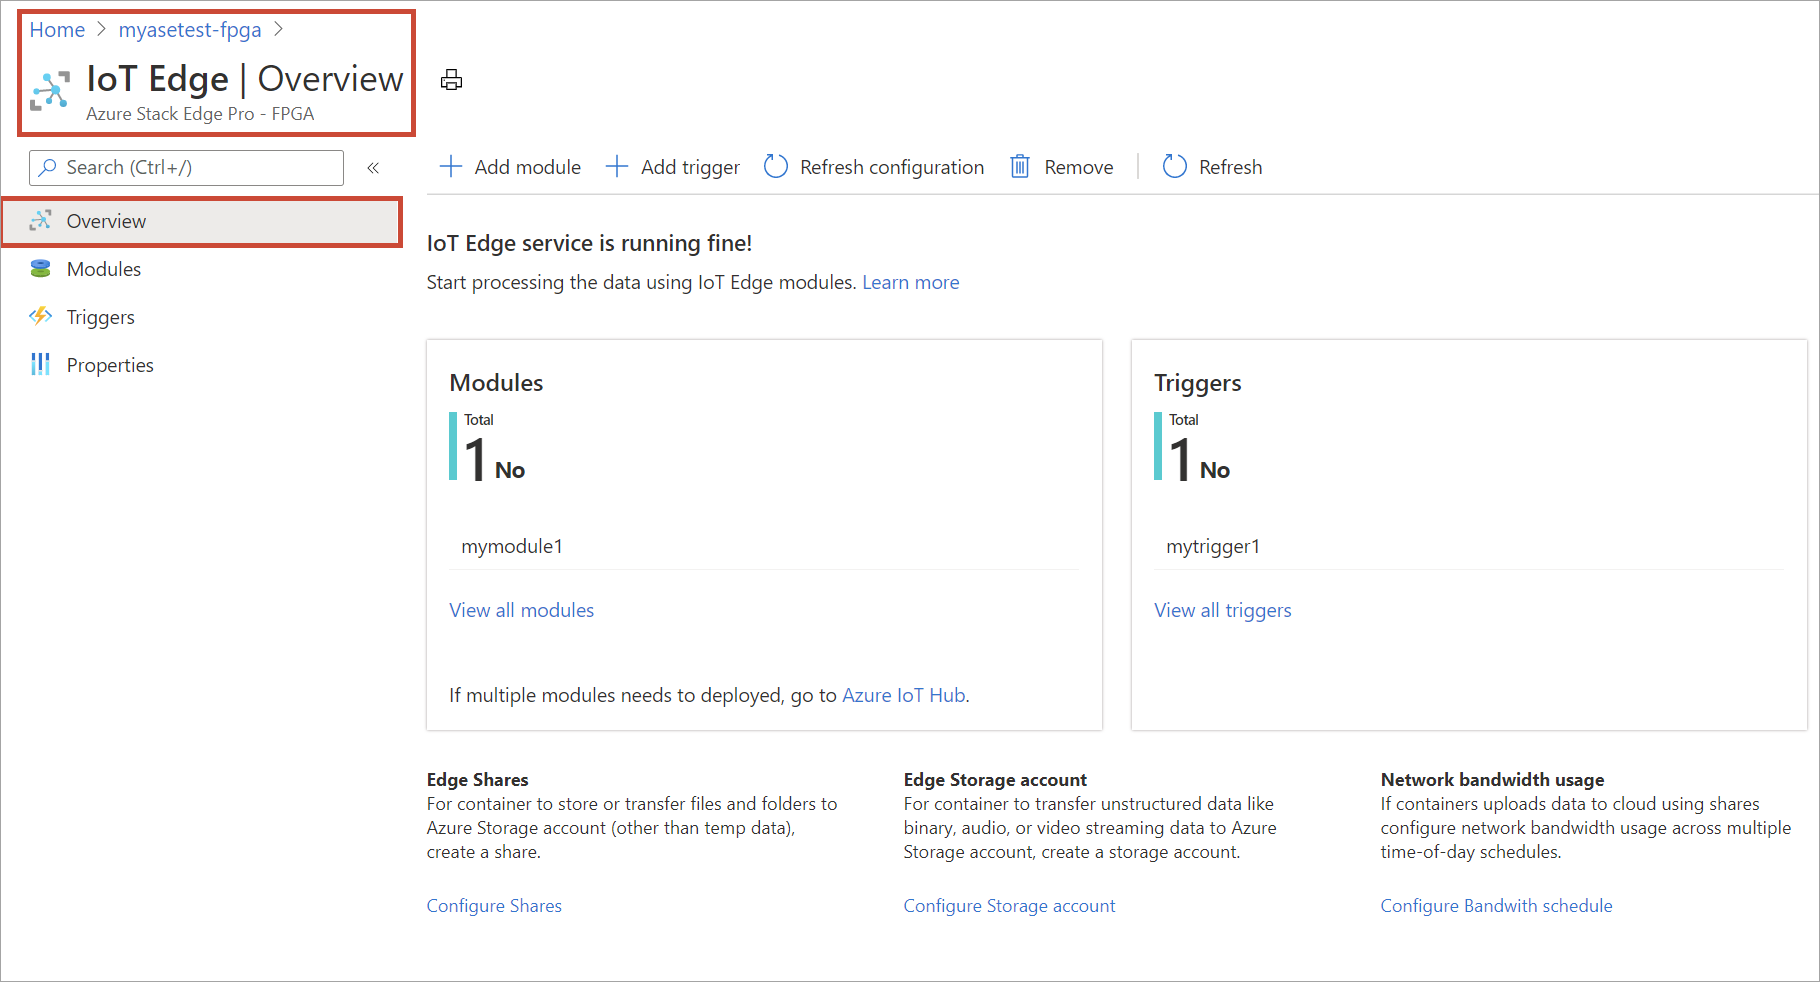
Go to Properties page. Make a note of the compute configuration on your device. When you configured compute, you created an IoT Hub resource. Under that IoT Hub resource, an IoT device and an IoT Edge device are configured. Only the Linux modules are supported to run on the IoT Edge device.
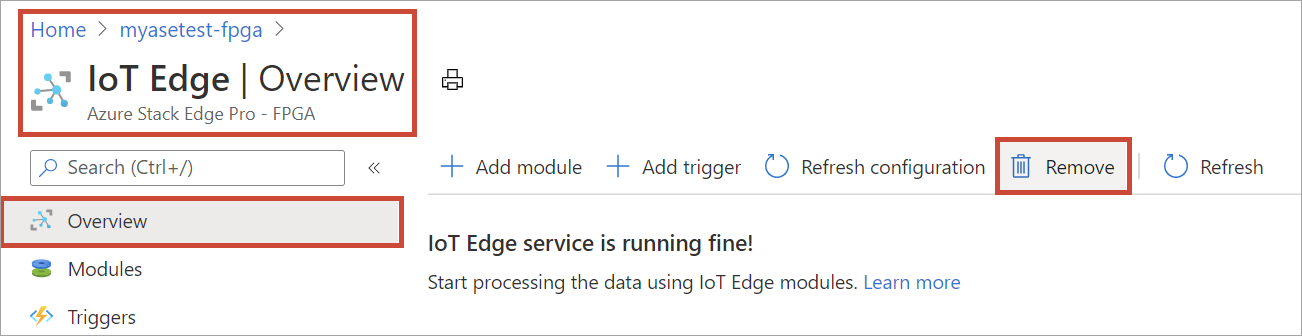
Take the following steps in the Azure portal to remove the existing Edge compute configuration for your device.
In the Azure portal, go to your Azure Stack Edge resource and then go to IoT Edge > Overview. Select Remove on the command bar.
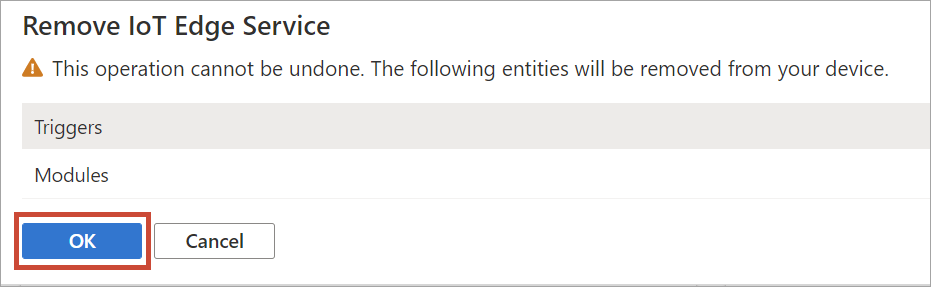
If you remove the compute configuration, you will need to reconfigure your device in case you need to use compute again. When prompted for confirmation, select Yes.
When you configure compute on your Azure Stack Edge Pro FPGA, an IoT device and an IoT Edge device are created. These devices are automatically assigned symmetric access keys. As a security best practice, these keys are rotated regularly via the IoT Hub service.
To rotate these keys, you can go to the IoT Hub service that you created and select the IoT device or the IoT Edge device. Each device has a primary access key and a secondary access keys. Assign the primary access key to the secondary access key and then regenerate the primary access key.
If your IoT device and IoT Edge device keys have been rotated, then you need to refresh the configuration on your Azure Stack Edge Pro FPGA to get the latest access keys. The sync helps the device get the latest keys for your IoT device and IoT Edge device. Azure Stack Edge Pro FPGA uses only the primary access keys.
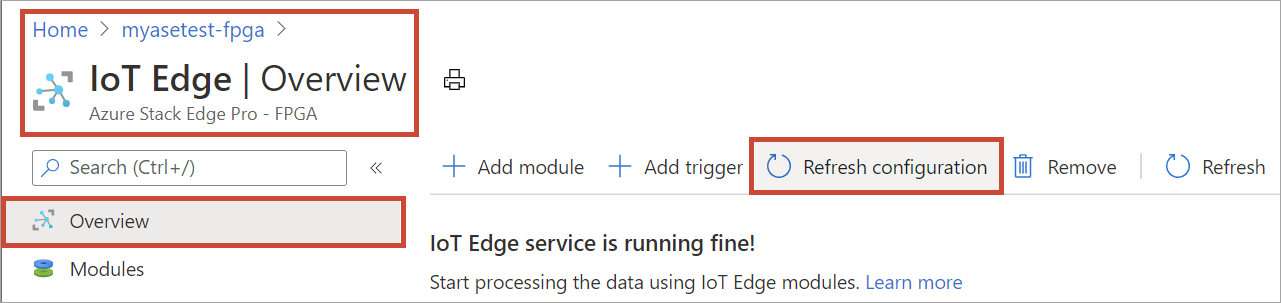
Take the following steps in the Azure portal to sync the access keys for your device.
In the Azure portal, go to your Azure Stack Edge resource and then go to IoT Edge > Overview. Select Refresh configuration on the command bar.
Select Yes when prompted for confirmation.

Exit out of the dialog once the sync is complete.
Training
Certification
Microsoft Certified: Azure Developer Associate - Certifications
Build end-to-end solutions in Microsoft Azure to create Azure Functions, implement and manage web apps, develop solutions utilizing Azure storage, and more.