Note
Access to this page requires authorization. You can try signing in or changing directories.
Access to this page requires authorization. You can try changing directories.
This article shows you how to call a protected ASP.NET Core web API using Insomnia. Insomnia is an application that lets you send HTTP requests to a web API to test its authorization and access control (authentication) policies. In this article, you register a web app and a web API in a tenant. The web app is used to get an access token generated by the Microsoft identity platform. Next, you use the token to make an authorized call to the web API using Insomnia.
This article shows you how to call a protected ASP.NET Core web API using Insomnia. Insomnia is an application that lets you send HTTP requests to a web API to test its authorization and access control (authentication) policies. Following on from the Tutorial: Implement a protected endpoint to your API, where you created a protected API, you need to register a web application with the Microsoft identity platform to generate an access token. Next, you use the token to make an authorized call to the API using Insomnia.
Prerequisites
- An Azure account with an active subscription. Create an account for free.
- This Azure account must have permissions to manage applications. Any of the following Microsoft Entra roles include the required permissions:
- Application Administrator
- Application Developer
- Cloud Application Administrator
- Download and install Insomnia. You use Insomnia to obtain an access token for your API requests.
- A minimum requirement of .NET 8.0 SDK.
- An Azure account with an active subscription. Create an account for free.
- This Azure account must have permissions to manage applications. Any of the following Microsoft Entra roles include the required permissions:
- Application Administrator
- Application Developer
- Cloud Application Administrator
- Completion of the tutorial series:
- Download and install Insomnia.
Register an application
The Microsoft identity platform requires your application to be registered before providing identity and access management services. The application registration allows you to specify the name and type of the application and the sign-in audience. The sign-in audience specifies what types of user accounts are allowed to sign-in to a given application.
Register the web API
Follow these steps to create the web API registration:
Sign in to the Microsoft Entra admin center as at least an Application Developer.
If you have access to multiple tenants, use the Settings icon
 in the top menu to switch to the tenant in which you want to register the application from the Directories + subscriptions menu.
Browse to Entra ID > App registrations.
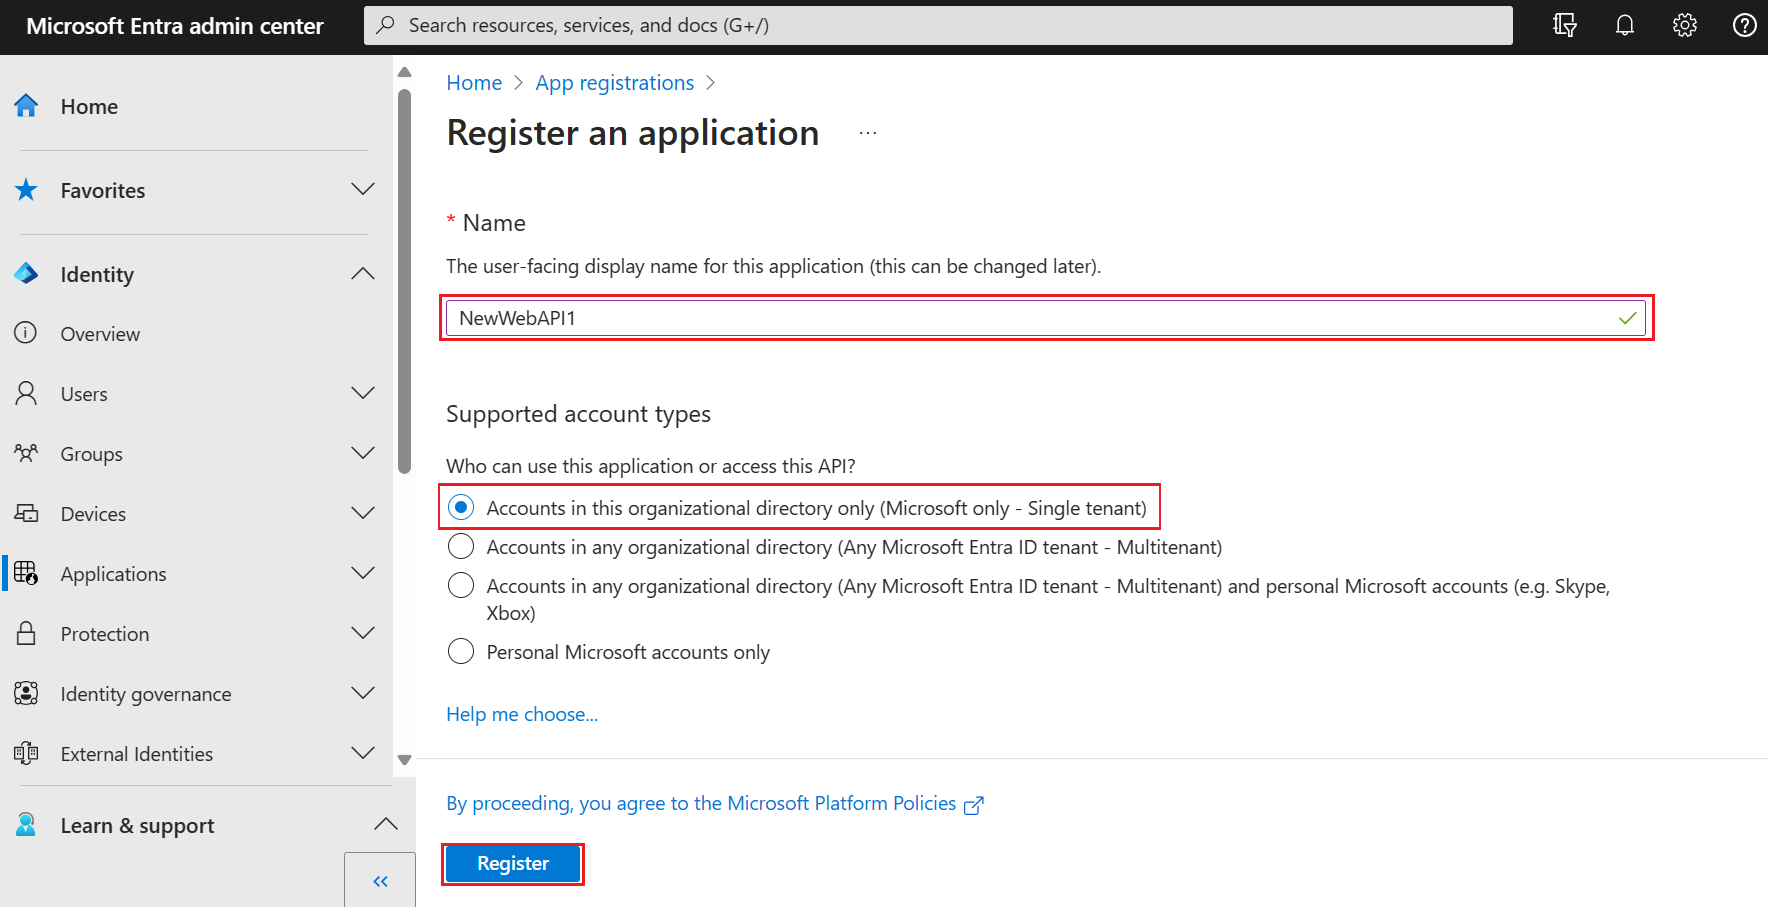
Select New registration.
Enter a Name for the application, such as NewWebAPI1.
For Supported account types, select Accounts in this organizational directory only. For information on different account types, select Help me choose option.
Select Register.
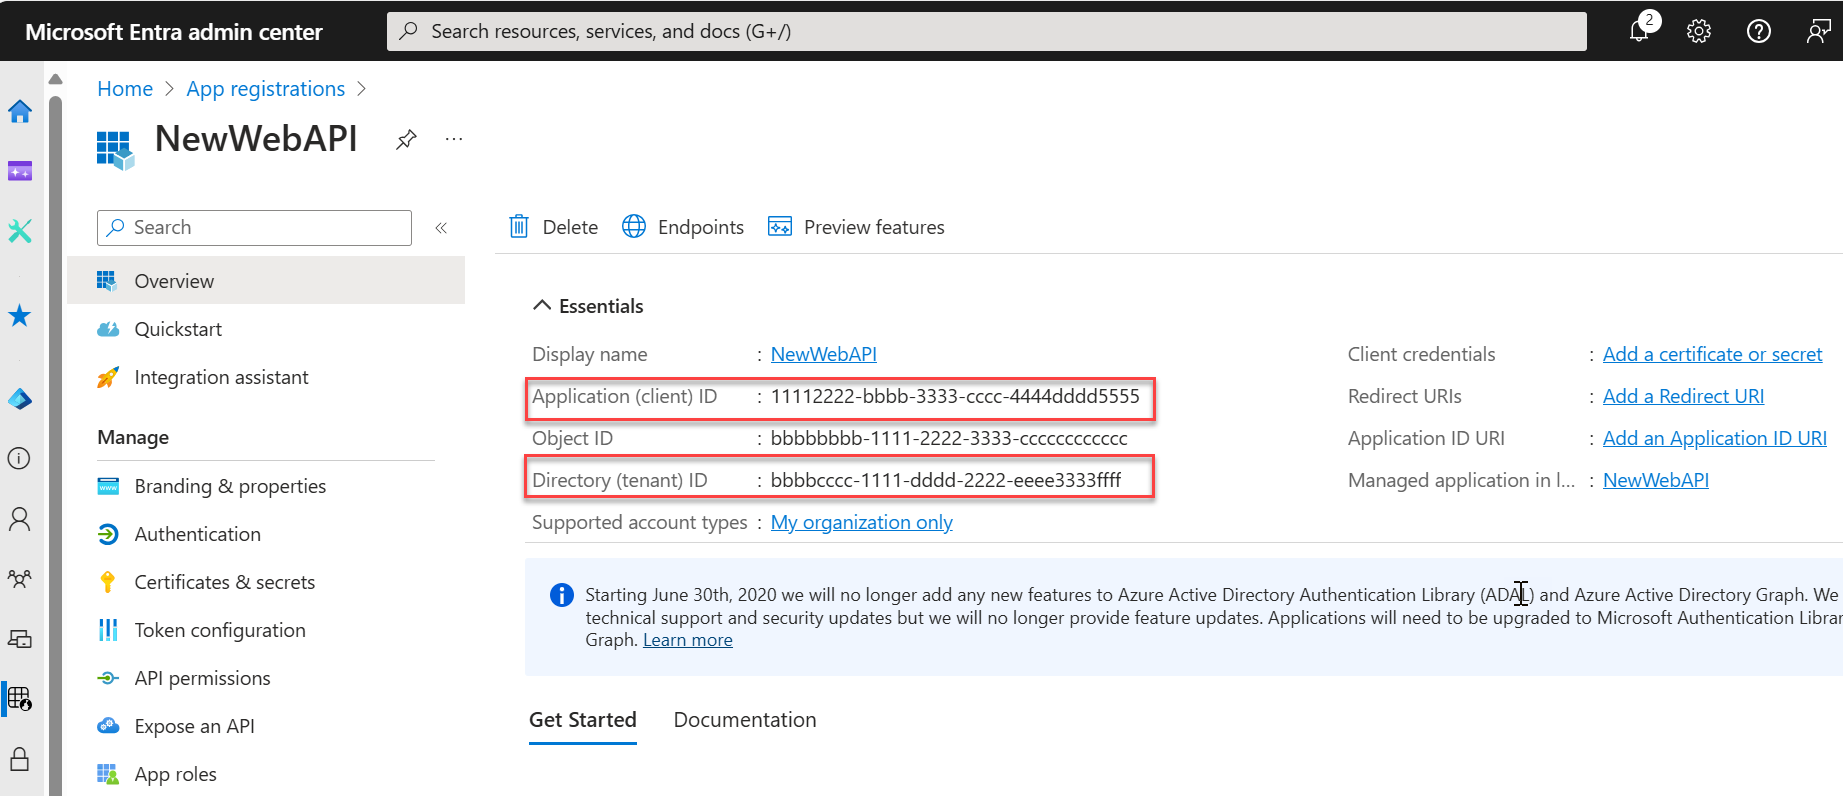
You can see the application's Overview pane when registration is complete. Record the Directory (tenant) ID and the Application (client) ID to be used in later steps.
Note
The Supported account types can be changed by referring to Modify the accounts supported by an application.
Expose the API
Once the API is registered, you can configure its permission by defining the scopes that the API exposes to client applications. Client applications request permission to perform operations by passing an access token along with its requests to the protected web API. The web API then performs the requested operation only if the access token it receives is valid.
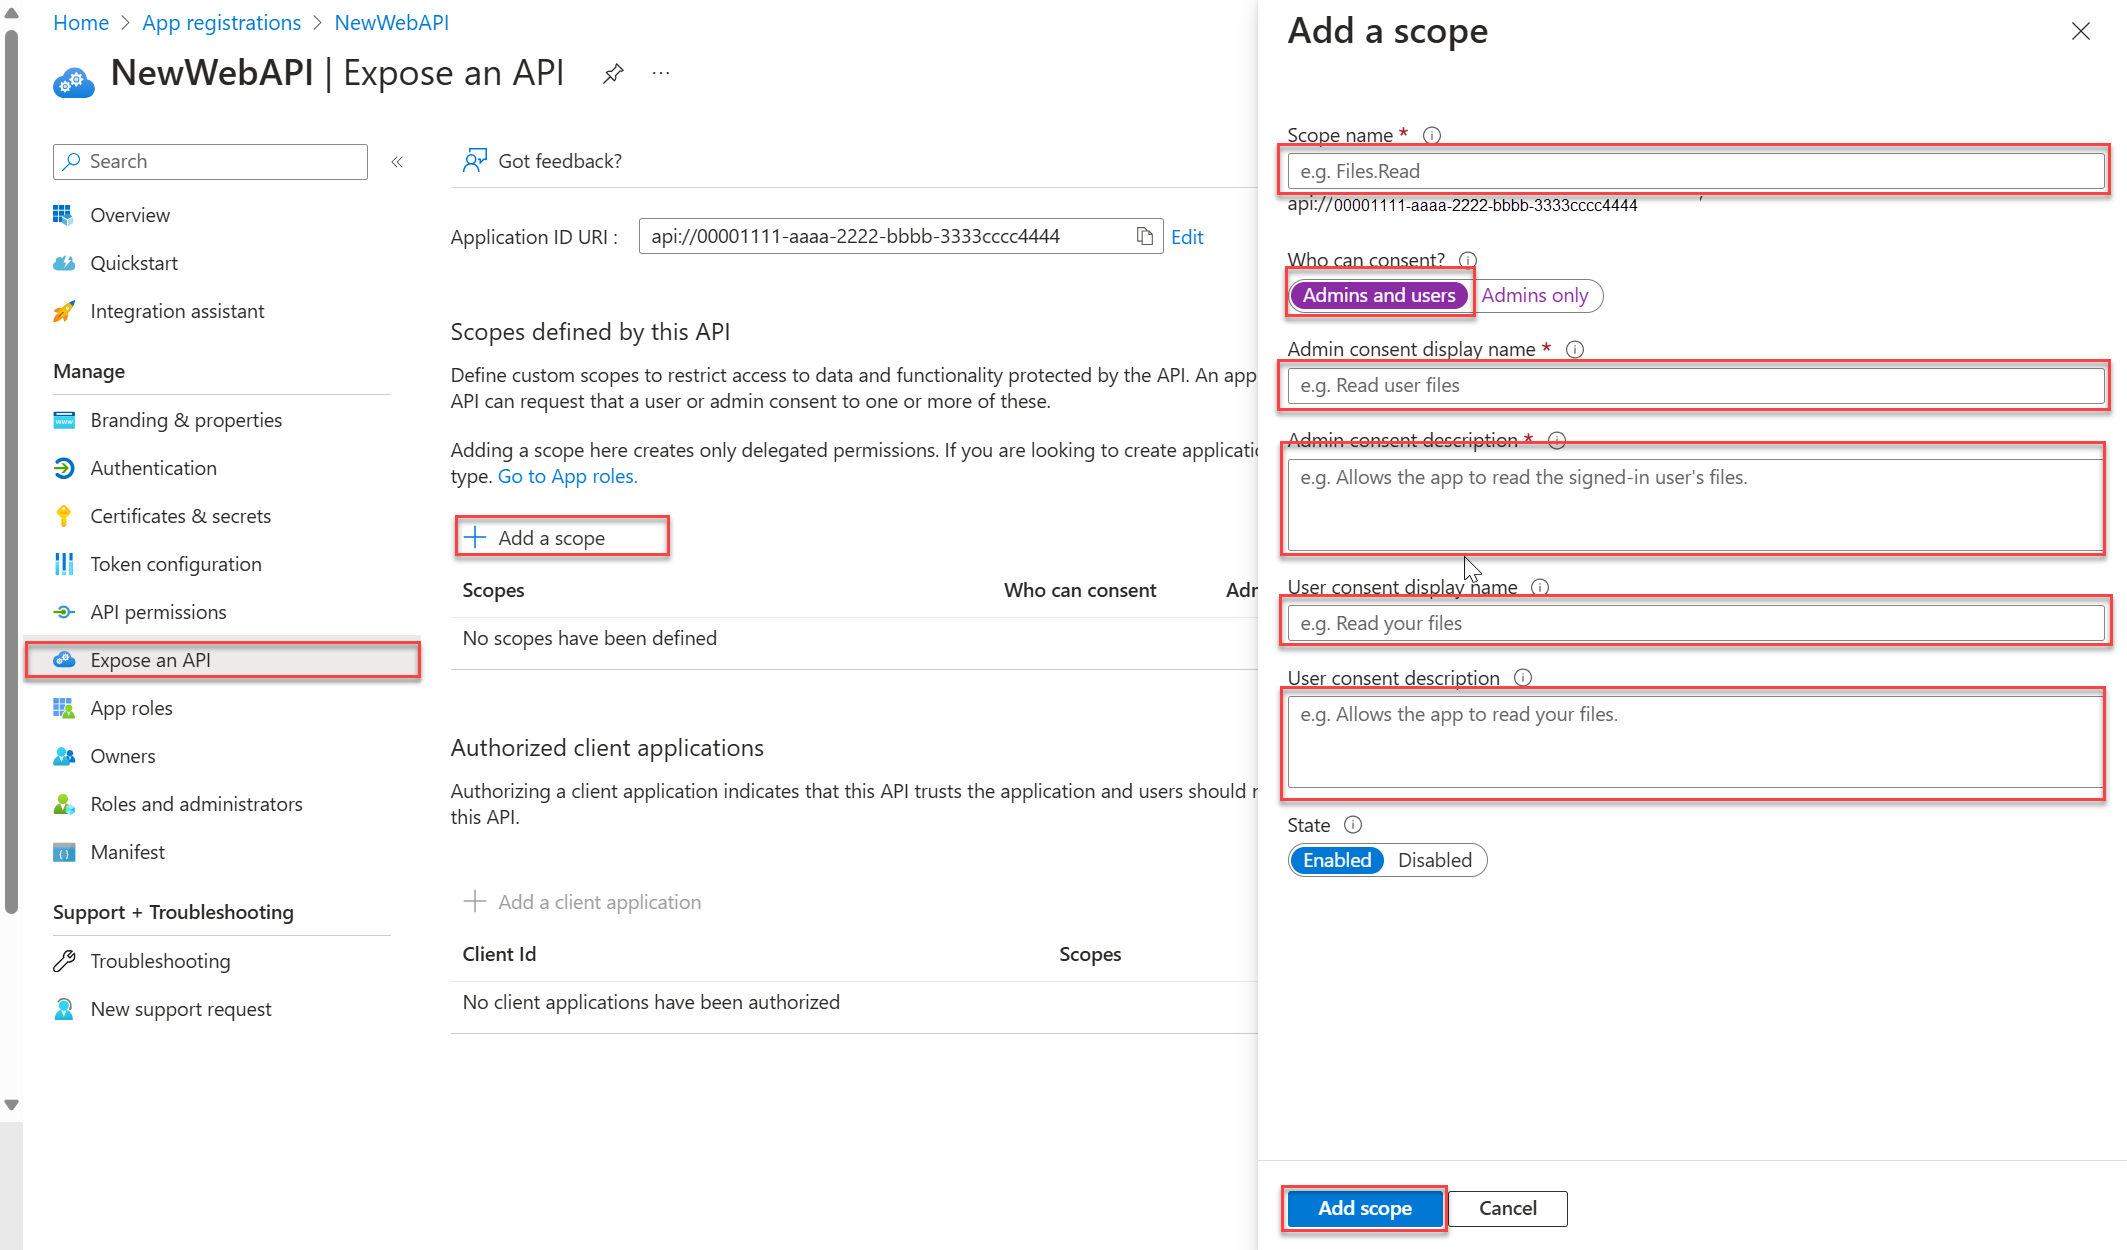
Under Manage, select Expose an API > Add a scope. Accept the proposed Application ID URI
(api://{clientId})by selecting Save and continue. The{clientId}is the value recorded from the Overview page. Then enter the following information:- For Scope name, enter
Forecast.Read. - For Who can consent, ensure that the Admins and users option is selected.
- In the Admin consent display name box, enter
Read forecast data. - In the Admin consent description box, enter
Allows the application to read weather forecast data. - In the User consent display name box, enter
Read forecast data. - In the User consent description box, enter
Allows the application to read weather forecast data. - Ensure that the State is set to Enabled.
- For Scope name, enter
Select Add scope. If the scope has been entered correctly, it appears in the Expose an API pane.

Register the web app
It's not enough to have a web API, you also need a web app to obtain an access token to access the web API.
Follow these steps to create the web app registration:
- Select Home to return to the home page. Browse to Entra ID > App registrations.
- Select New registration.
- Enter a Name for the application, such as web-app-calls-web-api.
- For Supported account types, select Accounts in this organizational directory only. For information on different account types, select the Help me choose option.
- Under Redirect URI (optional), select Web, and then enter
http://localhostin the URL text box. - Select Register.
- Sign in to the Microsoft Entra admin center as at least an Application Developer.
- If you have access to multiple tenants, use the Settings icon
in the top menu to switch to the tenant in which you want to register the application from the Directories + subscriptions menu.
- Browse to Entra ID > App registrations.
- Select New registration.
- Enter a Name for the application, such as web-app-calls-web-api.
- For Supported account types, select Accounts in this organizational directory only. For information on different account types, select the Help me choose option.
- Under Redirect URI (optional), select Web, and then enter
http://localhostin the URL text box. - Select Register.
You can see the application's Overview pane when registration is complete. Record the Directory (tenant) ID and the Application (client) ID to be used in later steps.
Add a client secret
A client secret is a string value your app can use to identity itself, and is sometimes referred to as an application password. The web app uses the client secret to prove its identity when it requests tokens.
Follow these steps to configure a client secret:
From the Overview pane, under Manage, select Certificates & secrets > Client secrets > New client secret.
Add a description for your client secret, for example My client secret.
Select an expiration for the secret or specify a custom lifetime.
- A client secret's lifetime is limited to two years (24 months) or less. You can't specify a custom lifetime longer than 24 months.
- Microsoft recommends that you set an expiration value of less than 12 months.
Select Add.
Be sure to record the Value of the client secret. This secret value is never displayed again after you leave this page.
For more information about how to securely store your client secret, see Best practices for secrets management in Key Vault.
Add permissions to access your web API
By specifying a web API's scopes, the web app can obtain an access token containing the scopes provided by the Microsoft identity platform. Within the code, the web API can then provide permission-based access to its resources based on the scopes found in the access token.
Follow these steps to configure client's permissions to the web API:
- From the Overview pane of your application, under Manage, select API permissions > Add a permission > APIs my organization uses.
- Select NewWebAPI1 or the API that you wish to add permissions to.
- Under Select permissions, check the box next to Forecast.Read. You may need to expand the Permission list. This selects the permissions the client app should have on behalf of the signed-in user.
- Select Add permissions to complete the process.
After adding these permissions to your API, you should see the selected permissions under Configured permissions.
You may also notice the User.Read permission for the Microsoft Graph API. This permission is added automatically when you register an app.
Test the web API
To ensure your API is operational and ready to handle requests, follow these steps:
Clone the ms-identity-docs-code-dotnet repository.
git clone https://github.com/Azure-Samples/ms-identity-docs-code-dotnet.gitNavigate to
ms-identity-docs-code-dotnet/web-apiand openappsettings.json, replace the{APPLICATION_CLIENT_ID}and{DIRECTORY_TENANT_ID}with the following values:{APPLICATION_CLIENT_ID}is the web API Application (client) ID on the app's Overview pane.{DIRECTORY_TENANT_ID}is the web API Directory (tenant) ID on the app's Overview pane.
Execute the following command to start the app:
dotnet runAn output similar to the following will appear. Record the port number in the
https://localhost:{port}URL.... info: Microsoft.Hosting.Lifetime[14] Now listening on: https://localhost:{port} ...
Test the web API
To ensure your API is operational and ready to handle requests, follow these steps:
Navigate to the web API that was created in Tutorial: Create an ASP.NET Core project and configure the API, for example NewWebAPILocal, and open the folder.
Open a new terminal window and navigate to the folder where the web API project is located.
An output similar to the following will appear. Record the port number in the
https://localhost:{port}URL.... info: Microsoft.Hosting.Lifetime[14] Now listening on: https://localhost:{port} ...
Configure an authorized request to the web API in Insomnia
To obtain an access token for your API requests, follow these steps:
Launch the Insomnia application.
Select New HTTP Request, or you can use Ctrl + N to create a new HTTP Request.
In the New Request modal, select a GET method from the dropdown.
For the request URL, enter the URL of the endpoint exposed by the web API,
https://localhost:{port}/weatherforecast.From Auth dropdown menu, select OAuth 2.0. This displays OAuth 2.0 form.
Enter the following values in the OAuth 2.0 form:
Setting Value GRANT TYPE Select Authorization Code AUTHORIZATION URL https://login.microsoftonline.com/{tenantId}/oauth2/v2.0/authorize
Replace{tenantId}with the Directory (tenant)IDACCESS TOKEN URL https://login.microsoftonline.com/{tenantId}/oauth2/v2.0/token
Replace{tenantId}with the Directory (tenant) IDCLIENT ID The Application (client) ID value of your web app registration CLIENT SECRET The client secret Value of your web app registration REDIRECT URL Enter http://localhost, which sets the REDIRECT URL to the Redirect URI registered with Microsoft Entra ID.Advanced Options > SCOPE api://{application_client_id}/Forecast.Read
Navigate to your web app registration, under Manage, select API permissions, then select Forecast.Read
Copy the value in the textbox, which contains the Scope value
Get an access token and send a request to the web API
- Once these values are entered, select Fetch Tokens at the end of the form. This launches an Insomnia browser window where you authenticate with your user credentials. Be sure to allow pop ups from the Insomnia application in the browser.
- After authenticating, select Send to send the request to the protected web API endpoint.
With a valid access token included in the request, the expected response is 200 OK with output similar to:
[
  {
    "date": "YYYY-MM-DDTHH:MM:SS",
    "temperatureC": -16,
    "summary": "Scorching",
    "temperatureF": 4
  },
  {
    "date": "YYYY-MM-DDTHH:MM:SS",
    "temperatureC": 1,
    "summary": "Sweltering",
    "temperatureF": 33
  },
  {
    "date": "YYYY-MM-DDTHH:MM:SS",
    "temperatureC": 26,
    "summary": "Freezing",
    "temperatureF": 78
  },
  {
    "date": "YYYY-MM-DDTHH:MM:SS",
    "temperatureC": 54,
    "summary": "Mild",
    "temperatureF": 129
  },
  {
    "date": "YYYY-MM-DDTHH:MM:SS",
    "temperatureC": 11,
    "summary": "Bracing",
    "temperatureF": 51
  }
]
Related content
For more information about OAuth 2.0 authorization code flow and application types, see: