Get started with Data Activator
There are several different ways to create a Data Activator reflex. This article teaches you how to create a reflex from the left navigation bar (navbar).
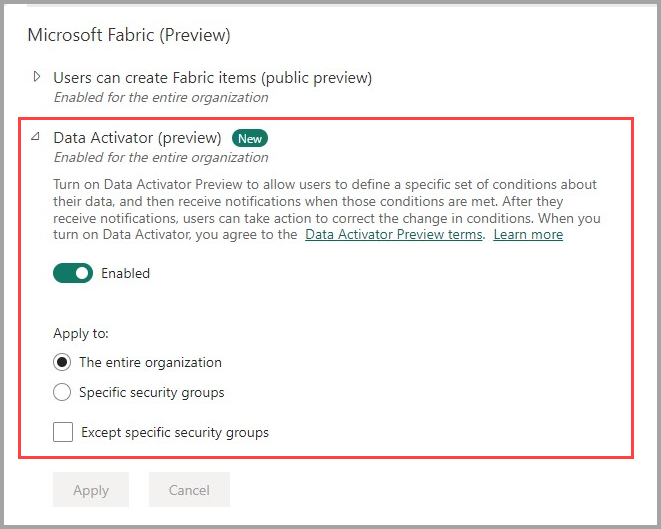
An administrator might need to enable Data Activator because it is in Preview. If you can't open Data Activator, ask your administrator to use the Admin portal to turn on the preview.
Create a Data Activator reflex item
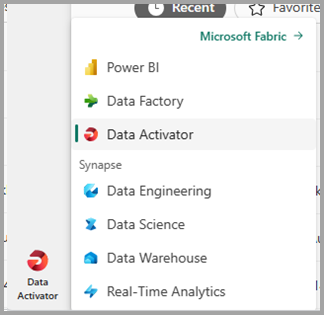
In Microsoft Fabric, select Data Activator from the workload switcher in the bottom left corner.
As with all Fabric workloads, you can begin using Data Activator by creating an item in a Fabric workspace. Data Activator’s items are called reflexes.
A reflex holds all the information necessary to connect to data, monitor for conditions, and act. You typically create a reflex for each business process or area you monitor.
Select a workplace to make it active.
From the left navbar, select Create.
From the New menu in the workspace, choose Reflex.
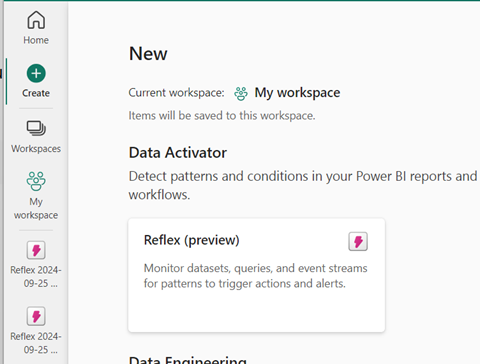
From here, you can start adding data to your reflex or you can use our Package delivery sample to get familiar with Data Activator. The Data Activator tutorial uses the sample to teach you how to create and use rules on objects in your live data.
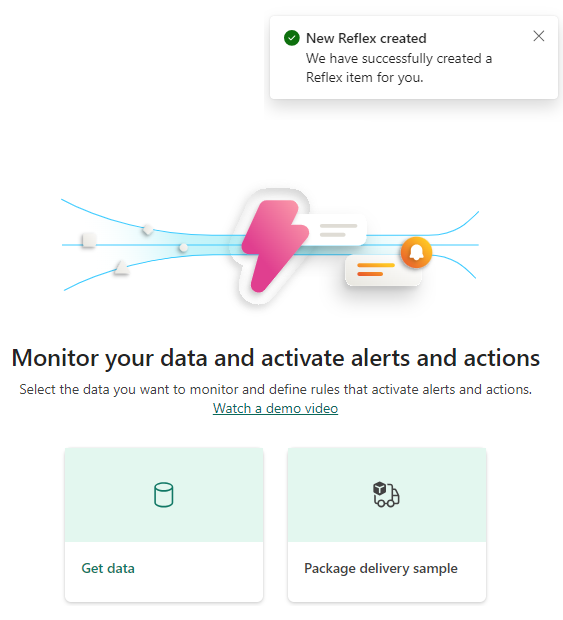
Once you create a reflex, populate it with data. Learn how to get data into your reflex from these two articles:
Alternatively, if you just want to learn how to use Data Activator using sample data, try the Data Activator tutorial using sample data.