Note
Access to this page requires authorization. You can try signing in or changing directories.
Access to this page requires authorization. You can try changing directories.
This tutorial describes how to use change data capture (CDC) in Copy job to efficiently replicate data changes from Azure SQL Database to a destination. This ensures your destination data stays up to date automatically. For a CDC overview in Copy job, refer to Change data capture (CDC) in Copy job.
Prerequisites
Before you begin, ensure you have the following:
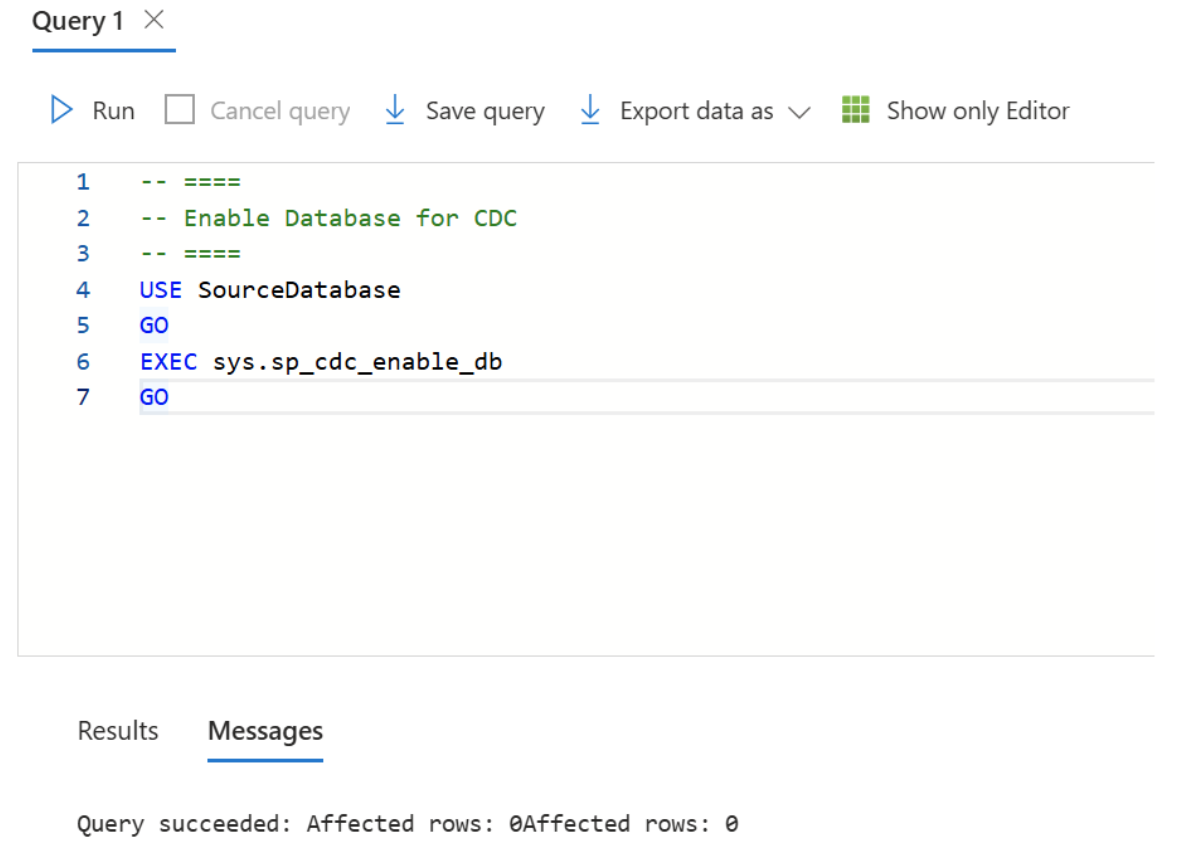
Ensure that change data capture (CDC) is enabled on your database and tables in the supported source store. In this case, it's Azure SQL Database.

Note
- We suggest you enable CDC for all the tables mentioned above.
- Be sure supports_net_changes is enabled.
- All of the columns in the source table must be identified as captured columns as default.
Learn more in Enable and Disable change data capture - SQL Server | Microsoft Learn.
Create a Copy job with Azure SQL Database CDC
Complete the following steps to create a new Copy job to ingest data from Azure SQL Database via CDC to another Azure SQL Database:
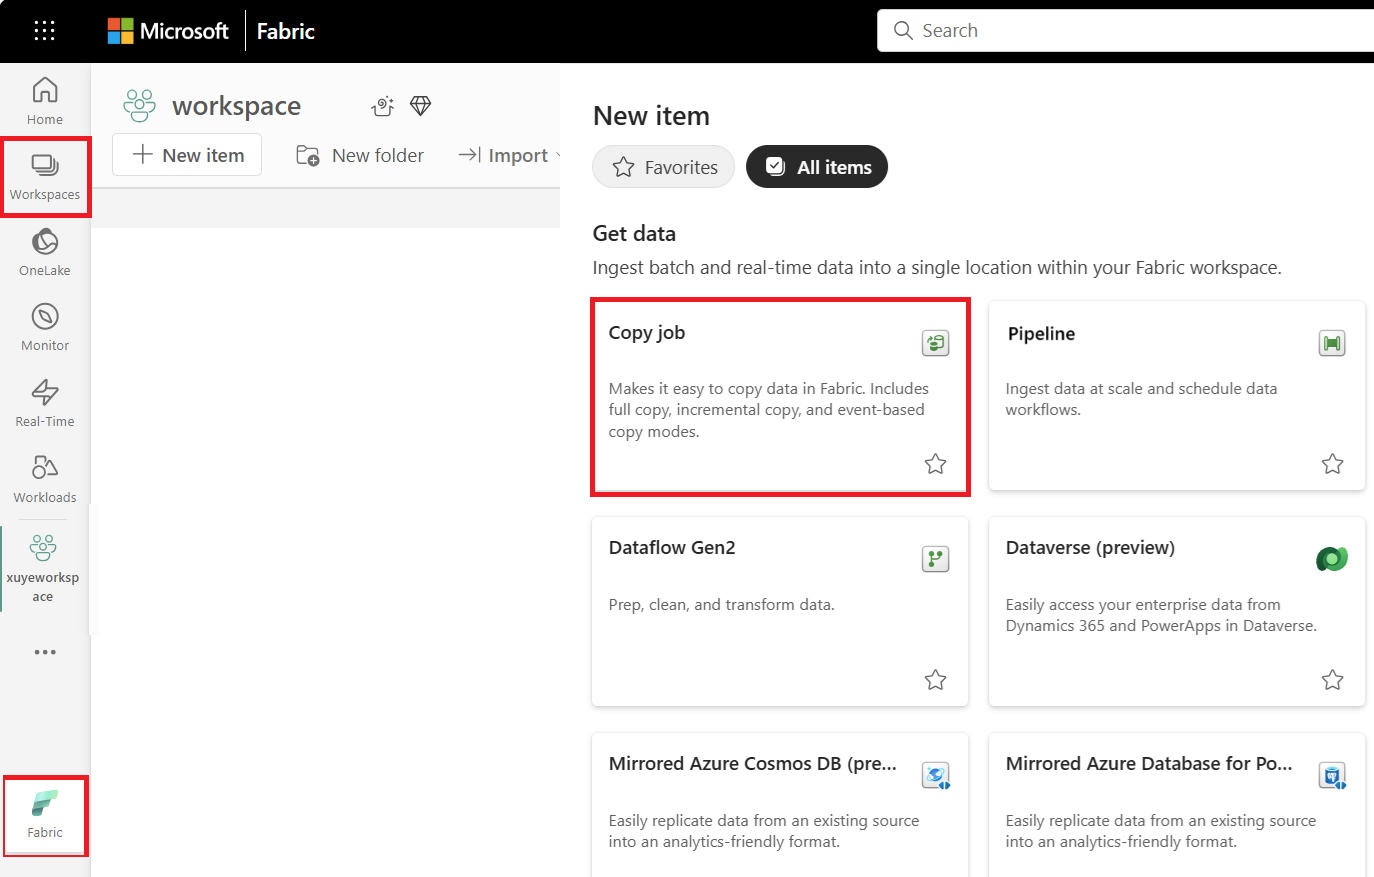
Select + New Item, choose the Copy job icon, name your Copy job, and select Create.
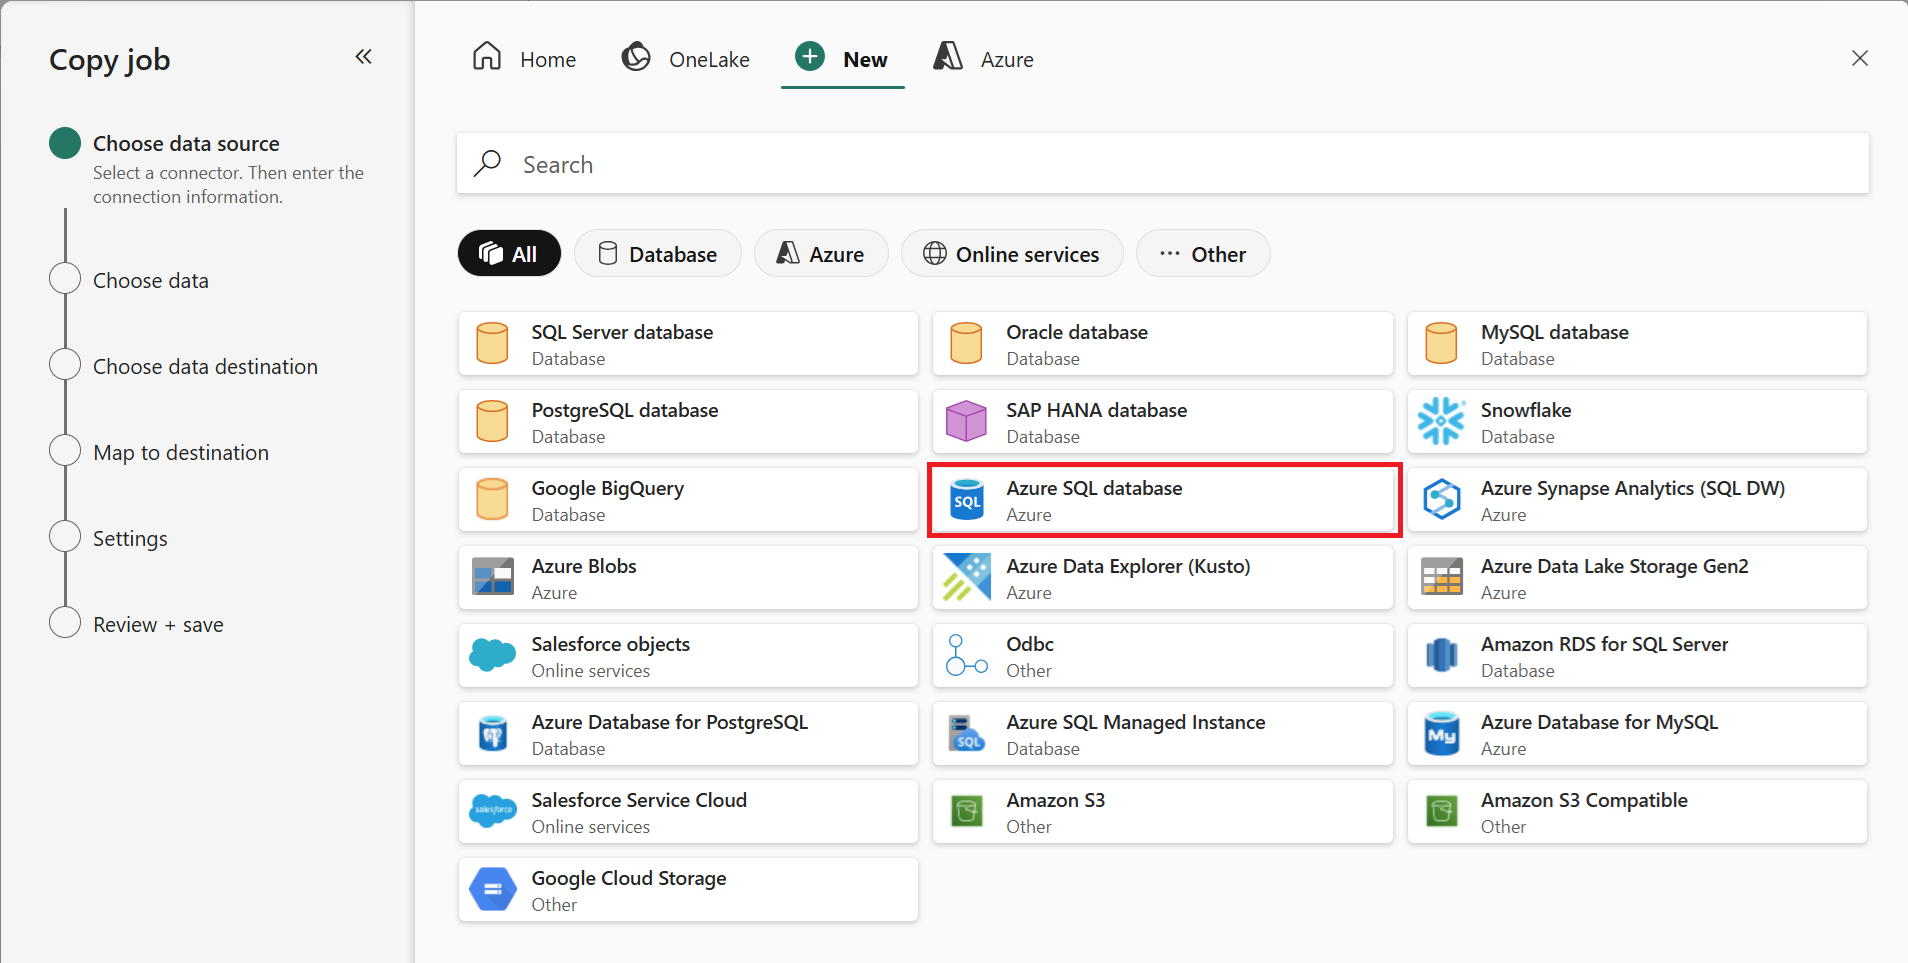
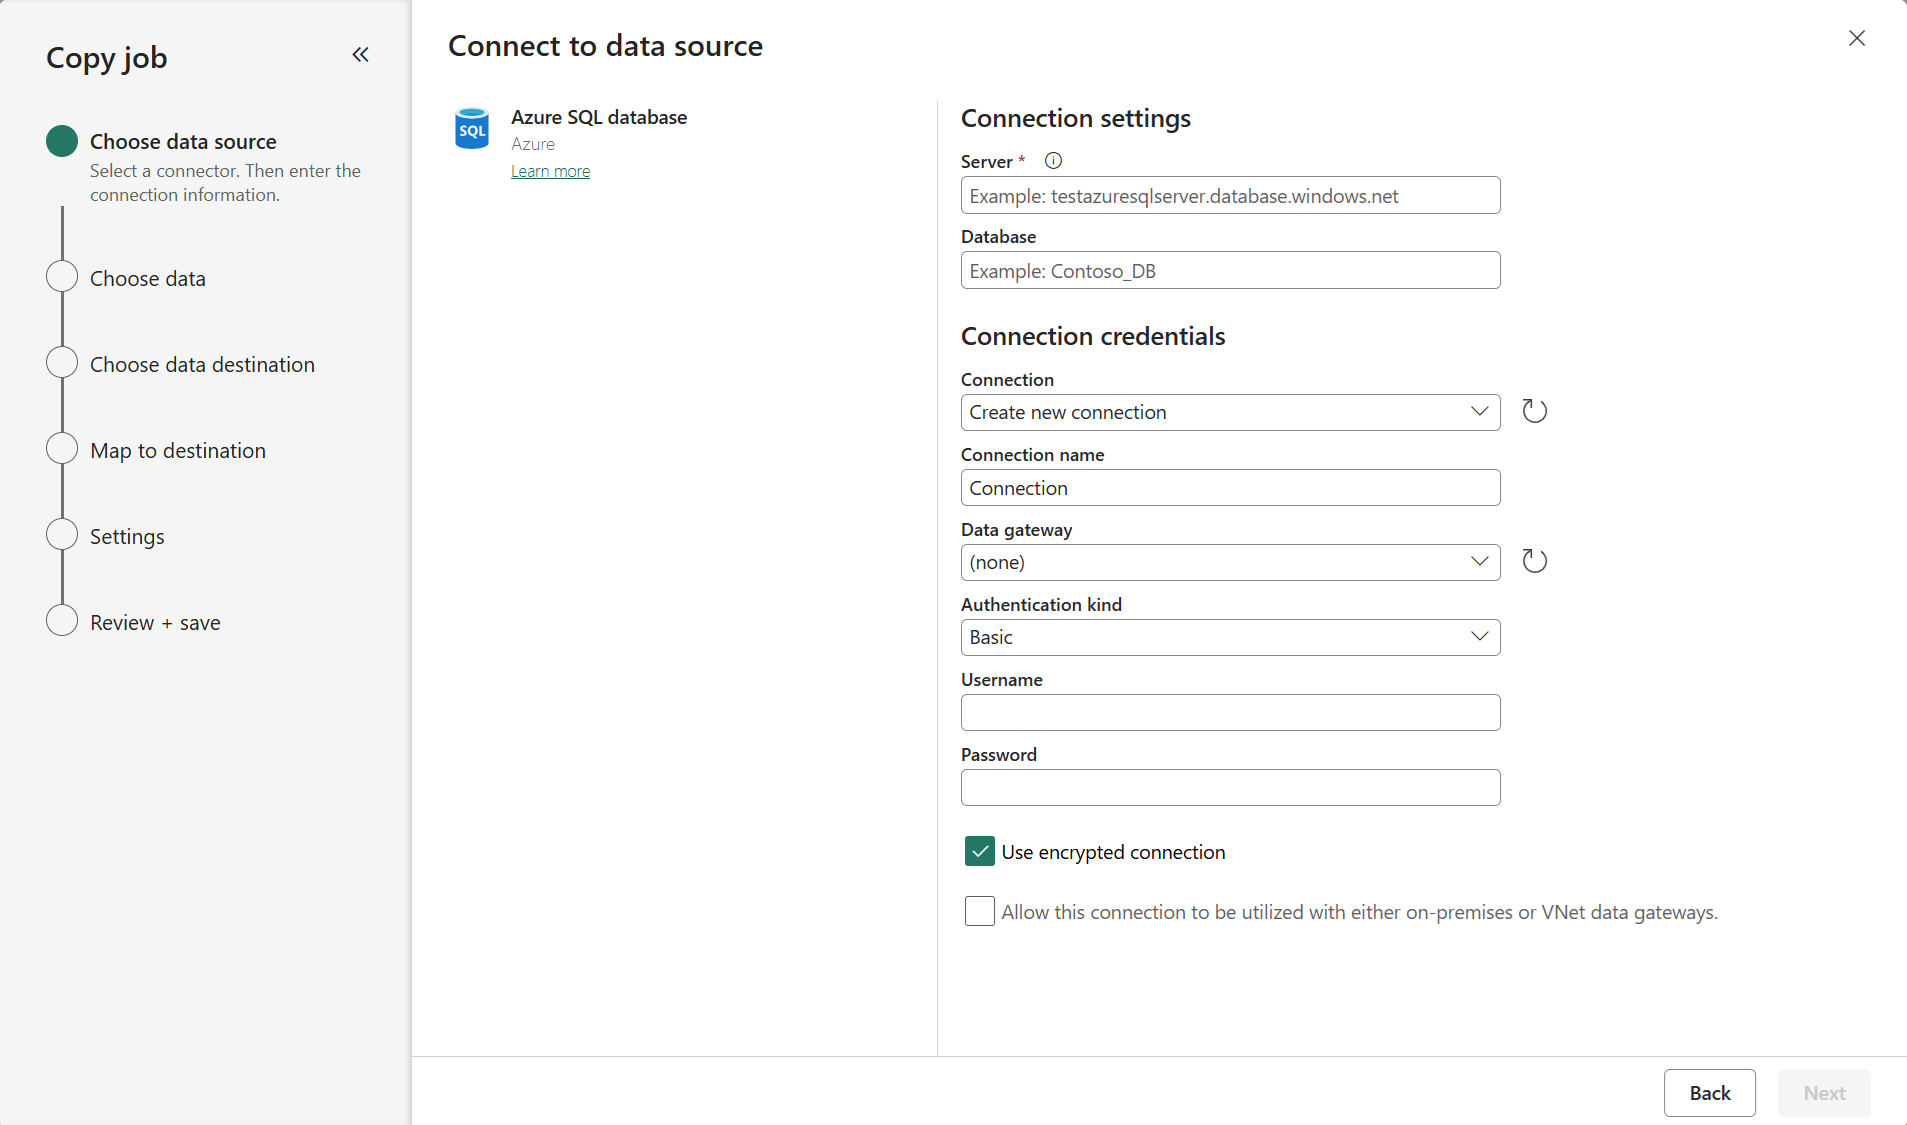
Choose the data stores to copy data from. In this example, choose Azure SQL Database.
Enter your server path and credentials to connect to Azure SQL Database. You can copy data securely within a virtual network environment using on-premises or virtual network gateway.
You should have clear visibility of which source tables have CDC enabled. Select the tables with CDC enabled to copy.
Tables with CDC enabled:

Tables without CDC enabled:


Note
- Fabric Lakehouse tables cannot currently be detected for whether their CDF is enabled.
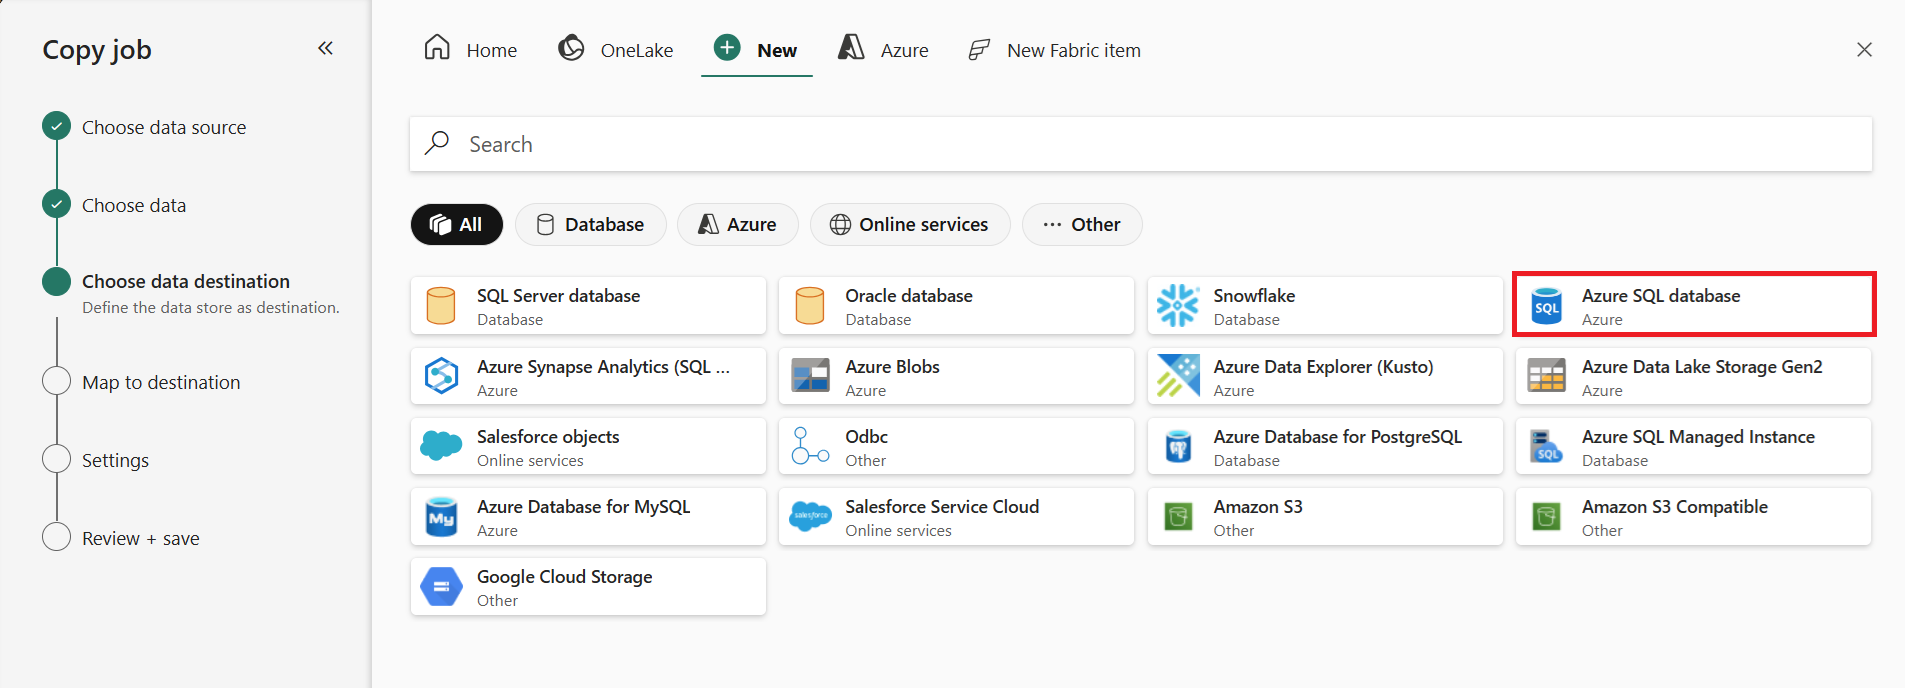
Select your destination store. In this example, choose another Azure SQL Database.
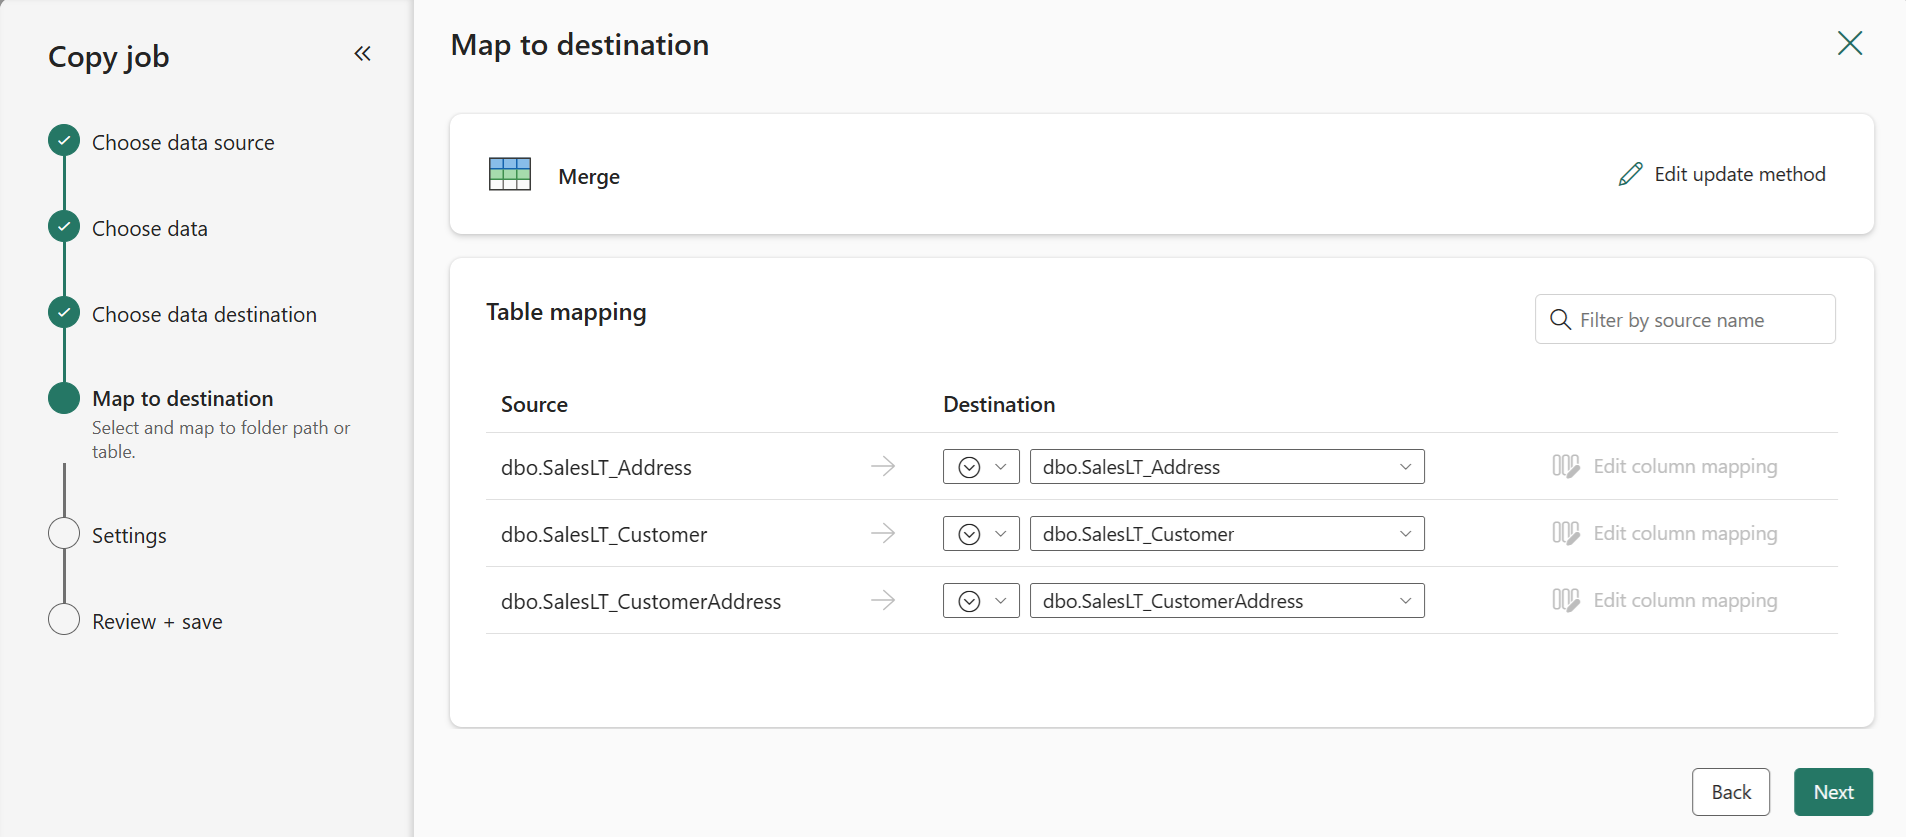
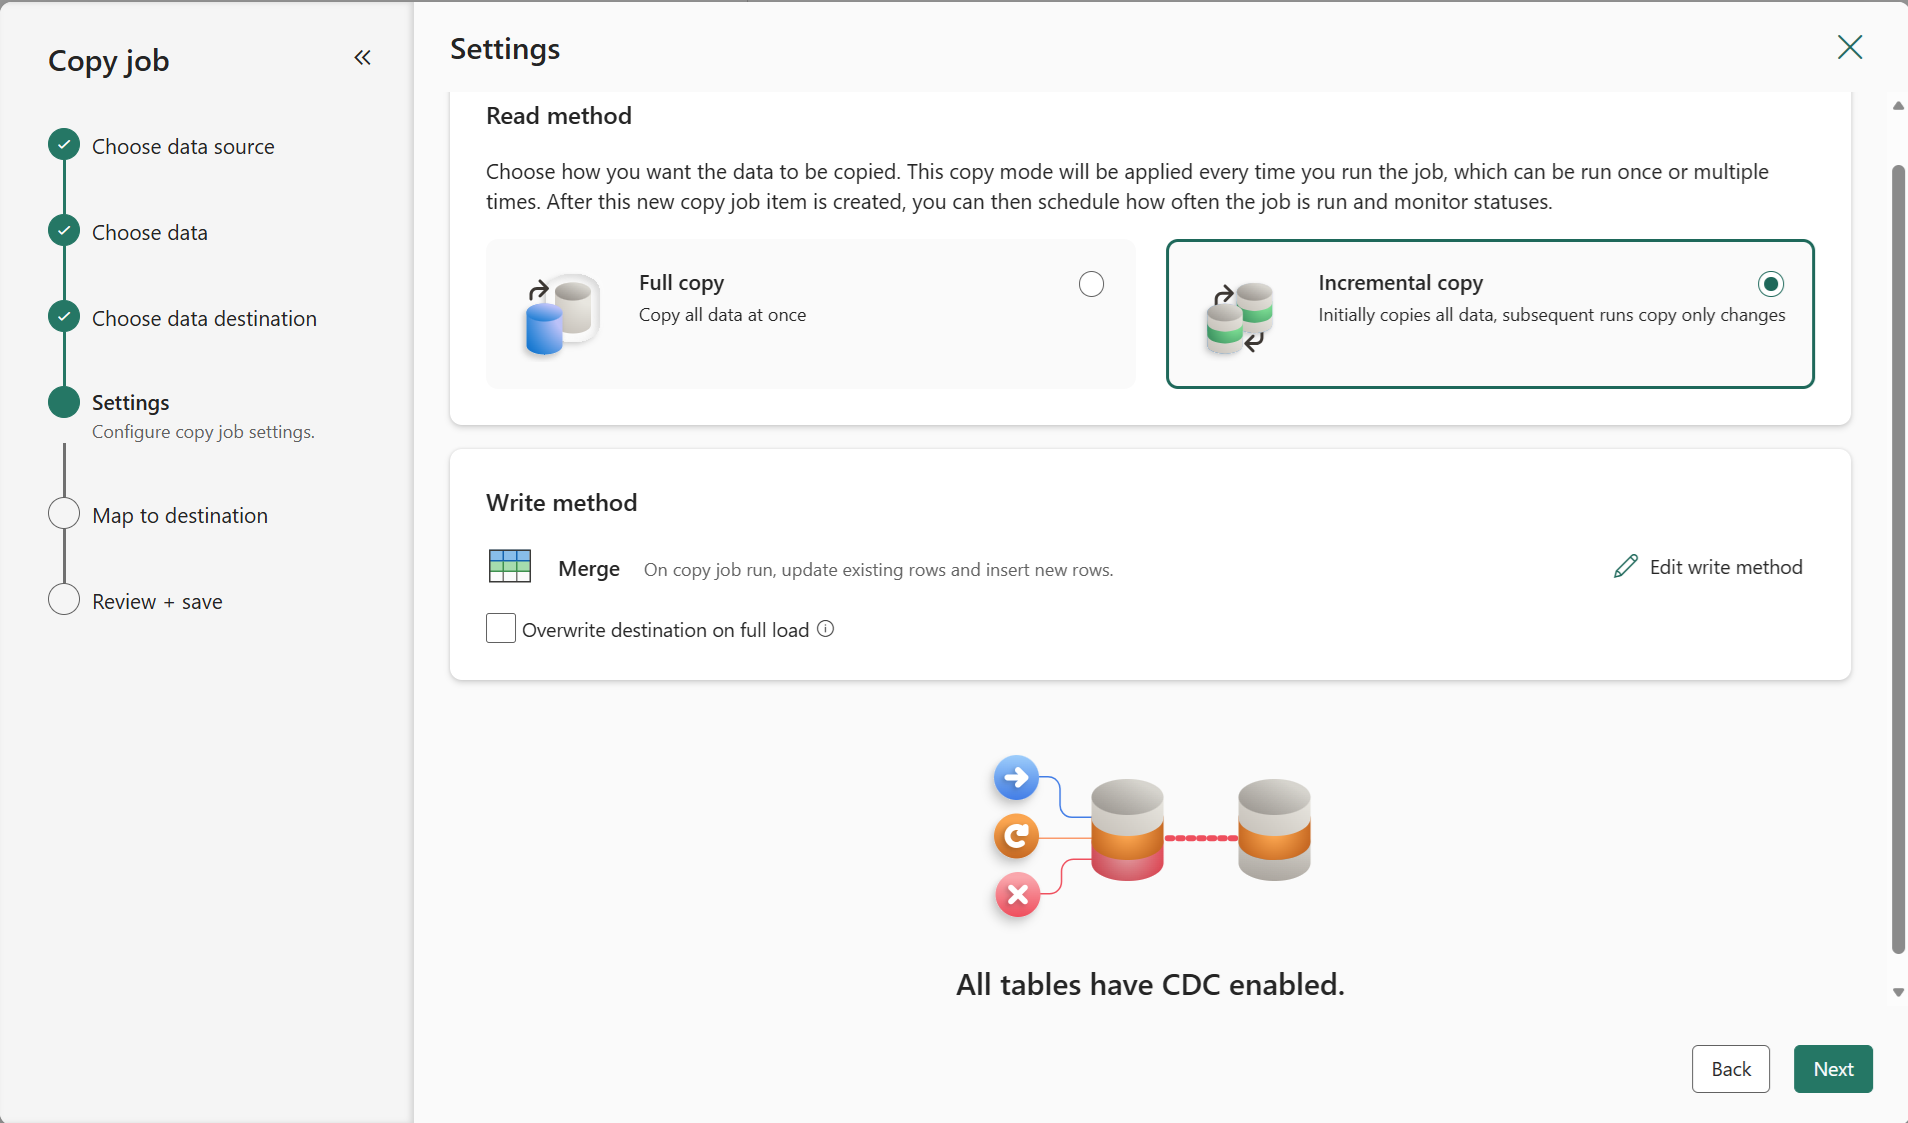
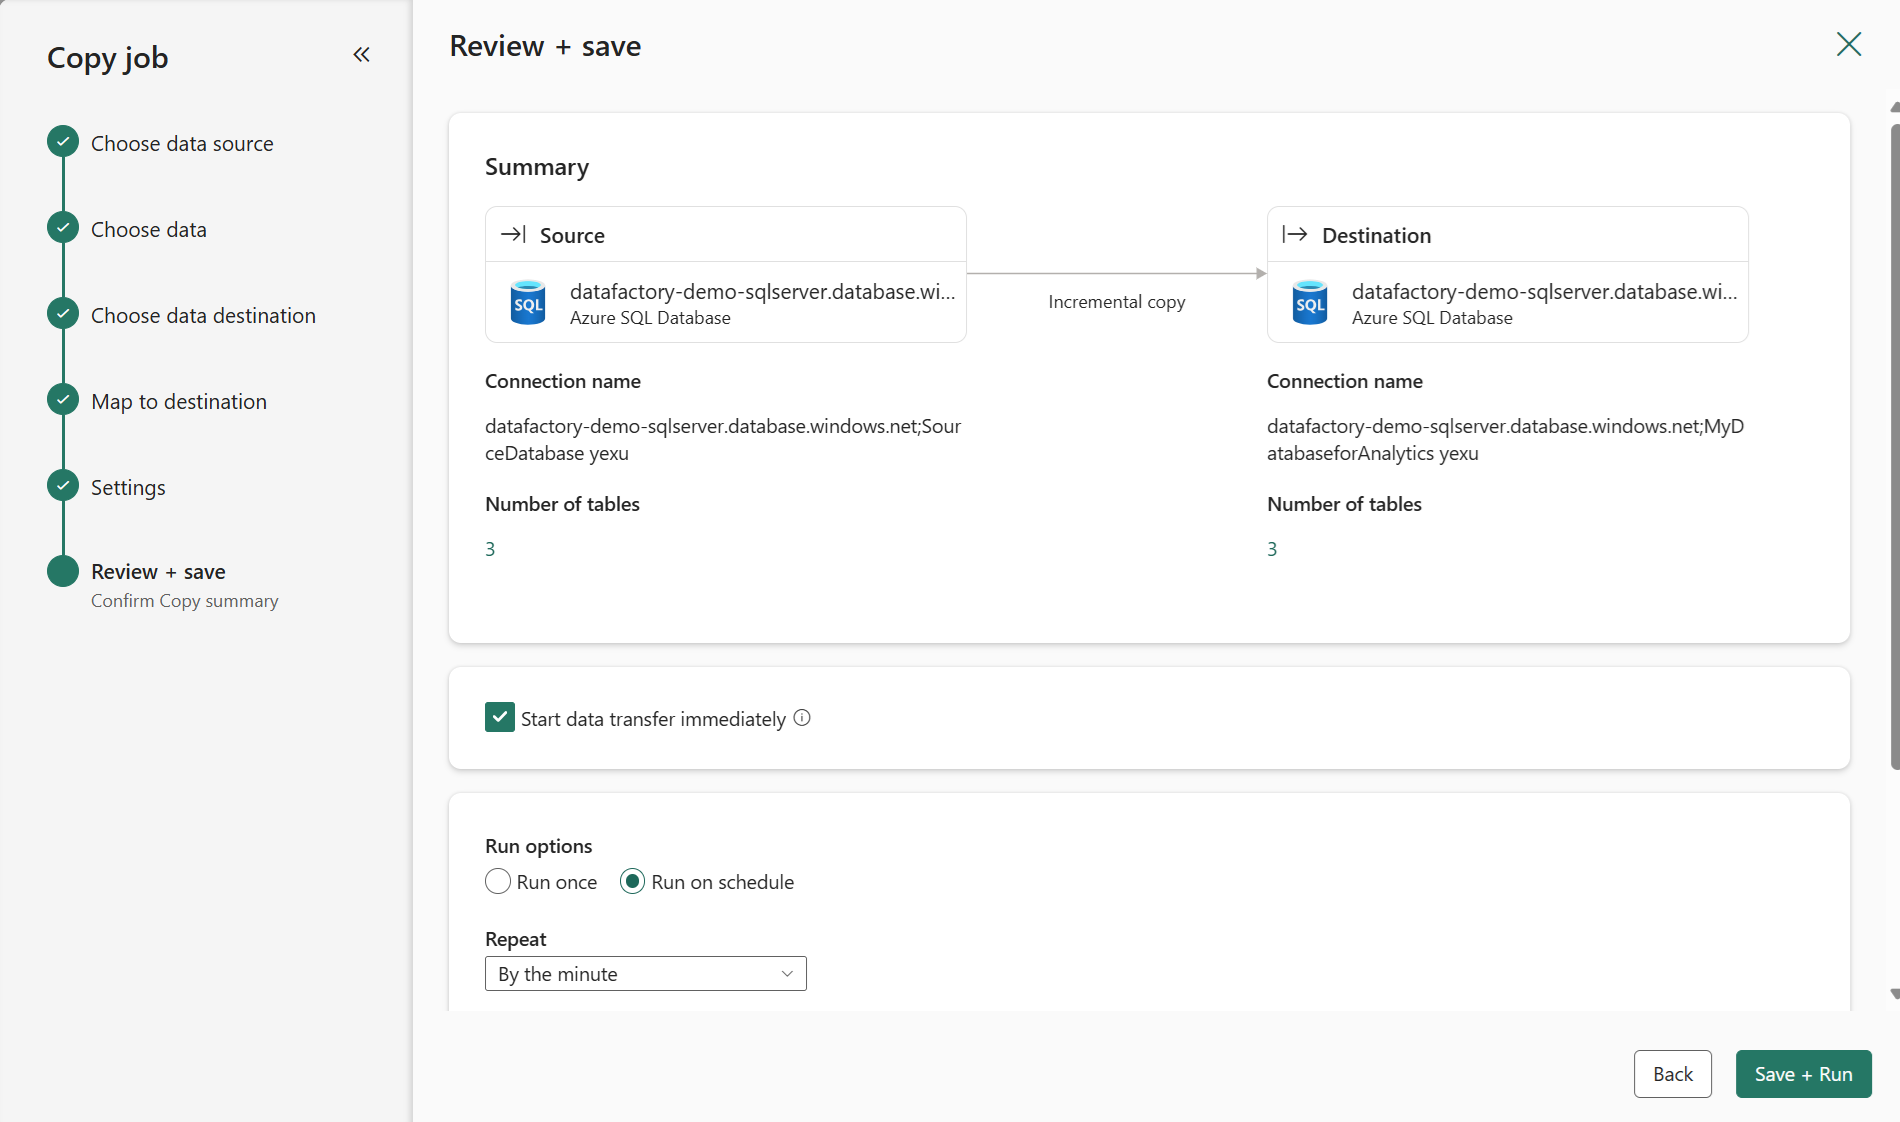
The default Update method should be set to Merge, and the required key columns will match the primary key defined in the source store by default.
Select Incremental copy and you'll see no Incremental column for each table is required to be input to track changes.
Note
Copy Job initially performs a full load and subsequently carries out incremental copies in subsequent runs via CDC.
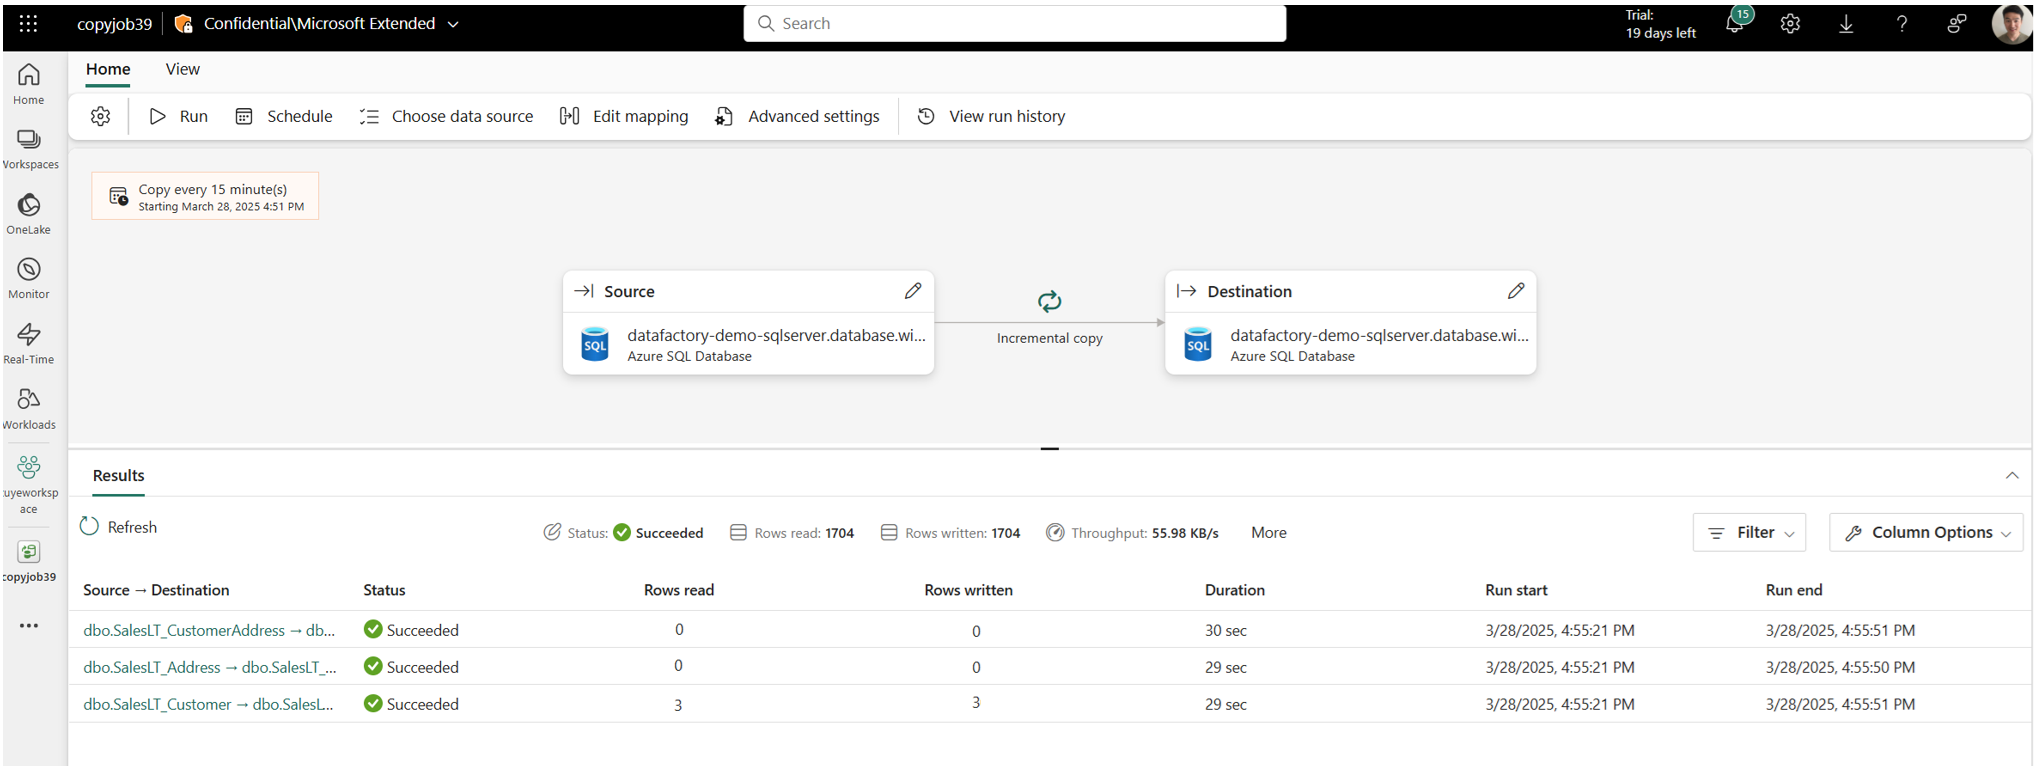
Review the job summary, set the run option to on schedule, and select Save + Run.
Note
Please ensure that your CDC log retention period is longer than the interval between scheduled runs; otherwise, the changed data captured by CDC might be lost if not processed within the retention period.
Your copy job will start immediately. The first run will copy an initial full snapshot.

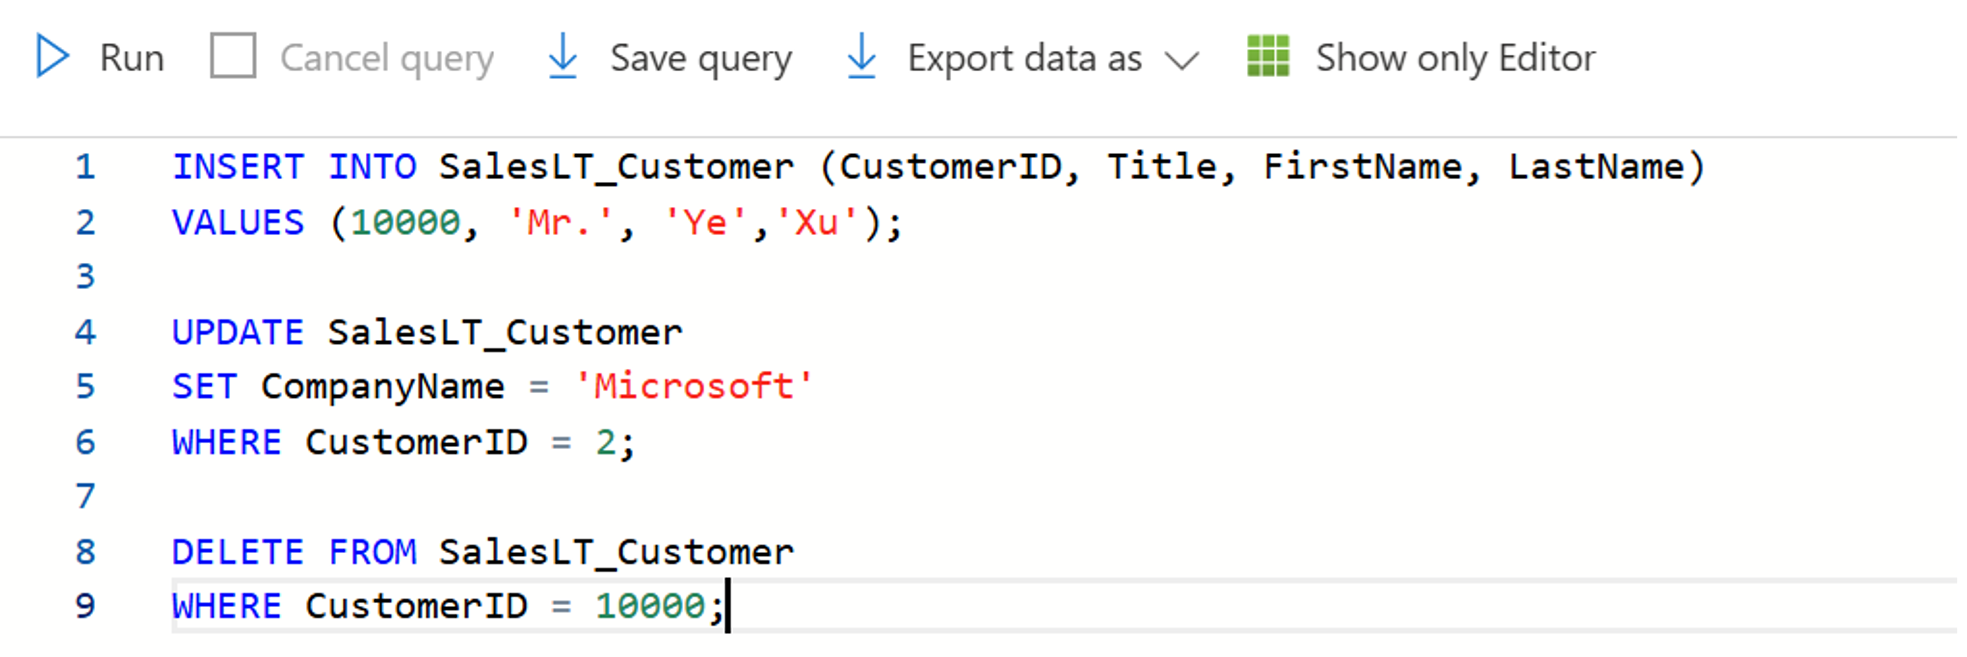
Update your source tables by inserting, updating, or deleting rows.
Run the Copy job again to capture and replicate all changes, including inserted, updated, and deleted rows, to the destination.