Note
Access to this page requires authorization. You can try signing in or changing directories.
Access to this page requires authorization. You can try changing directories.
This tutorial describes how to use change data capture (CDC) in Copy job to efficiently replicate data changes from Snowflake to a destination. This ensures your destination data stays up to date automatically.
Prerequisites
Before you begin, ensure you have the following:
Snowflake requirements:
- A Snowflake account with access to the database and schema containing your source tables.
- OWNERSHIP privilege on the tables where you want to enable change tracking. Alternatively, the MODIFY privilege can be used to enable change tracking.
- USAGE privilege on the database and schema containing the tables.
- SELECT privilege on the tables to read data.
- Tables must have a data retention period configured (minimum 0 days, maximum 90 days). The retention period should be longer than your scheduled Copy job interval to prevent change data loss.
For more information about Snowflake permissions and change tracking, see Access Control Privileges and Introduction to Streams.
Fabric requirements:
- A Fabric workspace with the necessary permissions to create a Copy job.
- A destination data store supported by Copy job for CDC replication.
Tip
Use the SECURITYADMIN or SYSADMIN roles in Snowflake to grant the required object privileges. The ACCOUNTADMIN role might be needed for certain account-wide configurations.
Enable change tracking in Snowflake
Snowflake uses table-level change tracking to capture data changes. Change tracking must be enabled on each table individually. Follow these steps to enable change tracking on your Snowflake tables:
Connect to your Snowflake account using the Snowflake web interface, SnowSQL, or another SQL client.
Enable change tracking on each table you want to track. For each table, run the following SQL command:
ALTER TABLE <schema_name>.<table_name> SET CHANGE_TRACKING = TRUE;Replace
<schema_name>and<table_name>with your schema and table names.Example:
ALTER TABLE sales.customers SET CHANGE_TRACKING = TRUE;
ALTER TABLE sales.orders SET CHANGE_TRACKING = TRUE;
(Optional) Enable change tracking when creating a new table:
CREATE TABLE <schema_name>.<table_name> (
  column1 STRING,
  column2 NUMBER
) CHANGE_TRACKING = TRUE;
Verify change tracking is enabled. Run the following command to check the status:
SHOW TABLES LIKE '<table_name>' IN SCHEMA <schema_name>;In the output, locate the
change_trackingcolumn and confirm it showsON.Alternatively, query the
INFORMATION_SCHEMA:SELECT table_catalog, table_schema, table_name, change_tracking FROM <database_name>.INFORMATION_SCHEMA.TABLES WHERE table_schema = '<schema_name>' AND table_name = '<table_name>';
Note
- Change tracking is a table-level property in Snowflake that tracks INSERT, UPDATE, and DELETE operations.
- You must have
OWNERSHIPprivilege on the table or theMODIFYprivilege to enable change tracking. - Change tracking consumes additional storage for metadata but is required for features like streams and CDC patterns.
- Snowflake retains change tracking data according to the table's data retention period (minimum 0 days, maximum 90 days). Ensure the retention period is longer than your scheduled Copy job interval to avoid data loss.
For more information about Snowflake change tracking, see the official Snowflake Documentation - ALTER TABLE and Managing Streams.
Create a Copy job with Snowflake CDC
Note
- The following steps are very similar to what you have done in Use Copy job to ingest data from Azure SQL DB via CDC to another Azure SQL DB
Complete the following steps to create a new Copy job to ingest data from Snowflake via CDC to a destination:
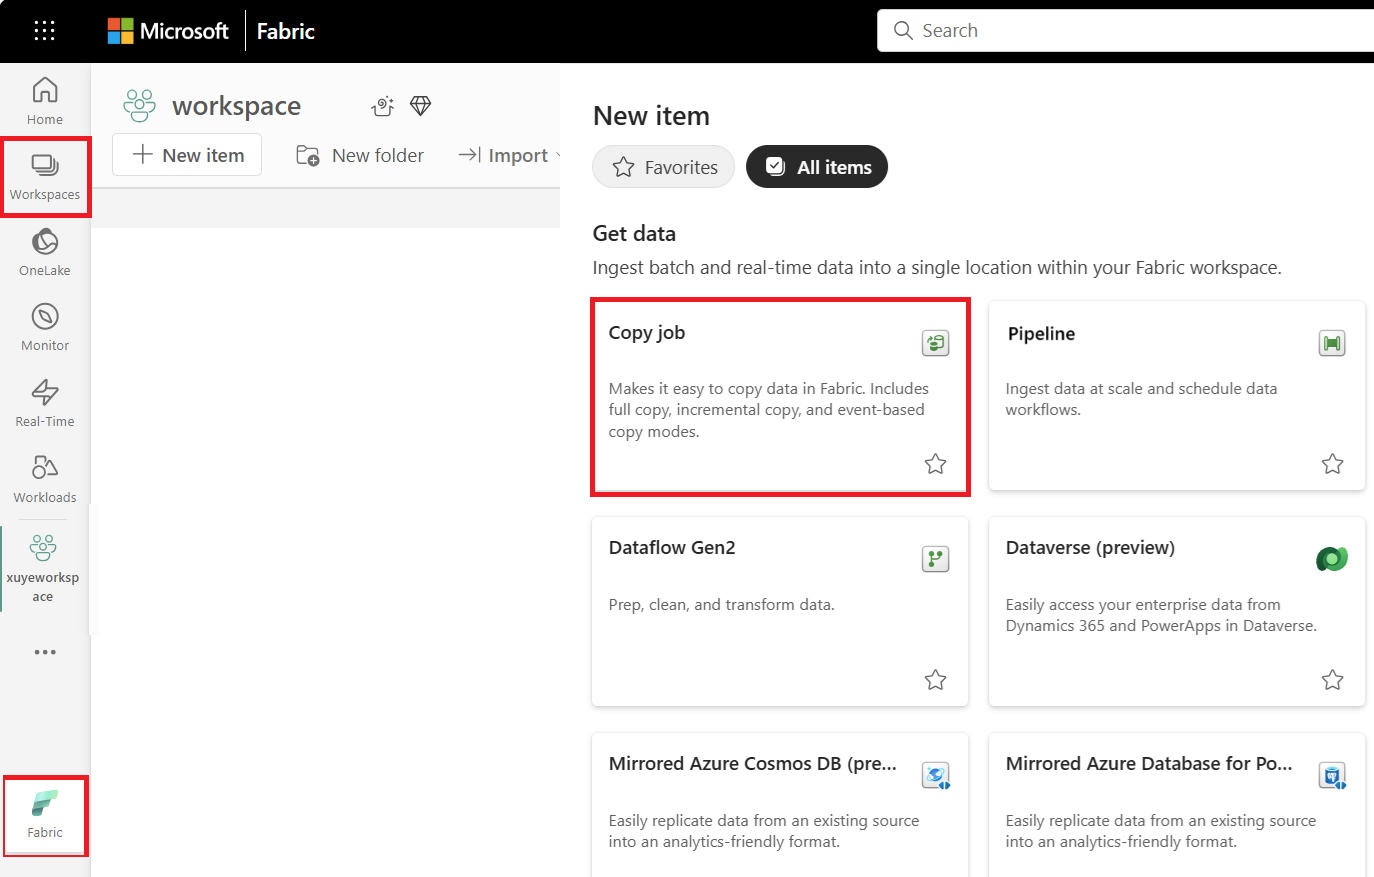
Select + New Item, choose the Copy job icon, name your Copy job, and select Create.
Choose the data store to copy data from. In this example, choose Snowflake.
Enter your connection details and credentials to connect to Snowflake. You can copy data securely within a VNET environment using on-premises or VNET gateway.
You should have clear visibility of which source tables have CDC enabled. Select the tables with CDC enabled to copy.
Tables with CDC enabled:

Tables without CDC enabled:


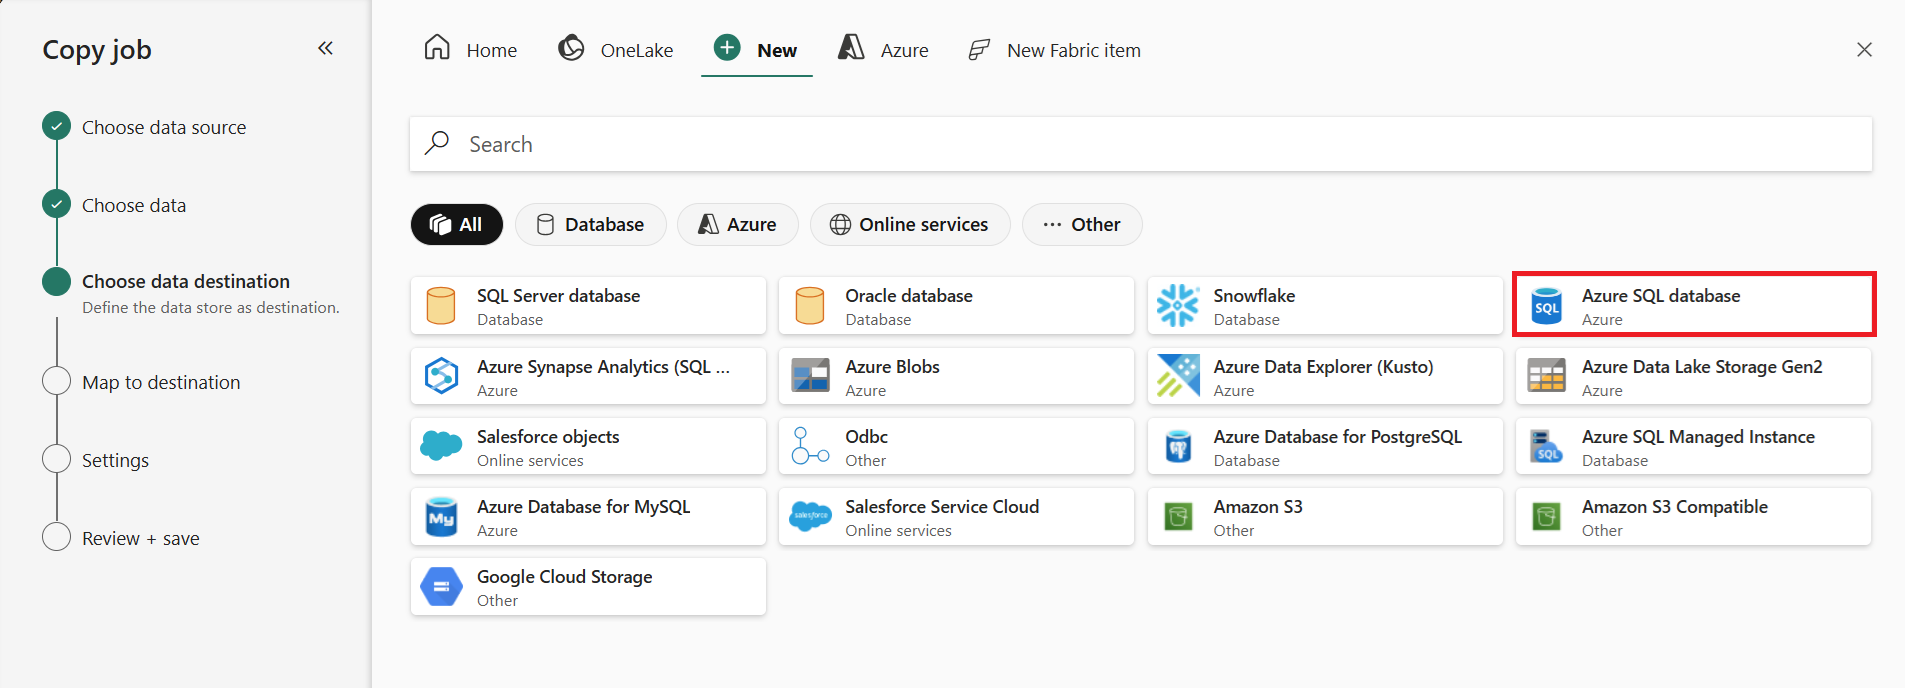
Select your destination store. Choose a destination that supports CDC merge or upsert operations for optimal CDC replication.
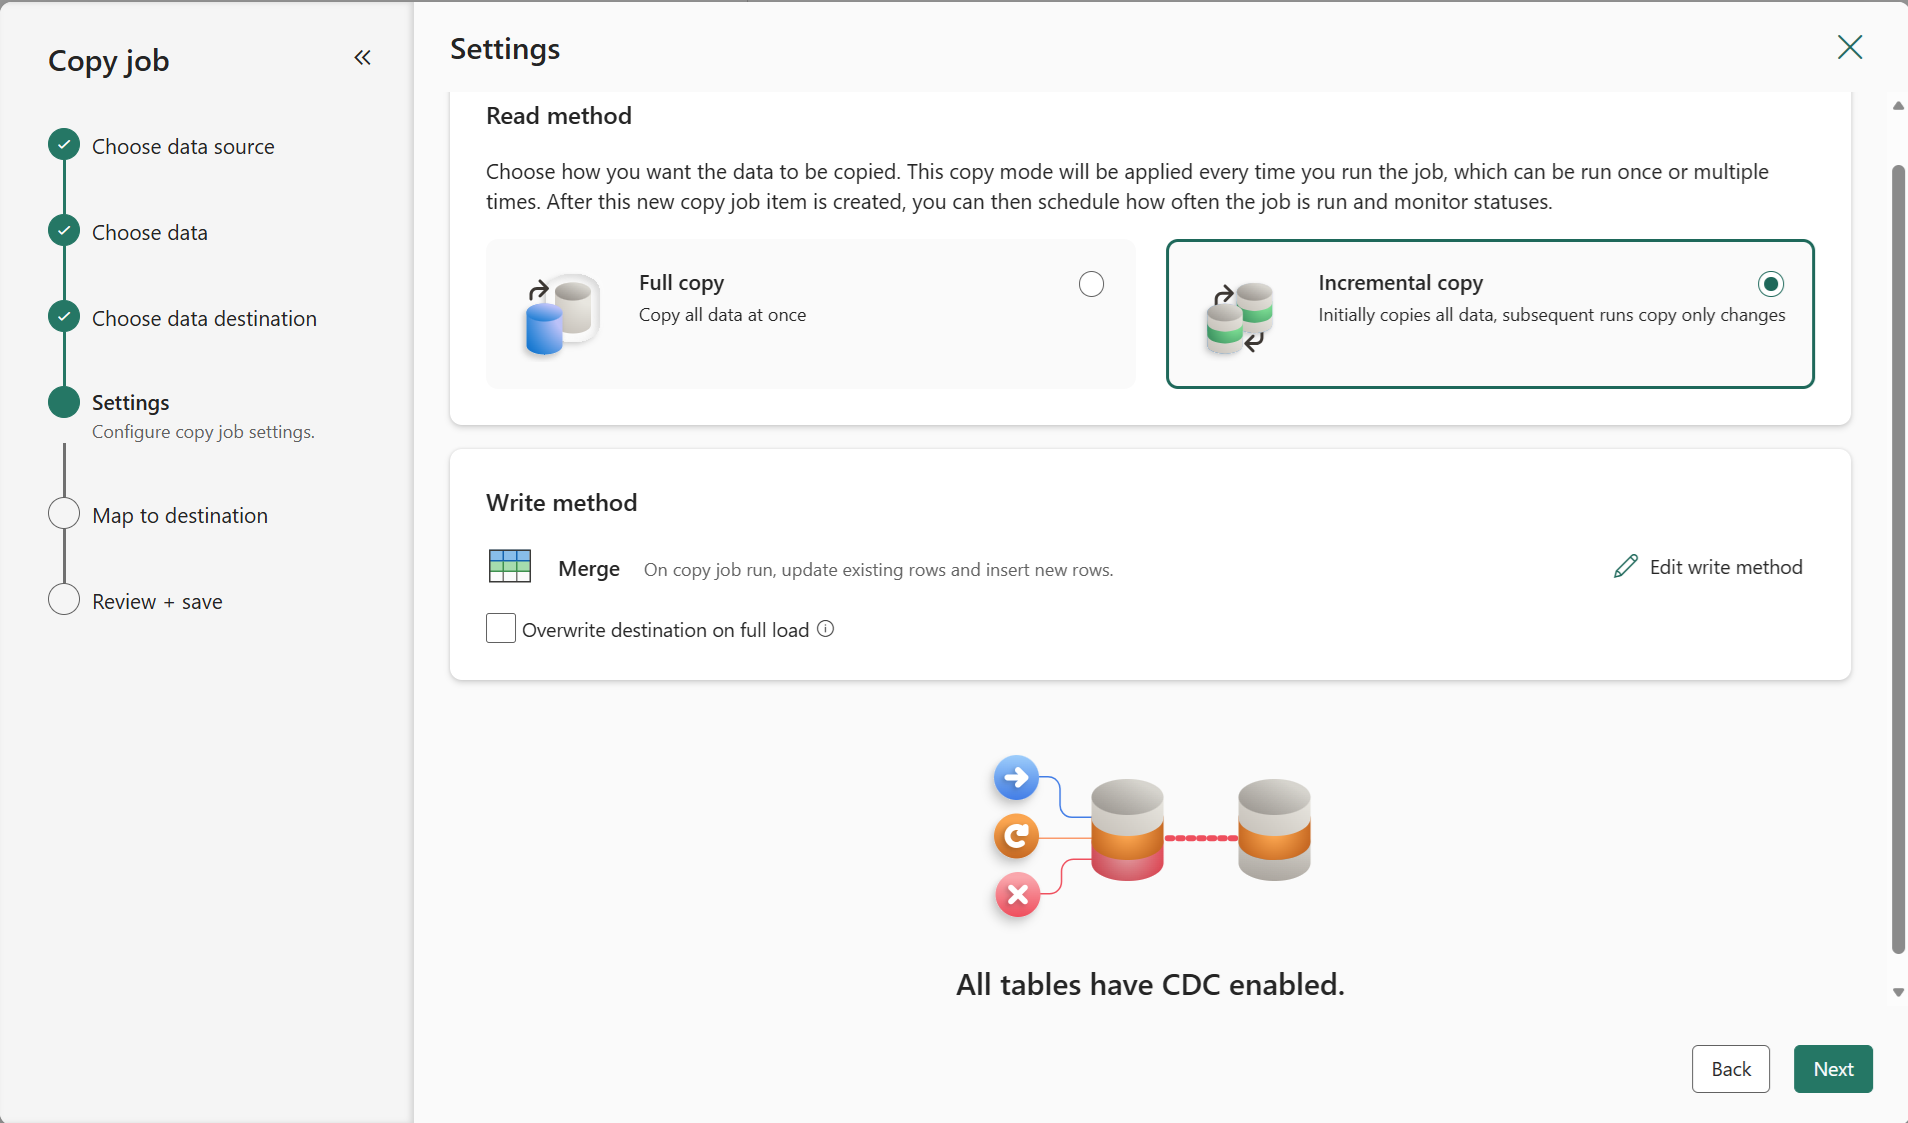
Select Incremental copy and you'll see no Incremental column for each table is required to be input to track changes. The default Update method should be set to Merge, and the required key columns will match the primary key defined in the source store by default.
Note
Copy job initially performs a full load and subsequently carries out incremental copies in subsequent runs via CDC.
Review the job summary, set the run option to on schedule, and select Save + Run.
Note
Ensure that your Snowflake change tracking retention period is longer than the interval between scheduled runs; otherwise, the changed data might be lost if not processed within the retention period.
Your copy job starts immediately. The first run copies an initial full snapshot.
Update your source tables in Snowflake by inserting, updating, or deleting rows.
Run the Copy job again to capture and replicate all changes, including inserted, updated, and deleted rows, to the destination.