Add conditions to topics
You can use Condition nodes to add branches in your topic, comparing the value of one variable to that of another variable or to a specific value. For example, if the value of isClubMember is True, then the topic offers a discount; otherwise, the topic presents the standard item price.
Tip
Rename nodes to make them easier to identify. Select the node's name field to update the name directly, or select the More icon (…) of the node and select Rename from the menu. You can also rename nodes in the code editor.
It's not possible to rename Trigger nodes and Go to step nodes.
Node names can be up to 500 characters in length.
Prerequisites
Add a condition
Open the desired topic.
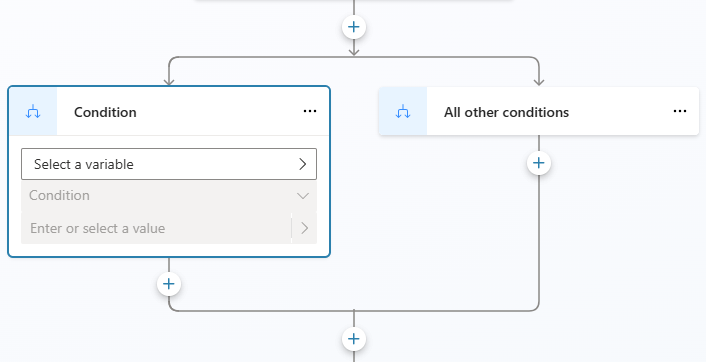
Select the Add node icon
 below the node under which you want to add a condition, and then select Add a condition.
This action adds two branches to your topic. One branch starts with a Condition node and defines the conversation path for when the condition is true. The other branch starts with an All Other Conditions node and defines the path for when the condition is false.
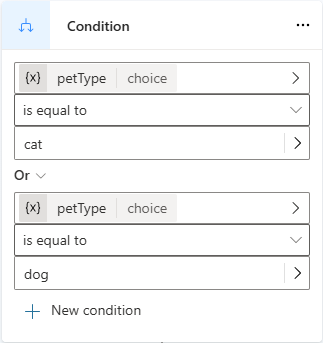
To build your condition in the Condition branch, you must select a variable, a logical operator, and a value.
Select Select a variable and select the variable to compare.
The logical operators available depend on the type of the variable you selected. For example, is equal to is selected by default, and it's available for all variable types. The operator is greater than is available for number types, but not for string types.
Select a different operator if needed.
Select or enter a value to compare with your variable.
The value or variable to compare must be of a compatible type, based on the variable and the operator. Some operators, such as is Blank or is not Blank, don't require you to add a comparison value.
For simple types, such as text or number, you can type a literal value. Select the Select variable icon (>) to select a variable or use a Power Fx formula.
Select + New condition if you need to add more criteria to your condition. Select And to make the criteria cumulative, or select Or to make them exclusive of one another.
Note
While configuring a condition that compares a string to a different data type, if you encounter a mismatch between the first variable and the comparison value, an error message noting the type comparison and the Fix type mismatch button appears. Select the button to have Copilot Studio automatically generate a Power Fx formula that resolves the mismatch.
Add more Condition branches
Initially, a condition has two branches: a Condition branch for when the condition is true (that is, the if statement), and the All Other Conditions branch for when it's false (the else statement). You can add as many Condition branches (for any else if statements) as you need. Each condition is evaluated in order. The first branch with a condition that evaluates to true is followed. If all conditions evaluate to false, the All Other Conditions branch is followed.
For example, you might have a number variable and want three branches for the following cases:
- If the number is less than 10
- Else if the number is greater than 50
- Else—that is, when the number is between 10 and 50
To add another Condition branch, select the Add node icon ![]() above your condition, and select Add a condition.
above your condition, and select Add a condition.

Selecting the Add node icon ![]() below a condition adds an entire new condition (with a Condition node and an All Other Conditions node), not a new condition branch.
below a condition adds an entire new condition (with a Condition node and an All Other Conditions node), not a new condition branch.
Insert a new condition to a group of conditions
You can insert a new condition into a group of conditions.
Select the More icon (…) of the Condition node, and then select Insert new condition.
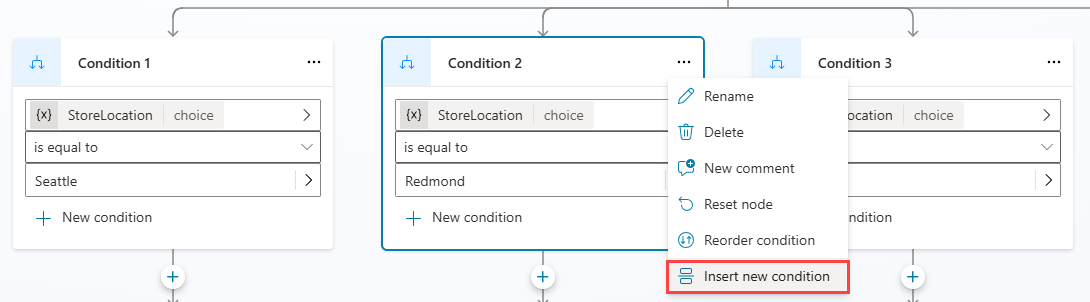
The new condition is inserted to the right of the previously selected condition.

Note
You can't insert a new condition to the right of an All Other Conditions branch. It must remain as the last condition item on the right of the condition branch.
Organize conditions
For more complex condition structures, you can reorder conditions within the same condition group.
Select the More icon (…) of the Condition node, and then select Reorder condition.
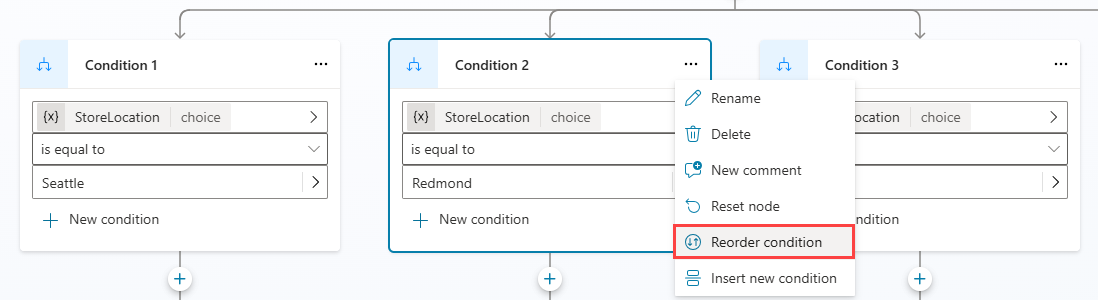
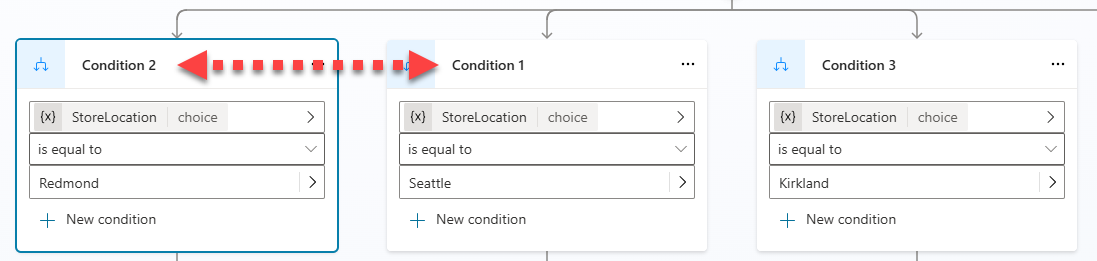
The Select destination position message is displayed. Select the condition node that you want to swap positions with.
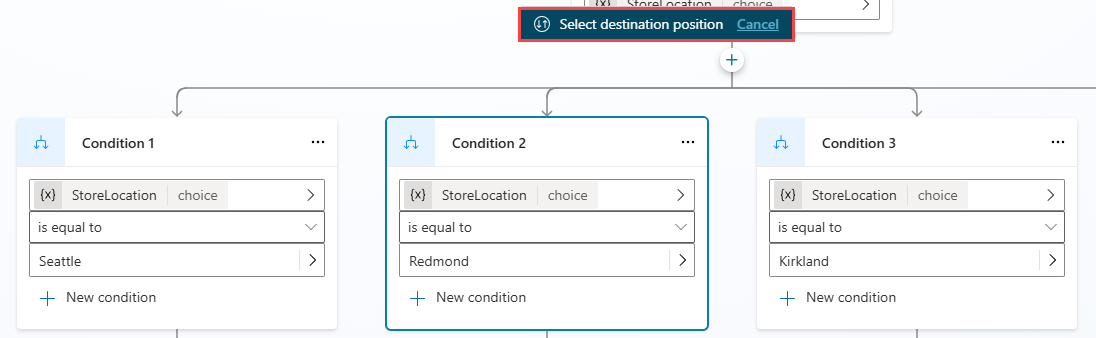
The condition node is now in its new position within the group.
Note
- You can't move a condition to the right of an All Other Conditions branch. It must remain as the last condition item on the right of the condition branch.
- You can only reorder conditions in the same condition group.
Use Power Fx to define a condition
The default condition editor is good for most scenarios. If you need more flexibility, use Power Fx in a Condition branch.
Select the More icon (…) of the Condition node, and then select Change to formula.
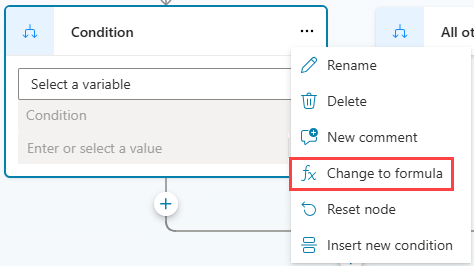
The node switches to the formula editor control. If you defined a condition earlier, the formula behind that condition is shown in the formula editor.
To change the formula, select the Select variable icon (>) to open the Power Fx formula editor. The formula you enter here must return a Boolean (true or false) value.
Learn how to create expressions using Power Fx.
To switch back to the simple condition editor, select the More icon (…) of the Condition node, and then select Reset node.