Note
Access to this page requires authorization. You can try signing in or changing directories.
Access to this page requires authorization. You can try changing directories.
Appropriate roles: Global Admin, Compliance Admin, Account Admin (MAICPP-specific), Manager or Owner for Developer (for example, Microsoft Marketplace; Windows and Xbox; Microsoft 365 and Copilot).
Note
For Developer offerings, only the account's Primary Contact with an appropriate role can complete Identity Verification.
Learn how to complete identity verification in Partner Center by obtaining and presenting a verified credential (VC). A verified credential is a credential issued by a trusted identity verification provider and used during identity verification.
When this step is required
Microsoft may require identity verification during initial Partner Center enrollment and periodically afterward. This requirement might not apply to all partner organizations.
This process requires you to obtain and present a verified credential issued by a trusted identity verification provider.
Note
If you don't currently have a verified credential, you must get one before you can complete identity verification. The steps to get and present a verified credential are listed separately in the following sections. After you get a verified credential, return to Partner Center to present your new verified credential.
Before you start
Make sure you have the following items:
A valid, non-expired government-issued ID, such as a passport, driver's license, or identity card.
A mobile device with the latest version of the Microsoft Authenticator app installed.
Important
- The name on your government-issued ID must be in the same language and match the name on your Partner Center account exactly. If the names don't match, update your account information in Partner Center before continuing.
- Complete identity verification within 30 days of receiving the request. Delays extend the process and might result in your account verification being rejected.
Who can perform verification
The following roles can complete verification:
Global admin
Compliance admin
Account admin (MAICPP-specific)
Manager or owner for Developer offerings
For Developer offerings, only the account's primary contact with an appropriate role can complete identity verification.
If you do not already have one of the above roles, a Global Admin, Account Admin, or User Management Admin from your tenant can assign you the appropriate role in Account Settings > User Management. Once assigned, notify the user to continue verification by navigating to Verification Summary on the Legal info page.
Complete identity verification
When identity verification is required, the primary contact receives a notification to take action.
Go to the Verification Summary link on the Legal Info page. Review the instructions in the following sections for the legacy and updated experiences.
Obtain a verified credential in the legacy experience
Sign in to Partner Center.
Select Settings (gear icon), and then choose Account settings.
Select Legal info.
Select Verification Summary link or click go here under Verification status.
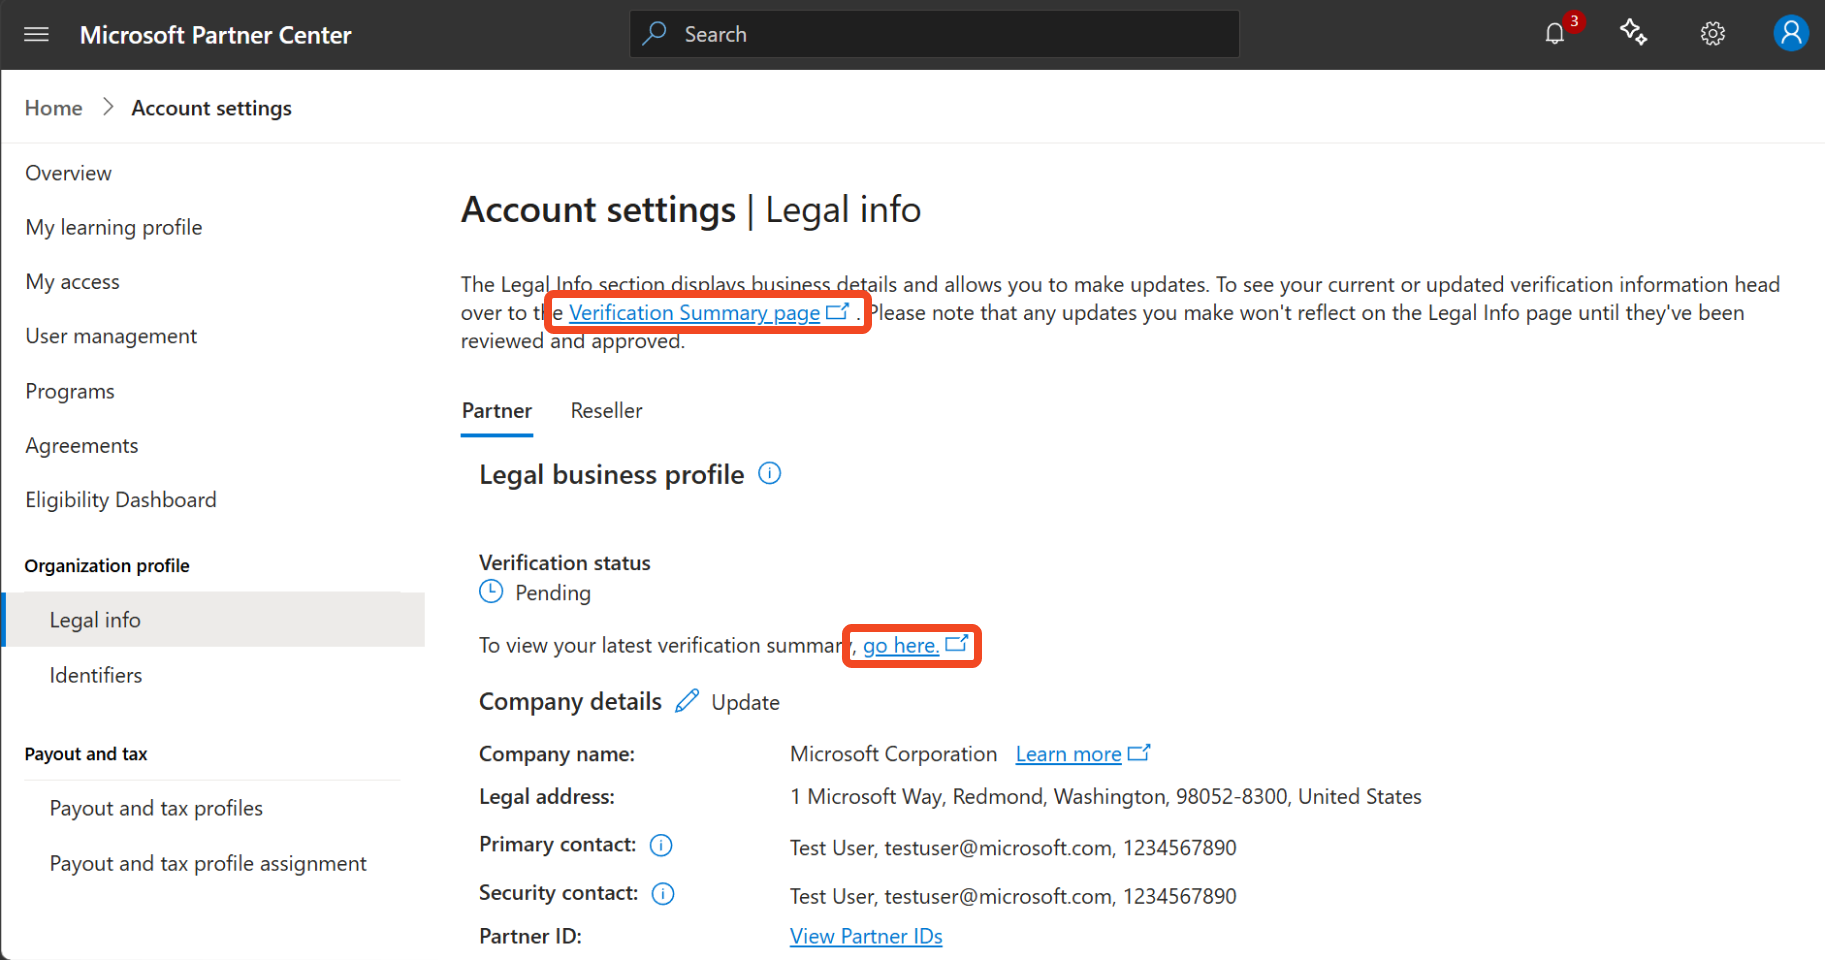
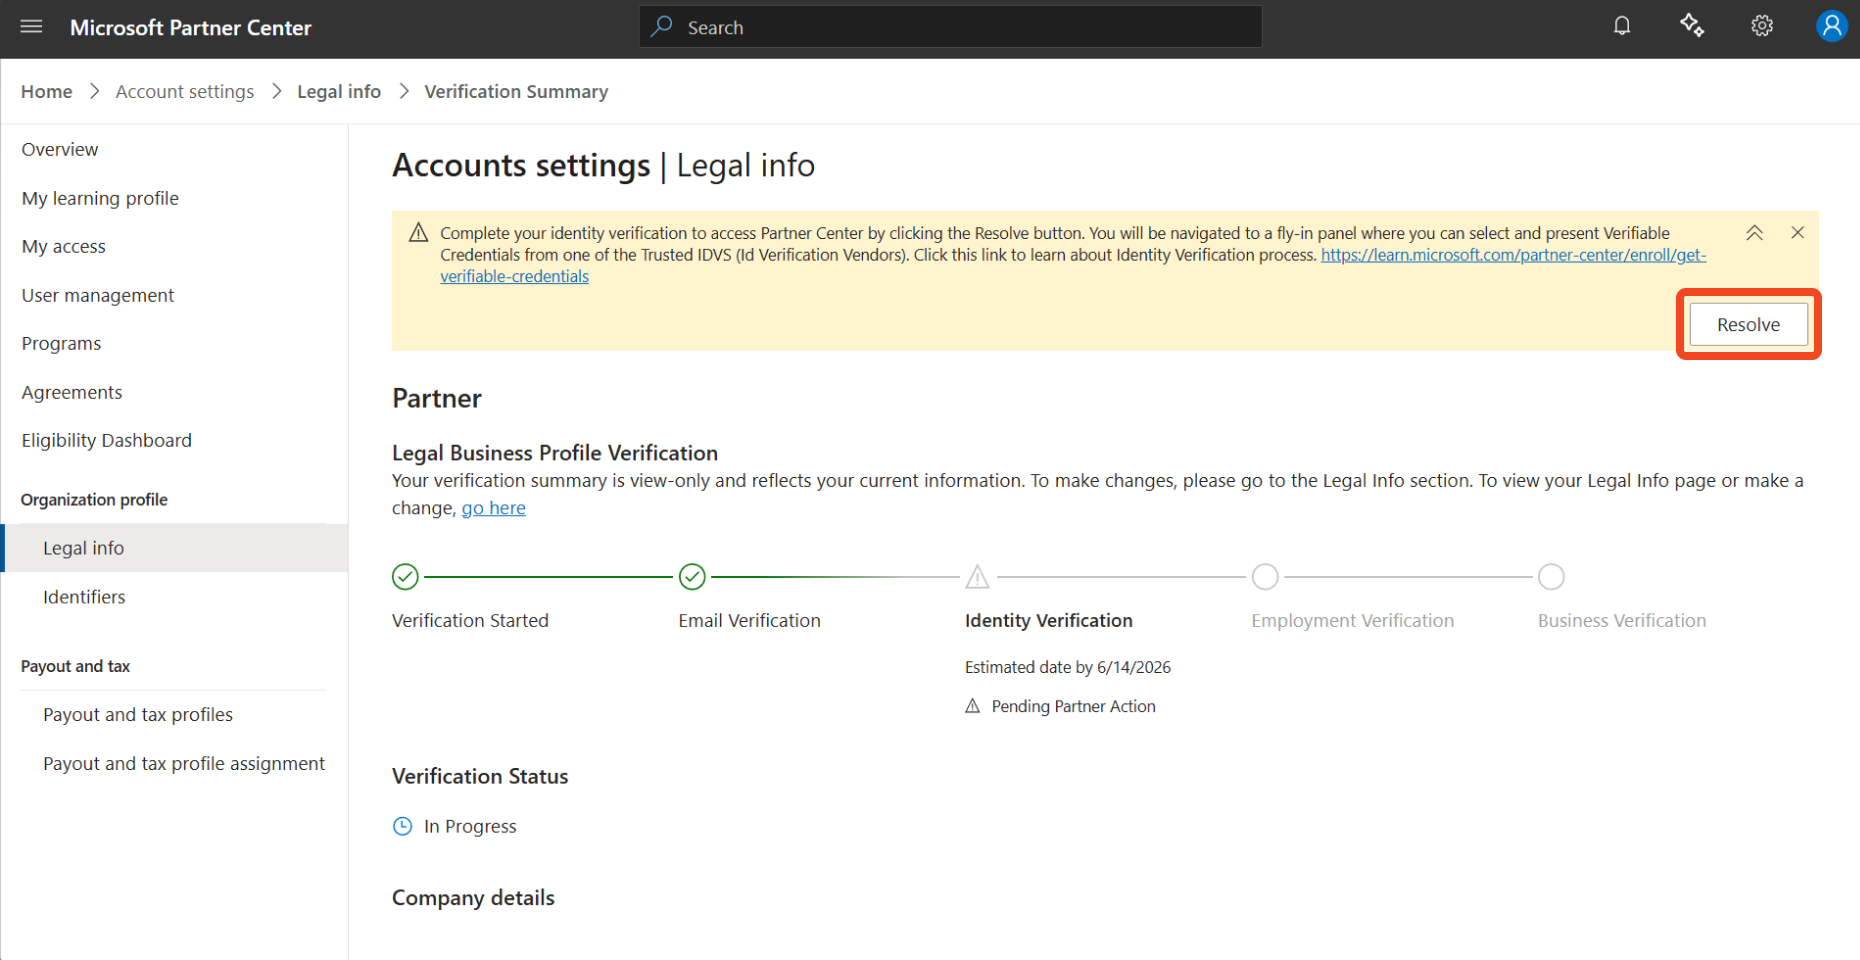
On Verification summary page, select Resolve.
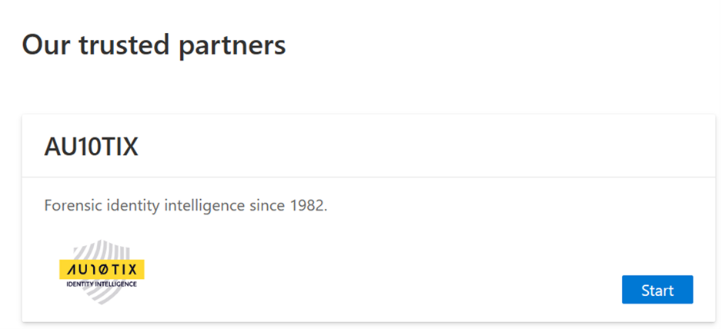
Select Start.
Follow the instructions to verify your identity using a government-issued ID.
Finish the process to create and store your verified credential in the Microsoft Authenticator app.
To present your newly issued verified credential, return to Partner Center and follow the steps under Present a verified credential in the legacy experience.
Important
Creating a verified credential does not complete identity verification. After your verified credential is issued, follow the steps below to return to Partner Center Verification Summary page to present your verified credential by scanning the QR code under Present your Verified ID.
Present a verified credential in the legacy experience
Sign in to Partner Center.
Select Settings (gear icon), then choose Account settings.
Select Legal info.
Select Verification Summary link or click go here under Verification status.
On Verification summary page, select Resolve.
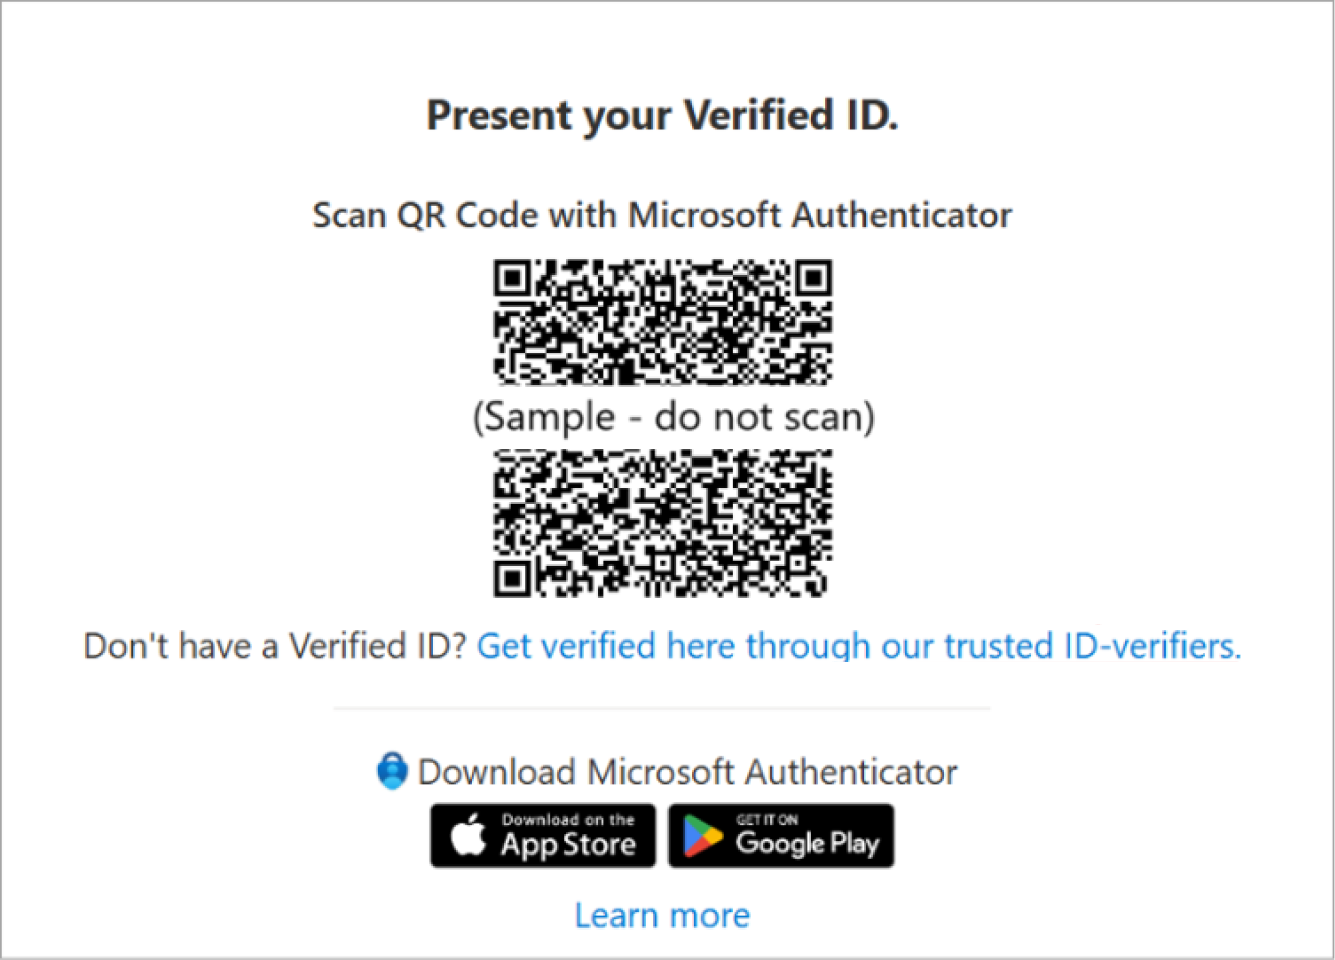
Scan the QR code to present your verified credential using the Microsoft Authenticator app.
When prompted, select your existing verified credential.
Complete the upload steps to share your credential.
After the credential is successfully presented, return to Account settings | Legal info in Partner Center to track your verification progress.
Obtain a verified credential in the updated experience
Sign in to Partner Center.
Select Settings (gear icon), then choose Account Settings.
Select Legal info.
Select Verification Summary link or click go here under Verification status.
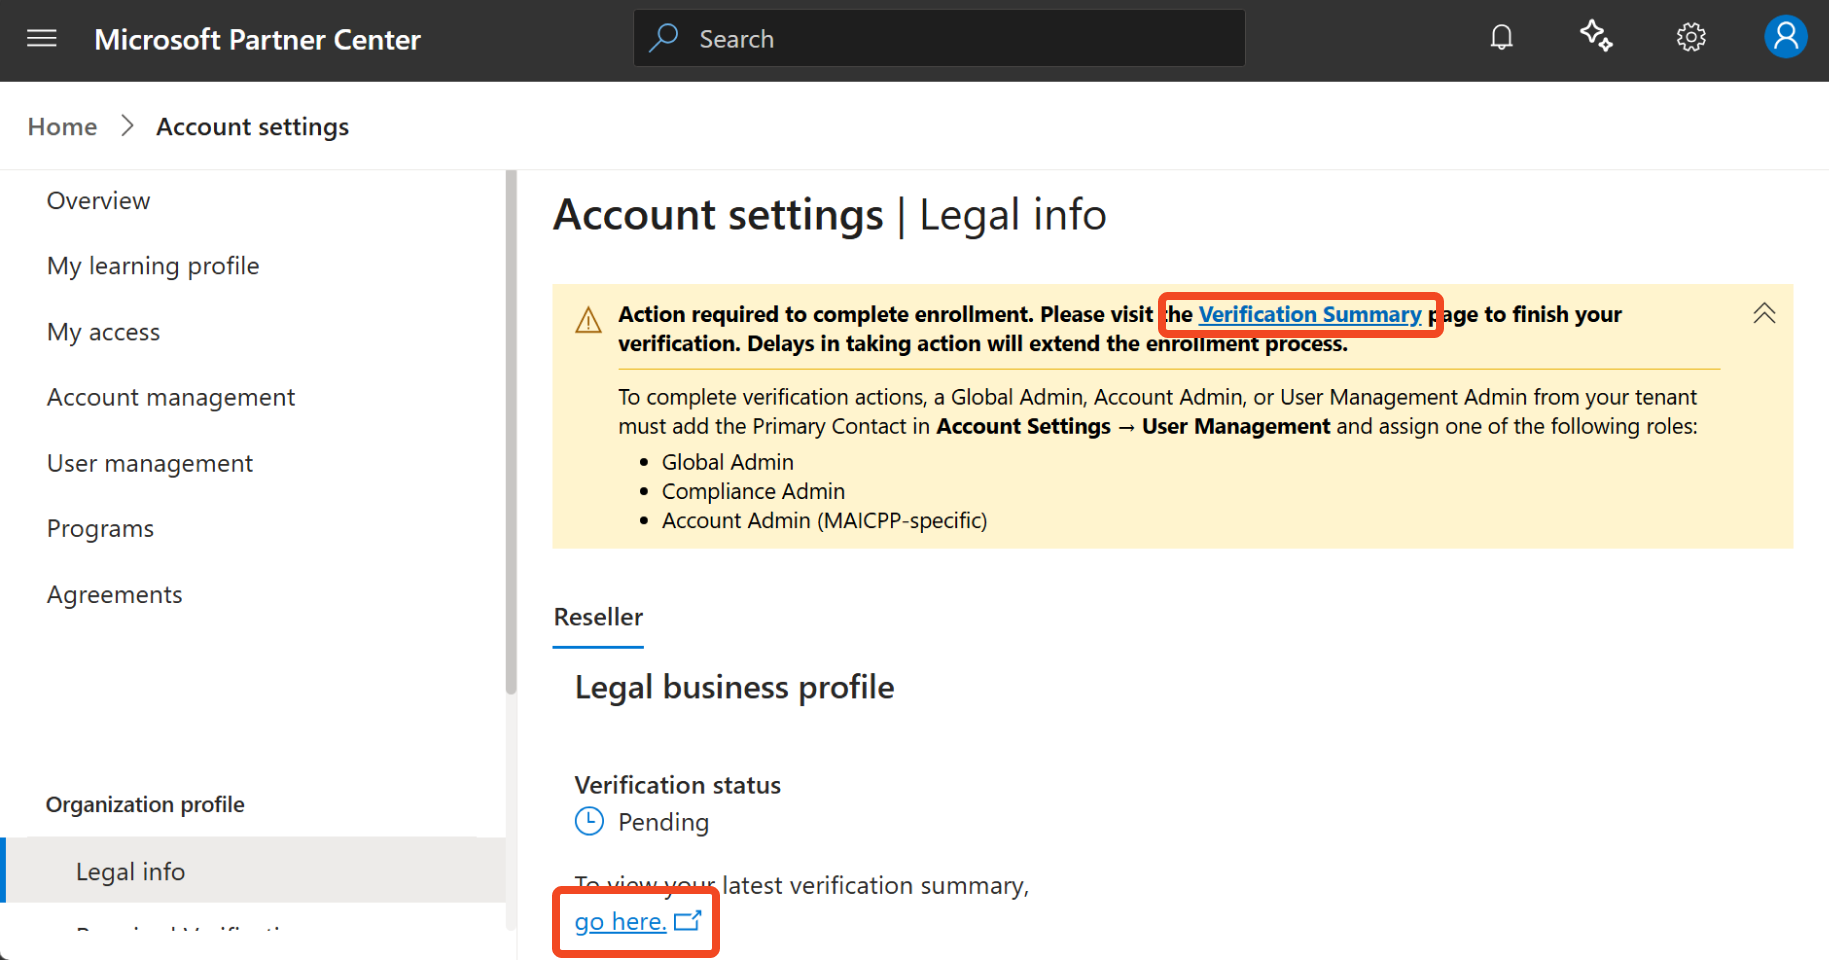
Select the link Get verified here through our trusted ID-verifier.
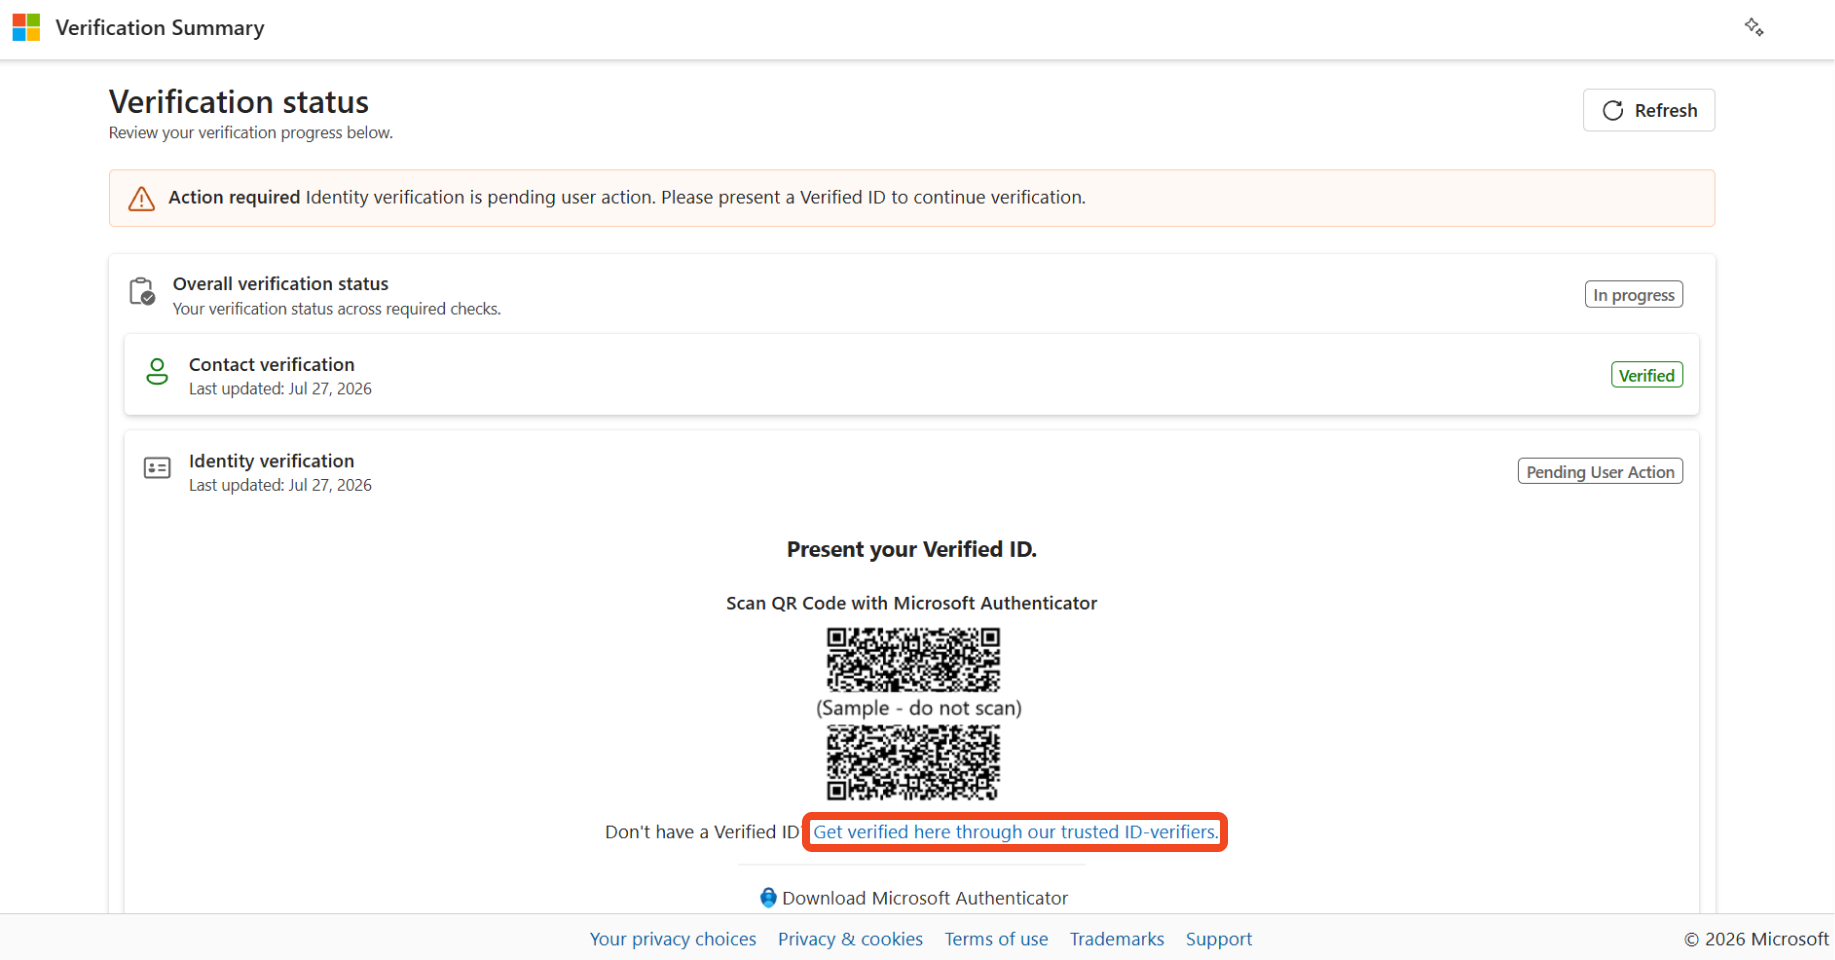
Follow the instructions to verify your identity using a government-issued ID.
Finish the process to create your verified credential.
Add your verified credential to your Microsoft Authenticator app.
Return to Partner Center Verification Summary page to present your verified credential by scanning the QR code under Present your Verified ID.
Important
Creating a verified credential does not complete identity verification. After your verified credential is issued, follow the steps below to return to Partner Center and present your credential through the QR code to continue.
Present a verified credential in the updated experience
Sign in to Partner Center.
Select Settings (gear icon), then choose Account Settings.
Select Legal info.
Select Verification Summary link or click go here under Verification status.
Present your verified credential by scanning the QR code under Present your verified ID using the Microsoft Authenticator app.
Follow the prompts in the Microsoft Authenticator app.
When prompted, select your verified credential.
Complete the upload steps to present your credential.
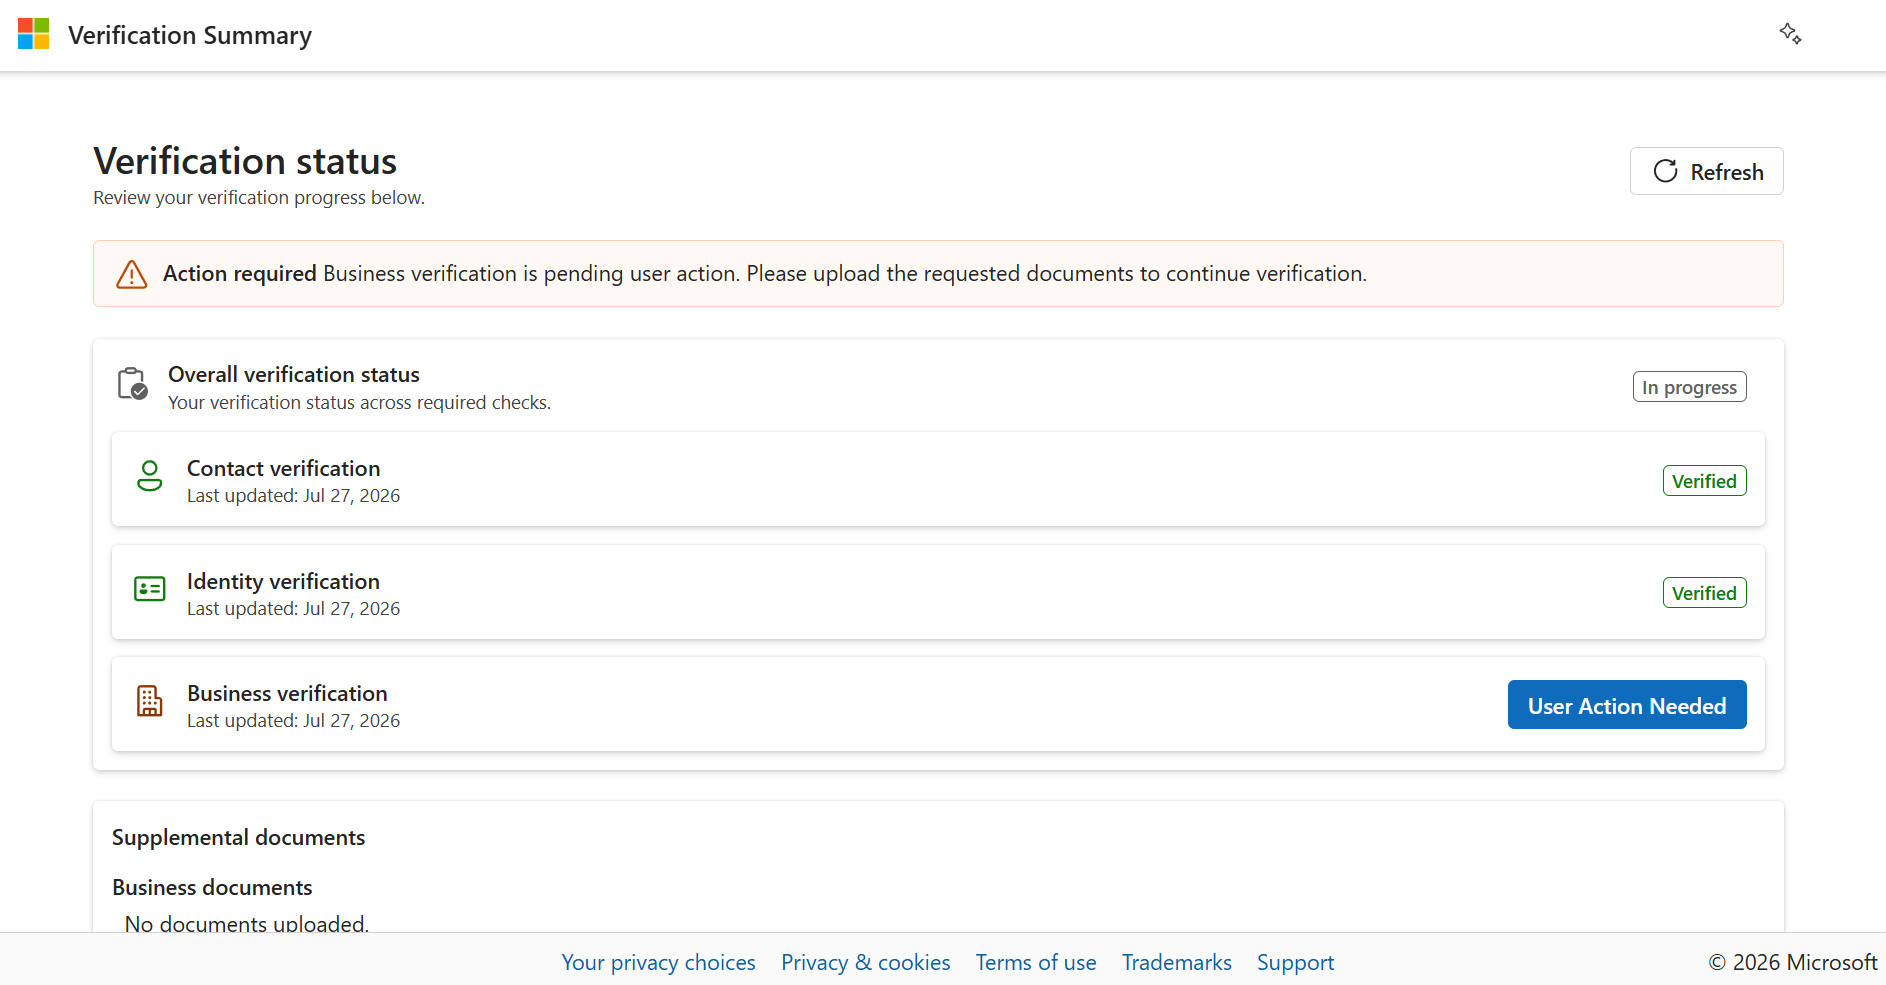
After you successfully present your verified credential, the Identity Verification status will update on the Verification Summary page.
What happens next
After you present your verified credential, your identity verification status updates automatically in Partner Center. You might still need to complete additional verification steps, such as business verification. Identity verification is complete when the identity verification step shows verified and no further action is required.
If the status is "In progress", no action is required while Microsoft reviews your information. If additional information is needed, the step will be updated with further instructions.
You can monitor your progress at any time by returning to Account settings > Legal info.
If you're unable to complete identity verification
If identity verification is incomplete and you're unable to progress:
Confirm the name on your government-issued ID matches your Partner Center account username exactly.
Ensure that Microsoft Authenticator app is installed and running on the latest version on your mobile device.
If the issue persists, learn more about creating a support ticket.