Note
Access to this page requires authorization. You can try signing in or changing directories.
Access to this page requires authorization. You can try changing directories.
Note
You can author Prep data for AI features in both Power BI Desktop and the Power BI service. Users can consume these features anywhere Copilot in Power BI is available.
In this tutorial, you prepare and configure your semantic model for AI use by applying recommended practices. In this tutorial, you learn to:
- Simplify the data schema
- Create verified answers
- Add AI instructions
- Mark as Approved for Copilot
Important
This tutorial includes preview features.
Note
Copilot outputs are nondeterministic, meaning that it's possible for a user to receive a different output from a Copilot experience, despite using the same prompt and grounding data. It's important to set expectations with users so that they know what kinds of outputs to expect from Copilot and how they can evaluate or validate these outputs, for themselves.
Learn more about the Responsible use of Copilot in Power BI.
Guidance
When developing a semantic model in Power BI, prepare your model to work effectively with Copilot. Without proper preparation, Copilot can generate less helpful and inaccurate results. To ensure the effectiveness of your semantic model, follow best modeling practices and take essential steps. Neglecting these preparations can lead to Copilot producing suboptimal outcomes. The following sections outline key considerations for semantic model developers and analysts to enhance Copilot experiences within Power BI:
- Model organization: Provide field descriptions, hide columns and measures, and avoid duplicate field names across tables.
- Consistent naming conventions: Use human-readable names for tables, columns, and measures. Distinguish between similarly named fields, such as "Name" in the Customer table and "Name" in the Store table.
- Concise descriptions: Use descriptive sentences to document and explain the meaning of tables, columns, measures, and other model object properties.
- Model design: Follow recommended data modeling practices, like star schema design, to ensure quality semantic models.
- Model complexity: Simplify models by removing unused objects (tables, fields, and measures), avoiding ambiguous relationships, and limiting complex patterns (like disconnected field parameter tables).
Continuously test your model with Copilot to ensure consistent and reliable results both as you introduce model changes and as new tools and capabilities become available for preparing your semantic model for AI. If issues persist, review the model with your users, understand common questions they might ask, and simplify the design to achieve better outcomes.
Learn more about best practices to optimize asking questions and getting answers in Power BI.
Prep data for AI (preview)
In Power BI Desktop, select the Prep data for AI icon located on the Home tab of the ribbon, as shown in the following image.

Simplify the data schema (preview)
To ensure consistent and reliable results, first simplify the schema that Copilot can use. Here are some common scenarios where this process can be beneficial:
- Duplicative field names across tables: When multiple tables have fields with the same name, it can be challenging to generate accurate responses. By ensuring unique field names, you reduce confusion and improve the accuracy of data retrieval.
- Complexity in semantic models: Models with many unused objects (such as tables, fields, and measures) can introduce uncertainty in responses. Streamline the schema by removing unnecessary objects to reduce ambiguity and potential errors.
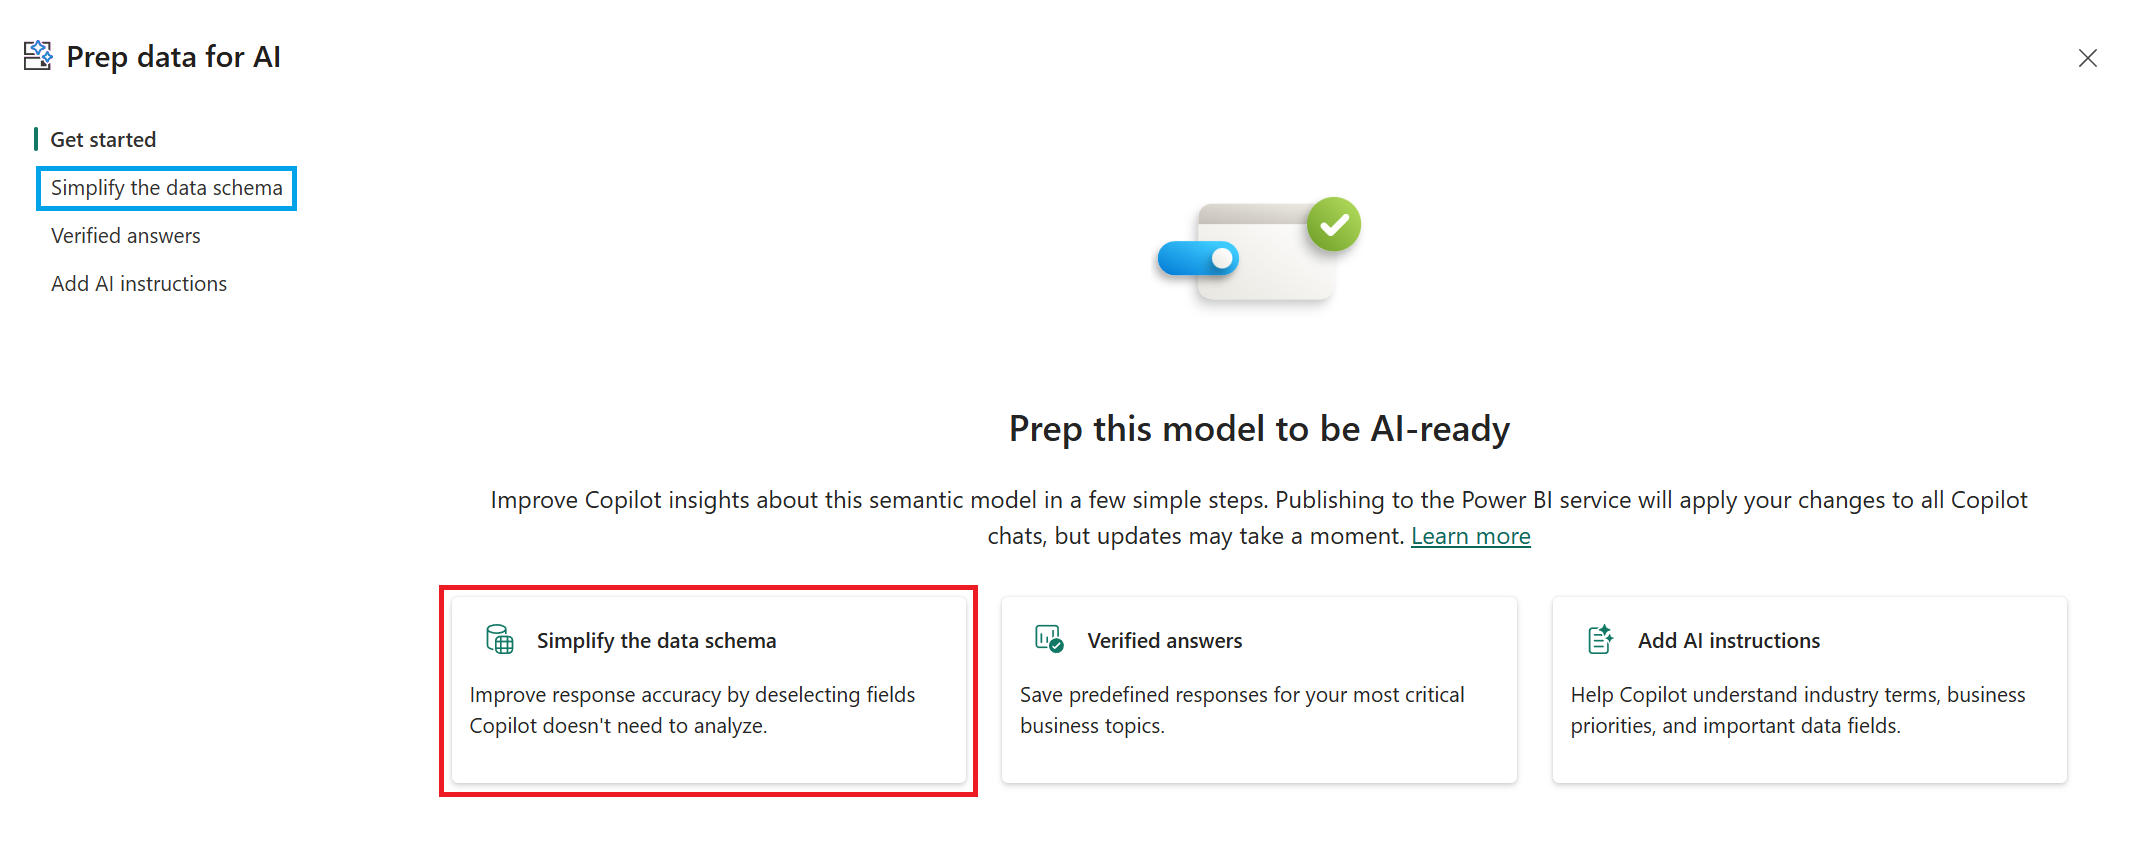
In the dialog that opens, select Simplify the data schema by selecting the card or using the left-hand navigation menu.
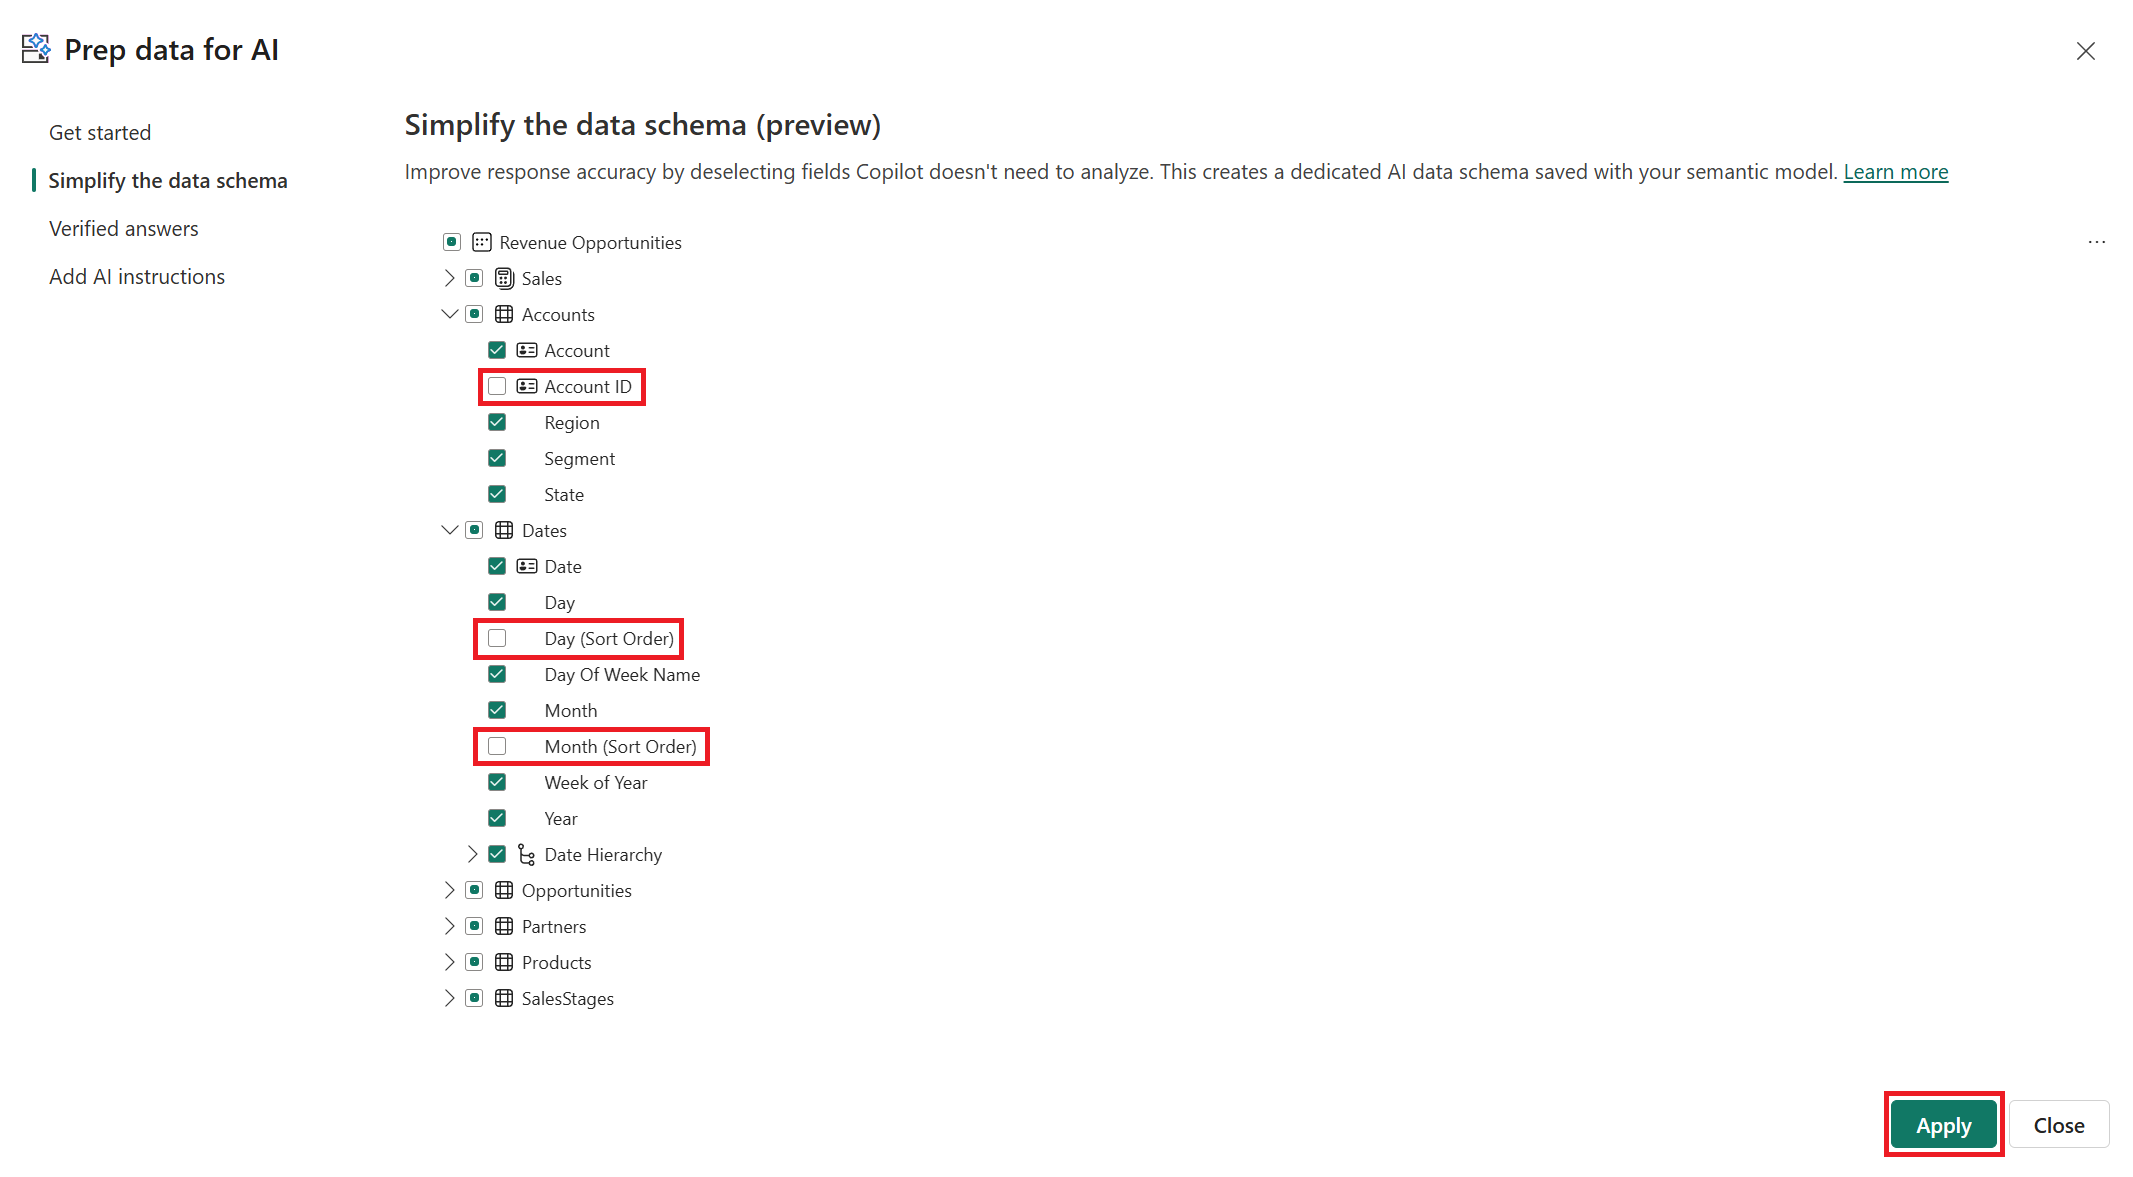
To improve Copilot’s response accuracy, deselect the fields that aren't relevant for Copilot to analyze, and then select Apply:
- From the Accounts table, deselect the unique identifier relationship field by expanding the table explorer and deselecting the box for the Account ID field.
- From the Dates table, deselect the model's sort by column helper fields by expanding the table explorer and deselecting the boxes for the Day (Sort Order) and Month (Sort Order) fields.
Select Close to return to the Report view page, where you create verified answers for the visuals on the report.

Create verified answers (preview)
By creating verified answers, you can add phrases, questions, or keywords that users might ask when seeking insights from the semantic model. When users ask Copilot a question using one of these trigger phrases, Copilot can return an answer based on the configured visual.
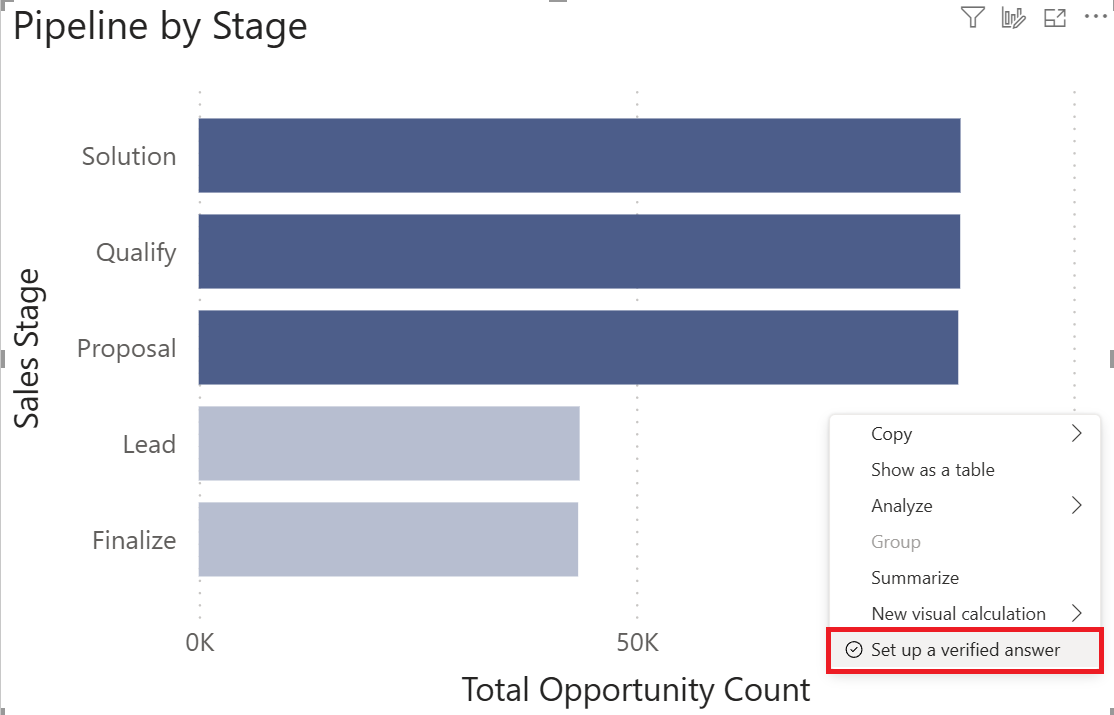
On the Opportunity Overview page, select the Pipeline by Stage visual in the bottom-left corner, right-click it, and select Set up a verified answer.
A set of Copilot suggestions is created based on the information in the visual. You can select these suggestions to add as phrases connected to verified answers, select Refresh to generate a new set of suggestions, or add your own.
Because Copilot suggestions can vary for each session, manually configure the connected phrases by selecting the add (+) option.
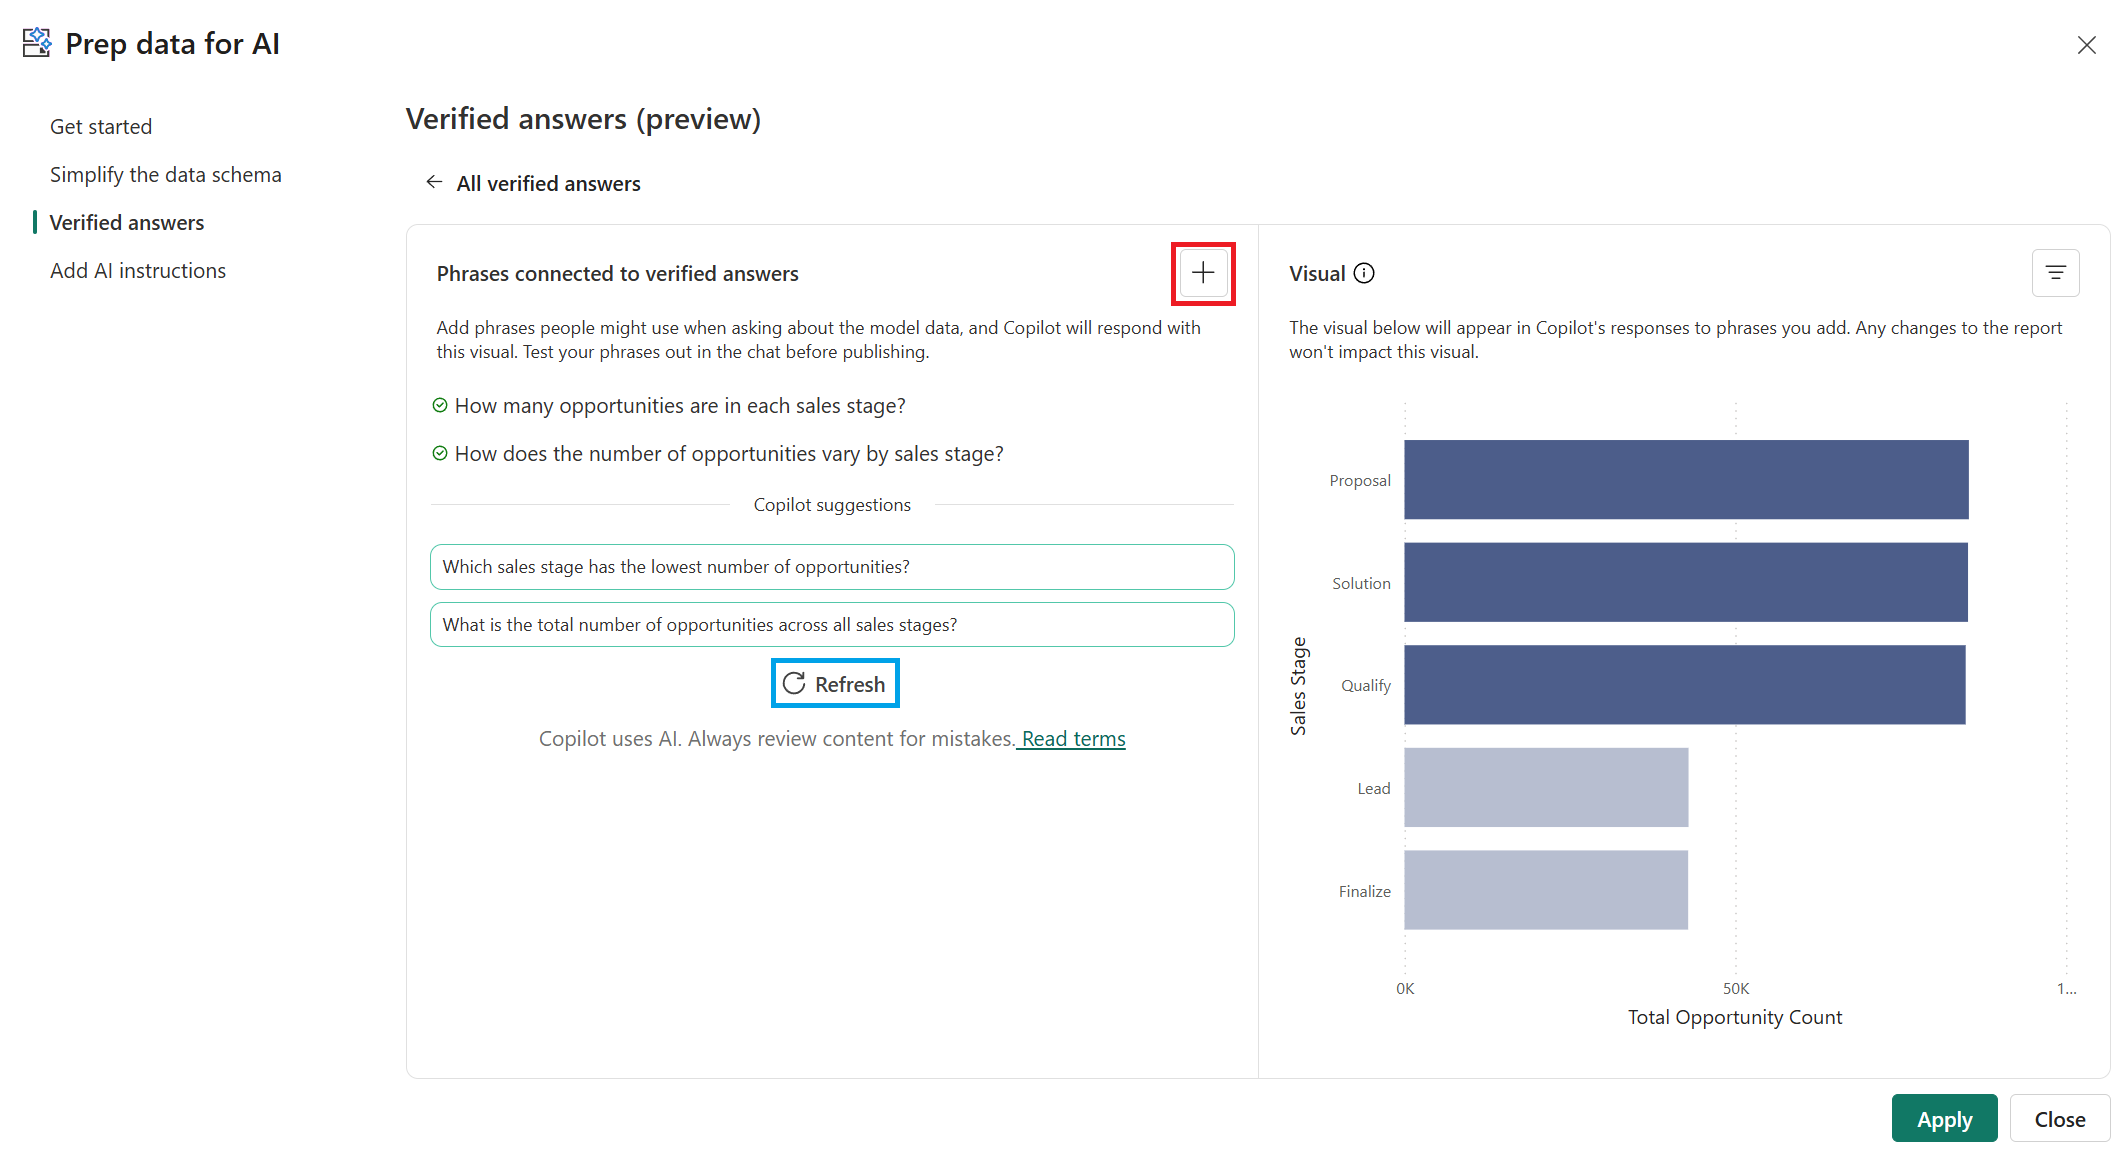
Add the following two example verified answers and select Enter to confirm each entry when done:
- How many opportunities are in each sales stage?
- How does the number of opportunities vary by sales stage?
To adjust verified answers, hover over each entry and select the edit (pencil) or delete (trash can) options.
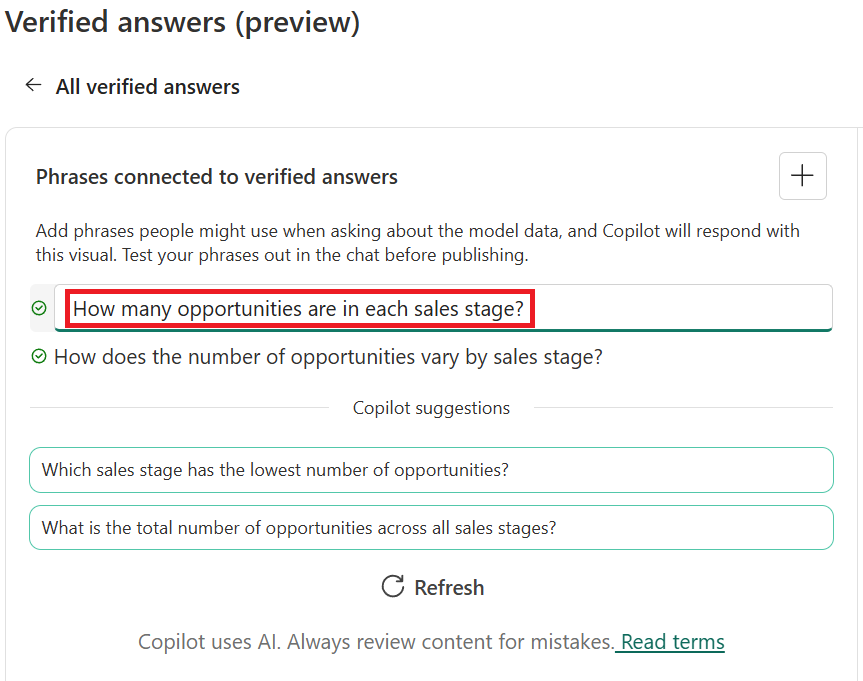
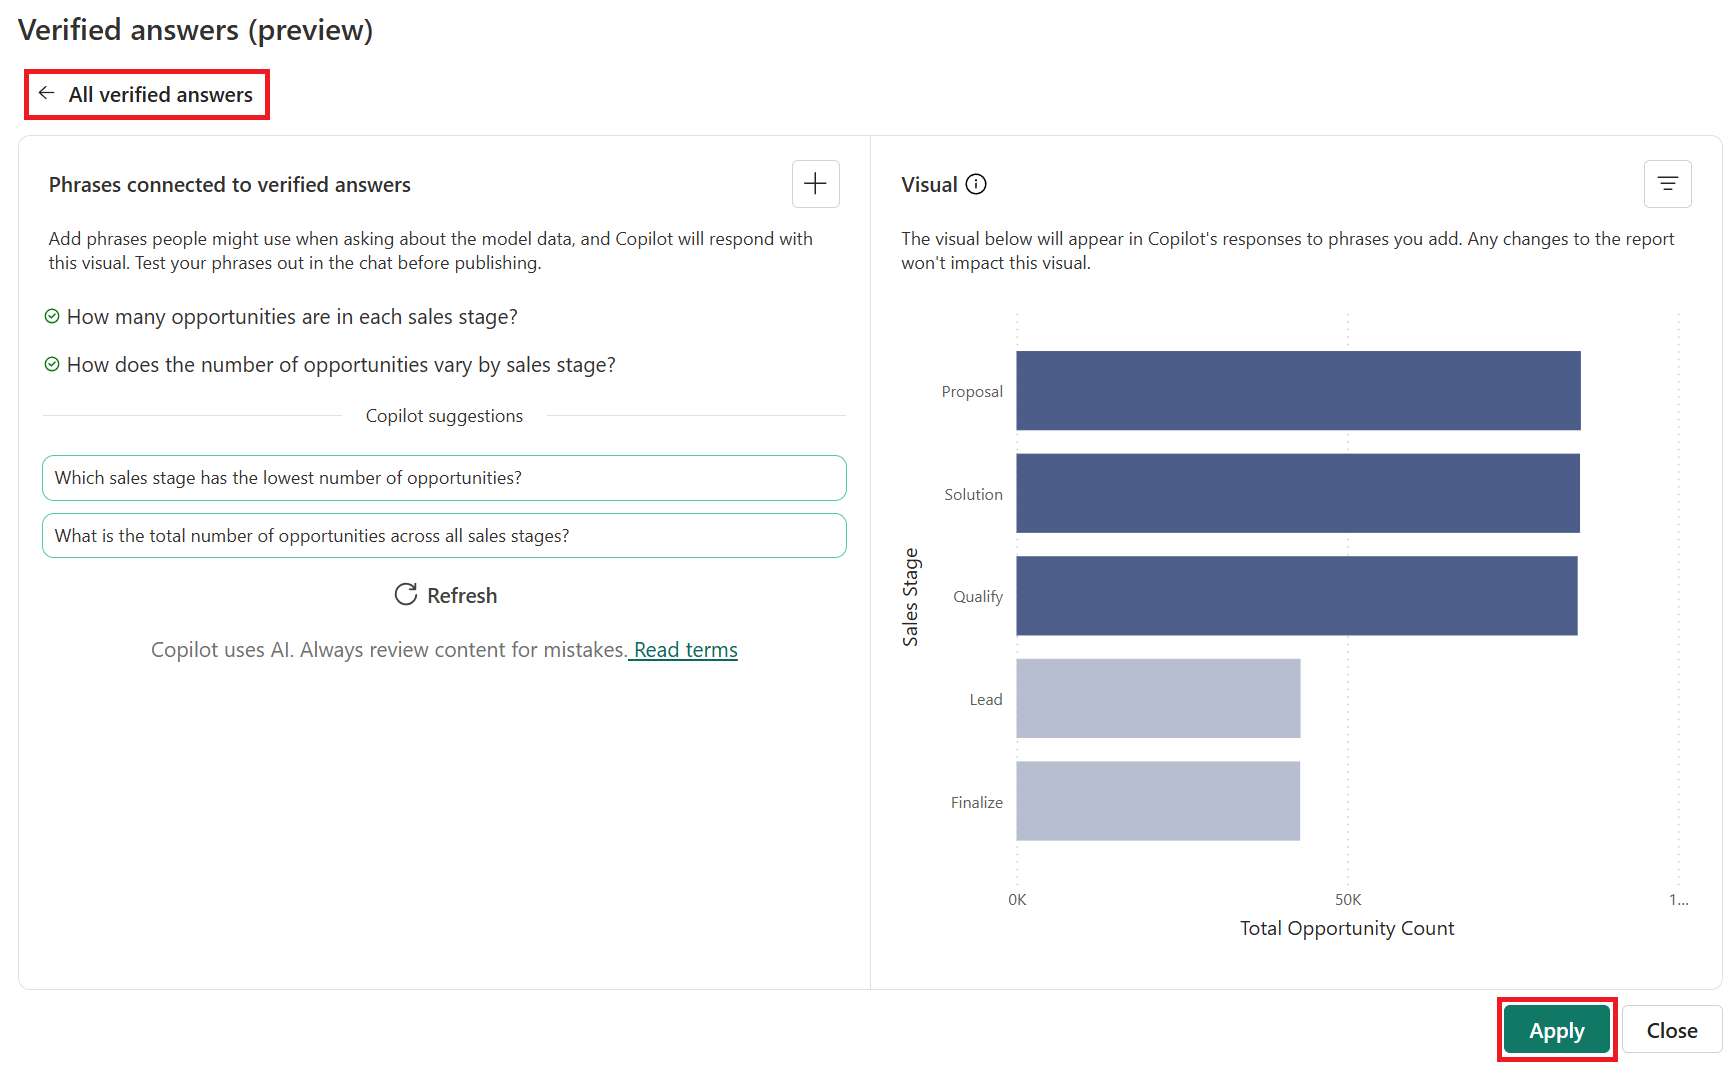
Select Apply and then go to the All verified answers view.
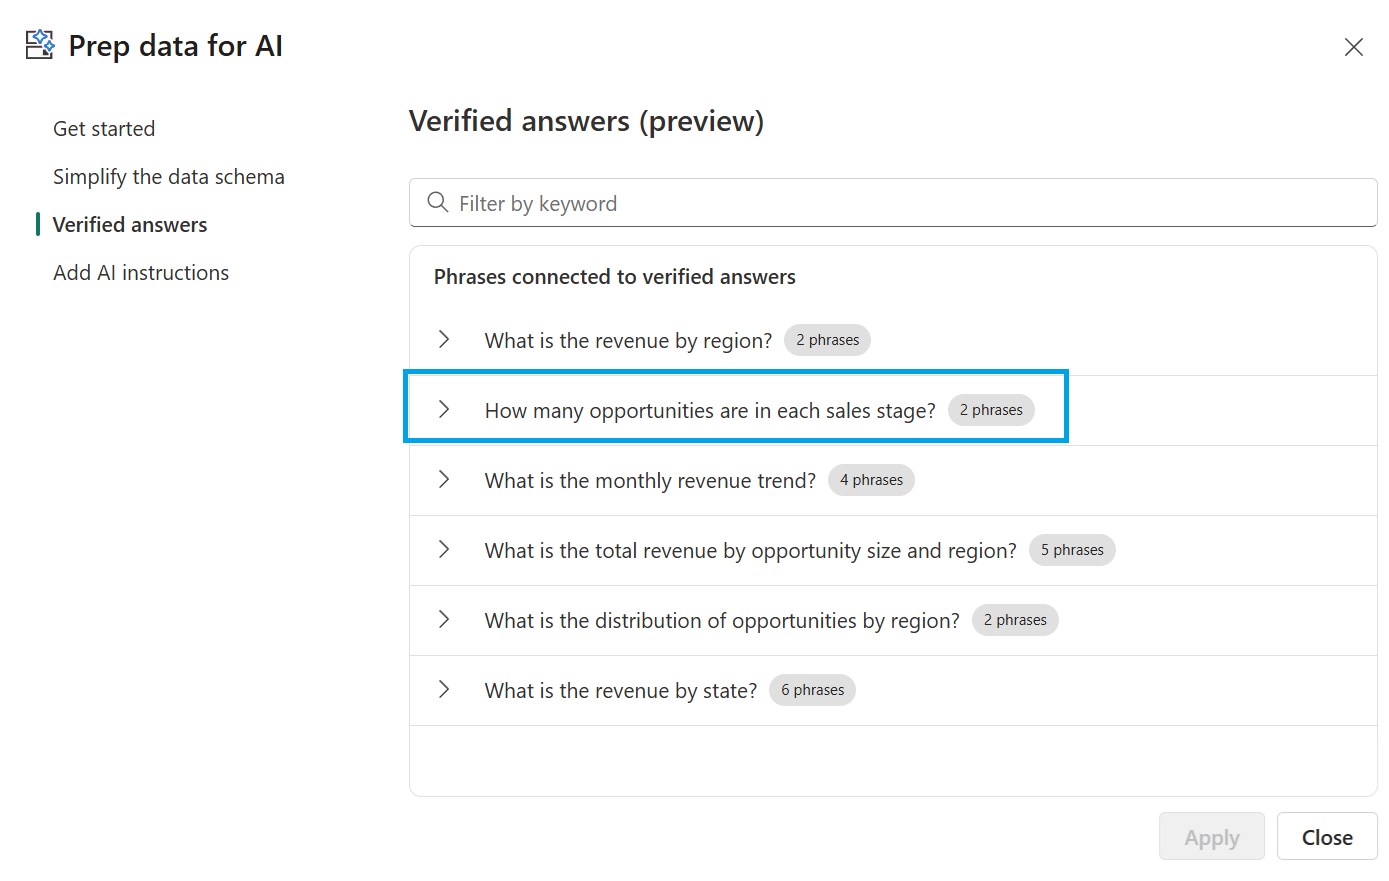
The verified answers list shows all phrases connected to visuals, along with their phrase counts. You can select each phrase to update or remove it.
Add AI instructions (preview)
By using AI Instructions, you can enhance Copilot's capabilities by connecting it to your organization's knowledge. By providing key business context, guidance, and domain-specific logic, you help Copilot understand your business's specific needs and deliver more relevant, accurate responses. Throughout your development, iteratively refine your AI instructions and test Copilot’s responses to ensure accuracy and alignment with business goals.
Select Add AI instructions, copy and paste the following example into the instructions field, and select Apply.
Tailor responses to industry norms for a software company's sales channel. Sales managers monitor their direct and partner sales channels by tracking opportunities and revenue by region, deal size, and channel.

Specific instances:
- Key earners refers to the top three partners by total revenue.
- If asked about "Clients", "Customers", or "Organizations" use the Accounts table.
- For sales cycle questions, always use the Average Opportunity Days measure.
- Opportunity Days is synonymous with Sales Cycle duration, or Time to Close (TTC)
- "Leads", "Deals", "Potential Deals" and "Sales Prospects" are all phrases that refer to the opportunities table.
- If asked about early stages of an opportunity, only show the Solution stage.
- If the audience is leadership, prioritize revenue and opportunity count, as well as the number of deals in the finalize stage.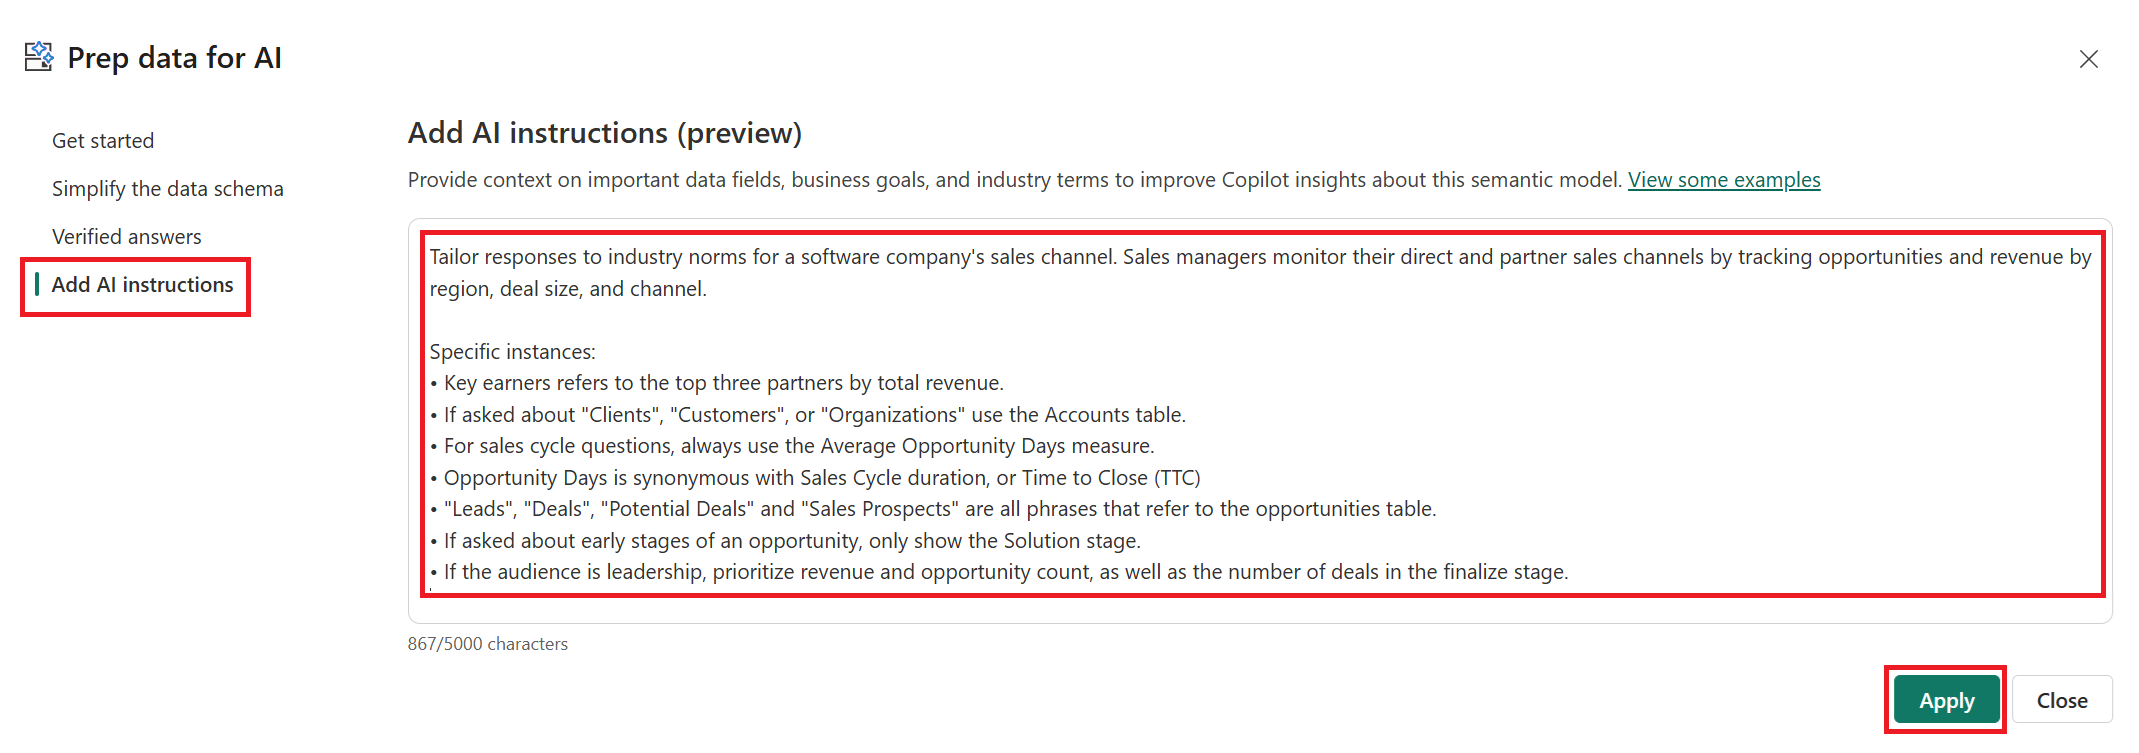
Select Close to return to the Report view page.
Test your data with Copilot (preview)
Before sharing your data with others in your organization, test it thoroughly with Copilot. This testing process involves trying common questions users might ask to ensure Copilot provides accurate and helpful responses. Experiment with different inputs based on the AI instructions to verify that Copilot can handle a range of scenarios effectively. Attempt to access available fields from your simplified data schema to confirm that Copilot can retrieve and utilize the available information.
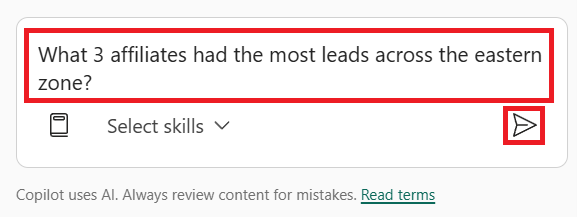
From the Copilot pane, ask this example question and select Send or Enter to confirm.
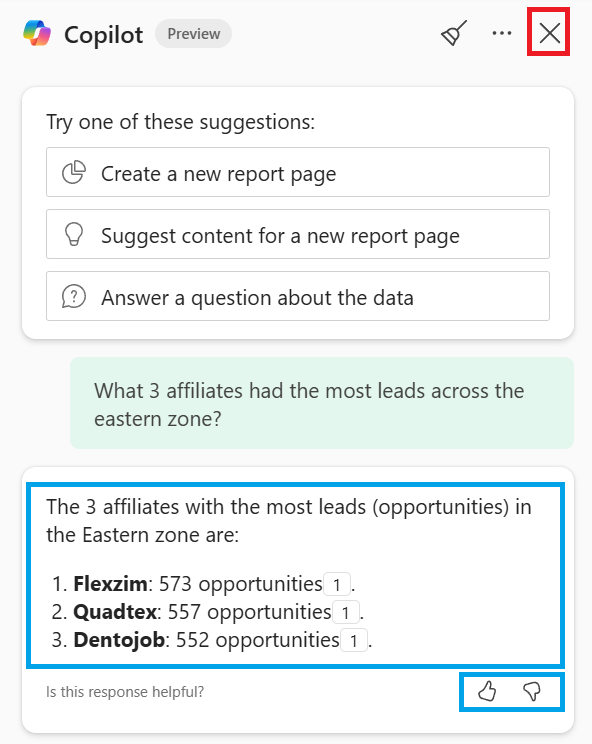
- What three affiliates had the most leads across the eastern zone?
A list response is returned by using the terms and variances included within the AI instructions. You can provide feedback by using the thumbs up or thumbs down buttons. Select the close (X) button to continue.
Publish
When you publish your Power BI report to the cloud, you can easily share and collaborate within your organization. Team members can access and interact with the report and its semantic model. Also, by using Copilot, you can make more informed decisions by using natural language inputs with your data.
Select the Publish button located on the Home tab of the ribbon. Save changes if prompted and search your list of available workspaces to find the workspace where you want to publish. Select My workspace, and then select Select.
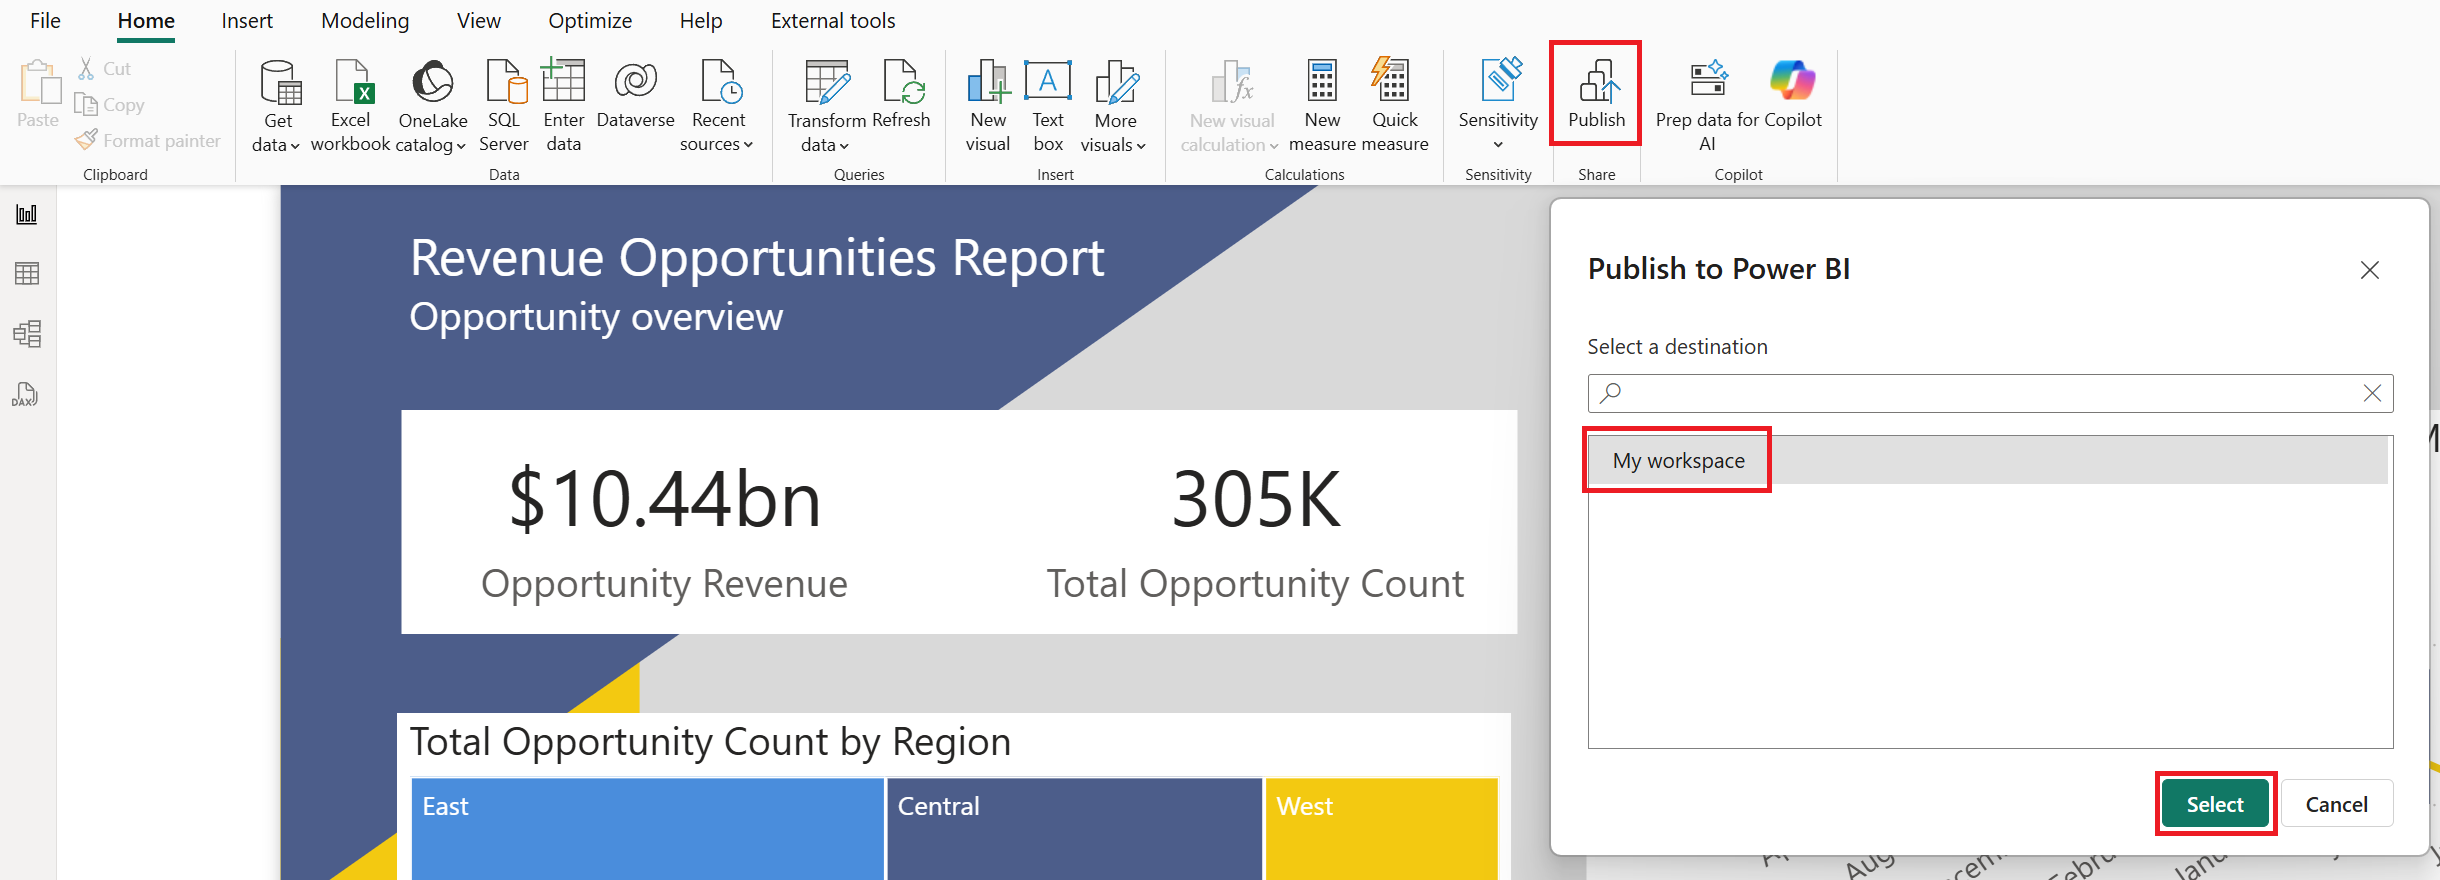
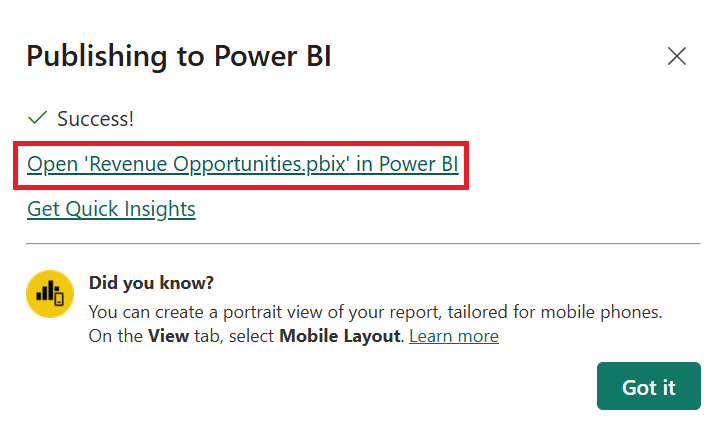
When publishing finishes, you receive a link to your report. Select the link Open ‘Revenue Opportunities.pbix’ in Power BI to open the report.
Descriptions
The item's name and description are equally important for data discovery with Copilot. Use the description to provide full natural language context about the item, using relevant and distinct keywords when appropriate to help Copilot (and your users) know what the item can answer.
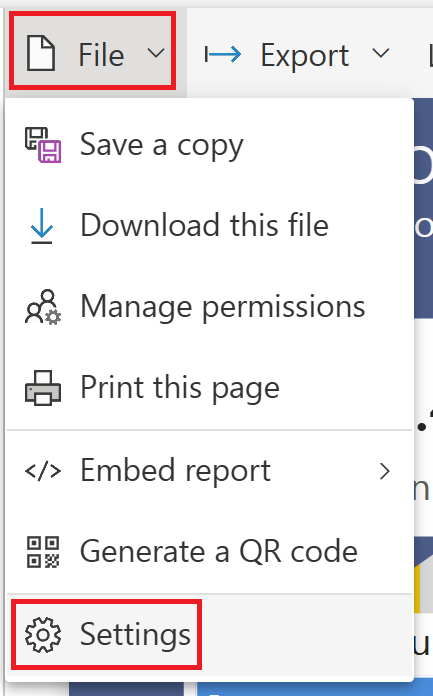
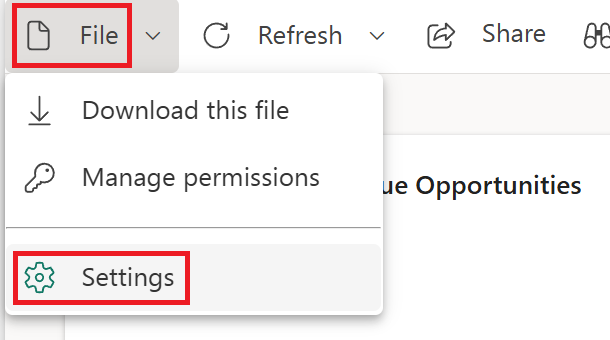
From the action bar, select File > Settings.
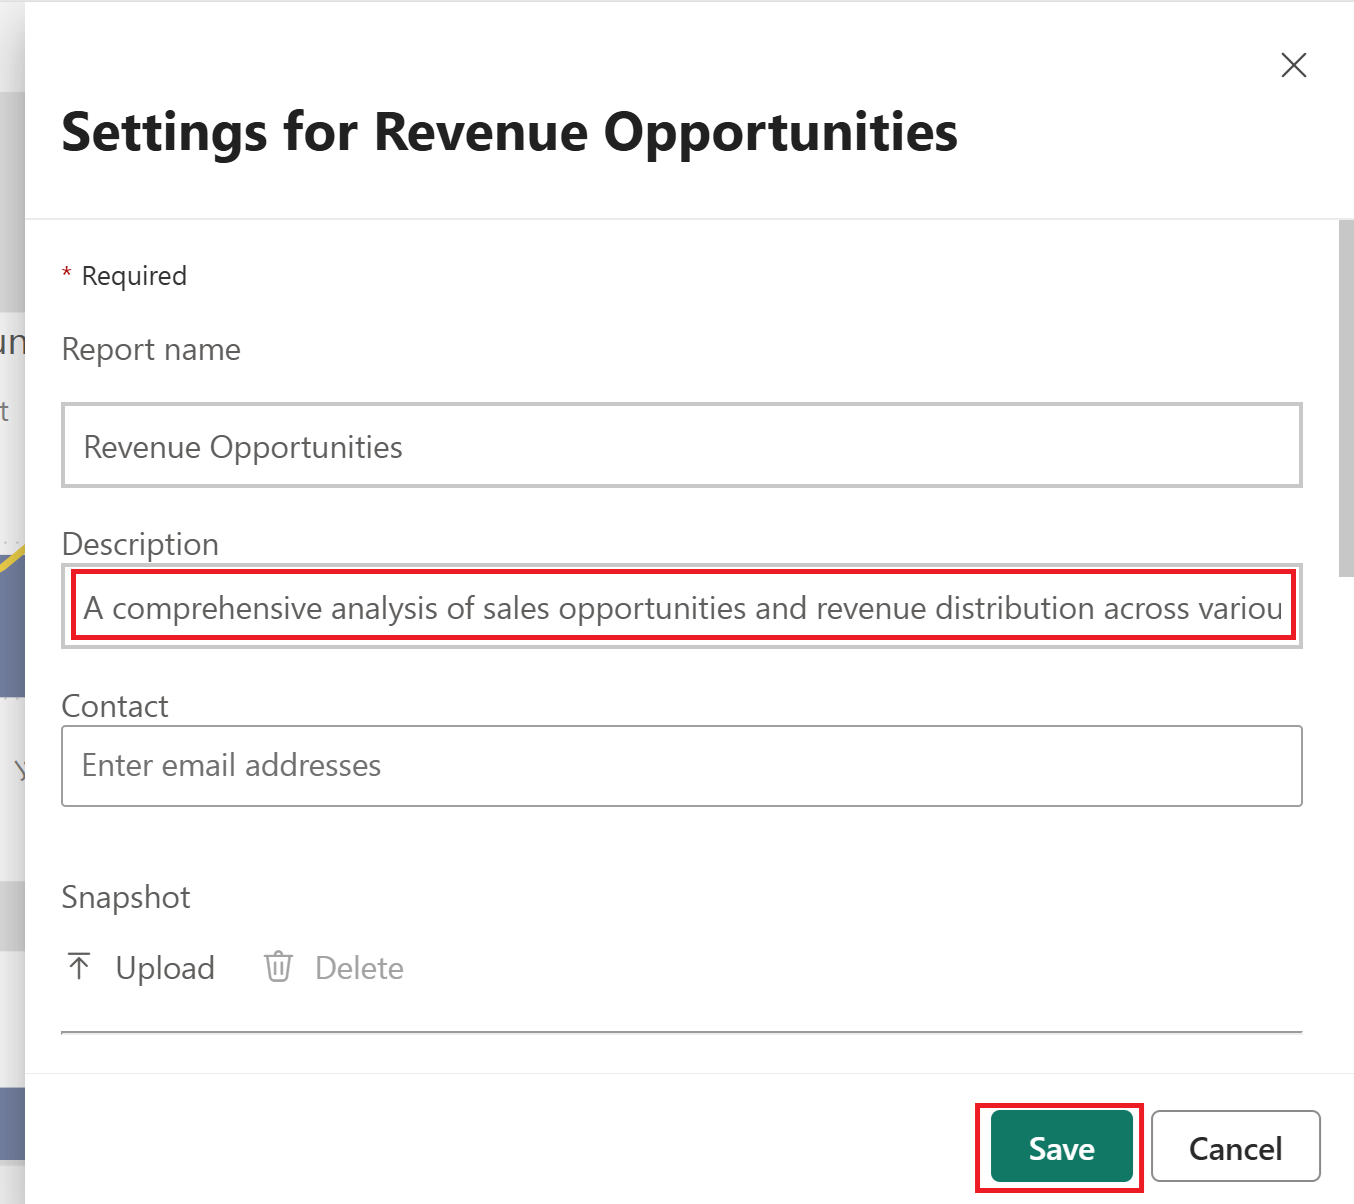
Update the report Description field to the following example text, and then select Save.
- A comprehensive analysis of sales opportunities and revenue distribution across various dimensions for software products.
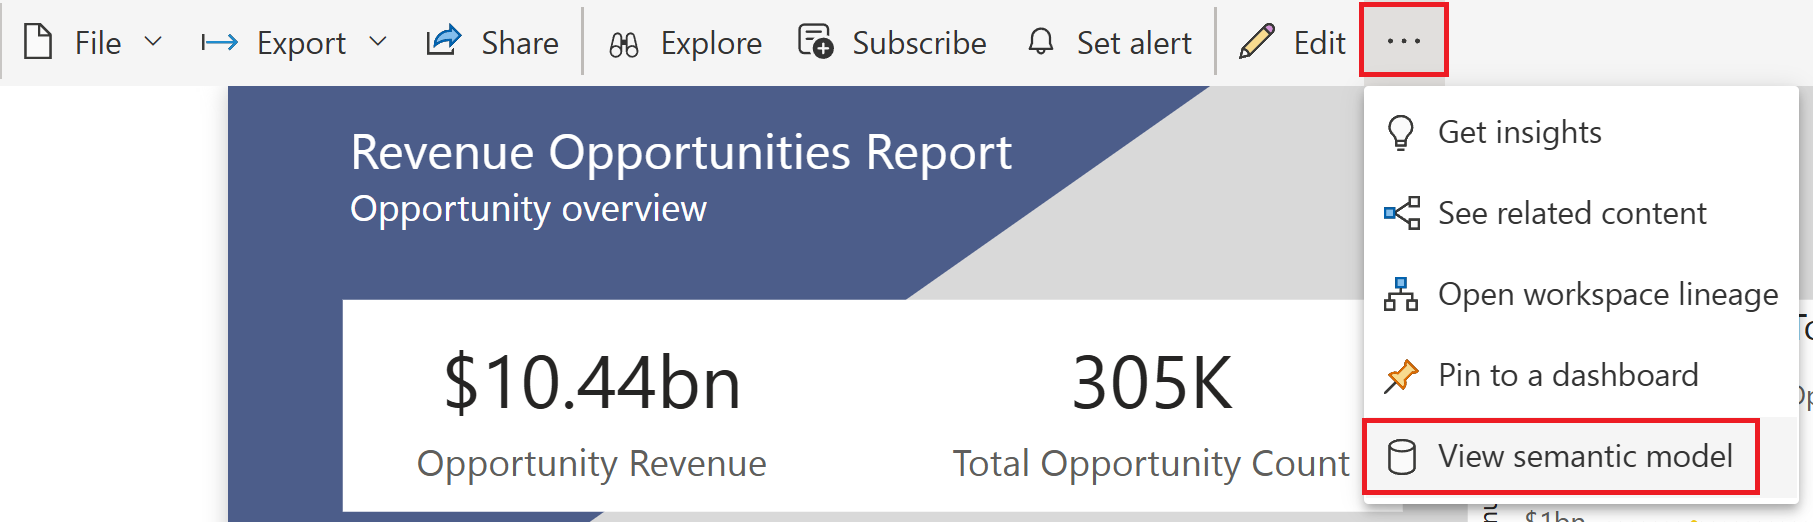
From the action bar, select more options (...) and then select the View semantic model option.
Within the semantic model viewer, select File > Settings.
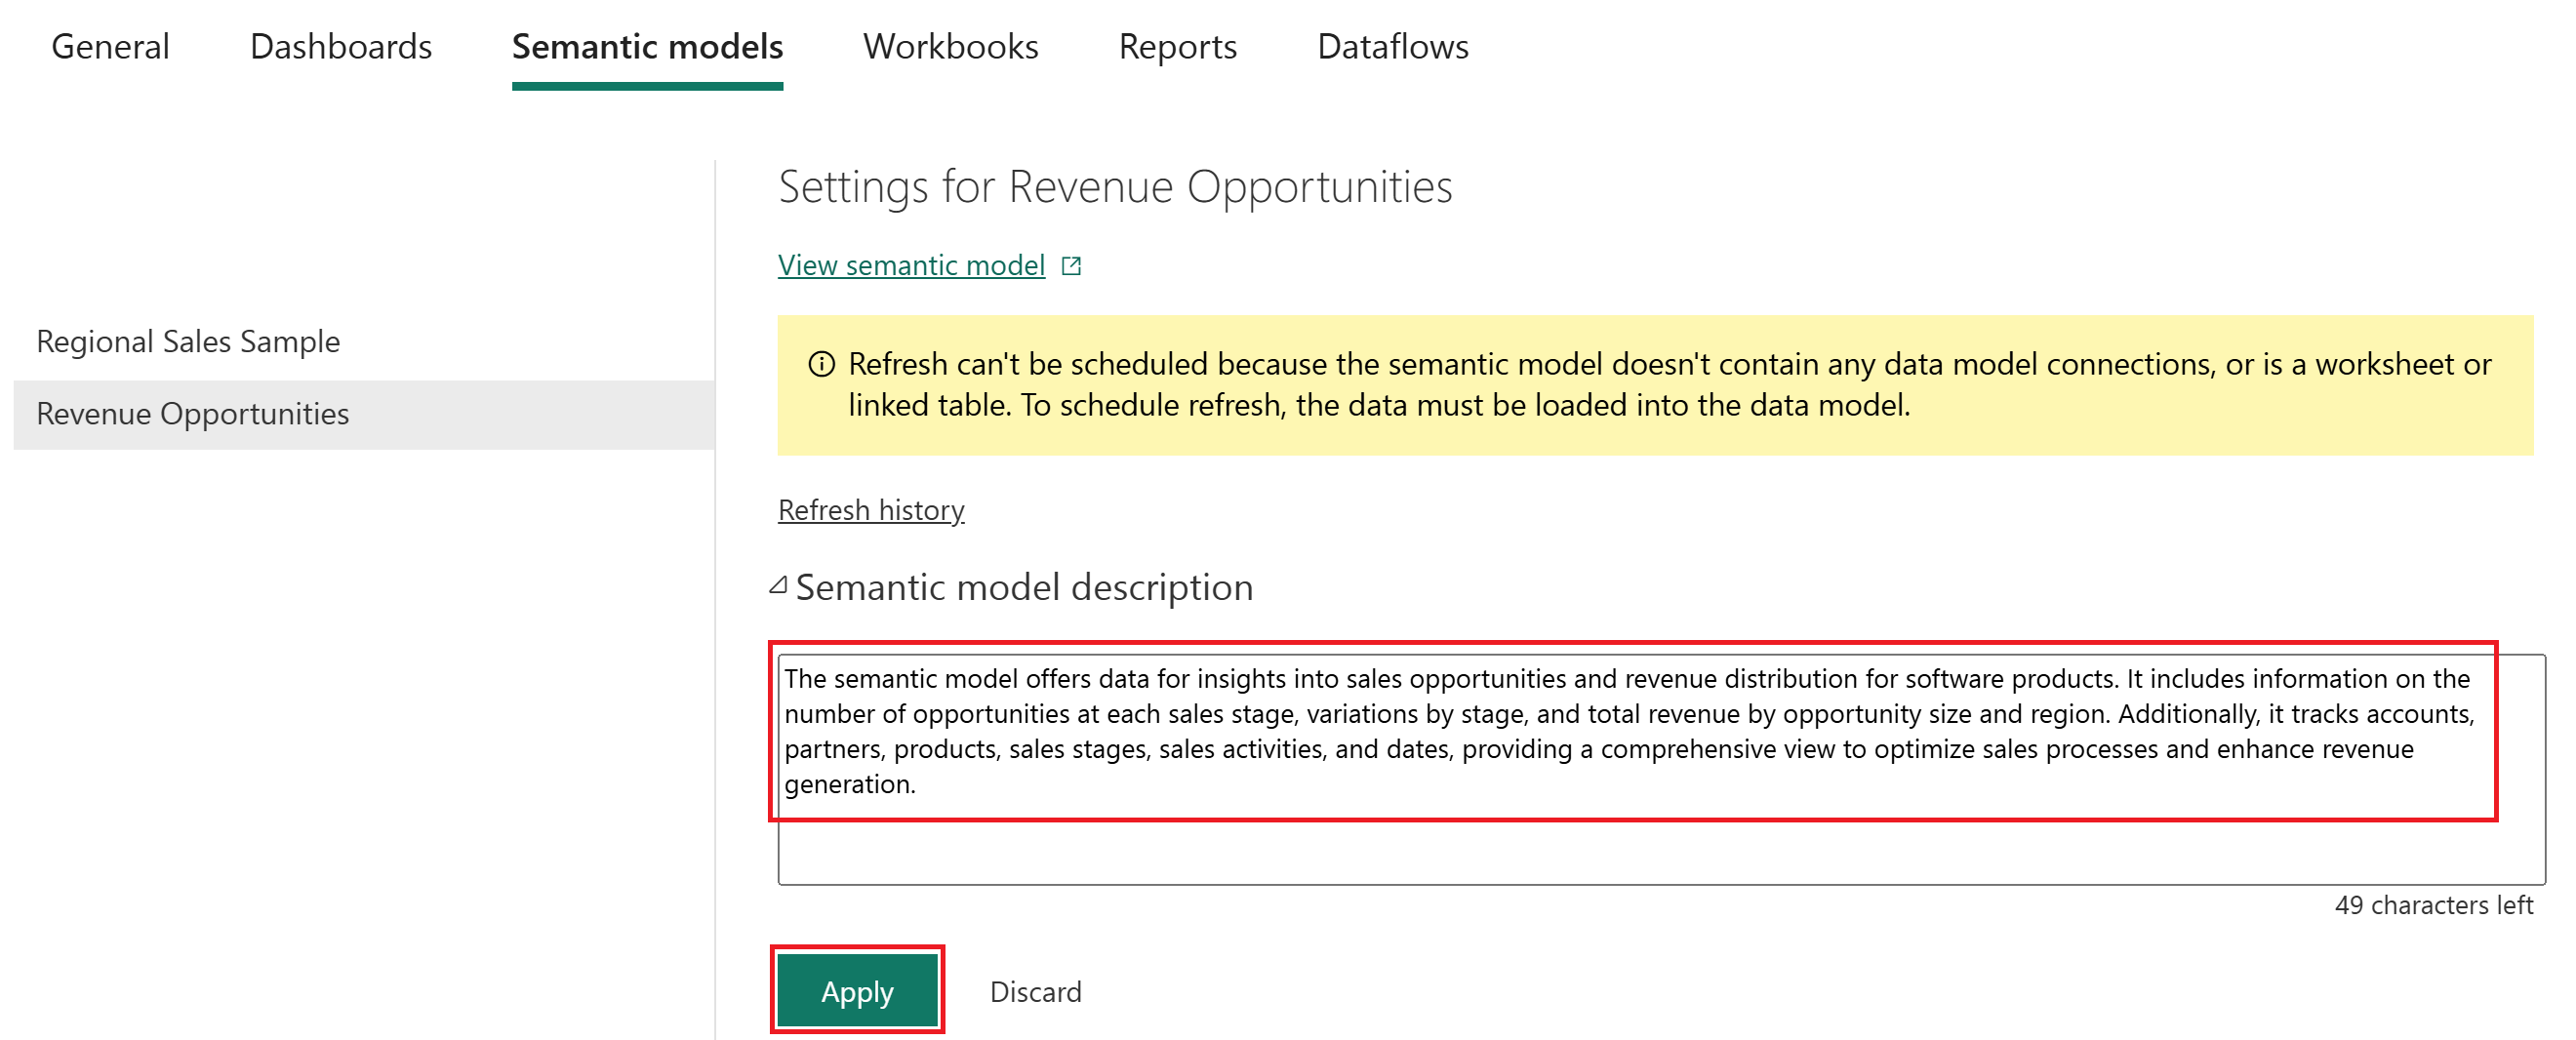
Update the Semantic model description field to the following example text, and then select Apply.
- The semantic model offers data for insights into sales opportunities and revenue distribution for software products. It includes information on the number of opportunities at each sales stage, variations by stage, and total revenue by opportunity size and region. Additionally, it tracks accounts, partners, products, sales stages, sales activities, and dates, providing a comprehensive view to optimize sales processes and enhance revenue generation.
Approved for Copilot (preview)
Mark your semantic model as Approved for Copilot to signal to Copilot that the model is optimized for AI experiences. For models that aren't approved, users should inspect results carefully. Clear messaging and indicators are displayed for answers from items that aren't approved, advising users to contact the content owner to prepare the data for AI and improve accuracy and relevance.
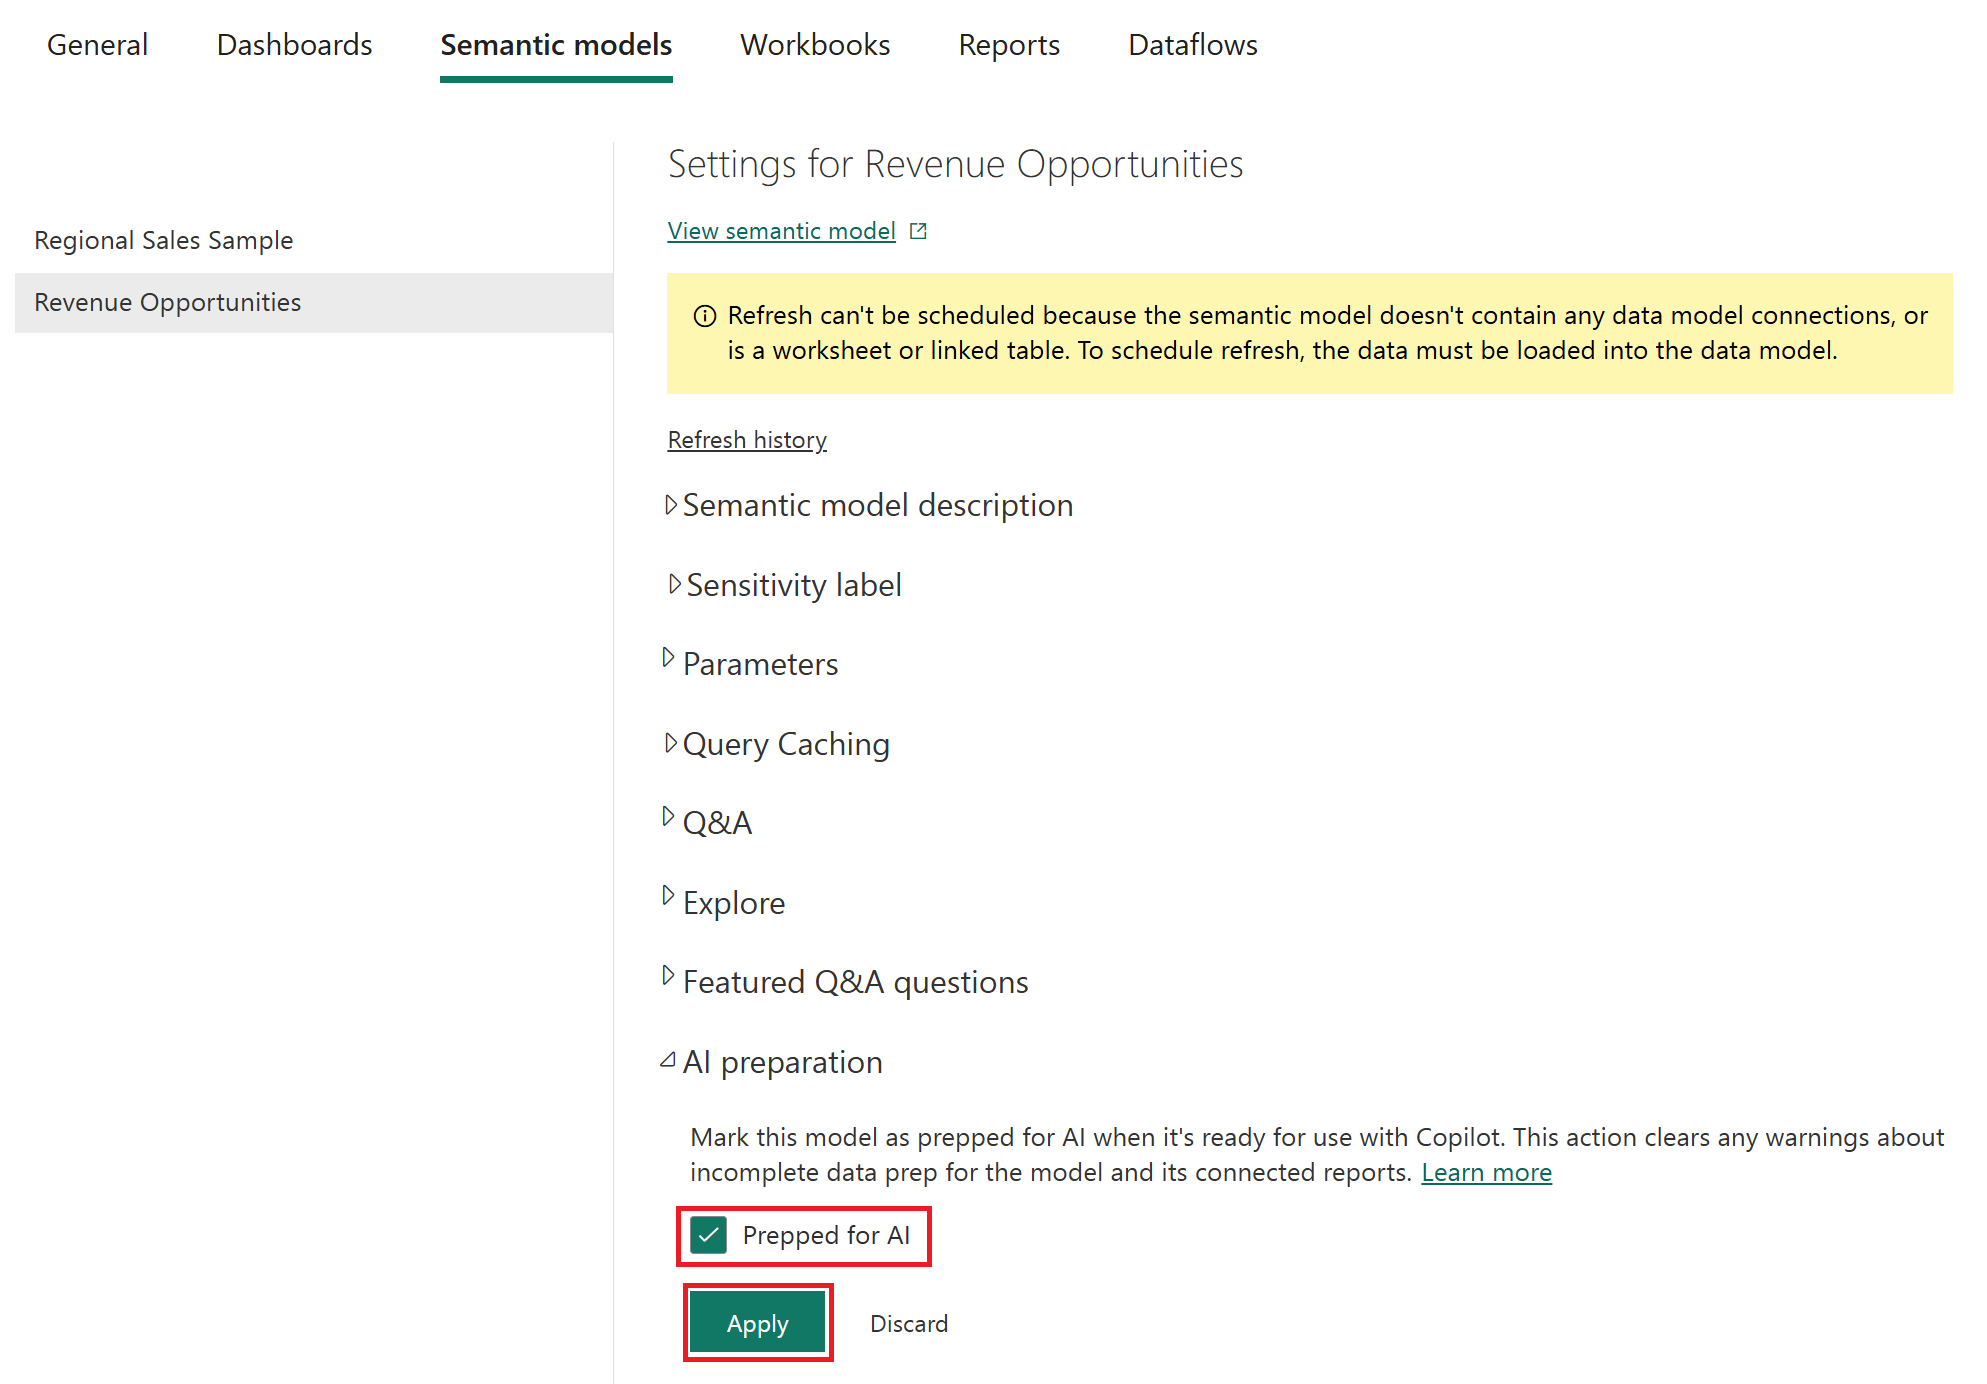
In the settings for the semantic model, expand the Approved for Copilot setting.
Select the checkbox for Approved for Copilot, and then select Apply.