Note
Access to this page requires authorization. You can try signing in or changing directories.
Access to this page requires authorization. You can try changing directories.
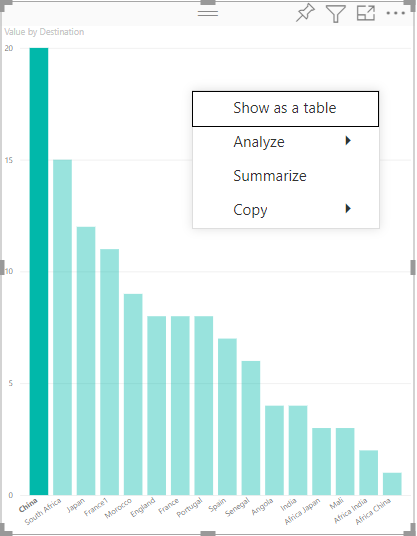
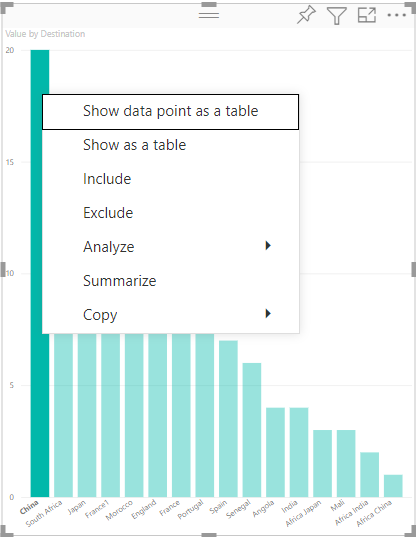
Every Power BI visual can display a context menu. The context menu allows you to perform various operations on the visual, such as analyzing, summarizing, or copying it. When you right-click anywhere inside a visual's viewport (or long-press for touch devices), the context menu displays. There are two modes of context menus for each visual. The mode that displays depends on where you click inside the visual:
- Call the context menu on empty space to see the basic context menu for the visual.
- Call the context menu on a specific data point for added options that can be applied to that data point. In this case, the context menu also contains the options Show data point as a table, Include, and Exclude, which will apply the corresponding filter to that data point.
To have Power BI display a context menu for your visual, use selectionManager.showContextMenu() with parameters selectionId and a position (as an {x:, y:} object).
Note
- The
selectionManager.showContextMenu()is available from Visuals API version 2.2.0. To find out which version you’re using, check theapiVersionin the pbiviz.json file. - All visuals published to AppSource must support both
ContextMenumodes (empty space and data point).
The following example shows how to add a context menu to a visual. The code is taken from the barChart.ts file, which is part of the sample BarChart visual:
constructor(options: VisualConstructorOptions) {
        ...
        this.handleContextMenu();
    }

private handleContextMenu() {
        this.rootSelection.on('contextmenu', (event: PointerEvent, dataPoint) => {
            this.selectionManager.showContextMenu(dataPoint ? dataPoint: {}, {
                x: mouseEvent.clientX,
                y: mouseEvent.clientY
            });
            mouseEvent.preventDefault();
        });
    }
Related content
More questions? Ask the Power BI Community

