Core Graphics in Xamarin.iOS
This article discusses the Core Graphics iOS frameworks. It shows how to use Core Graphics to draw geometry, images and PDFs.
iOS includes the Core Graphics framework to provide low-level drawing support. These frameworks are what enable the rich graphical capabilities within UIKit.
Core Graphics is a low-level 2D graphics framework that allows drawing device independent graphics. All 2D drawing in UIKit uses Core Graphics internally.
Core Graphics supports drawing in a number of scenarios including:
- Drawing to the screen via a
UIView. - Drawing images in memory or on screen.
- Creating and drawing to a PDF.
- Reading and drawing an existing PDF.
Geometric Space
Regardless of the scenario, all drawing done with Core Graphics is done in geometric space, meaning it works in abstract points rather than pixels. You describe what you want drawn in terms of geometry and drawing state such as colors, line styles, etc. and Core Graphics handles translating everything into pixels. Such state is added to a graphics context, which you can think of like a painter’s canvas.
There are a few benefits to this approach:
- Drawing code becomes dynamic, and can subsequently modify graphics at runtime.
- Reducing the need for static images in the application bundle can reduce application size.
- Graphics become more resilient to resolution changes across devices.
Drawing in a UIView Subclass
Every UIView has a Draw method that is called by the system when it needs to be drawn. To add drawing code to a view, subclass UIView and override Draw:
public class TriangleView : UIView
{
    public override void Draw (CGRect rect)
    {
        base.Draw (rect);
    }
}
Draw should never be called directly. It is called by the system during run loop processing. The first time through the run loop after a view is added to the view hierarchy, its Draw method is called. Subsequent calls to Draw occur when the view is marked as needing to be drawn by calling either SetNeedsDisplay or SetNeedsDisplayInRect on the view.
Pattern for Graphics Code
The code in the Draw implementation should describe what it wants drawn. The drawing code follows a pattern in which it sets some drawing state and calls a method to request it be drawn. This pattern can be generalized as follows:
Get a graphics context.
Set up drawing attributes.
Create some geometry from drawing primitives.
Call a Draw or Stroke method.
Basic Drawing Example
For example, consider the following code snippet:
//get graphics context
using (CGContext g = UIGraphics.GetCurrentContext ()) {

    //set up drawing attributes
    g.SetLineWidth (10);
    UIColor.Blue.SetFill ();
    UIColor.Red.SetStroke ();

    //create geometry
    var path = new CGPath ();

    path.AddLines (new CGPoint[]{
    new CGPoint (100, 200),
    new CGPoint (160, 100),
    new CGPoint (220, 200)});

    path.CloseSubpath ();

    //add geometry to graphics context and draw it
    g.AddPath (path);
    g.DrawPath (CGPathDrawingMode.FillStroke);
}
Let's break this code down:
using (CGContext g = UIGraphics.GetCurrentContext ()) {
...
}
With this line, it first gets the current graphics context to use for drawing. You can think of a graphics context as the canvas that drawing happens on, containing all the state about the drawing, such as stroke and fill colors, as well as the geometry to draw.
g.SetLineWidth (10);
UIColor.Blue.SetFill ();
UIColor.Red.SetStroke ();
After getting a graphics context the code sets up some attributes to use when drawing, shown above. In this case the line width, stroke and fill colors are set. Any subsequent drawing will then use these attributes because they are maintained in the graphics context's state.
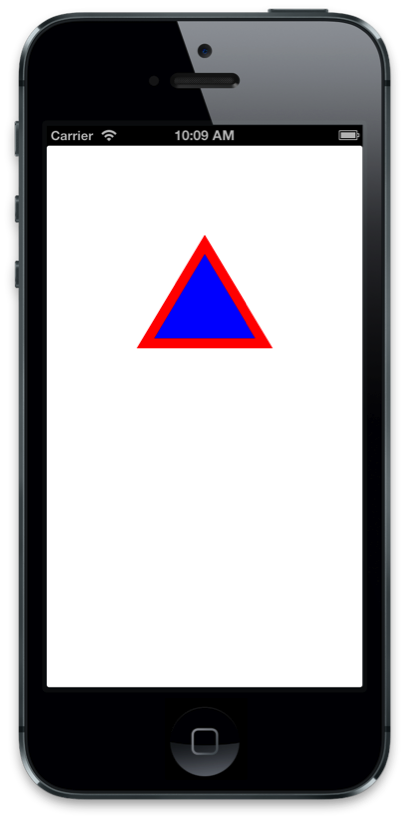
To create geometry the code uses a CGPath, which allows a graphics path to be described from lines and curves. In this case, the path adds lines connecting an array of points to make up a triangle. As displayed below Core Graphics uses a coordinate system for view drawing, where the origin is in the upper left, with positive x-direct to the right and the positive-y direction down:
var path = new CGPath ();

path.AddLines (new CGPoint[]{
new CGPoint (100, 200),
new CGPoint (160, 100),
new CGPoint (220, 200)});

path.CloseSubpath ();
Once the path is created, it's added to the graphics context so that calling AddPath and DrawPath respectively can draw it.
The resulting view is shown below:
Creating Gradient Fills
Richer forms of drawing are also available. For example, Core Graphics allows creating gradient fills and applying clipping paths. To draw a gradient fill inside the path from the previous example, first the path needs to be set as the clipping path:
// add the path back to the graphics context so that it is the current path
g.AddPath (path);
// set the current path to be the clipping path
g.Clip ();
Setting the current path as the clipping path constrains all subsequent drawing within the geometry of the path, such as the following code, which draws a linear gradient:
// the color space determines how Core Graphics interprets color information
    using (CGColorSpace rgb = CGColorSpace.CreateDeviceRGB()) {
        CGGradient gradient = new CGGradient (rgb, new CGColor[] {
        UIColor.Blue.CGColor,
        UIColor.Yellow.CGColor
    });

// draw a linear gradient
    g.DrawLinearGradient (
        gradient,
        new CGPoint (path.BoundingBox.Left, path.BoundingBox.Top),
        new CGPoint (path.BoundingBox.Right, path.BoundingBox.Bottom),
        CGGradientDrawingOptions.DrawsBeforeStartLocation);
    }
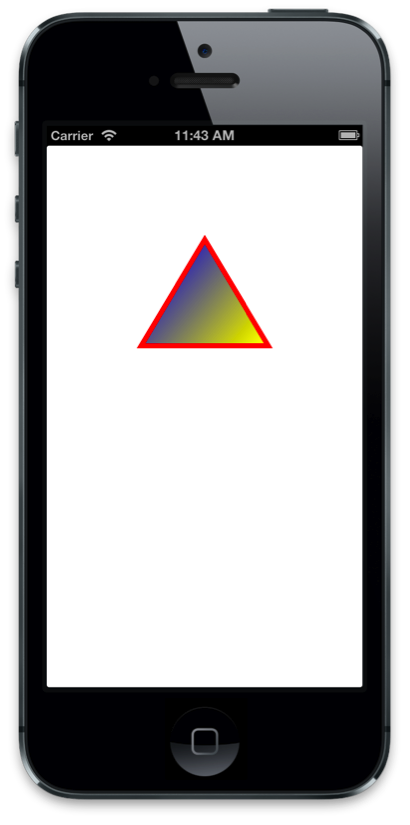
These changes produce a gradient fill as shown below:
Modifying Line Patterns
The drawing attributes of lines can also be modified with Core Graphics. This includes changing the line width and stroke color, as well as the line pattern itself, as seen in the following code:
//use a dashed line
g.SetLineDash (0, new nfloat[] { 10, 4 * (nfloat)Math.PI });
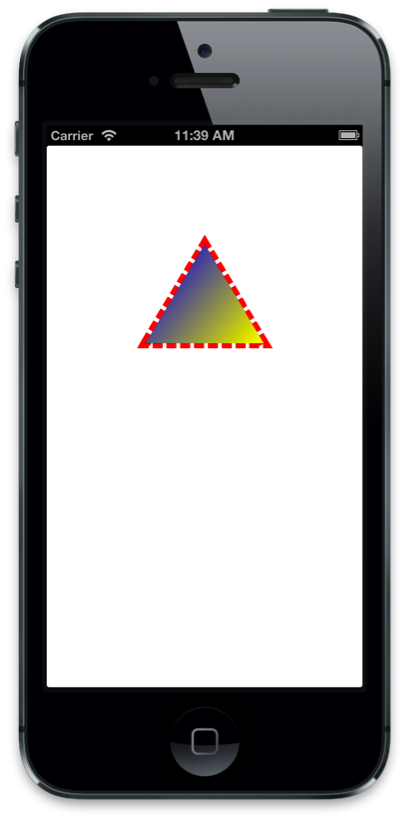
Adding this code before any drawing operations results in dashed strokes 10 units long, with 4 units of spacing between dashes, as shown below:
Note that when using the Unified API in Xamarin.iOS, the array type needs to be an nfloat, and also needs to be explicitly cast to Math.PI.
Drawing Images and Text
In addition to drawing paths in a view's graphics context, Core Graphics also supports drawing images and text. To draw an image, simply create a CGImage and pass it to a DrawImage call:
public override void Draw (CGRect rect)
{
    base.Draw (rect);

    using(CGContext g = UIGraphics.GetCurrentContext ()){
        g.DrawImage (rect, UIImage.FromFile ("MyImage.png").CGImage);
    }
}
However, this produces an image drawn upside down, as shown below:
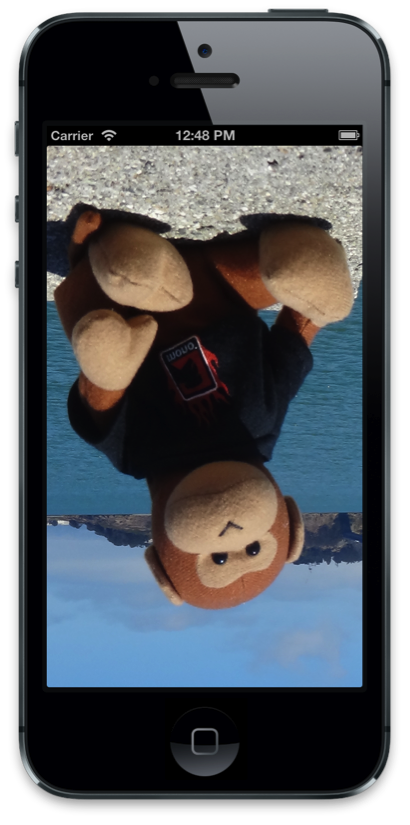
The reason for this is Core Graphics origin for image drawing is in the lower left, while the view has its origin in the upper left. Therefore, to display the image correctly, the origin needs to be modified, which can be accomplished by modifying the Current Transformation Matrix (CTM). The CTM defines where points live, also known as user space. Inverting the CTM in the y direction and shifting it by the bounds’ height in the negative y direction can flip the image.
The graphics context has helper methods to transform the CTM. In this case, ScaleCTM "flips" the drawing and TranslateCTM shifts it to the upper left, as shown below:
public override void Draw (CGRect rect)
{
    base.Draw (rect);

    using (CGContext g = UIGraphics.GetCurrentContext ()) {

        // scale and translate the CTM so the image appears upright
        g.ScaleCTM (1, -1);
        g.TranslateCTM (0, -Bounds.Height);
        g.DrawImage (rect, UIImage.FromFile ("MyImage.png").CGImage);
}
The resulting image is then displayed upright:

Important
Changes to the graphics context apply to all subsequent drawing operations. Therefore, when the CTM is transformed, it will affect any additional drawing. For example, if you drew the triangle after the CTM transformation, it would appear upside down.
Adding Text to the Image
As with paths and images, drawing text with Core Graphics involves the same basic pattern of setting some graphics state and calling a method to draw. In the case of text, the method to display text is ShowText. When added to the image drawing example, the following code draws some text using Core Graphics:
public override void Draw (RectangleF rect)
{
    base.Draw (rect);

    // image drawing code omitted for brevity ...

    // translate the CTM by the font size so it displays on screen
    float fontSize = 35f;
    g.TranslateCTM (0, fontSize);

    // set general-purpose graphics state
    g.SetLineWidth (1.0f);
    g.SetStrokeColor (UIColor.Yellow.CGColor);
    g.SetFillColor (UIColor.Red.CGColor);
    g.SetShadow (new CGSize (5, 5), 0, UIColor.Blue.CGColor);

    // set text specific graphics state
    g.SetTextDrawingMode (CGTextDrawingMode.FillStroke);
    g.SelectFont ("Helvetica", fontSize, CGTextEncoding.MacRoman);

    // show the text
    g.ShowText ("Hello Core Graphics");
}
As you can see, setting the graphics state for text drawing is similar to drawing geometry. For text drawing however, the text drawing mode and the font are applied as well. In this case, a shadow is also applied, although applying shadows works the same for path drawing.
The resulting text is displayed with the image as shown below:

Memory-Backed Images
In addition to drawing to a view's graphics context, Core Graphics supports drawing memory backed images, also known as drawing off-screen. Doing so requires:
- Creating a graphics context that is backed by an in memory bitmap
- Setting drawing state and issuing drawing commands
- Getting the image from the context
- Removing the context
Unlike the Draw method, where the context is supplied by the view, in this case you create the context in one of two ways:
By calling
UIGraphics.BeginImageContext(orBeginImageContextWithOptions)By creating a new
CGBitmapContextInstance
CGBitmapContextInstance is useful when you are working directly with the image bits, such as for cases where you are using a custom image manipulation algorithm. In all other cases, you should use BeginImageContext or BeginImageContextWithOptions.
Once you have an image context, adding drawing code is just like it is in a UIView subclass. For example, the code example used earlier to draw a triangle can be used to draw to an image in memory instead of in a UIView, as shown below:
UIImage DrawTriangle ()
{
    UIImage triangleImage;

    //push a memory backed bitmap context on the context stack
    UIGraphics.BeginImageContext (new CGSize (200.0f, 200.0f));

    //get graphics context
    using(CGContext g = UIGraphics.GetCurrentContext ()){

        //set up drawing attributes
        g.SetLineWidth(4);
        UIColor.Purple.SetFill ();
        UIColor.Black.SetStroke ();

        //create geometry
        path = new CGPath ();

        path.AddLines(new CGPoint[]{
            new CGPoint(100,200),
            new CGPoint(160,100),
            new CGPoint(220,200)});

        path.CloseSubpath();

        //add geometry to graphics context and draw it
        g.AddPath(path);
        g.DrawPath(CGPathDrawingMode.FillStroke);

        //get a UIImage from the context
        triangleImage = UIGraphics.GetImageFromCurrentImageContext ();
    }

    return triangleImage;
}
A common use of drawing to a memory-backed bitmap is to capture an image from any UIView. For example, the following code renders a view's layer to a bitmap context and creates a UIImage from it:
UIGraphics.BeginImageContext (cellView.Frame.Size);

//render the view's layer in the current context
anyView.Layer.RenderInContext (UIGraphics.GetCurrentContext ());

//get a UIImage from the context
UIImage anyViewImage = UIGraphics.GetImageFromCurrentImageContext ();
UIGraphics.EndImageContext ();
Drawing PDFs
In addition to images, Core Graphics supports PDF drawing. Like images, you can render a PDF in memory as well as read a PDF for rendering in a UIView.
PDF in a UIView
Core Graphics also supports reading a PDF from a file and rendering it in a view using the CGPDFDocument class. The CGPDFDocument class represents a PDF in code, and can be used to read and draw pages.
For example, the following code in a UIView subclass reads a PDF from a file into a CGPDFDocument:
public class PDFView : UIView
{
    CGPDFDocument pdfDoc;

    public PDFView ()
    {
        //create a CGPDFDocument from file.pdf included in the main bundle
        pdfDoc = CGPDFDocument.FromFile ("file.pdf");
    }

     public override void Draw (Rectangle rect)
    {
        ...
    }
}
The Draw method can then use the CGPDFDocument to read a page into CGPDFPage and render it by calling DrawPDFPage, as shown below:
public override void Draw (CGRect rect)
{
    base.Draw (rect);

    //flip the CTM so the PDF will be drawn upright
    using (CGContext g = UIGraphics.GetCurrentContext ()) {
        g.TranslateCTM (0, Bounds.Height);
        g.ScaleCTM (1, -1);

        // render the first page of the PDF
        using (CGPDFPage pdfPage = pdfDoc.GetPage (1)) {

        //get the affine transform that defines where the PDF is drawn
        CGAffineTransform t = pdfPage.GetDrawingTransform (CGPDFBox.Crop, rect, 0, true);

        //concatenate the pdf transform with the CTM for display in the view
        g.ConcatCTM (t);

        //draw the pdf page
        g.DrawPDFPage (pdfPage);
        }
    }
}
Memory-Backed PDF
For an in-memory PDF, you need to create a PDF context by calling BeginPDFContext. Drawing to PDF is granular to pages. Each page is started by calling BeginPDFPage and completed by calling EndPDFContent, with the graphics code in between. Also, as with image drawing, memory backed PDF drawing uses an origin in the lower left, which can be accounted by modifying the CTM just like with images.
The following code shows how to draw text to a PDF:
//data buffer to hold the PDF
NSMutableData data = new NSMutableData ();

//create a PDF with empty rectangle, which will configure it for 8.5x11 inches
UIGraphics.BeginPDFContext (data, CGRect.Empty, null);

//start a PDF page
UIGraphics.BeginPDFPage ();

using (CGContext g = UIGraphics.GetCurrentContext ()) {
    g.ScaleCTM (1, -1);
    g.TranslateCTM (0, -25);
    g.SelectFont ("Helvetica", 25, CGTextEncoding.MacRoman);
    g.ShowText ("Hello Core Graphics");
    }

//complete a PDF page
UIGraphics.EndPDFContent ();
The resulting text is drawn to the PDF, which is then contained in an NSData that can be saved, uploaded, emailed, etc.
Summary
In this article we looked at the graphics capabilities provided via the Core Graphics framework. We saw how to use Core Graphics to draw geometry, images and PDFs within the context of a UIView, as well as to memory-backed graphics contexts.