Note
Access to this page requires authorization. You can try signing in or changing directories.
Access to this page requires authorization. You can try changing directories.
This article shows you how to use Azure Storage Explorer to create and manage directories and files in storage accounts that have hierarchical namespace (HNS) enabled.
Prerequisites
An Azure subscription. See Get Azure free trial.
A storage account that has hierarchical namespace (HNS) enabled. Follow these instructions to create one.
Azure Storage Explorer installed on your local computer. To install Azure Storage Explorer for Windows, macOS, or Linux, see Azure Storage Explorer.
Note
Storage Explorer uses both the Blob (blob) and Data Lake Storage (dfs) endpoints when working with Azure Data Lake Storage. If you configure access to Azure Data Lake Storage by using private endpoints, make sure you create two private endpoints for the storage account: one with the target sub-resource blob and the other with the target sub-resource dfs.
Sign in to Storage Explorer
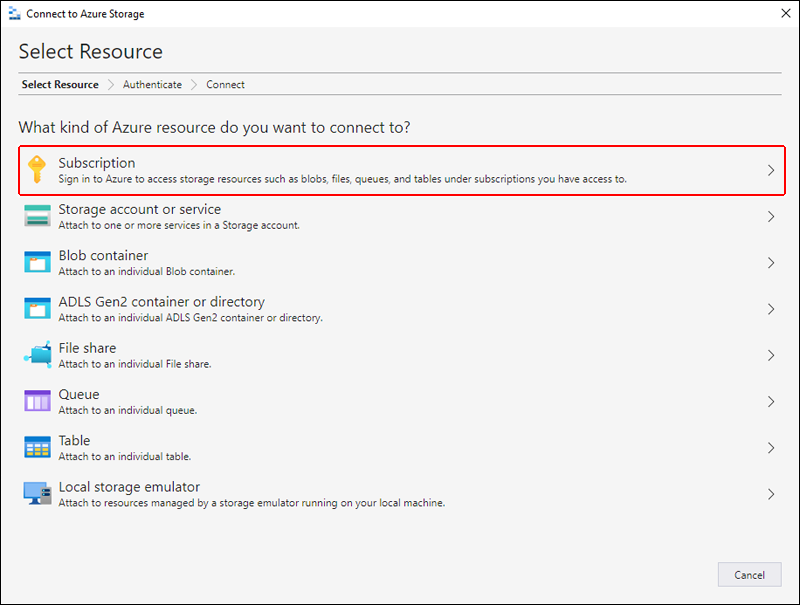
When you first start Storage Explorer, the Microsoft Azure Storage Explorer - Connect to Azure Storage window appears. While Storage Explorer provides several ways to connect to storage accounts, only the Subscription connection method supports managing ACLs.
In the Select Resource panel, select Subscription.
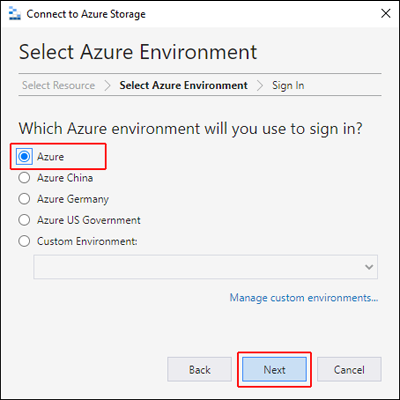
In the Select Azure Environment panel, select an Azure environment to sign in to. You can sign in to global Azure, a national cloud, or an Azure Stack instance. Then select Next.
Storage Explorer opens a webpage for you to sign in.
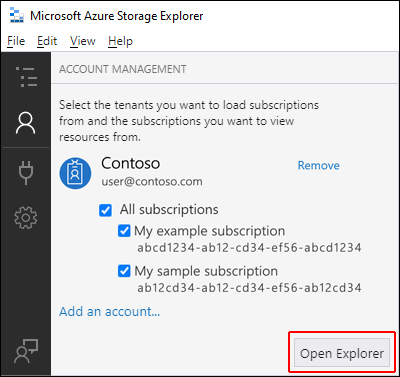
After you successfully sign in with an Azure account, the account and the Azure subscriptions associated with that account appear under ACCOUNT MANAGEMENT. Select the Azure subscriptions that you want to work with, and then select Open Explorer.
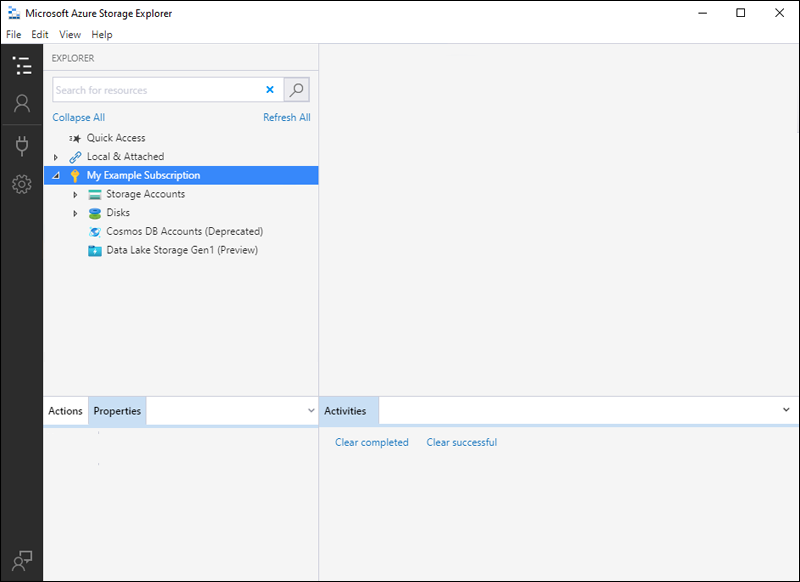
When it completes connecting, Azure Storage Explorer loads with the Explorer tab shown. This view gives you insight into all of your Azure storage accounts as well as local storage configured through the Azurite storage emulator or Azure Stack environments.
Create a container
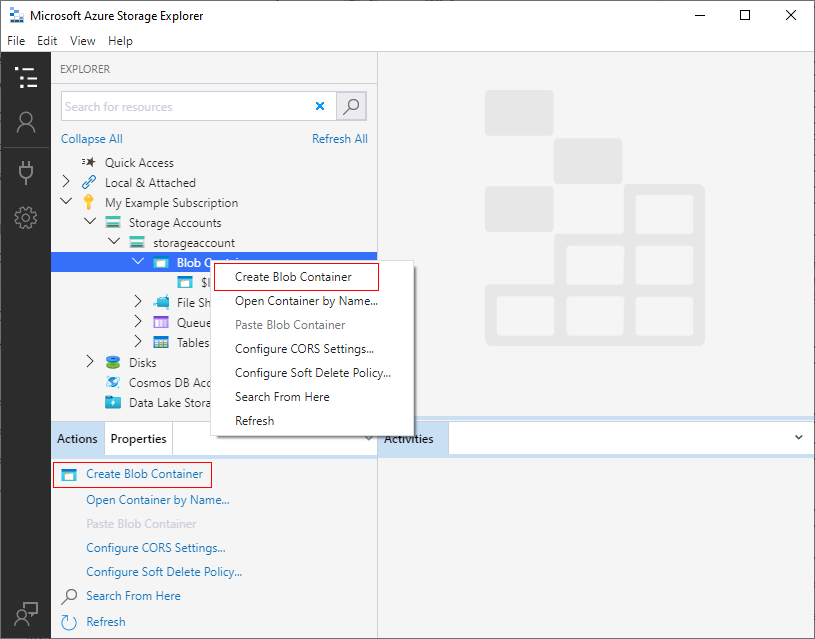
A container holds directories and files. To create one, expand the storage account you created in the preceding step. Select Blob Containers, right-click, and select Create Blob Container. Alternatively, you can select Blob Containers, and then select Create Blob Container in the Actions pane.
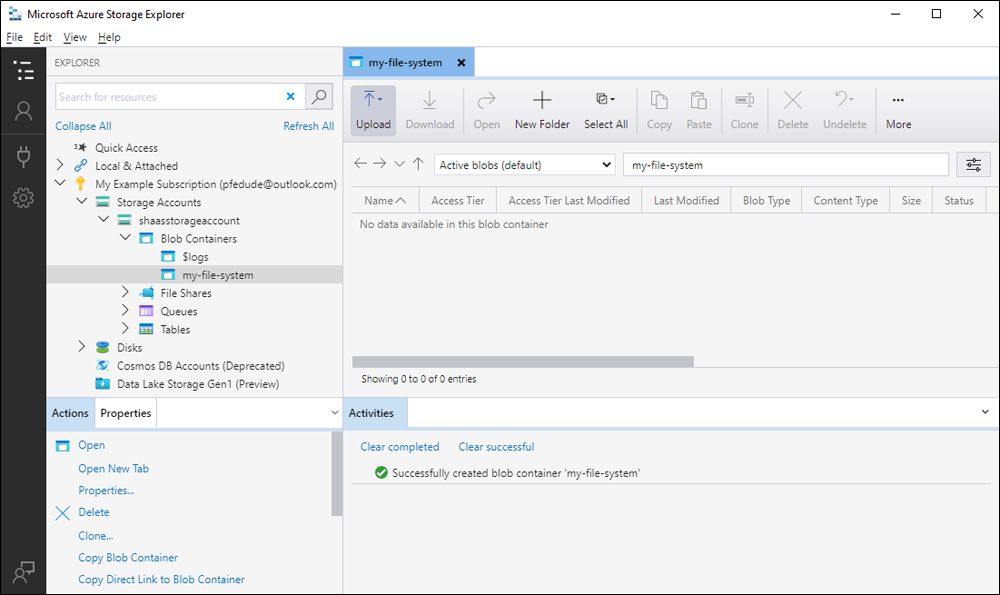
Enter the name for your container. See the Create a container section for a list of rules and restrictions on naming containers. When complete, press Enter to create the container. After the container is created, it appears under the Blob Containers folder for the selected storage account.
Create a directory
To create a directory, select the container that you created in the Create a container section. In the container ribbon, select the New Folder button. Enter the name for your directory. When complete, press Enter to create the directory. After the directory is created, it appears in the main pane.
Upload blobs to the directory
On the directory ribbon, select the Upload button. You can upload a folder or a file.
Select the files or folder to upload.
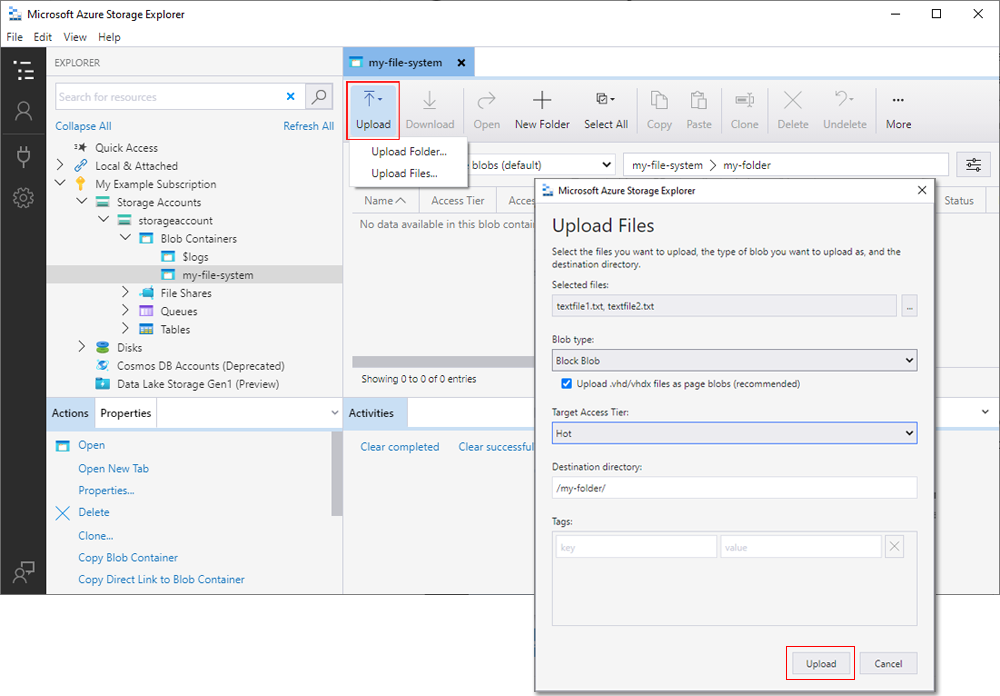
When you select Upload, the files you selected are queued, and each file is uploaded. When the upload finishes, the results show in the Activities window.
View blobs in a directory
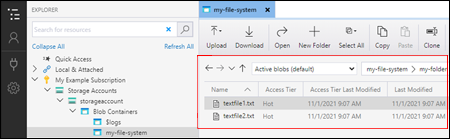
In the Azure Storage Explorer application, select a directory under a storage account. The main pane shows a list of the blobs in the selected directory.
Download blobs
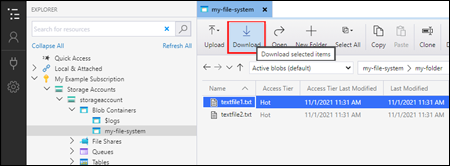
To download a file, select it and then select Download from the ribbon. A file dialog opens where you can enter a file name. Select Select Folder to start the download of a file to the local location.
Next steps
Learn how to manage file and directory permission by setting access control lists (ACLs).