Zone and line placement guide
Important
On 30 March 2025, Azure AI Vision Spatial Analysis will be retired. Please transition to Azure AI Video Indexer or another open-source solution before the specified date. We encourage you to make the switch sooner to gain the richer benefits of Azure AI Video Indexer. In addition to the familiar features you are using, here's a quick comparison between Azure AI Vision Spatial Analysis and Azure AI Video Indexer.
| Feature | Azure AI Vision Spatial Analysis | Azure AI Video Indexer |
|---|---|---|
| Edge support | Yes | Yes |
| Object Detection | People & Vehicle detection only | Detects 1000+ objects |
| Audio/Speech Processing | Not supported | Supported (includes speech transcription, translation and summarization) Supported >(includes speech transcription and sentiment analysis) |
| Event Detection & Tracking | Supported (tracking people & vehicles, event detection) | Not supported at the Edge yet. Is partially supported at the Cloud. |
| Azure Arc Support | Not supported | Native support |
| Focus Area | Visual analysis with specialized tracking | Comprehensive analysis of both audio and visual content |
From now until 30 March 2025, you can continue to use Azure AI Vision Spatial Analysis or transition to Azure AI Video Indexer before the specified date. After 30 March 2025, the Spatial Analysis container will no longer be supported and will stop processing new streams.
This article provides guidelines for how to define zones and lines for Spatial Analysis operations to achieve accurate analysis of peoples movements in a space. This applies to all operations.
Zones and lines are defined using the JSON SPACEANALYSIS_CONFIG parameter. See the Spatial Analysis operations article for more information.
Guidelines for drawing zones
Remember that every space is different; you'll need to update the position or size depending on your needs.
If you want to see a specific section of your camera view, create the largest zone that you can, covering the specific floor area that you're interested in but not including other areas that you're not interested in. This increases the accuracy of the data collected and prevents false positives from areas you don't want to track. Be careful when placing the corners of your polygon and make sure they're not outside the area you want to track.
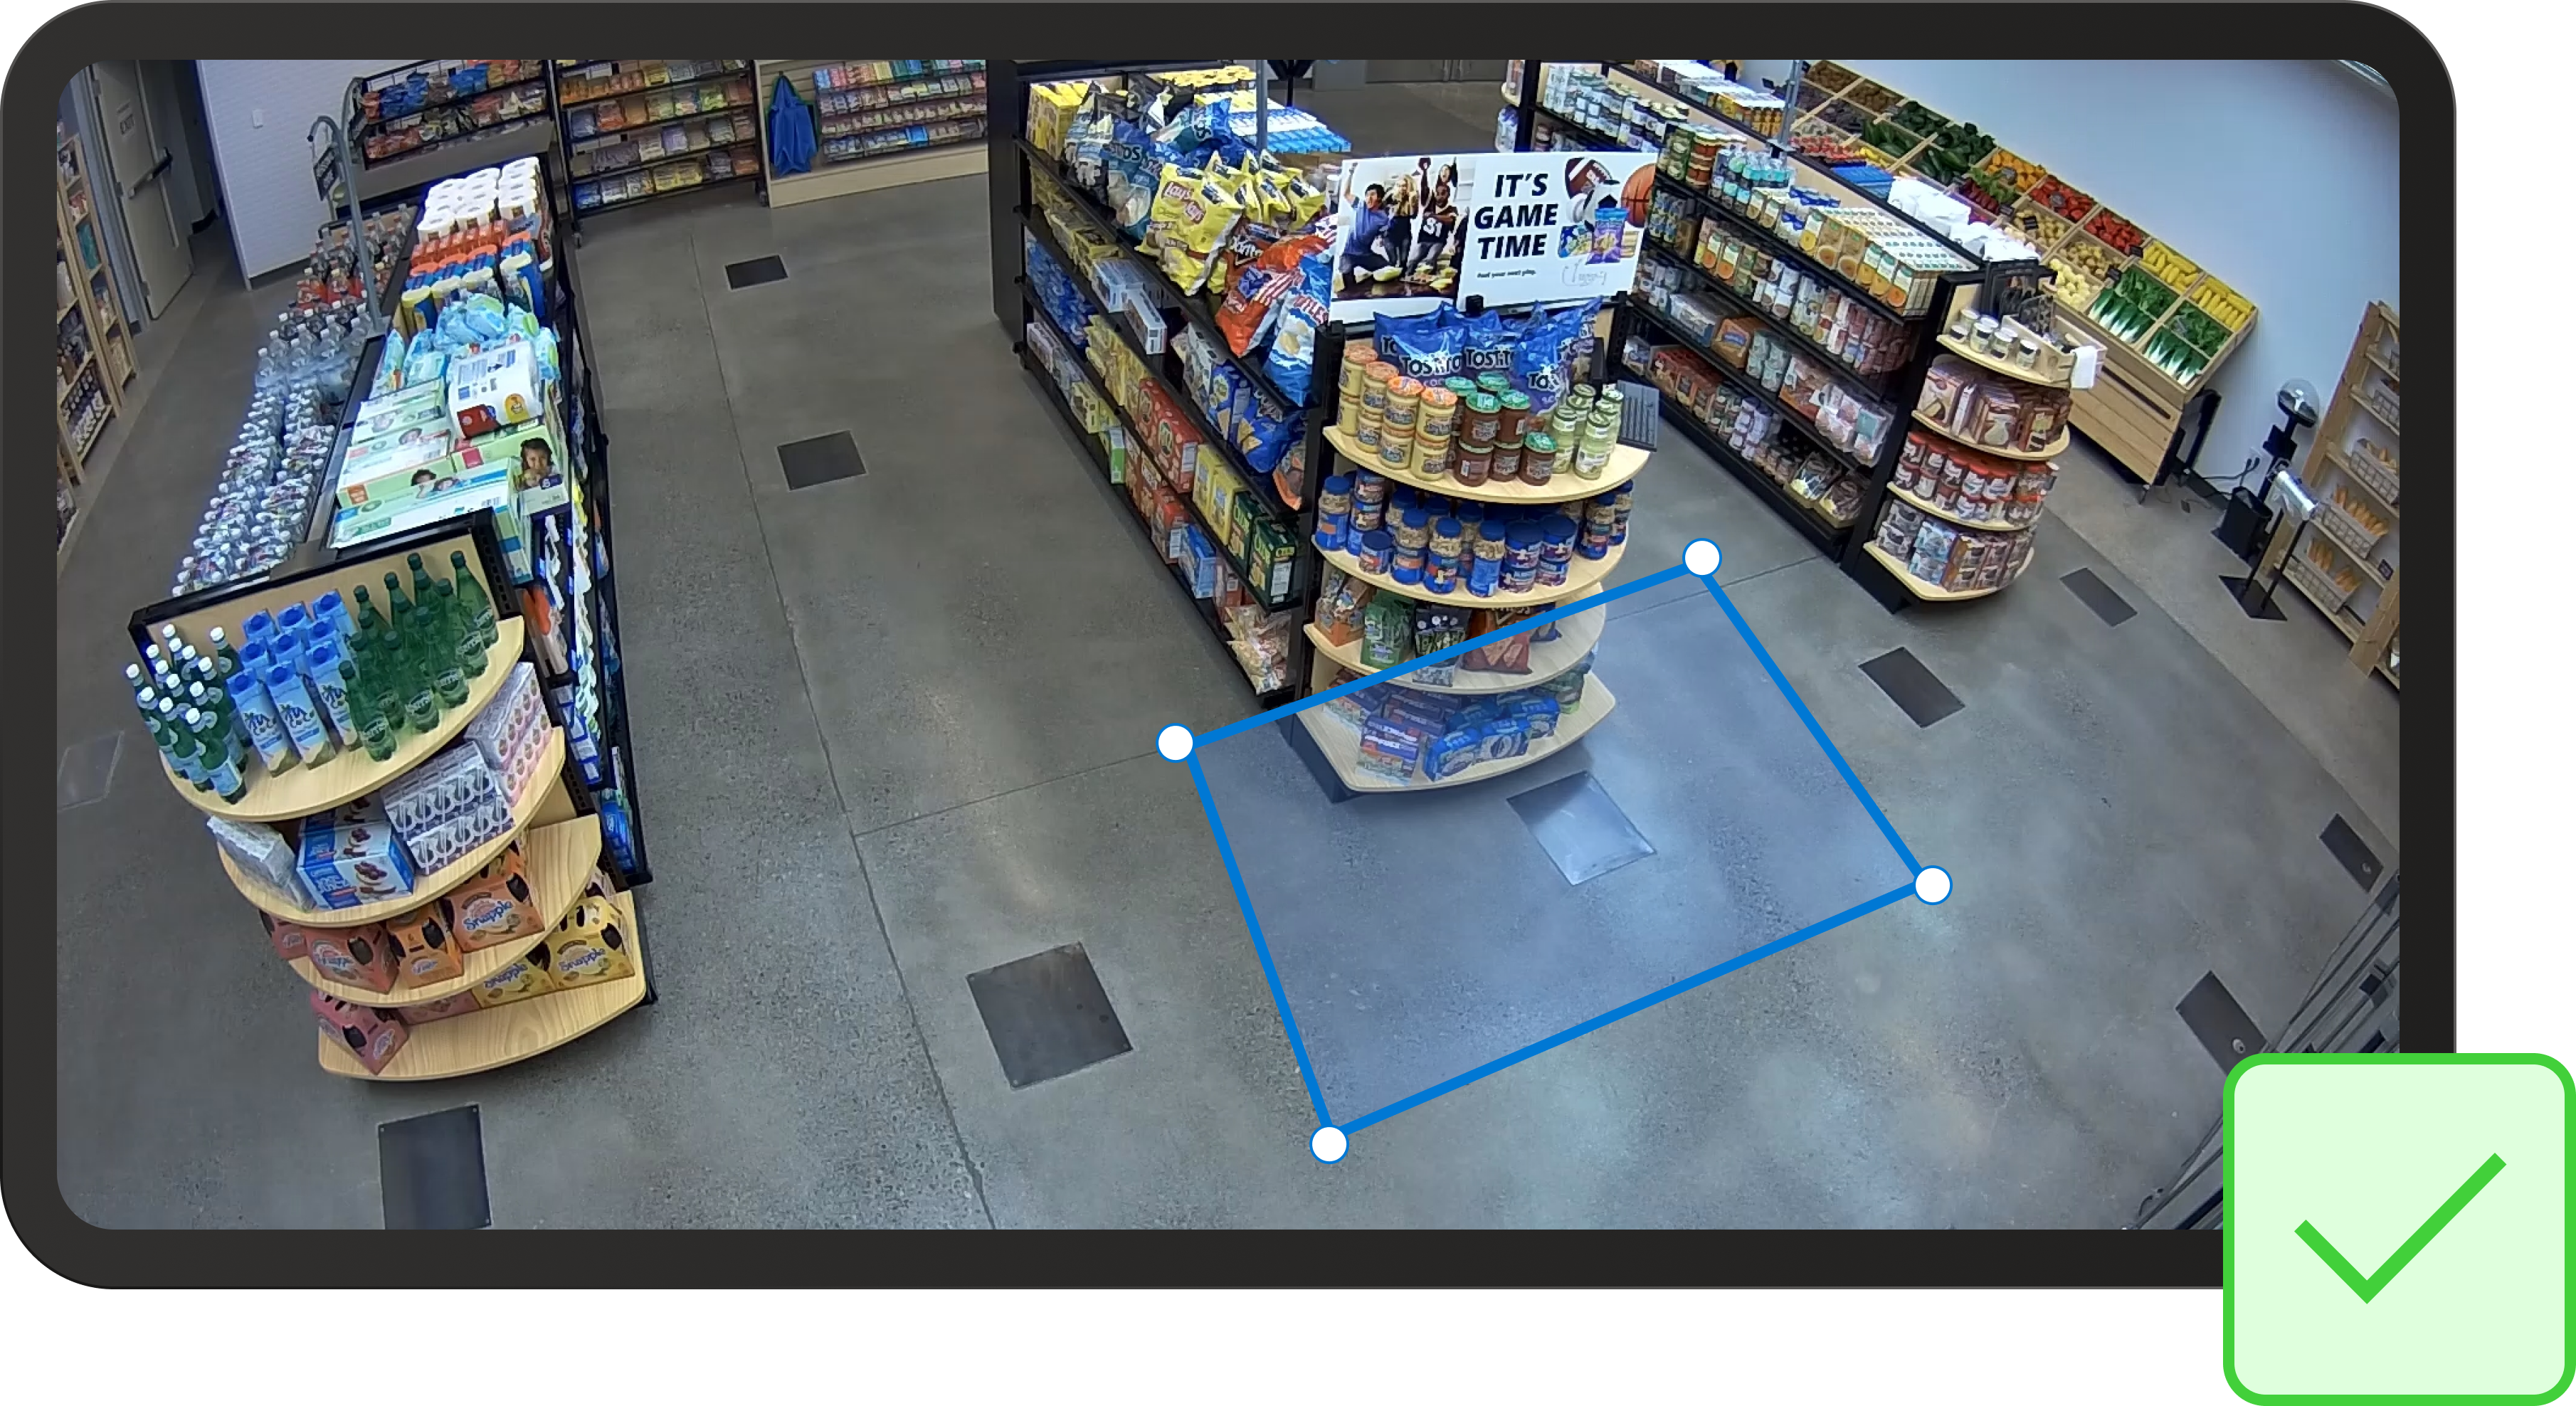
Example of a well-shaped zone
The zone should be large enough to accommodate three people standing along each edge and focused on the area of interest. Spatial Analysis identifies people whose feet are placed in the zone, so when drawing zones on the 2D image, imagine the zone as a carpet laying on the floor.
Examples of zones that aren't well-shaped
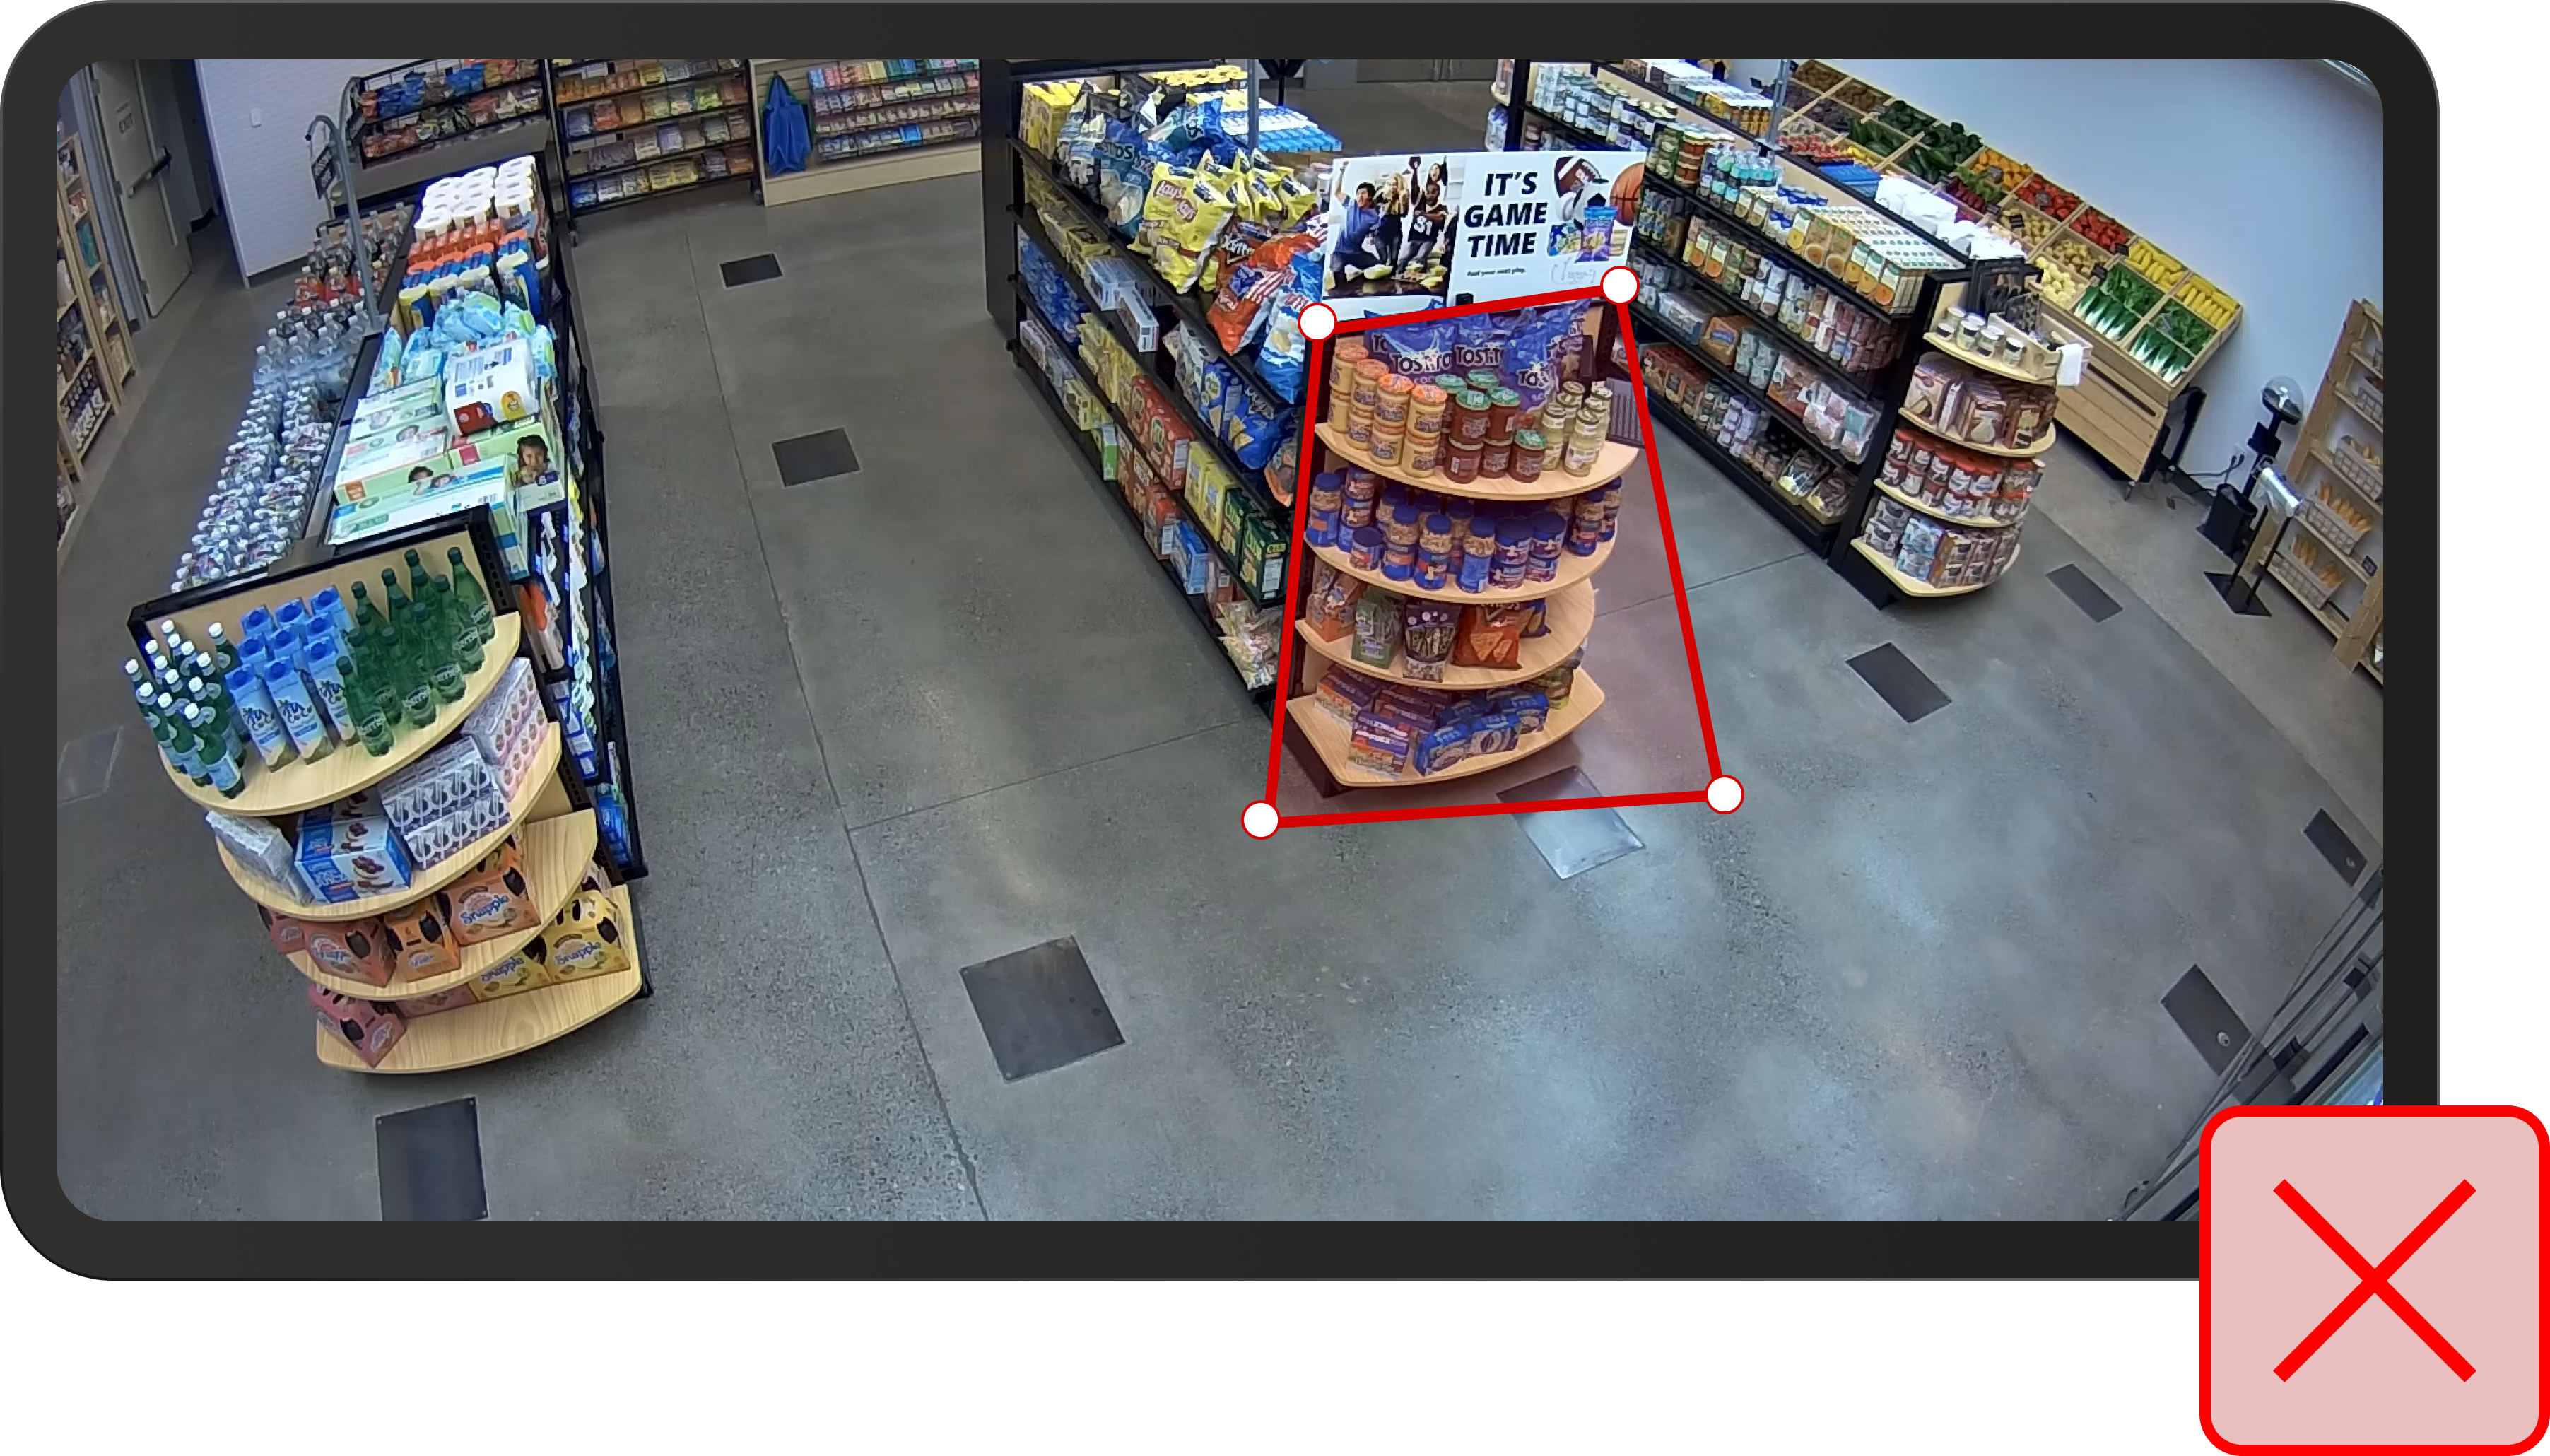
The following examples show poorly shaped zones. In these examples, the area of interest is the space in front of the It's Game Time display.
Zone is not on the floor
Zone is too small
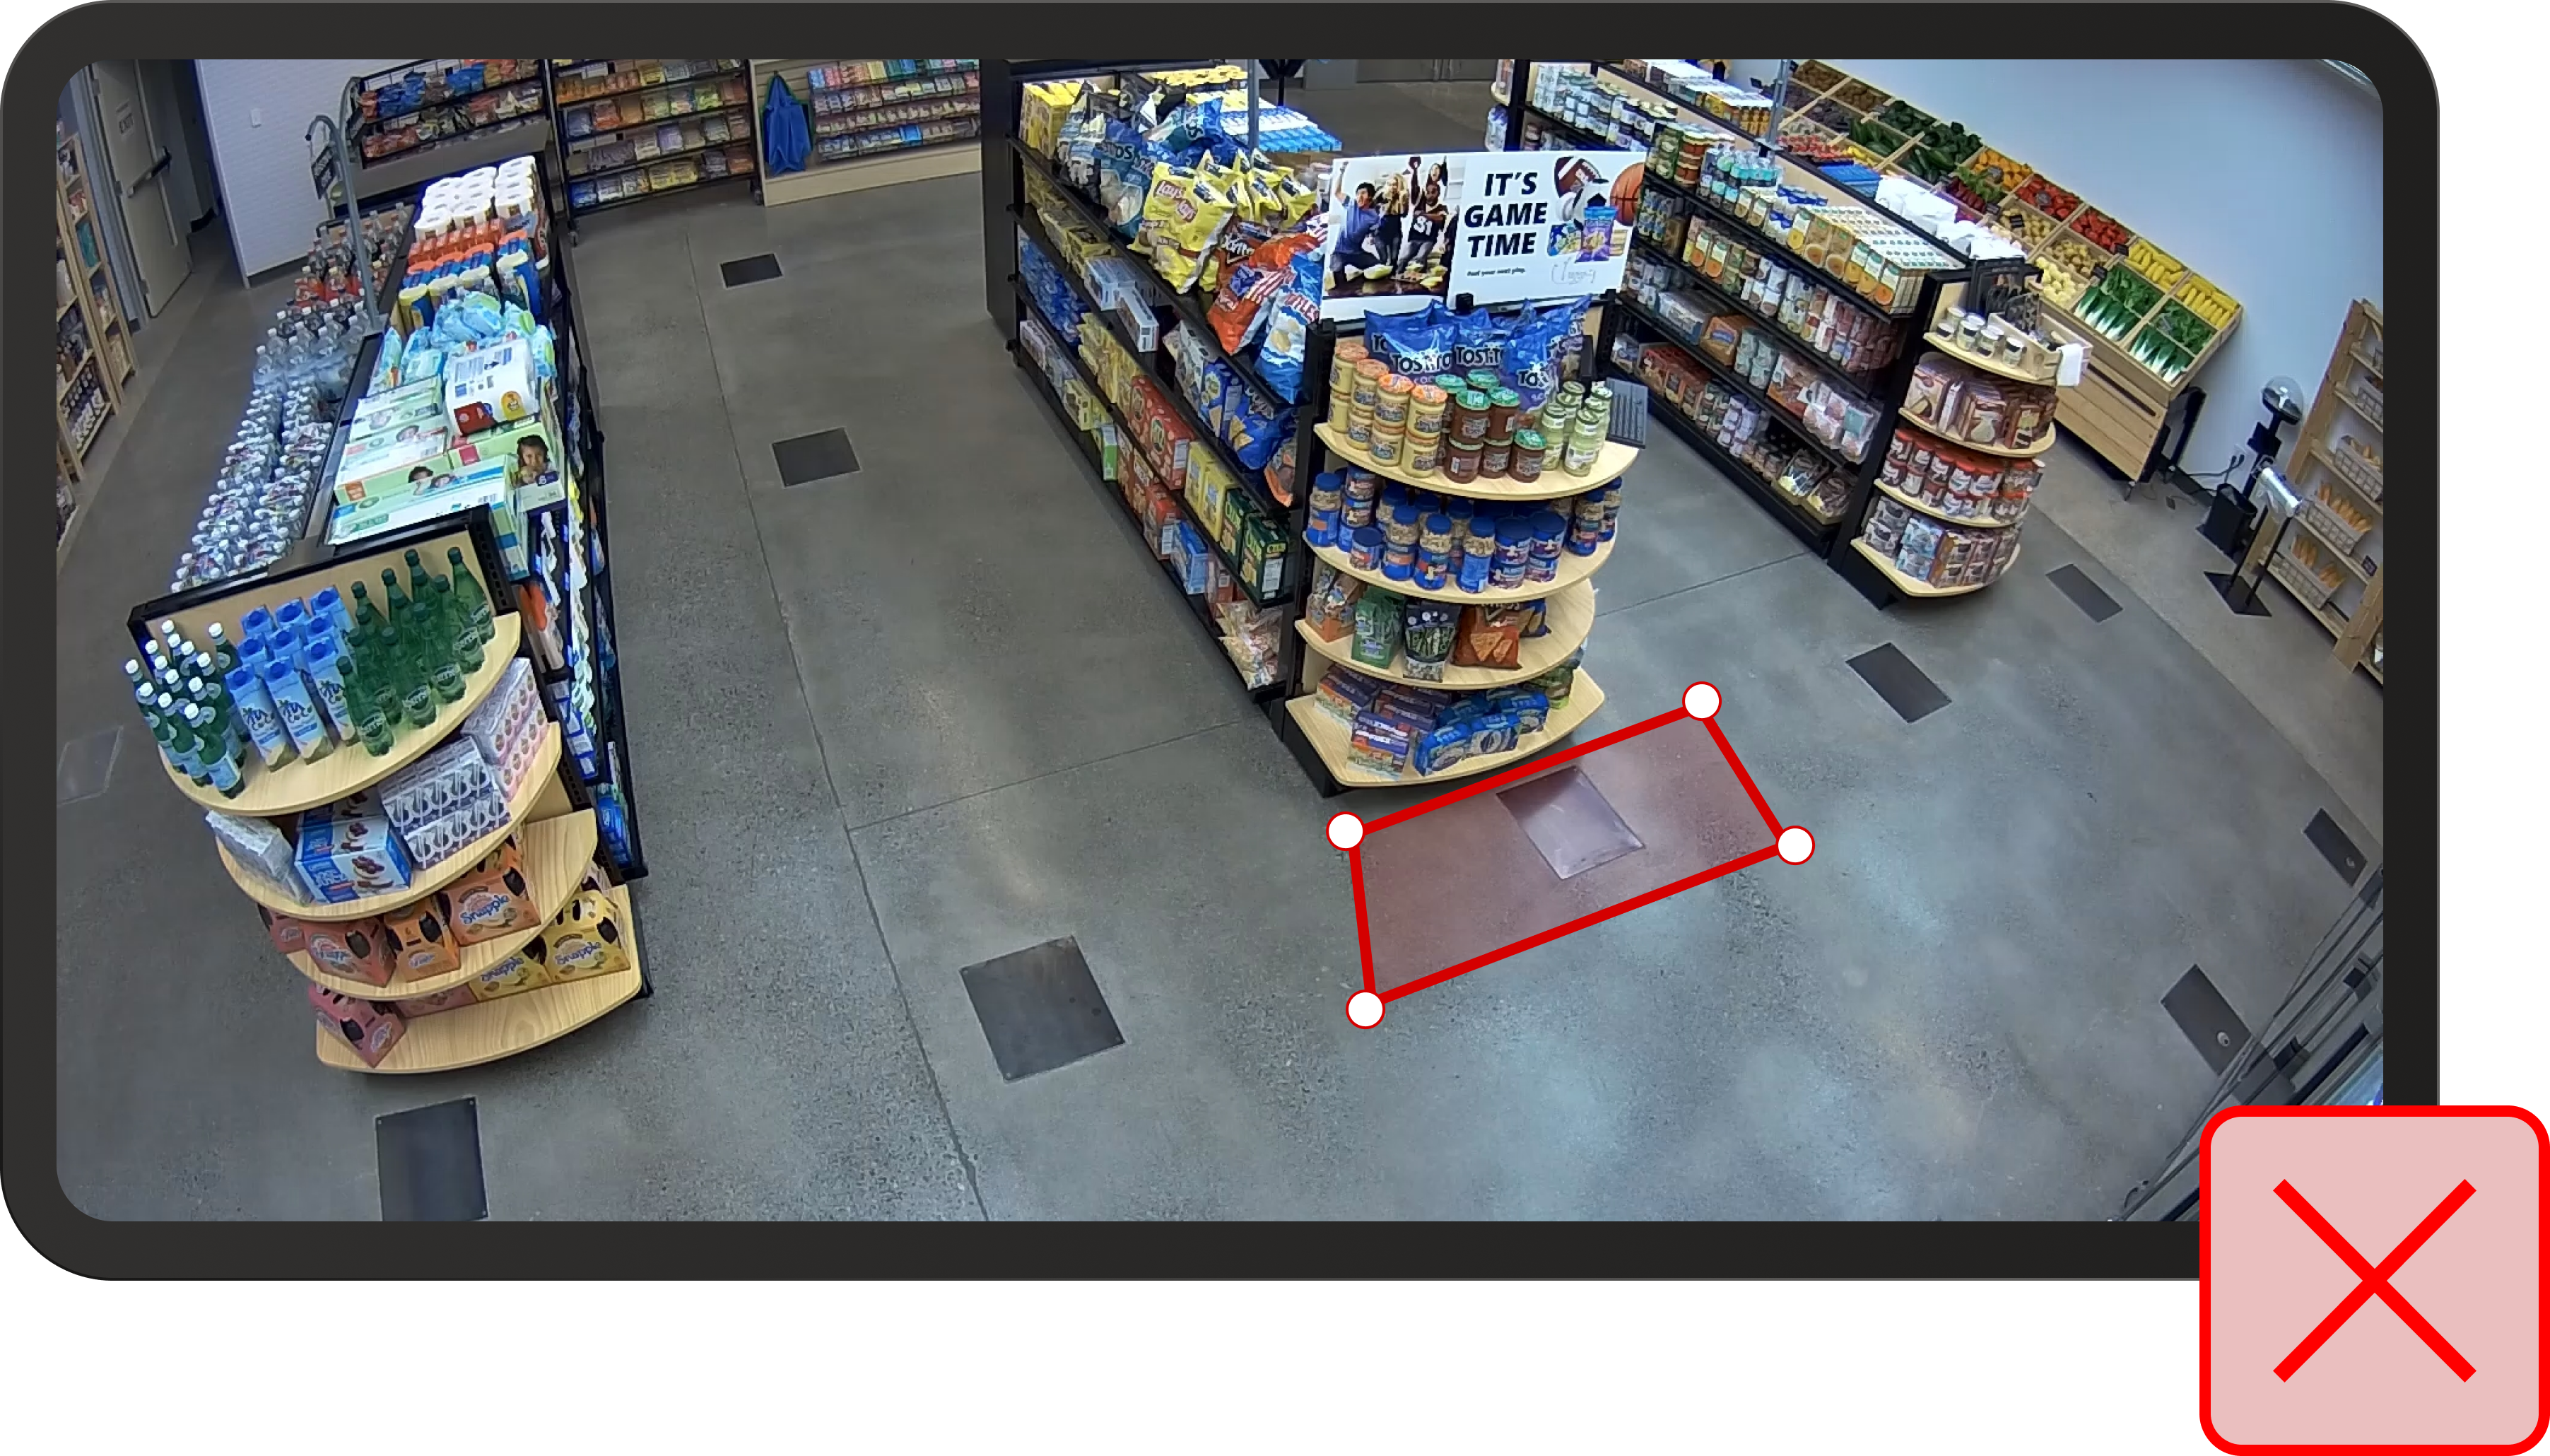
Zone doesn't fully capture the area around the display
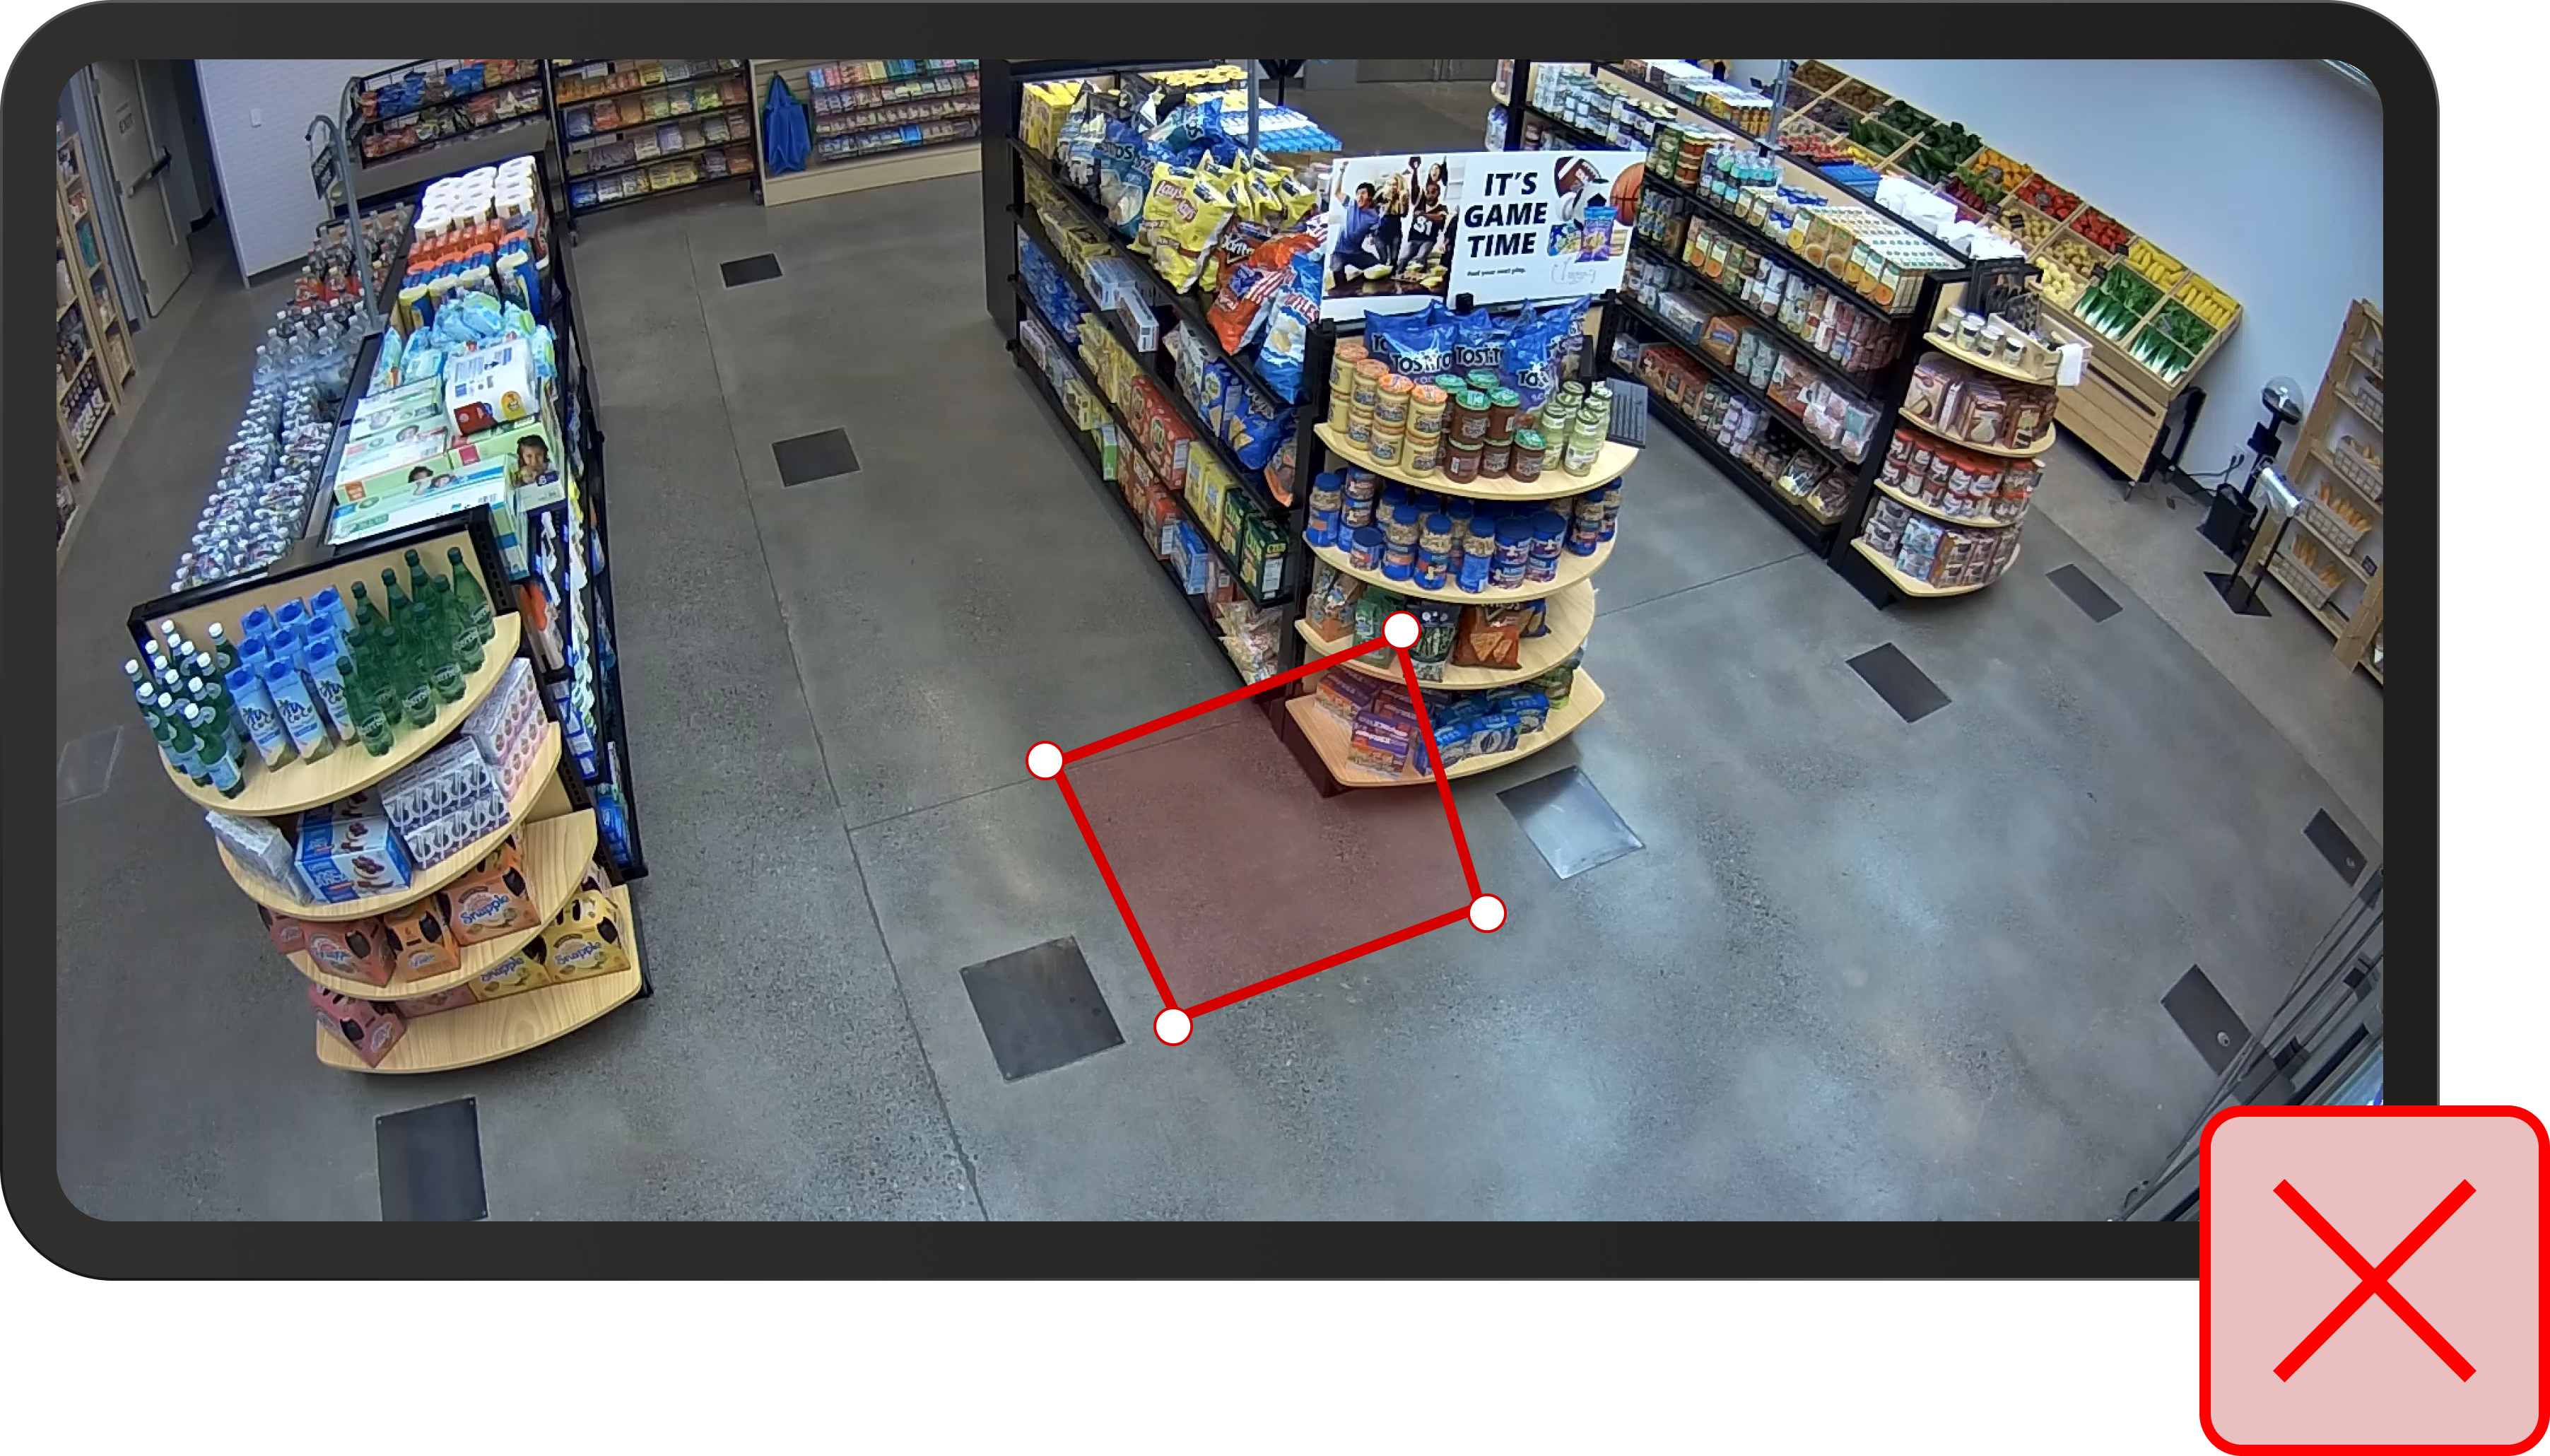
Zone is too close to the edge of the camera image and doesn't capture the right display
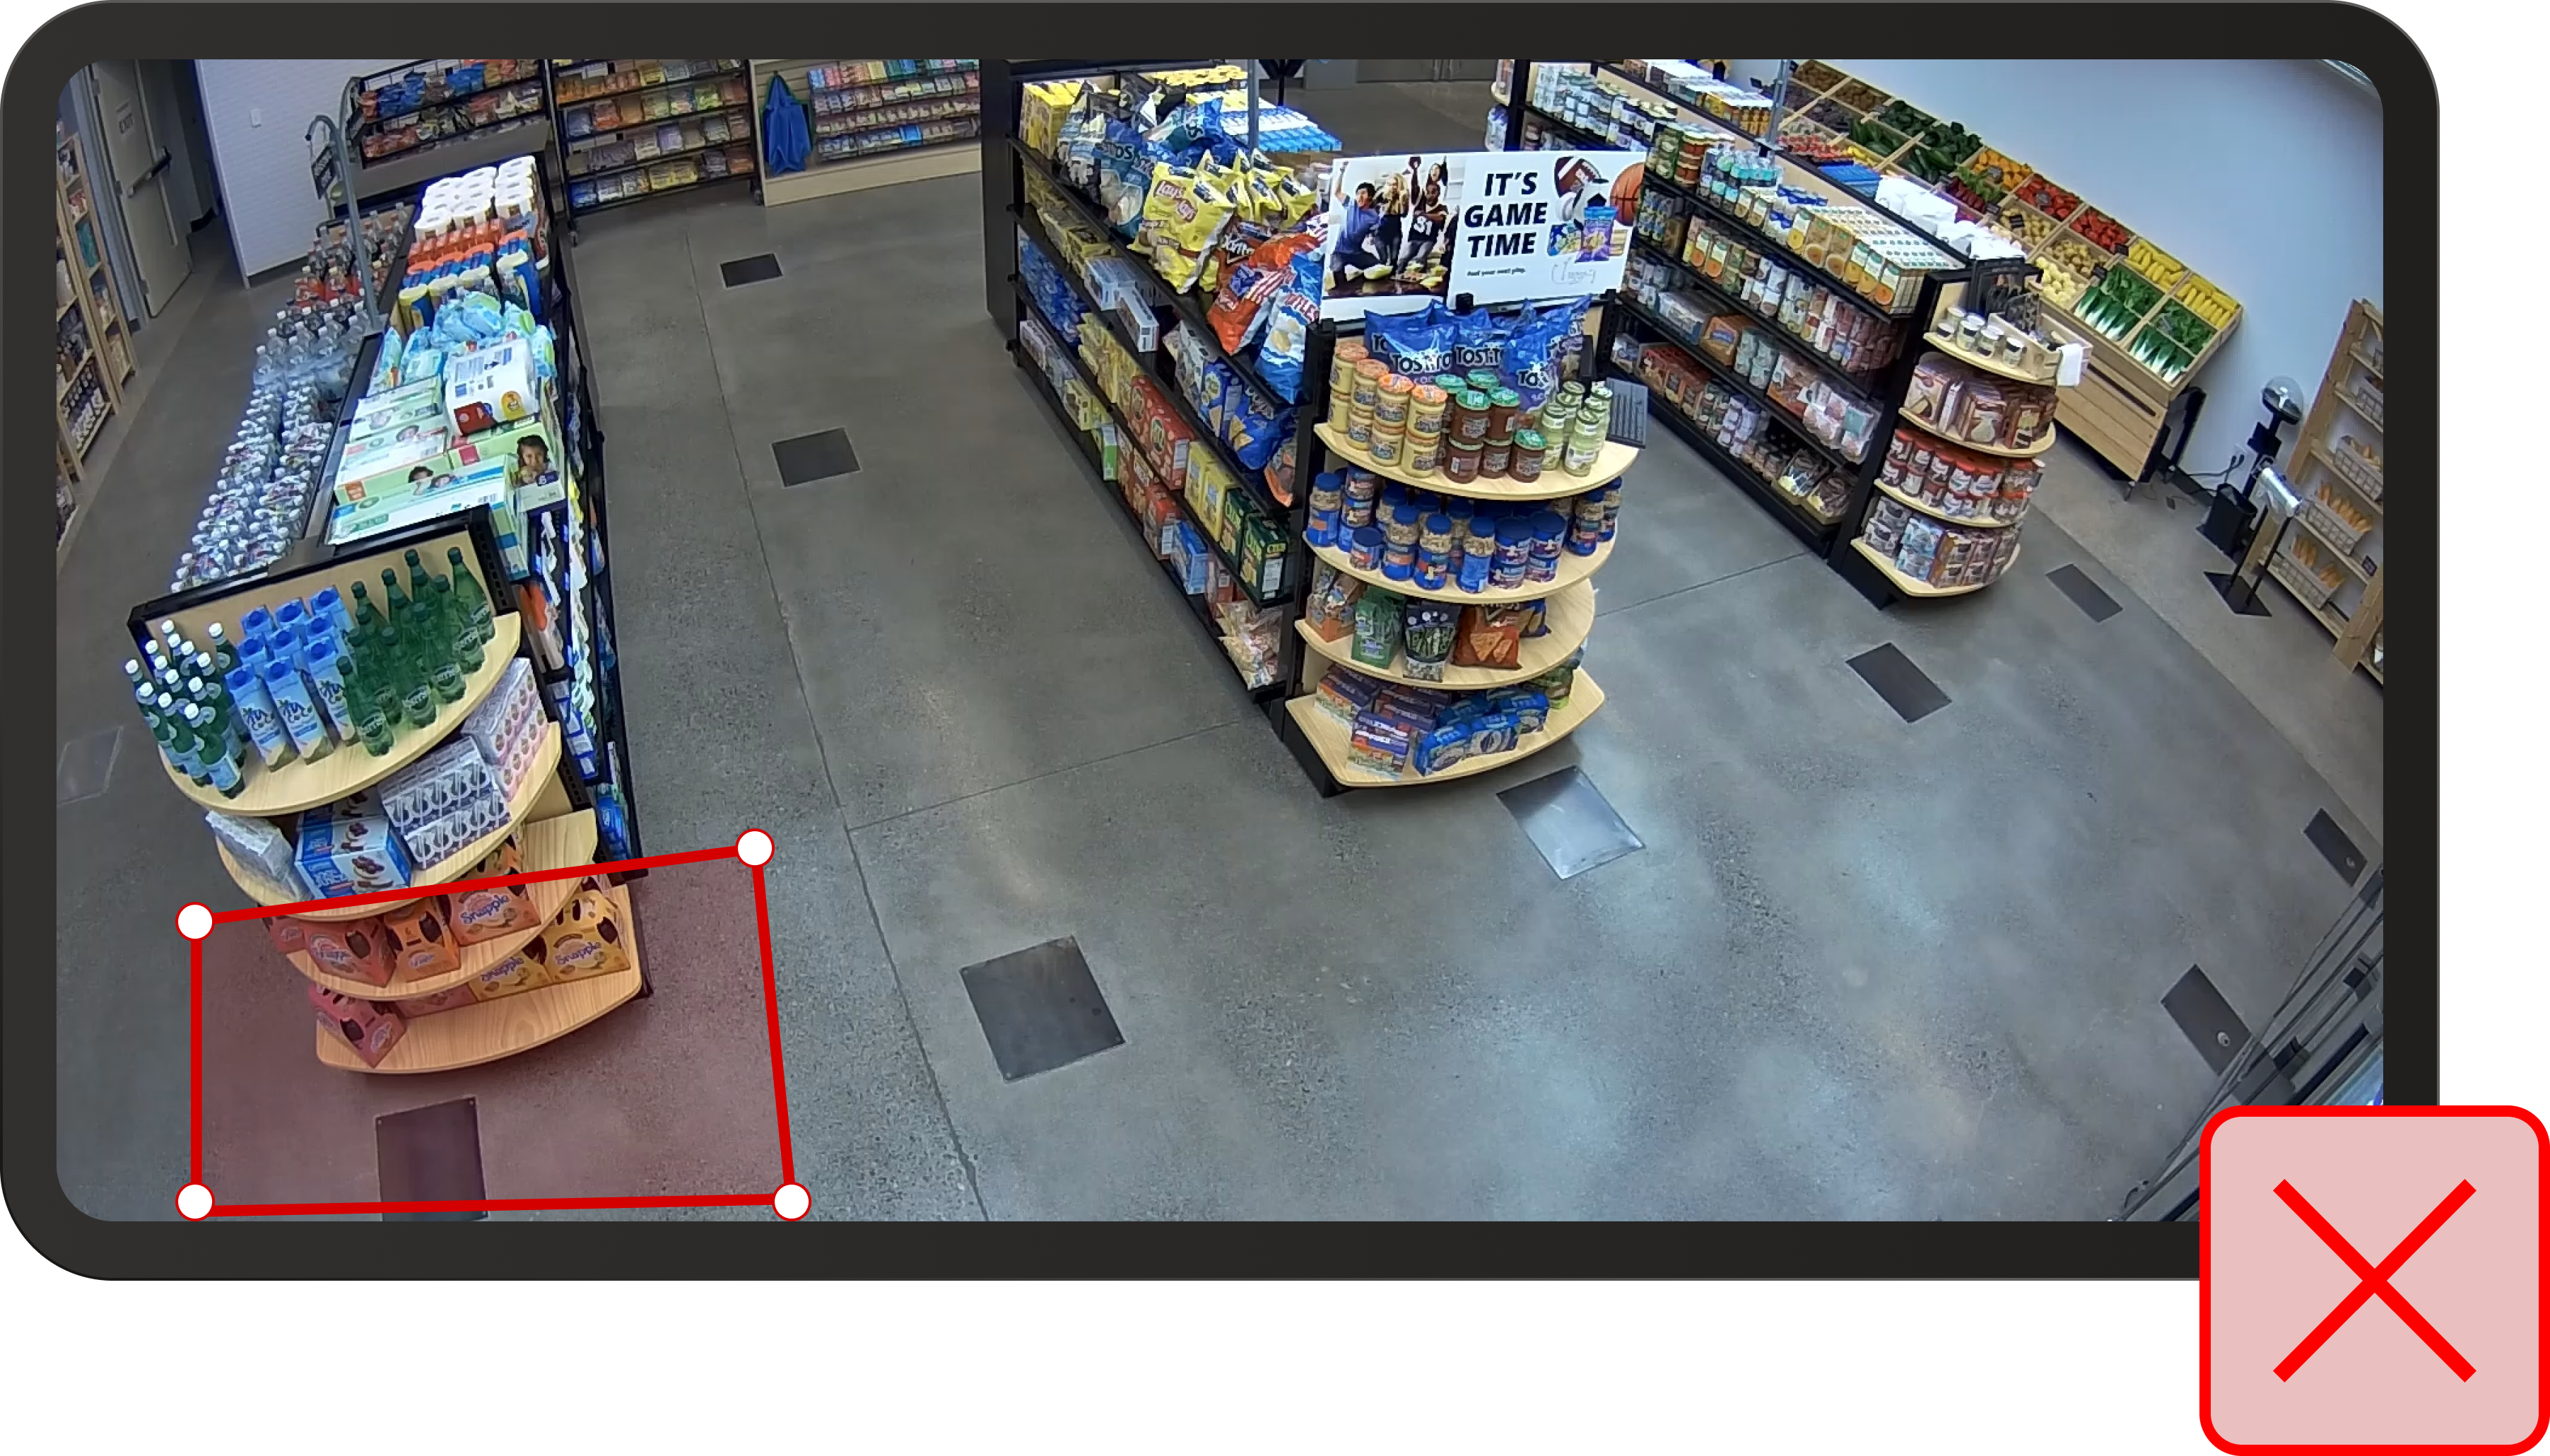
Zone is partially blocked by the shelf, so people and floor aren't fully visible
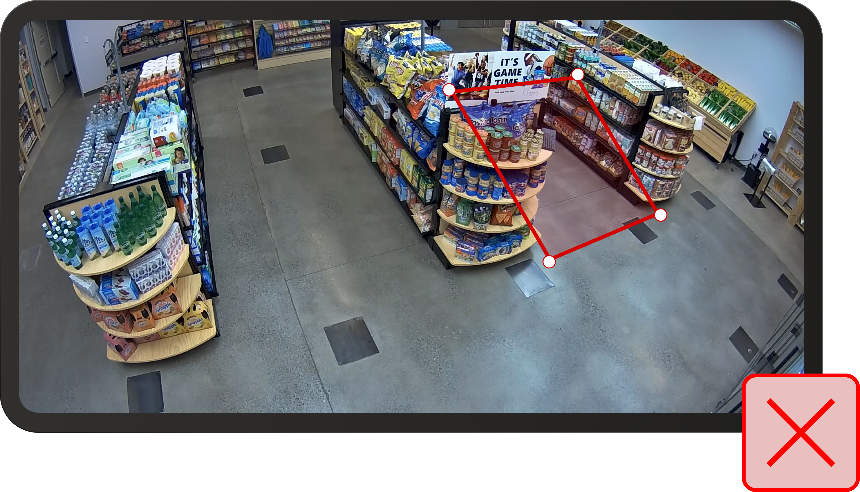
Guidelines for drawing lines
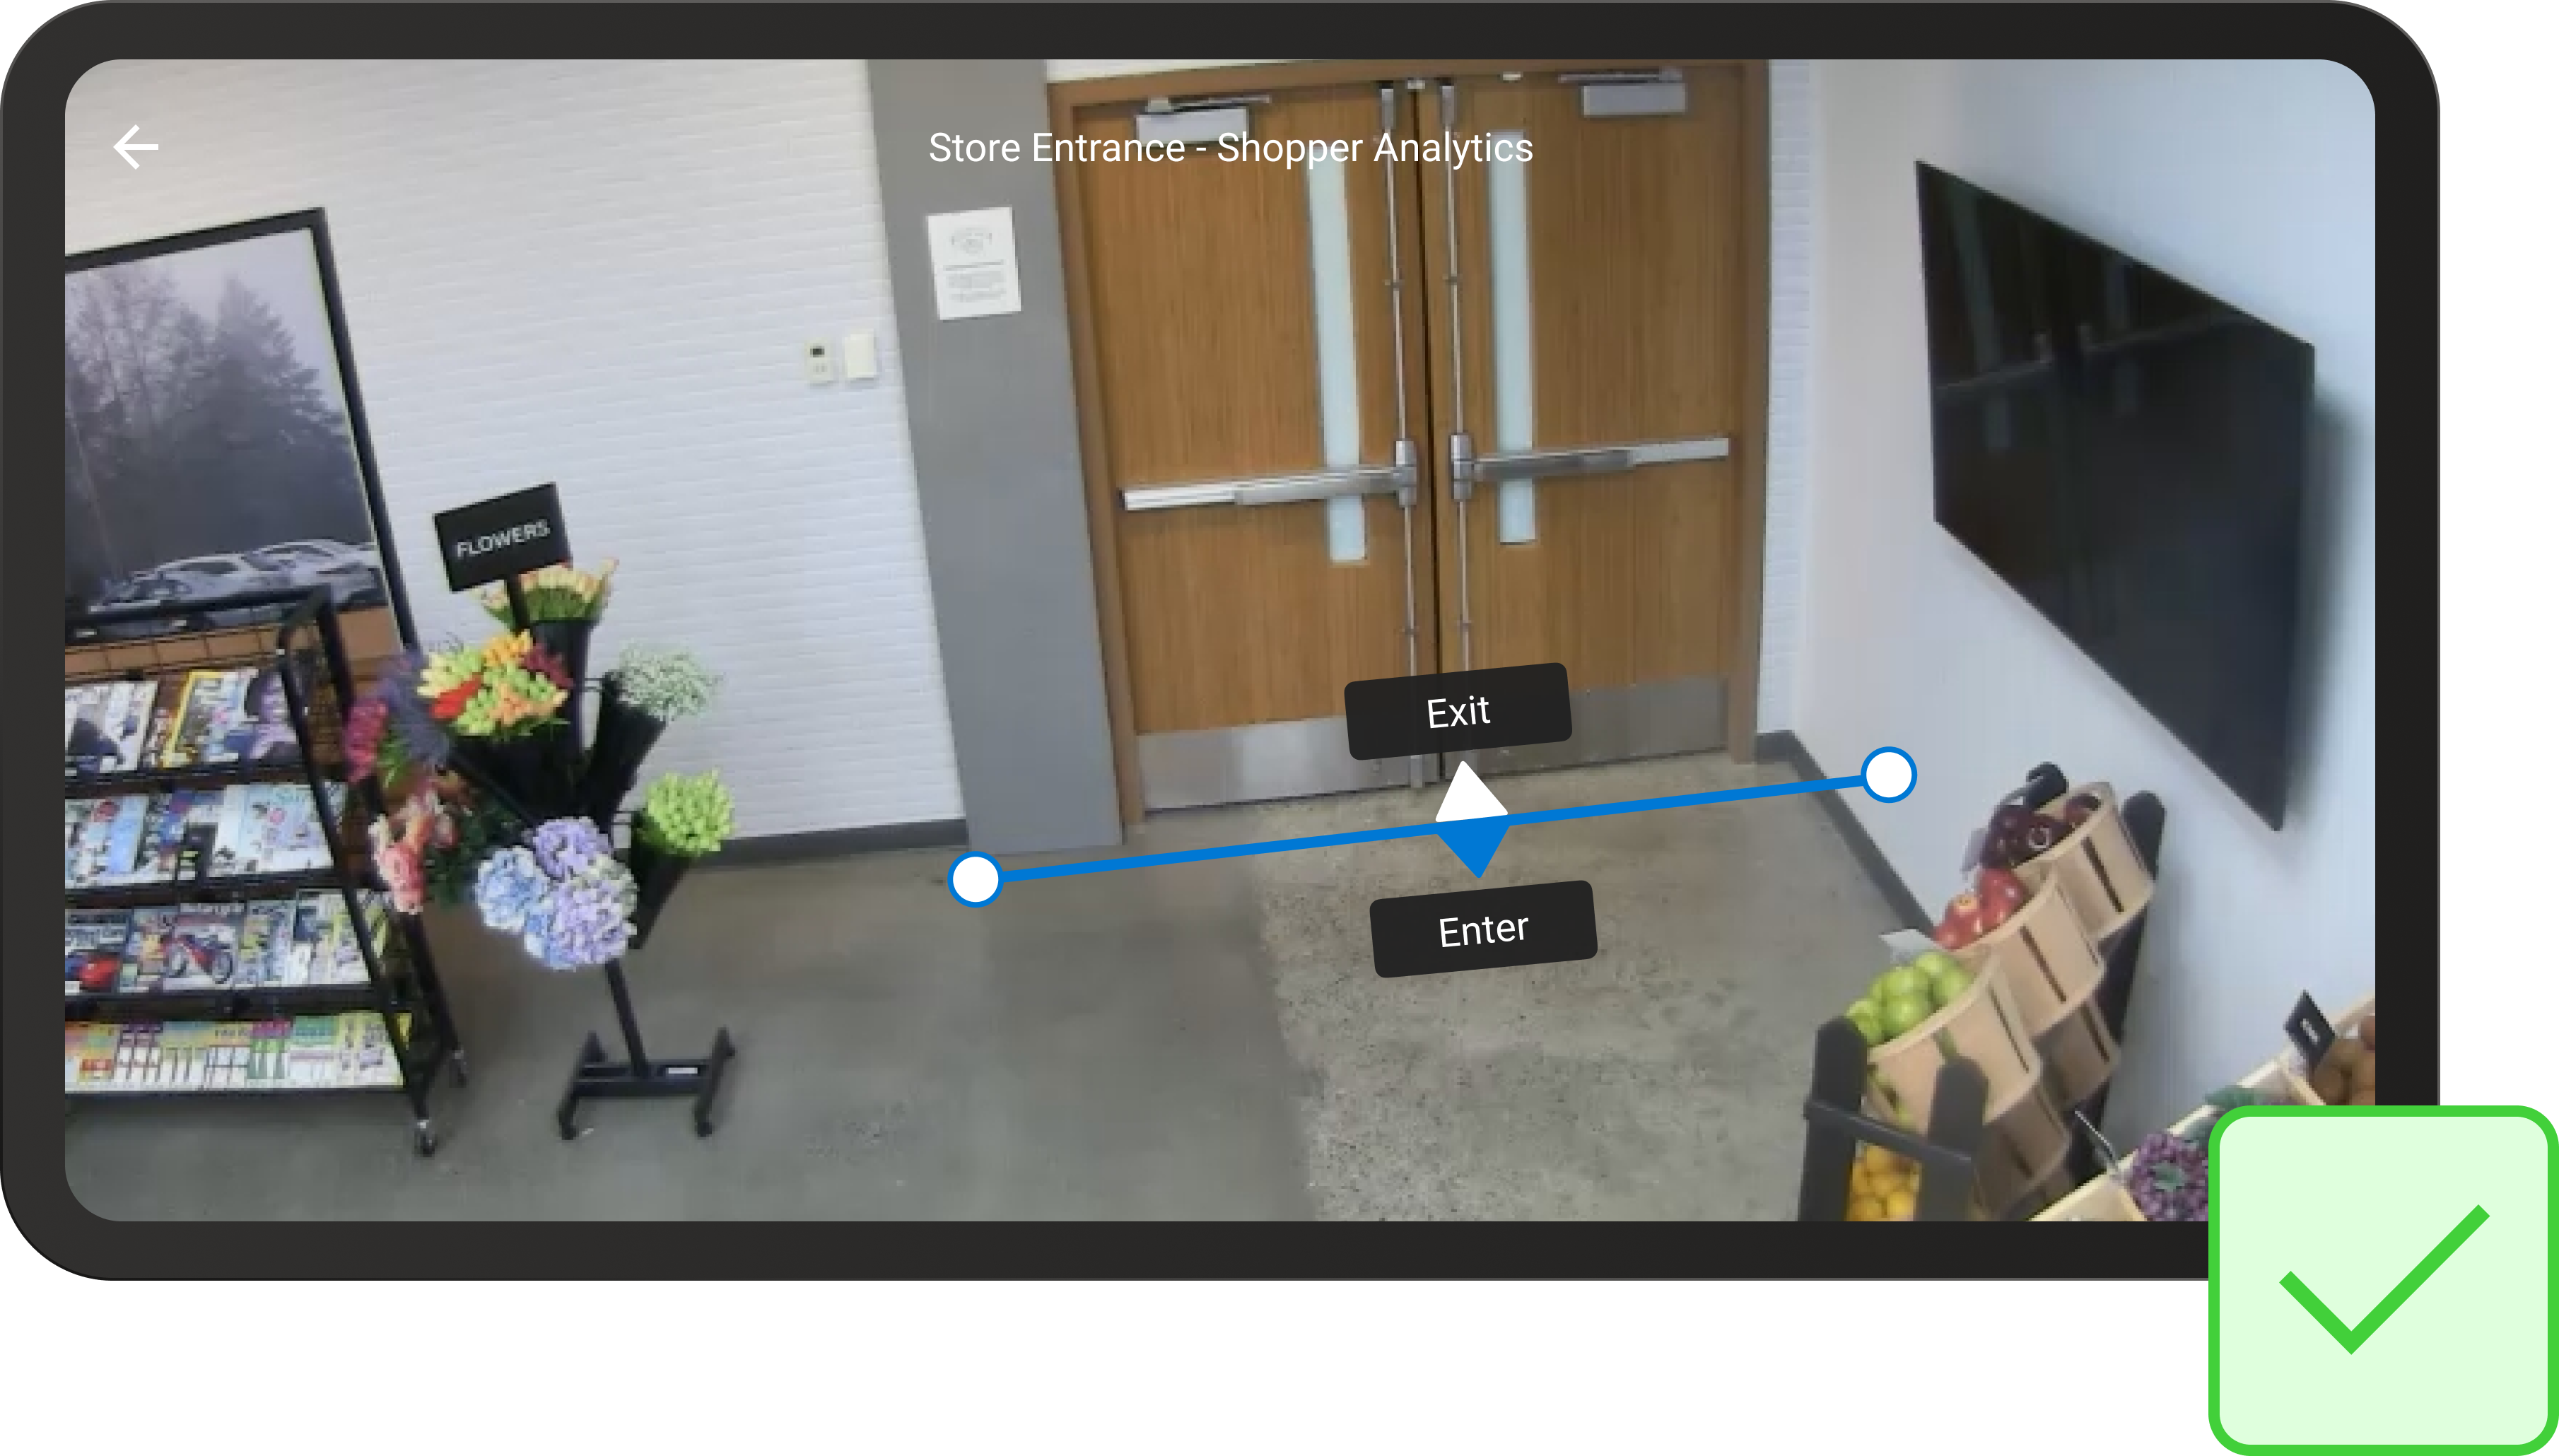
Example of a well-shaped line
The line should be long enough to accommodate the entire entrance. Spatial Analysis identifies people whose feet cross the line, so when drawing lines on the 2D image imagine you're drawing them as if they lie on the floor.
If possible, extend the line wider than the actual entrance. If this won't result in extra crossings (as in the image below when the line is against a wall) then extend it.
Examples of lines that aren't well-shaped
The following examples show poorly defined lines.
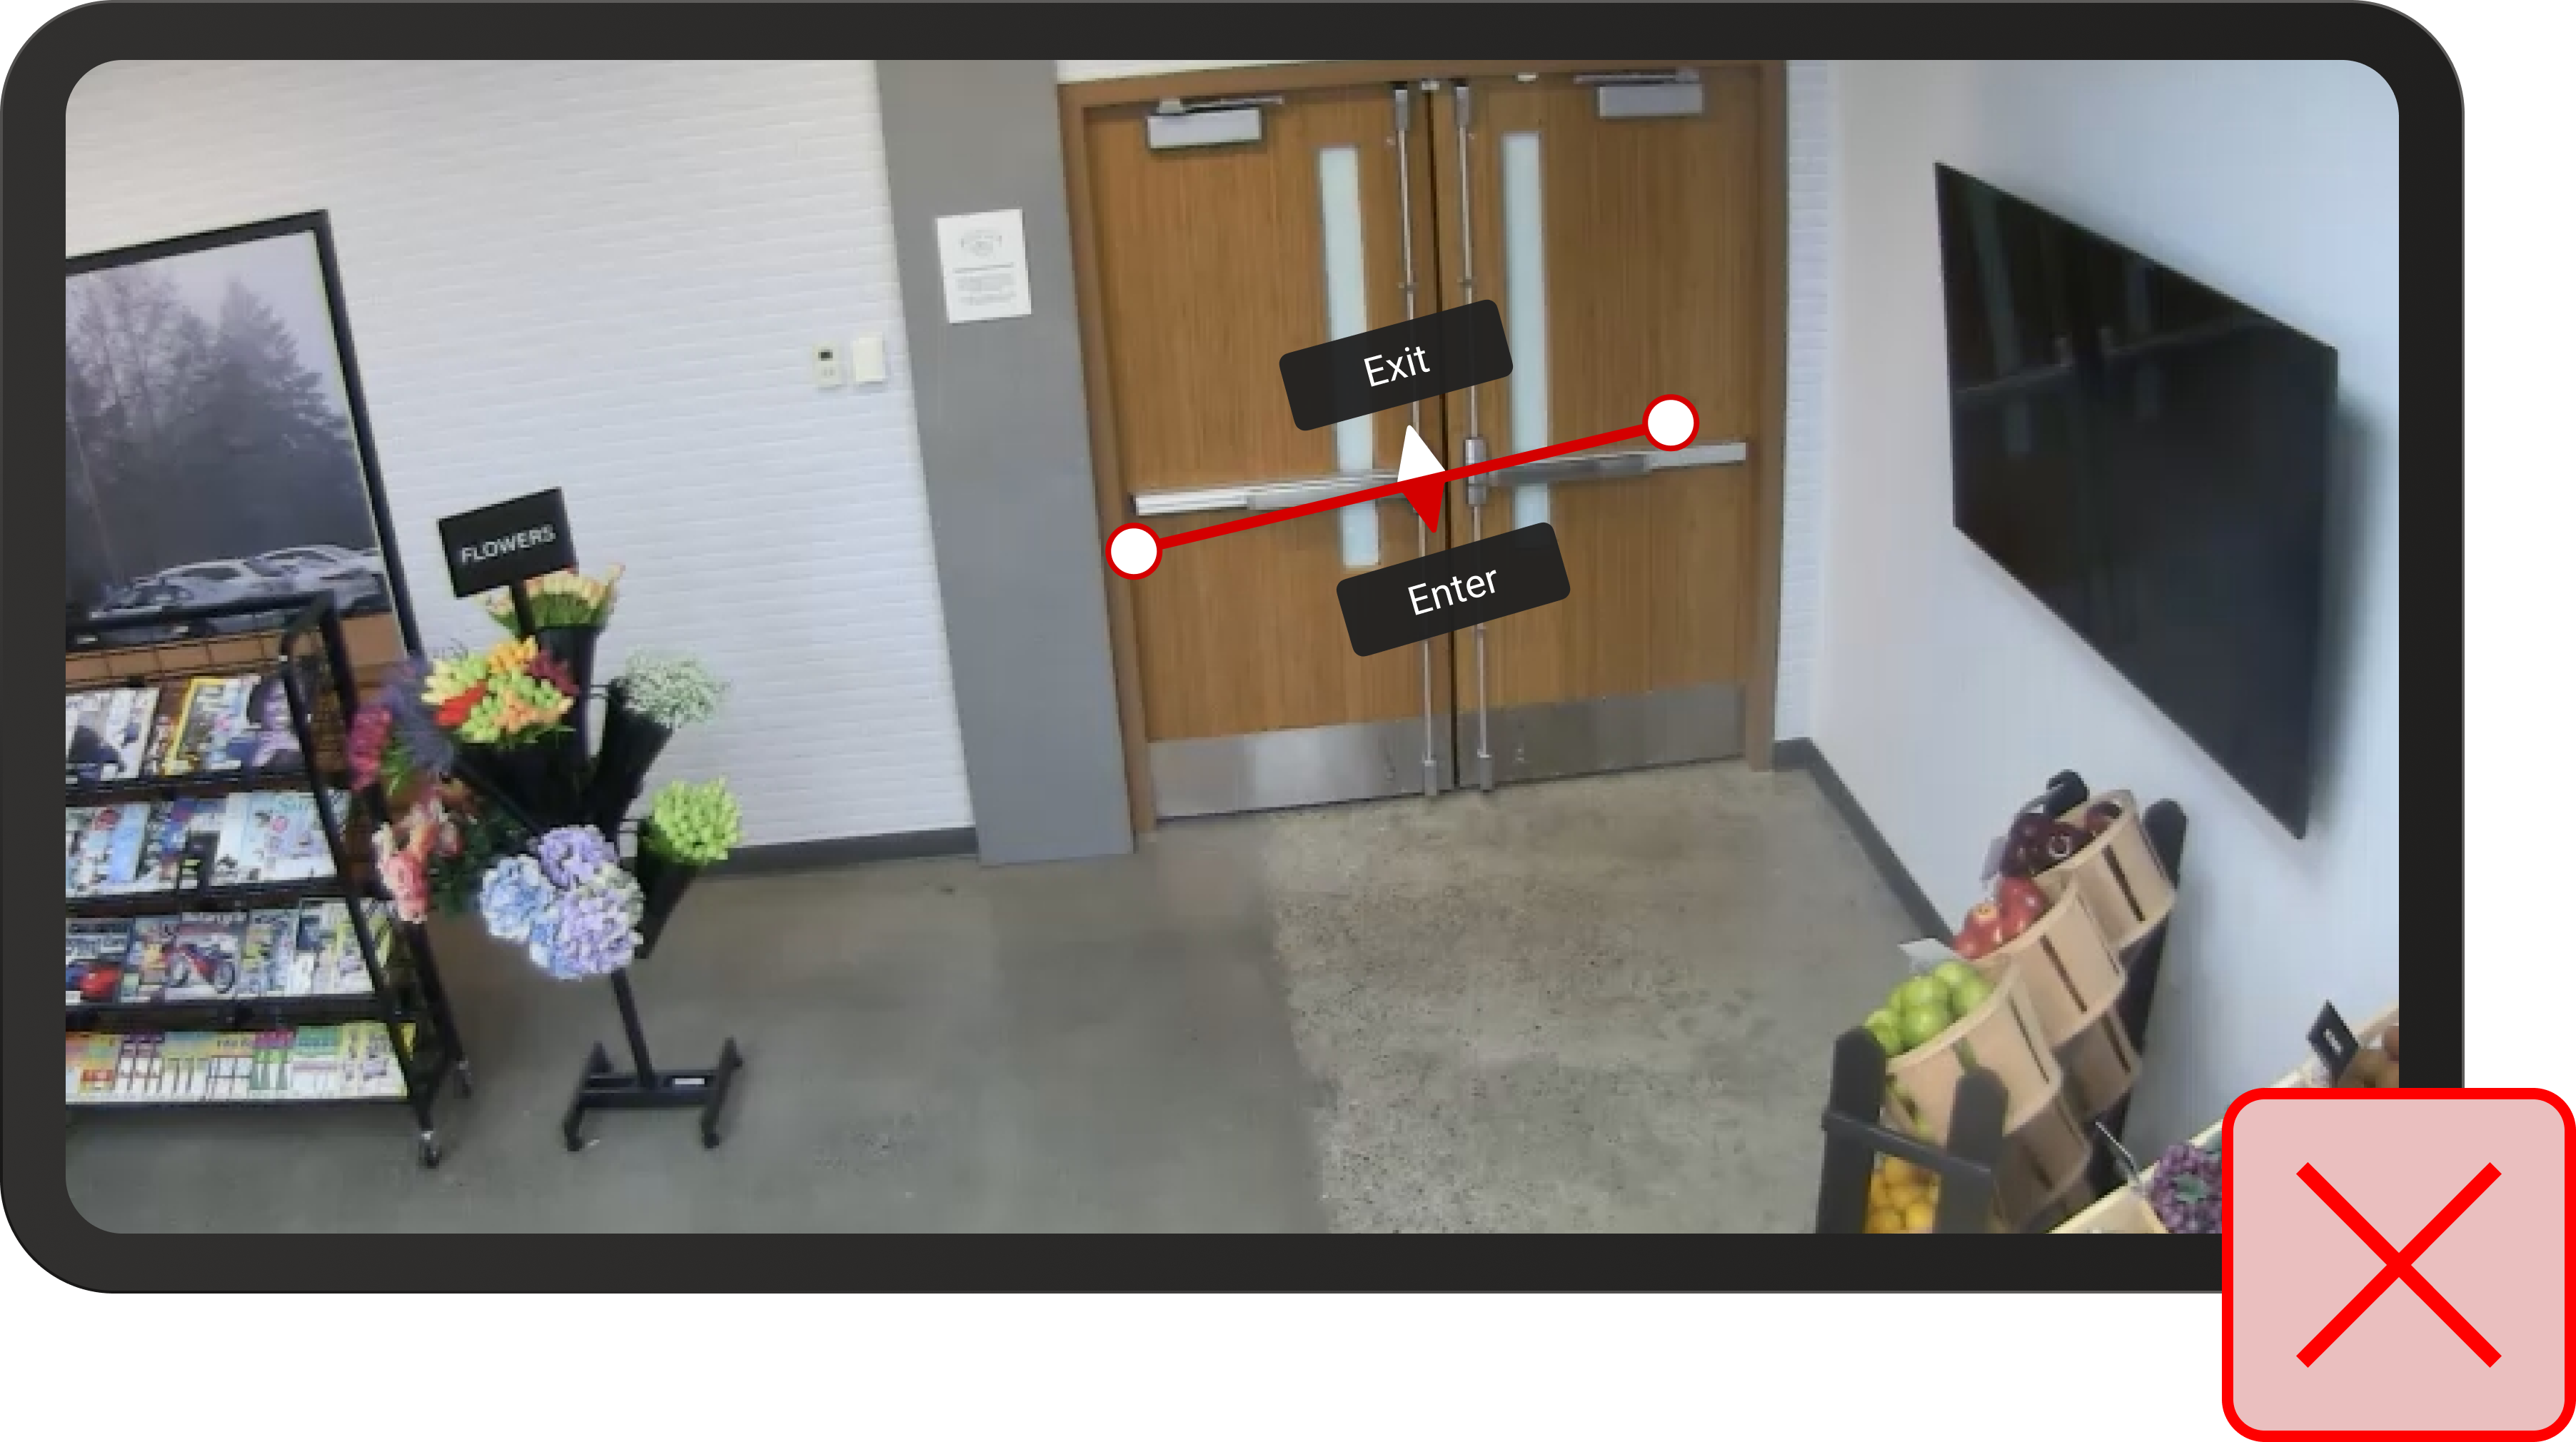
Line doesn't cover the entire entry way on the floor
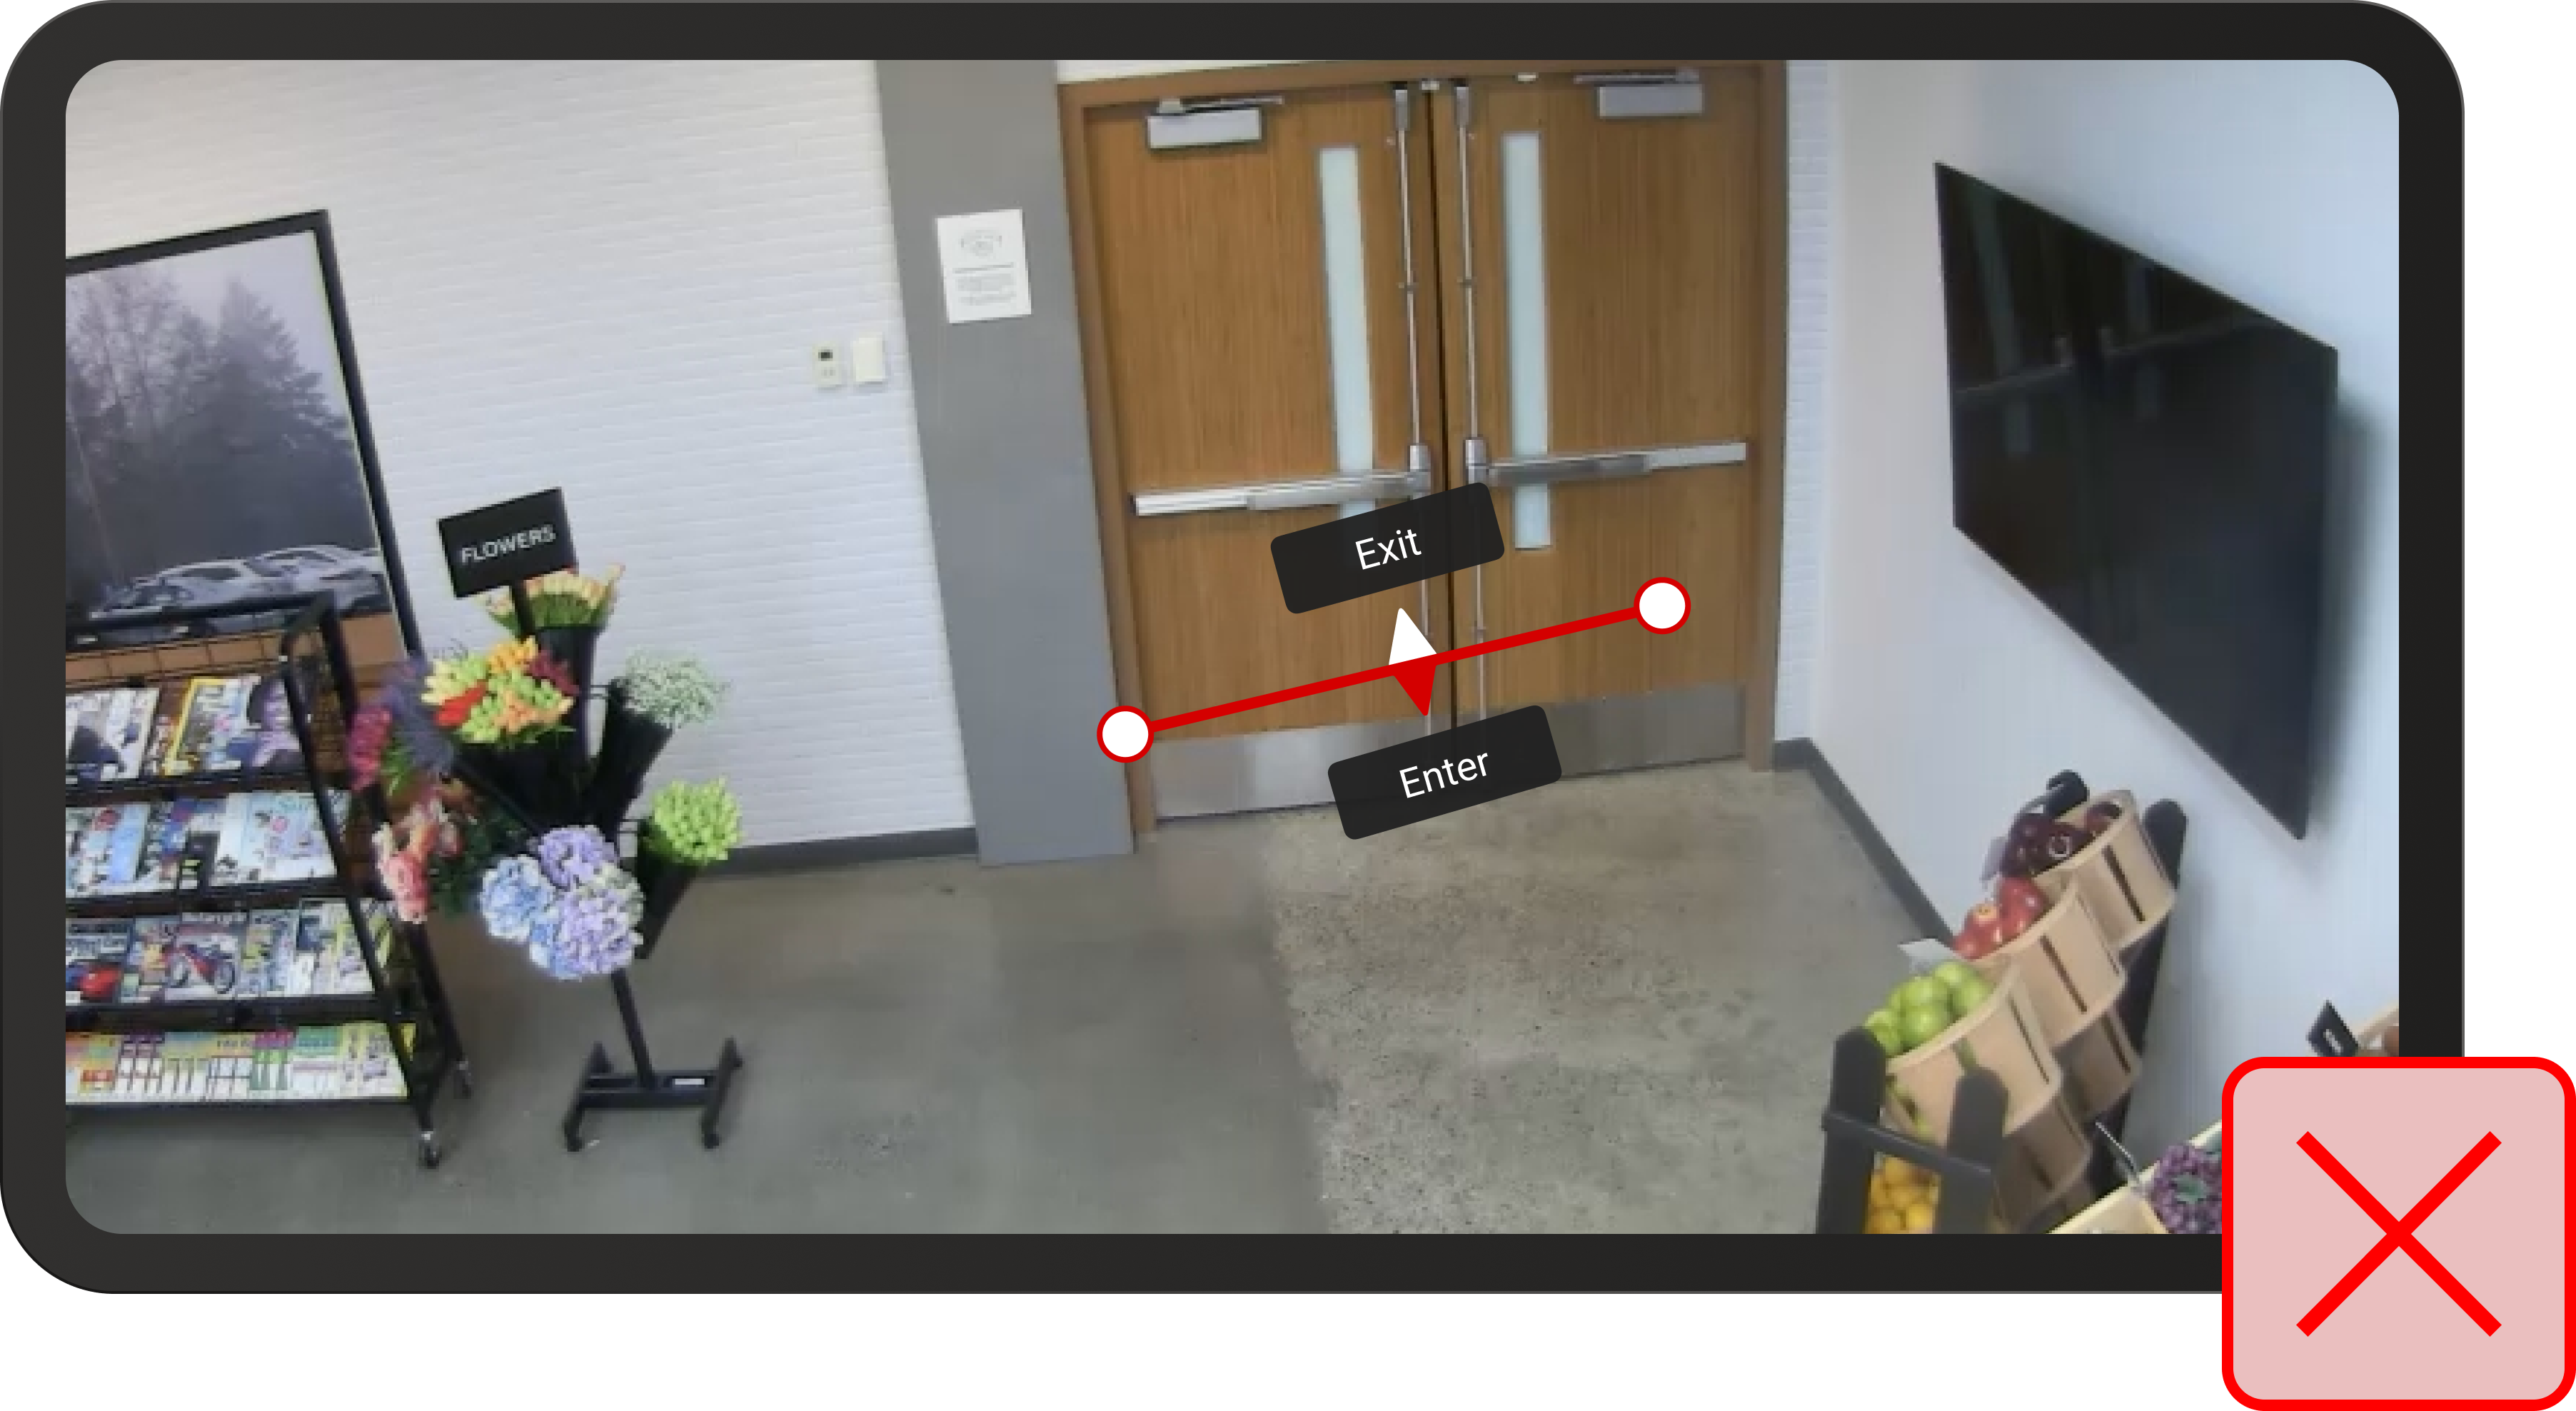
Line is too high and doesn't cover the entirety of the door
