Note
Access to this page requires authorization. You can try signing in or changing directories.
Access to this page requires authorization. You can try changing directories.
Important
This feature is in Public Preview.
Attaching a notebook to AI Runtime is the primary way to run training and fine-tuning workloads. You develop interactively against a GPU, then schedule the same notebook as a recurring job when it is ready for production.
Tip
- Attach a notebook to Serverless GPU to develop interactively on a GPU, with no cluster setup.
- Schedule the same notebook as a recurring job from the notebook UI, the Jobs API, or Declarative Automation Bundles.
- For multi-GPU training from a notebook, see Distributed training in notebooks.
Tip
This page covers notebooks. To reach AI Runtime another way, see connect from an IDE over an SSH tunnel, submit jobs from your laptop with the Use the Databricks CLI with AI Runtime, or run Ray. To productionize training code (not a notebook) with Declarative Automation Bundles, see Schedule GPU workloads and compose tasks.
Connect to a notebook
This is the primary way to use AI Runtime. To connect your notebook and configure the environment:
From a notebook, click the compute drop-down menu at the top and select Serverless GPU.
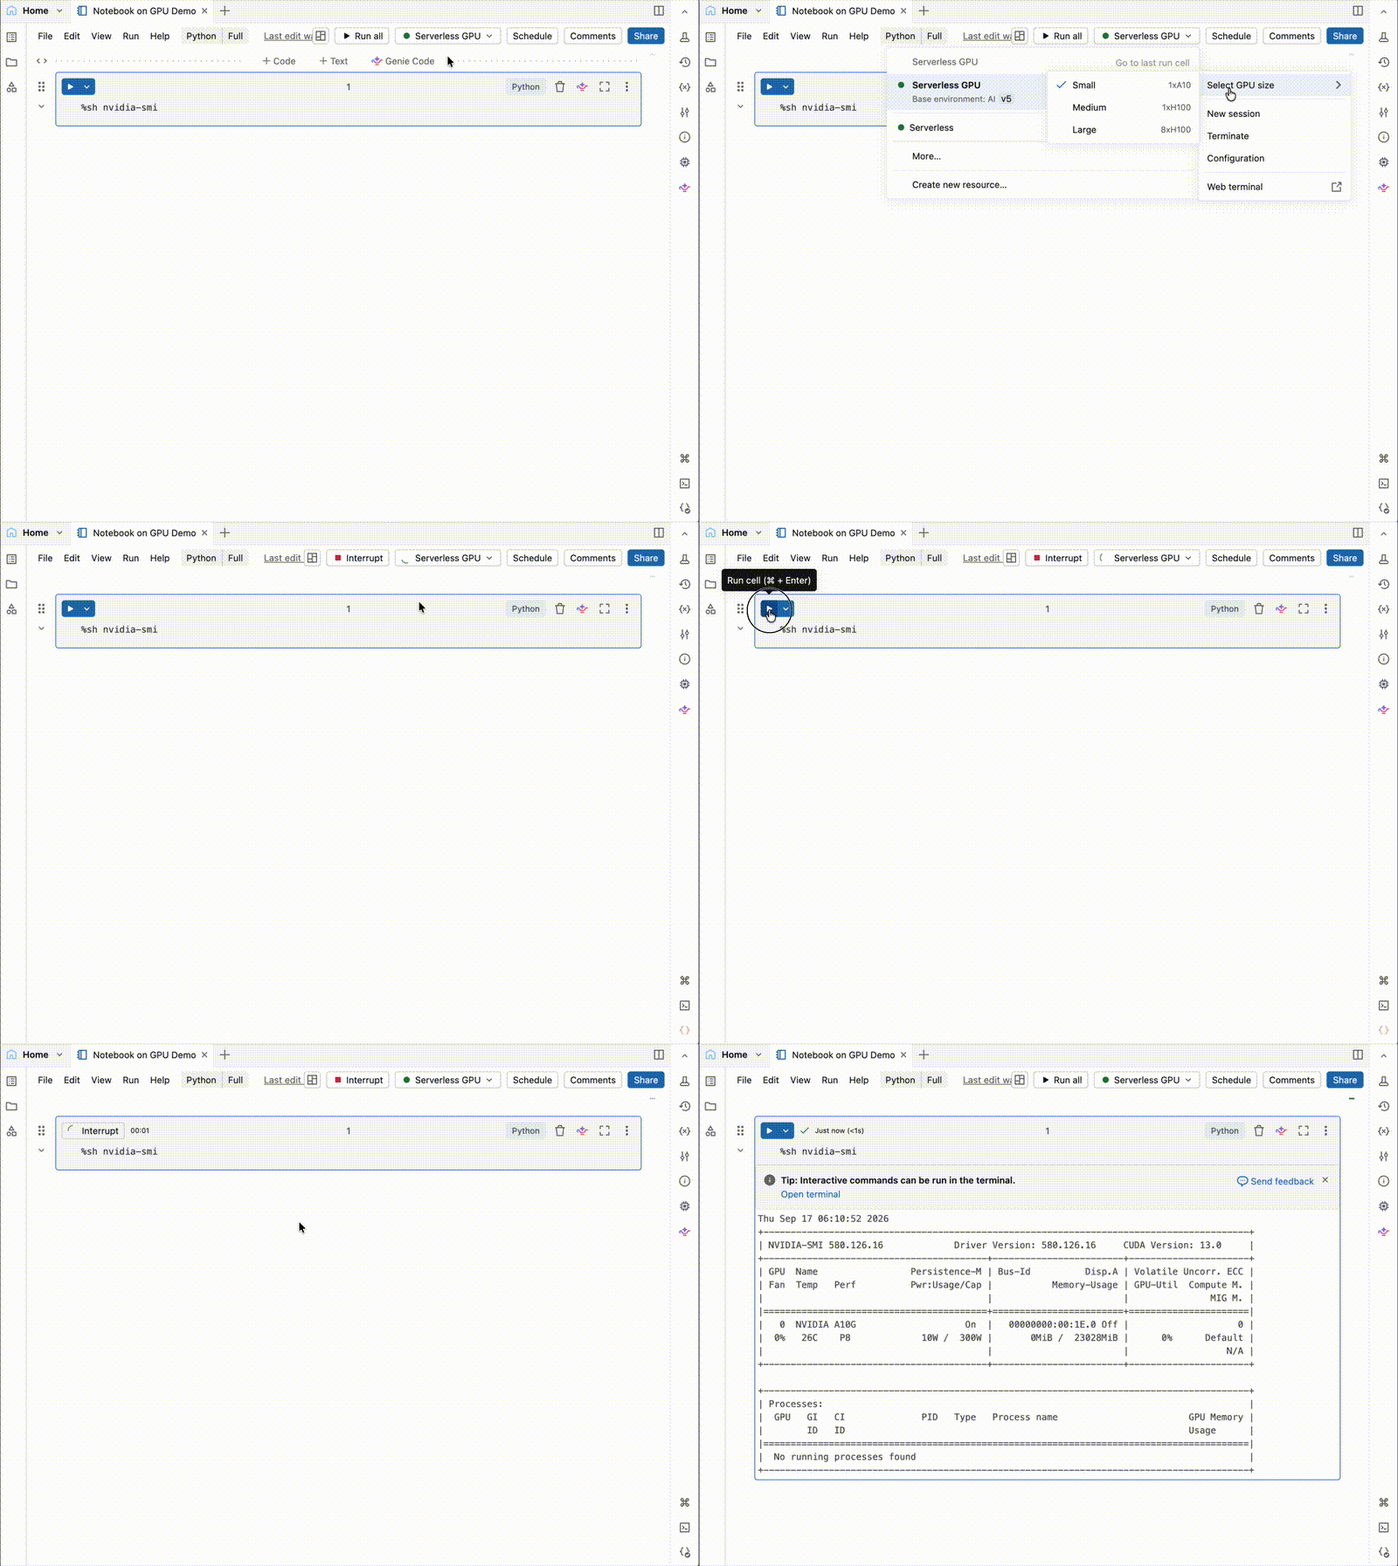
Click the
 to open the Environment side panel.
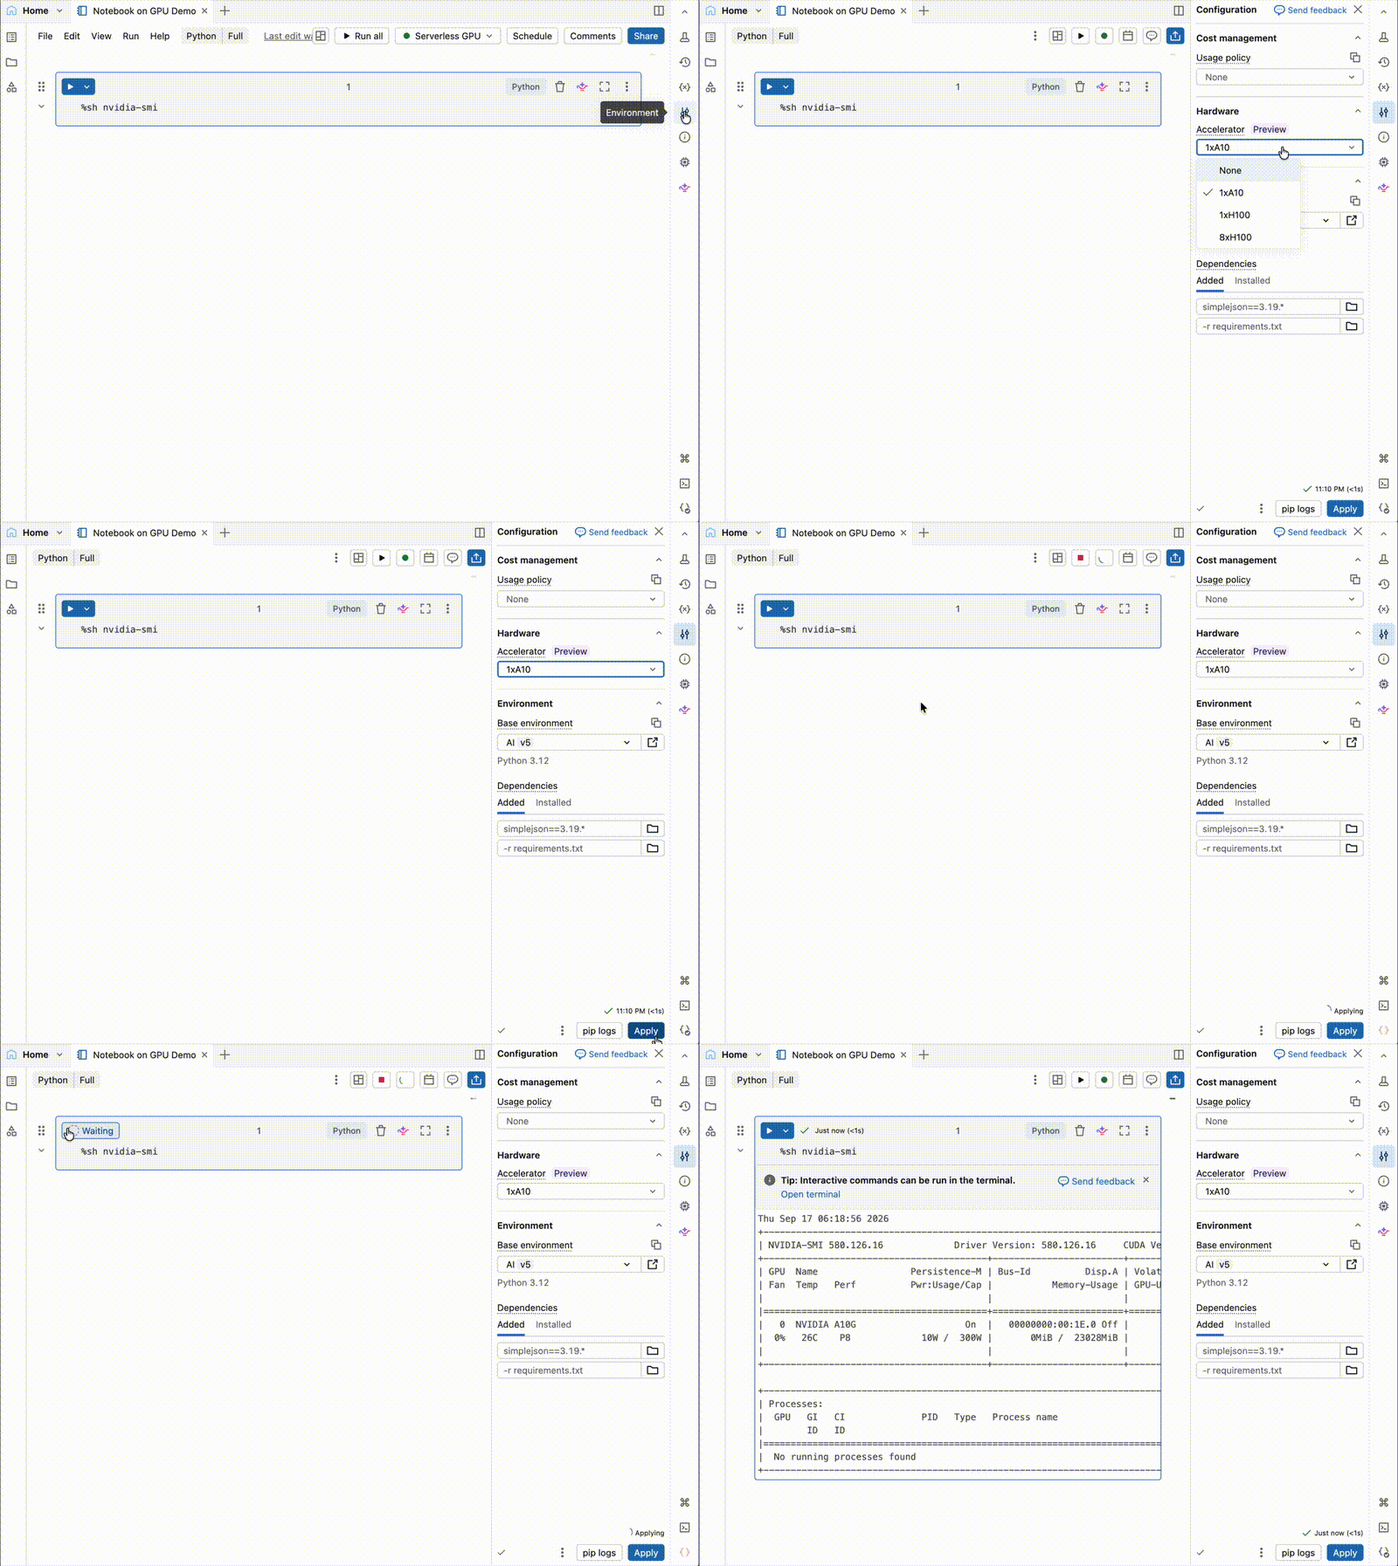
Select an accelerator from the Accelerator field. For distributed training workloads, select 8xH100. See Hardware options for guidance on choosing an accelerator.
Select Standard v6 for the Standard environment, or AI v6 for the AI environment, from the Base environment field.
Click Apply and then Confirm that you want to apply the AI Runtime to your notebook environment.
Note
Connection to your compute auto-terminates after 60 minutes of inactivity.
Tip
For operations that do not require GPUs (for example, cloning a Git repository, converting data formats, or exploratory data analysis), attach your notebook to a CPU cluster to preserve GPU resources.
Schedule a notebook
You can schedule notebooks that use AI Runtime as recurring jobs, either from the notebook UI or programmatically. See Create and manage scheduled notebook jobs for more details.
To schedule from the notebook you want to run:
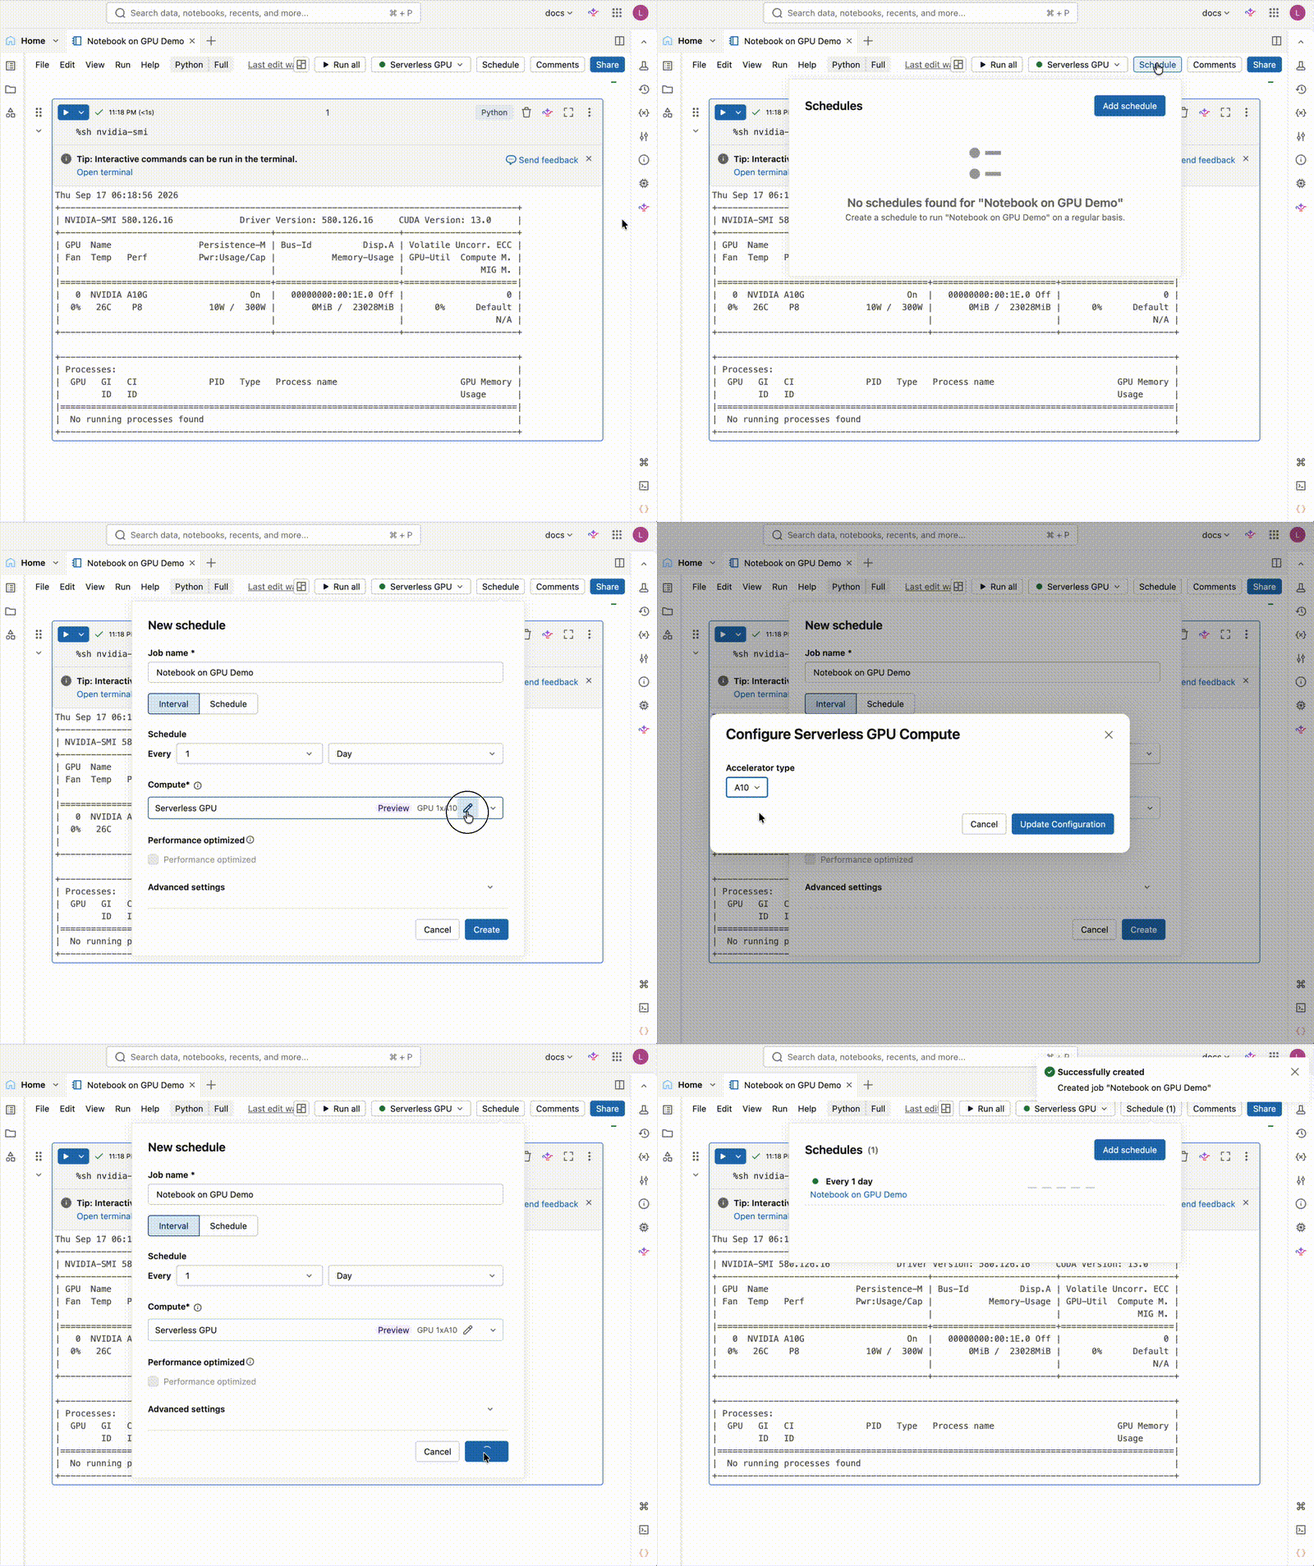
- Select the Schedule button on the top right.
- Select Add schedule.
- Populate the New schedule form with the Job name, Schedule, and Compute.
- Select Create.
Note
Adding dependencies using the Environments panel is not supported for AI Runtime scheduled jobs. Dependencies must be installed programmatically within your notebook (for example, %pip install). Auto-recovery is not supported. If your job fails due to incompatible packages, you must manually fix and re-run.
For workloads that may exceed the 7-day maximum runtime, implement manual checkpointing to allow resumption. We recommend using Unity Catalog volumes via UCVolumeWriter and UCVolumeReader from serverless_gpu.data. See Checkpoint with Distributed Checkpoint (DCP).
Schedule with the Jobs and pipelines UI
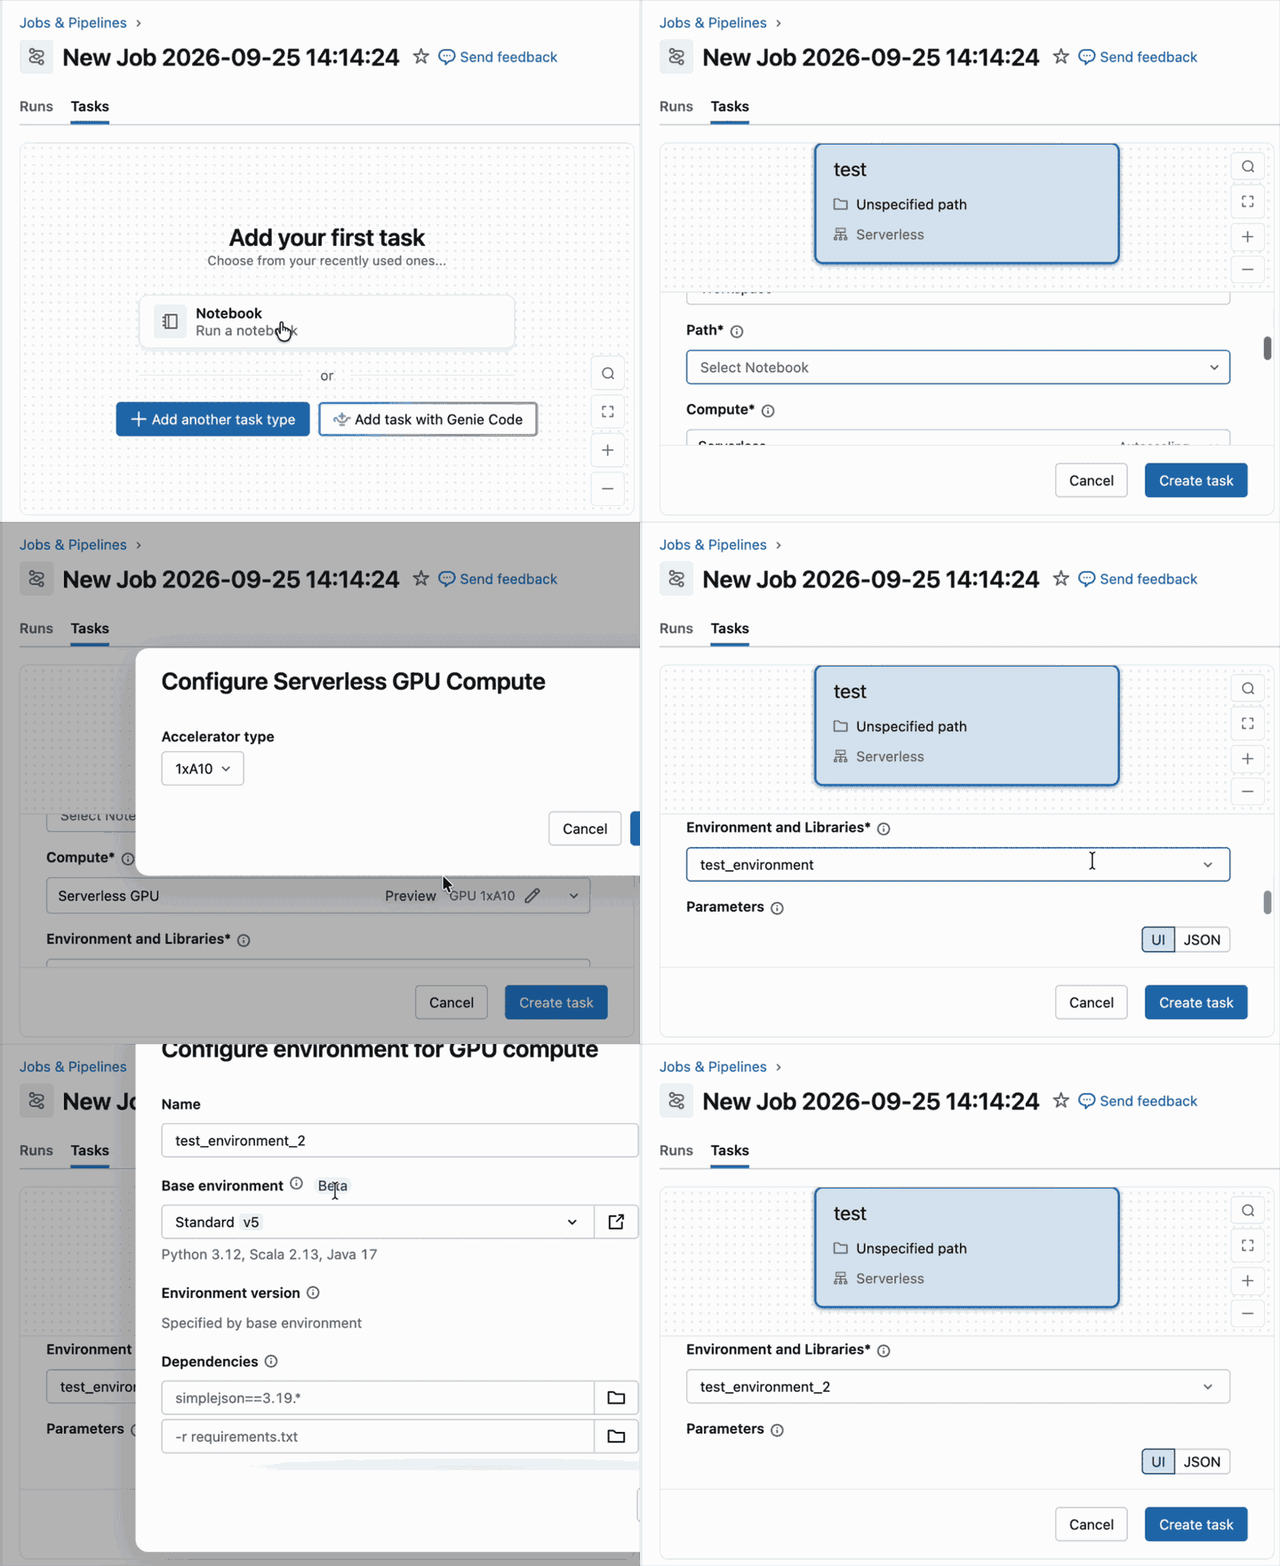
You can also create and schedule jobs from the Jobs and pipelines UI. See Create a new job for step-by-step guidance.
Important
Running a scheduled notebook job that uses a workspace base environment, including the Databricks AI environment, is in Beta. A workspace admin must turn on the Serverless workspace base environment support in Jobs preview. See Manage Azure Databricks previews.
Schedule with the Jobs API and Declarative Automation Bundles
You can programmatically create and manage AI Runtime notebook jobs using the Databricks Jobs API or Declarative Automation Bundles. Configure the compute type as serverless GPU in your job or bundle definition to automate deployment pipelines.
To run your own training command against a directory of code instead of a notebook, and to build multi-task jobs and scheduled pipelines, see Schedule GPU workloads and compose tasks.
The following example shows a Declarative Automation Bundles configuration for a scheduled AI Runtime notebook job using the Standard environment:
resources:
  jobs:
    sample_job:
      name: sample_job_h100

      trigger:
        periodic:
          interval: 1
          unit: DAYS

      parameters:
        - name: catalog
          default: ${var.catalog}
        - name: schema
          default: ${var.schema}

      environments:
        - environment_key: default
          spec:
            environment_version: '6'

      tasks:
        - task_key: notebook_task
          notebook_task:
            notebook_path: /Workspace/Users/your_email/your_notebook
          environment_key: default
          compute:
            hardware_accelerator: GPU_8xH100
To use the Databricks AI environment instead of the Standard environment, set base_environment to the AI environment identifier (for example, databricks_ai_v6 for AI v6) in the environment spec and reference it from the task's environment_key:
Important
Selecting a Databricks AI environment as a workspace base environment in a job is in Beta. A workspace admin must turn on the Serverless workspace base environment support in Jobs preview. See Manage Azure Databricks previews.
resources:
  jobs:
    sample_job:
      name: sample_job_aiv6_h100

      trigger:
        periodic:
          interval: 1
          unit: DAYS

      parameters:
        - name: catalog
          default: ${var.catalog}
        - name: schema
          default: ${var.schema}

      environments:
        - environment_key: aiv6
          spec:
            base_environment: databricks_ai_v6

      tasks:
        - task_key: notebook_task
          notebook_task:
            notebook_path: /Workspace/Users/your_email/your_notebook
          environment_key: aiv6
          compute:
            hardware_accelerator: GPU_8xH100