Tutorial: Deploy and walk through the solar panel monitoring application template
The solar panel monitoring app enables utilities and partners to monitor solar panels, such as their energy generation and connection status in near real time. It can send notifications based on defined threshold criteria. It provides sample commands, such as update firmware. You can export the solar panel data to other business applications.
Key application functionality:
- Solar panel sample device model
- Solar Panel info and live status
- Solar energy generation and other readings
- Command and control samples
- Built-in visualization and dashboards
- Extensibility for custom solution development

This architecture consists of the following components. Some applications may not require every component listed here.
Solar panels and connectivity
Solar panels are a source of renewable energy. Typically, a solar panel uses a gateway to connect to an IoT Central application. You might need to build IoT Central device bridge to connect devices that can't connect directly. The IoT Central device bridge is an open-source bridge solution.
IoT Central platform
When you build an IoT solution, Azure IoT Central simplifies the build process and helps to reduce the burden and costs of IoT management, operations, and development. With IoT Central, you can easily connect, monitor, and manage your IoT assets at scale. After you connect your solar panels to IoT Central, the application template uses built-in features such as device models, commands, and dashboards. The application template also uses the IoT Central storage for warm path scenarios such as near real-time meter data monitoring, analytics, rules, and visualization.
Extensibility options to build with IoT Central
The IoT Central platform provides two extensibility options: data export and APIs. The customers and partners can choose between these options to customize their solutions for specific needs. For example, use data export to send telemetry to Azure Data Lake Storage (ADLS). Use ADLS for long-term data retention and other cold path storage scenarios, such batch processing, auditing, and reporting.
In this tutorial, you learn how to:
- Create a solar panel app
- Walk through the application
- Clean up resources
Prerequisites
An active Azure subscription. If you don't have an Azure subscription, create a free account before you begin.
Create a solar panel monitoring application
To create your IoT Central application:
Navigate to the Create IoT Central Application page in the Azure portal. If prompted, sign in with your Azure account.
Enter the following information:
Field Description Subscription The Azure subscription you want to use. Resource group The resource group you want to use. You can create a new resource group or use an existing one. Resource name A valid Azure resource name. Application URL The URL subdomain for your application. The URL for an IoT Central application looks like https://yoursubdomain.azureiotcentral.com.Template Smart Power Monitoring Region The Azure region you want to use. Pricing plan The pricing plan you want to use. Select Review + create. Then select Create.
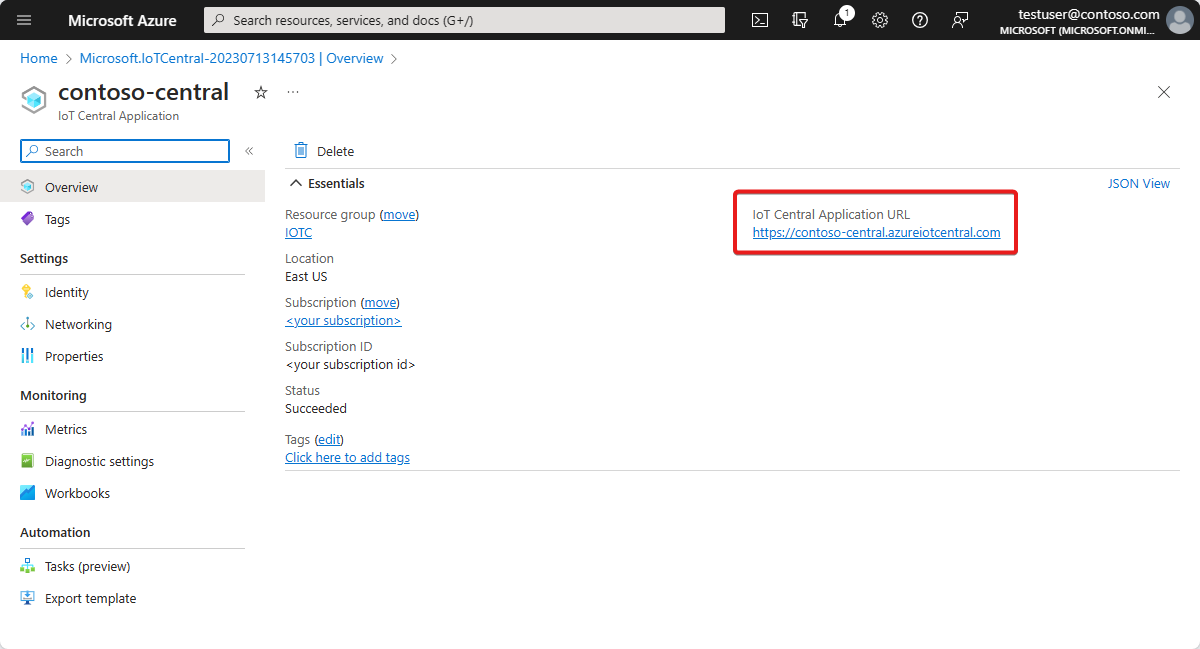
When the app is ready, you can navigate to it from the Azure portal:

To learn more, see Create an Azure IoT Central application.
Walk through the application
The following sections walk you through the key features of the application:
Dashboard
After you deploy the application template, you can explore the application. The application comes with sample smart meter device, device template, and dashboard.
Adatum is a fictitious energy company that monitors and manages solar panels. On the solar panel monitoring dashboard, you see solar panel properties, data, and sample commands. This dashboard allows you or your support team to complete the following tasks, before any issues require extra support resources:
- Review the latest panel info and its installed location on the map.
- Check the panel status and connection status.
- Review the energy generation and temperature trends to catch any anomalous patterns.
- Track the total energy generation for planning and billing purposes.
- Activate a panel and update the firmware version, if necessary. In the template, the command buttons show the possible functionalities, and don't send real commands.

Devices
The app comes with a sample solar panel device. To see device details, select Devices.
Select the sample device, SP0123456789. From the Update Properties tab, you can update the writable properties of the device and see a visual of the updated values on the dashboard.
Device template
To see the solar panel device model, select the Device templates tab. The model has predefined interfaces for data, properties, commands, and views.
Customize your application
As an administrator, you can change settings to customize the user experience in your application.
Select Customization > Appearance, and then:
- To set the masthead logo image, select Change.
- To set the browser icon image that appears on browser tabs, select Change.
- Under Browser colors, you can replace the default browser colors by adding HTML hexadecimal color codes. For more information about color notation for HEX values, see the W3Schools HTML Colors tutorial.
You can change the application image on the Application > Management page.
Clean up resources
If you don't plan to continue using this application, you can delete it:
- In your Azure IoT Central application, go to Application > Management.
- Select Delete, and then confirm your action.


