App object in Power Apps
Applies to: ![]() Canvas apps
Canvas apps ![]() Model-driven apps
Model-driven apps
Provides information about the currently running app and control over the app's behavior.
Description
Like a control, the App object provides properties that identify which screen is showing and that prompt the user to save changes so that they're not lost. Every app has an App object.
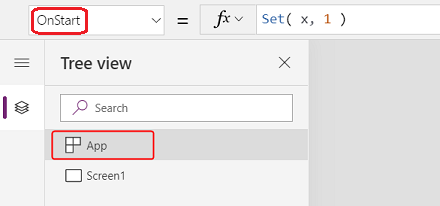
You can write formulas for some properties of the App object. At the top of the Tree view pane, select the App object as you would any other control or screen. View and edit one of the object's properties by selecting it in the drop-down list to the left of the formula bar.
ActiveScreen property
The ActiveScreen property identifies the screen that's showing.
This property returns a screen object. Use it to reference properties of the currently displayed screen, such as the name with the formula App.ActiveScreen.Name. You can also compare this property to another screen object, such as with the comparison formula App.ActiveScreen = Screen2 to test if Screen2 is the currently displayed screen.
Use the Back or Navigate function to change the screen that's showing.
BackEnabled property
The BackEnabled property changes how the app responds to the device back gesture (swipe or use the hardware back button on Android devices, swipe from left on iOS devices) when running in Power Apps mobile. When enabled, the device back gesture navigates back to the screen that was most recently displayed, which is similar to the Back formula. When disabled, the device back gesture returns the user to the app list.
ConfirmExit properties
Nobody wants to lose unsaved changes. Use the ConfirmExit and ConfirmExitMessage properties to warn the user before they close your app.
Note
- ConfirmExit doesn't work in apps that are embedded in, for example, Power BI and SharePoint.
- At present, these properties can reference controls on only the first screen if the Delayed load preview feature is enabled (which it is by default for new apps). If references are made, Power Apps Studio doesn't show an error, but the resulting published app doesn't open in Power Apps Mobile or a browser. We're actively working to lift this limitation. In the meantime, you can turn off Delayed load in Settings > Upcoming features (under Preview).
ConfirmExit
ConfirmExit is a Boolean property that, when true, opens a confirmation dialog box before the app is closed. By default, this property is false, and no dialog box appears.
In situations where the user may have unsaved changes in the app, use this property to show a confirmation dialog box before exiting the app. Use a formula that can check variables and control properties (for example, the Unsaved property of the Edit form control).
The confirmation dialog box appears in any situation where data could be lost, as in these examples:
- Running the Exit function.
- If the app is running in a browser:
- Closing the browser or the browser tab in which the app is running.
- Selecting the browser's back button.
- Running the Launch function with a LaunchTarget of Self.
- If the app is running in Power Apps Mobile (iOS or Android):
- Swiping to switch to a different app in Power Apps Mobile.
- Selecting the back button on an Android device.
- Running the Launch function to launch another canvas app.
The exact look of the confirmation dialog box might vary across devices and versions of Power Apps.
The confirmation dialog box doesn't appear in Power Apps Studio.
ConfirmExitMessage
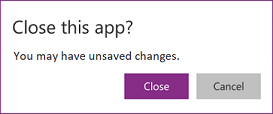
By default, the confirmation dialog box shows a generic message, such as "You may have unsaved changes." in the user's language.
Use ConfirmExitMessage to provide a custom message in the confirmation dialog box. If this property is blank, the default value is used. Custom messages are truncated as necessary to fit within the confirmation dialog box, so keep the message to a few lines at most.
In a browser, the confirmation dialog box might appear with a generic message from the browser.
Note
App object has two more properties OnMessage and BackEnabled that are experimental. These properties will be removed from the app object eventually. We recommend that you don't use these properties in your production environment.
Example
Create an app that contains two form controls, AccountForm and ContactForm.
Set the App object's ConfirmExit property to this expression:
AccountForm.Unsaved Or ContactForm.UnsavedThis dialog box appears if the user changes data in either form and then tries to close the app without saving those changes.
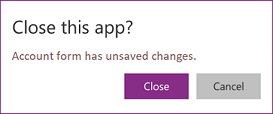
Set the App object's ConfirmExitMessage property to this formula:
If( AccountsForm.Unsaved,
    "Accounts form has unsaved changes.",
    "Contacts form has unsaved changes."
)
This dialog box appears if the user changes data in the Account form and then tries to close the app without saving those changes.
Setup Instrumentation Key for Application Insights
To export system-generated application logs to Application Insights, you need to set up the Instrumentation Key for your canvas app.
- Open your app for editing in Power Apps Studio.
- Select the App object in the left navigation tree view.
- Enter the Instrumentation Key in the properties pane.
If data isn't sent to App Insights, contact your Power Platform administrator and verify if App Insights is disabled at the tenant level.
Formulas property
Use named formulas, in the Formulas property, to define a formula that can be reused throughout your app.
In Power Apps, control properties are driven by formulas. For example, to set the background color consistently across an app, you might set the Fill property for each to a common formula:
Label1.Fill: ColorValue( Param( "BackgroundColor" ) )
Label2.Fill: ColorValue( Param( "BackgroundColor" ) )
Label3.Fill: ColorValue( Param( "BackgroundColor" ) )
With so many places where this formula may appear, it becomes tedious and error prone to update them all if a change is needed. Instead, you can create a global variable in OnStart to set the color once, and then reuse the value throughout the app:
App.OnStart: Set( BGColor, ColorValue( Param( "BackgroundColor" ) ) )
Label1.Fill: BGColor
Label2.Fill: BGColor
Label3.Fill: BGColor
While this method is better, it also depends on OnStart running before the value for BGColor is established. BGColor might also be manipulated in some corner of the app that the maker is unaware of, a change made by someone else, and that can be hard to track down.
Named formulas provide an alternative. Just as we commonly write control-property = expression, we can instead write name = expression and then reuse name throughout our app to replace expression. The definitions of these formulas are done in the Formulas property:
App.Formulas: BGColor = ColorValue( Param( "BackgroundColor" ) );
Label1.Fill: BGColor
Label2.Fill: BGColor
Label3.Fill: BGColor
The advantages of using named formulas include:
- The formula's value is always available. There's no timing dependency, no OnStart that must run first before the value is set, no time in which the formula's value is incorrect. Named formulas can refer to each other in any order, so long as they don't create a circular reference. They can be calculated in parallel.
- The formula's value is always up to date. The formula can perform a calculation that is dependent on control properties or database records, and as they change, the formula's value automatically updates. You don't need to manually update the value as you do with a variable. And formulas only recalculate when needed.
- The formula's definition is immutable. The definition in Formulas is the single source of truth and the value can't be changed somewhere else in the app. With variables, it's possible that some code unexpectedly changes a value, but this isn't possible with named formulas.
- The formula's calculation can be deferred. Because its value is immutable, it can always be calculated when needed, which means it need not be calculated until it's needed. Formula values that aren't used until screen2 of an app is displayed need not be calculated until screen2 is visible. Deferring this work can improve app load time. Named formulas are declarative and provide opportunities for the system to optimize how and when they're computed.
- Named formulas is an Excel concept. Power Fx uses Excel concepts where possible since so many people know Excel well. Named formulas are the equivalent of named cells and named formulas in Excel, managed with the Name Manager. They recalculate automatically like a spreadsheet, just like control properties do.
Named formulas are defined, one after another in the Formulas property, each ending with a semi-colon. The type of the formula is inferred from the types of the expression, which is based on the types of the elements within the expression and how they're used together. For example, these named formulas retrieve useful information about the current user from Dataverse:
UserEmail = User().Email;
UserInfo = LookUp( Users, 'Primary Email' = User().Email );
UserTitle = UserInfo.Title;
UserPhone = Switch( UserInfo.'Preferred Phone',
                    'Preferred Phone (Users)'.'Mobile Phone', UserInfo.'Mobile Phone',
                    UserInfo.'Main Phone' );
If the formula for UserTitle needs to be updated, it can be done easily in this one location. If UserPhone isn't needed in the app, then these calls to the Users table in Dataverse aren't made. There's no penalty for including a formula definition that isn't used.
Some limitations of named formulas:
- They can't use behavior functions or otherwise cause side effects within the app.
- They can't create a circular reference. Having a = b; and b = a; in the same app isn't allowed.
OnError property
Use OnError to take action after an error has been detected. It provides a global opportunity to intercept an error banner before it's displayed to the end user. It can also be used to log an error with the Trace function or write to a database or web service.
The result of every formula evaluation is checked for an error. If it's an error, OnError will be evaluated with the same FirstError and AllErrors scope variables that would have been present if the entire formula was wrapped in an IfError function.
If OnError is empty, a default error banner is shown with the FirstError.Message of the error. Defining an OnError formula overrides this behavior enabling the maker to handle the error reporting as they see fit. The default behavior can be requested in the OnError by rethrowing the error with the Error function. This is useful if some errors are to be filtered out or handled in a different manner, while others are to be passed through.
OnError can't replace an error in calculations the way that IfError can. At the point that OnError is invoked, the error has already happened and it has already been processed through formula calculations. *OnError* controls error reporting only.
OnError formulas are evaluated concurrently and it's possible that their evaluation may overlap with the processing of other errors. For example, if you set a global variable at the top of an OnError and read it later on in the same formula, the value may have changed. Use the With function to create a named value that is local to the formula.
Although each error is processed individually by OnError, the default error banner may not appear for each error individually. To avoid having too many error banners displayed at the same time, the same error won't trigger a new error banner if it has recently been shown.
Example
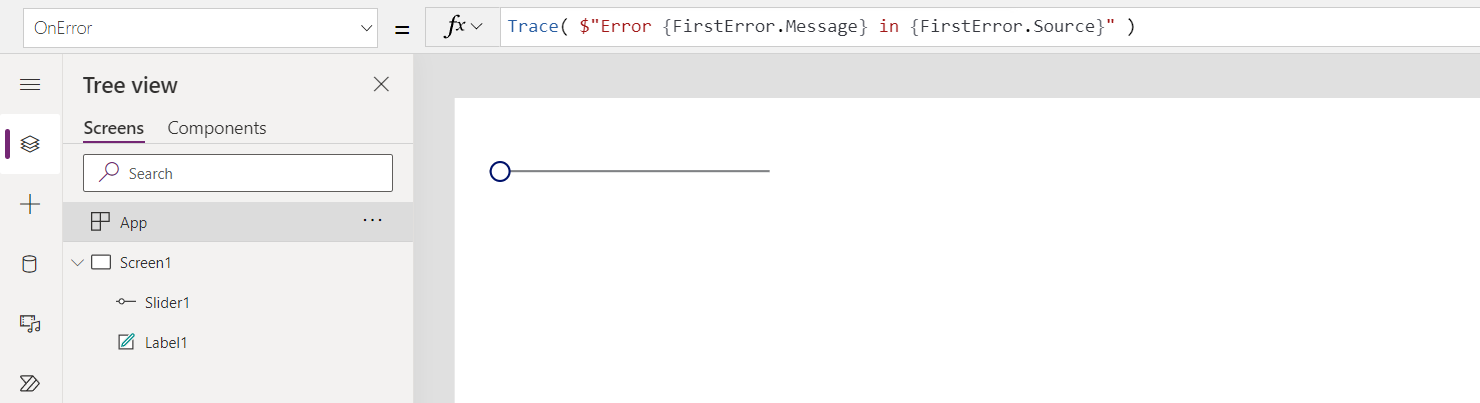
Consider a Label control and Slider control that are bound together through the formula:
Label1.Text = 1/Slider1.Value
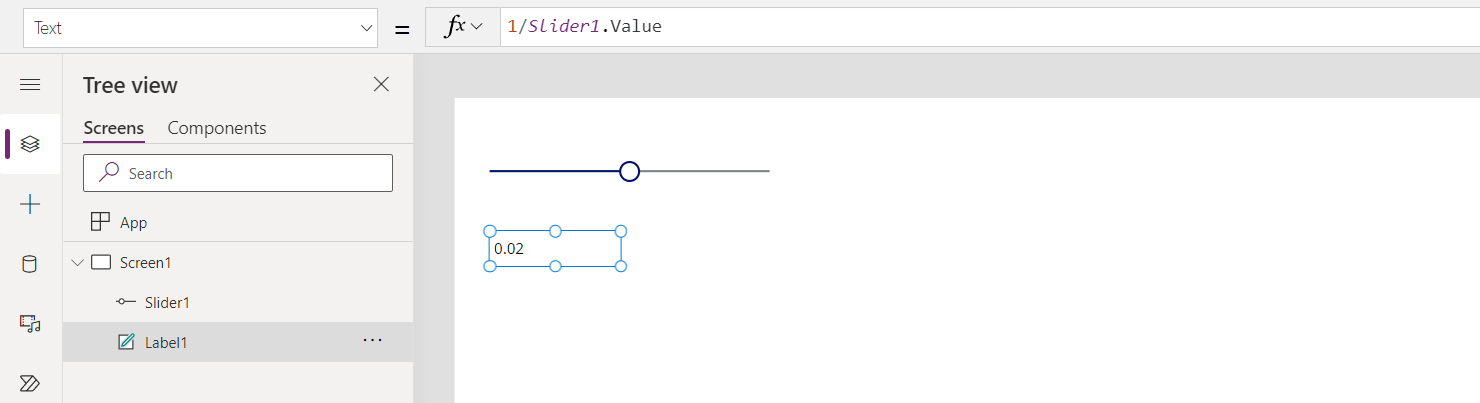
The slider defaults to 50. If the slider is moved to 0, Label1 will show no value, and an error banner is shown:

Let's look at what happened in detail:
- User moved the slide to the left and the Slide1.Value property changed to 0.
- Label1.Text was automatically reevaluated. Division by zero occurred, generating an error.
- There's no IfError in this formula. The division by zero error is returned by the formula evaluation.
- Label1.Text can't show anything for this error, so it shows a blank state.
- OnError is invoked. Since there's no handler, the standard error banner is displayed with error information.
If necessary, we could also modify the formula to Label1.Text = IfError( 1/Slider1.Value, 0 ). This would result in no error or error banner. We can't change the value of an error from OnError since at that point the error has already happened, it's only a question of how it will be reported.
If we add an OnError handler, it will have no impact before step 5, but it can impact how the error is reported:
Trace( $"Error {FirstError.Message} in {FirstError.Source}" )
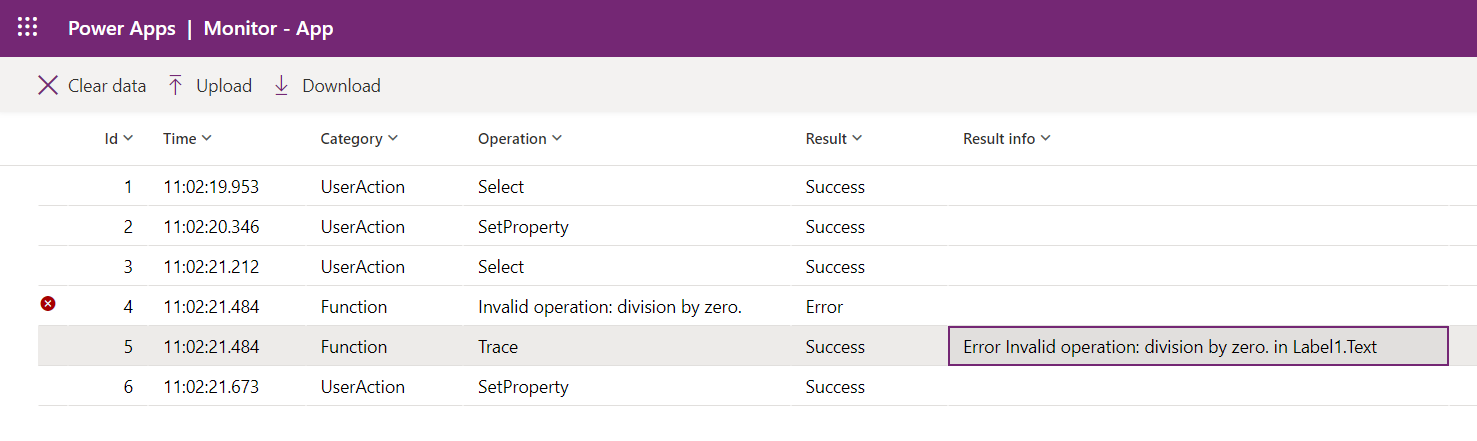
With this in place, from the app user's perspective, there won't be any error. But the error will be added to Monitor's trace, complete with the source of the error information from FirstError:
If we also wanted to have the same default error banner displayed in addition to the trace, we can rethrow the error with the Error function after the Trace call just as it did if the Trace wasn't there:
Trace( $"Error {FirstError.Message} in {FirstError.Source}" );
Error( FirstError )
OnStart property
Note
The use of OnStart property can cause performance problems when loading an app. We're in the process of creating alternatives for the top two reasons for using property—caching data and setting up global variables. We've already created an alternative for defining the first screen to be shown with Navigate. Depending on your context, this property may be disabled by default. If you don't see it, and you need to use it, check the app's Advanced settings for a switch to enable it. The OnVisible property of a screen can also be used.
The OnStart property runs when the user starts the app. This property is often used to perform the following tasks:
- Retrieve and cache data into collections by using the Collect function.
- Set up global variables by using the Set function.
This formula is evaluated before the first screen appears. No screen is loaded, so you can't set context variables with the UpdateContext function. However, you can pass context variables with the Navigate function.
After you change the OnStart property, test it by hovering over the App object in the Tree view pane, selecting ellipsis (...), and then selecting Run OnStart. Unlike when the app is loaded for the first time, existing collections and variables will already be set. To start with empty collections, use the ClearCollect function instead of the Collect function.

Note
- Using the Navigate function in the OnStart property has been retired. Existing apps will continue to work. For a limited time, you can still enable it in the app settings (available under Retired). However, using Navigate in this manner can lead to app load delays as it forces the system to complete evaluation of OnStart before displaying the first screen. Use the StartScreen property instead to calculate the first screen displayed.
- Retired switch will be turned off for apps created before March 2021 where you added Navigate to OnStart between March 2021 and now. When you edit such apps in Power Apps Studio, you may see an error. Turn the above mentioned Retired switch to clear this error.
StartScreen property
Note
StartScreen property will not appear in the list of properties when the retired option Enhanced formula bar is turned on. To turn Enhanced formula bar off, go to Settings > Upcoming features > Retired > turn off the Enhanced formula bar switch when you want to use StartScreen property.
The StartScreen property determines which screen will be displayed first. It's evaluated once when the app is loaded and returns the screen object to be displayed. By default, this property will be empty, and the first screen in the Studio Tree view is shown first.
StartScreen is a data flow property that can't contain behavior functions. All data flow functions are available, in particular use these functions and signals to determine which screen to show first:
- Param function to read parameters used to start the app.
- User function to read information about the current user.
- LookUp, Filter, CountRows, Max, and other functions that read from a data source.
- Any API calls through a connector, but be careful that it returns quickly.
- Signals such as Connection, Compass, and App.
Note
Global variables and collections, including those created in OnStart, are not available in StartScreen. There are declarative alternatives for doing this that are on the way. For your feedback on this restriction, go to Power Apps community forum.
If StartScreen returns an error, the first screen in the Studio Tree view will be shown as if StartScreen hadn't been set. Use the IfError function to catch any errors and redirect to an appropriate error screen.
After changing StartScreen in Studio, test it by hovering over the App object in the Tree view pane, selecting the ellipsis (...), and then selecting Navigate to StartScreen. The screen will change as if the app has been loaded.

Examples
Screen9
Indicates that Screen9 should be shown first whenever the app starts.
If( Param( "admin-mode" ) = 1, HomeScreen, AdminScreen )
Checks if the Param "admin-mode" has been set by the user and uses it to decide if the HomeScreen or AdminScreen should be displayed first.
If( LookUp( Attendees, User = User().Email ).Staff, StaffPortal, HomeScreen )
Checks if an attendee to a conference is a staff member and directs them to the proper screen on startup.
IfError( If( CustomConnector.APICall() = "Forest",
             ForestScreen,
             OceanScreen
         ),
         ErrorScreen
)
Directs the app based on an API call to either ForestScreen or OceanScreen. If the API fails for any reason, the ErrorScreen is used instead.
StudioVersion property
Use the StudioVersion property to display or log the version of Power Apps Studio that was used to publish an app. This can be useful when debugging and to ensure your app has been republished with a recent version of Power Apps Studio.
StudioVersion is returned as text. The format of the text may change over time and should be treated as a whole; avoid extracting individual portions.