Amazon RDS Multicloud Scanning Connector for Microsoft Purview (Public preview)
The Multicloud Scanning Connector for Microsoft Purview allows you to explore your organizational data across cloud providers, including Amazon Web Services, in addition to Azure storage services.
Important
This feature is currently in preview. The Supplemental Terms of Use for Microsoft Azure Previews include additional legal terms that apply to Azure features that are in beta, in preview, or otherwise not yet released into general availability.
This article describes how to use Microsoft Purview to scan your structured data currently stored in Amazon RDS, including both Microsoft SQL and PostgreSQL databases, and discover what types of sensitive information exist in your data. You'll also learn how to identify the Amazon RDS databases where the data is currently stored for easy information protection and data compliance.
Important
The Multicloud Scanning Connectors for Microsoft Purview are separate add-ons to Microsoft Purview. The terms and conditions for the Multicloud Scanning Connectors for Microsoft Purview are contained in the agreement under which you obtained Microsoft Azure Services. For more information, see Microsoft Azure Legal Information at https://azure.microsoft.com/support/legal/.
Microsoft Purview scope for Amazon RDS
Supported database engines: Amazon RDS structured data storage supports multiple database engines. Microsoft Purview supports Amazon RDS with/based on Microsoft SQL and PostgreSQL.
Supported regions: For private databases that use Kubernetes supported self-hosted integration runtime, there's no region limitation for Amazon RDS databases.
For public databases that use Amazon AutoResolveIntegrationRuntime, Microsoft Purview only supports Amazon RDS databases that are located in the following AWS regions:
- US East (Ohio)
- US East (N. Virginia)
- US West (N. California)
- US West (Oregon)
- Canada (Central)
- Africa (Cape Town)
- Asia Pacific (Hong Kong Special Administrative Region)
- Asia Pacific (Mumbai)
- Asia Pacific (Osaka-Local)
- Asia Pacific (Seoul)
- Asia Pacific (Tokyo)
- Asia Pacific (Singapore)
- Asia Pacific (Sydney)
- Europe (Frankfurt)
- Europe (Ireland)
- Europe (London)
- Europe (Paris)
- Europe (Milan)
- Europe (Stockholm)
- Middle East (Bahrain)
- South America (São Paulo)
Known issues: The following functionality isn't currently supported:
- The Test connection button. The scan status messages will indicate any errors related to connection setup.
- Selecting specific tables in your database to scan.
- Data lineage.
For more information, see:
- Manage and increase quotas for resources with Microsoft Purview
- Supported data sources and file types in Microsoft Purview
- Use private endpoints for your Microsoft Purview account
Prerequisites
Ensure that you've performed the following prerequisites before adding your Amazon RDS database as Microsoft Purview data sources and scanning your RDS data.
- You need to be a Microsoft Purview Data Source Admin.
- You need a Microsoft Purview account. Create a Microsoft Purview account instance, if you don't yet have one.
- You need an Amazon RDS PostgreSQL or Microsoft SQL database, with data.
- You need to create a Self-hosted Integration Runtime if you are connecting to a private database. Choose the right integration runtime configuration for your scenario.
- To use Self-hosted Integration Runtime for scan, set up a Kubernetes supported self-hosted integration runtime.
Register an Amazon RDS data source
To add your Amazon RDS server as a Microsoft Purview data source:
In Microsoft Purview, navigate to the Data Map page, and select Register
 .
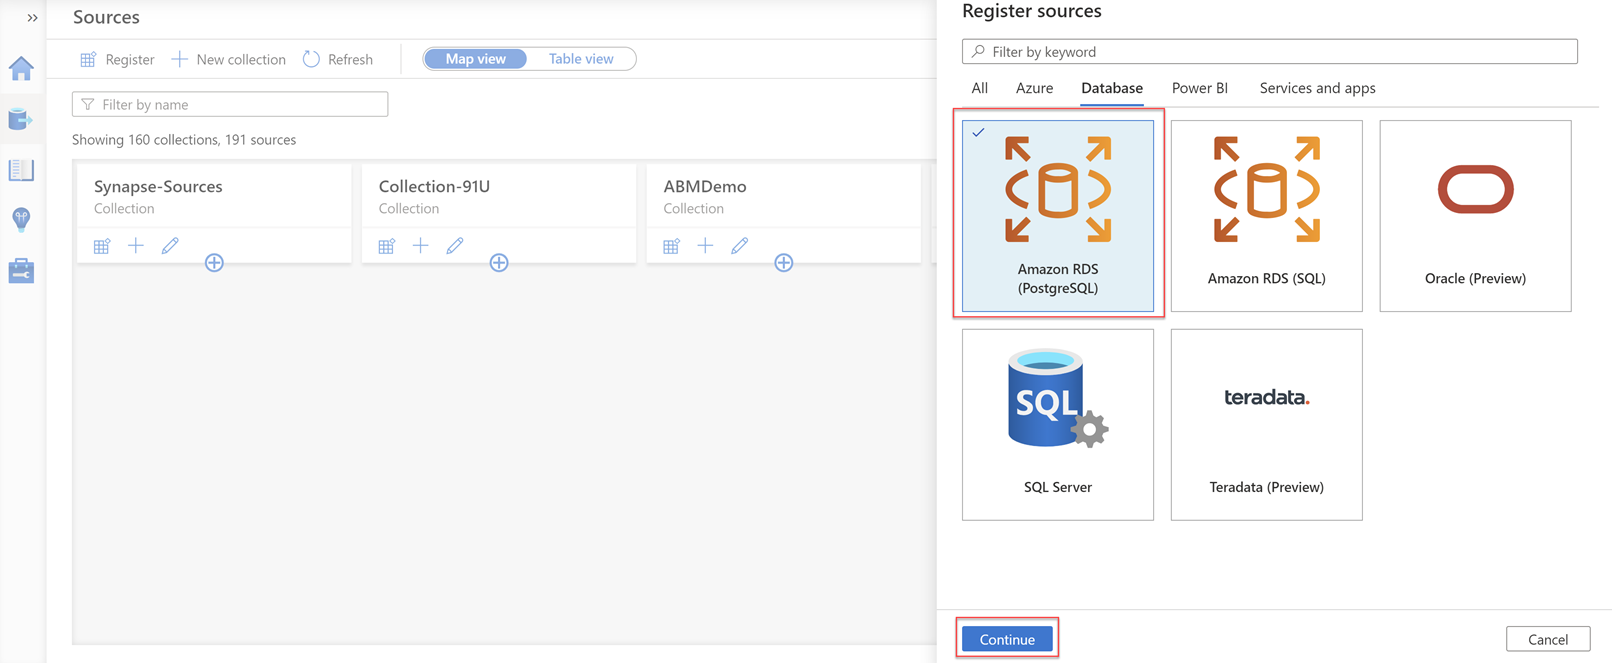
.On the Sources page, select Register. On the Register sources page that appears on the right, select the Database tab, and then select Amazon RDS (PostgreSQL) or Amazon RDS (SQL).
Enter the details for your source:
Field Description Name Enter a meaningful name for your source, such as AmazonPostgreSql-UpsServer name Enter the name of your RDS database in the following syntax: <instance identifier>.<xxxxxxxxxxxx>.<region>.rds.amazonaws.com
We recommend that you copy this URL from the Amazon RDS portal, and make sure that the URL includes the AWS region.Port Enter the port used to connect to the RDS database:
- PostgreSQL:5432
- Microsoft SQL:1433Collection (optional) Select a collection to add your data source to. For more information, see Manage data sources in Microsoft Purview (Preview). Select Register when you’re ready to continue.

Note
You cannot register a data source with a name that already exists for a given server name. You must use a different name for the data source.
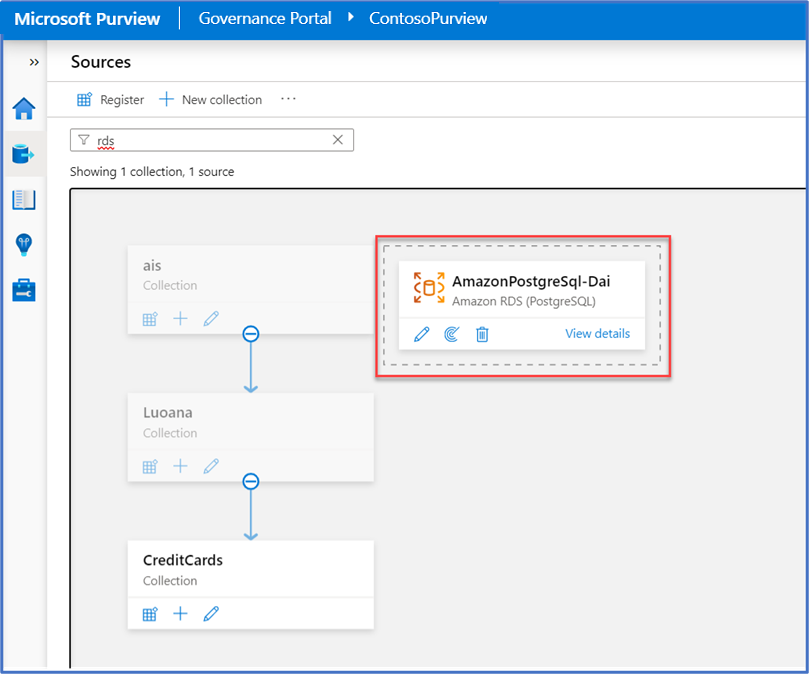
Your RDS data source appears in the Sources map or list. For example:
Create Microsoft Purview credentials for your RDS scan
Credentials supported for Amazon RDS data sources include username/password authentication only, with a password stored in an Azure KeyVault secret.
Create a secret for your RDS credentials to use in Microsoft Purview
Add your password to an Azure KeyVault as a secret. For more information, see Set and retrieve a secret from Key Vault using Azure portal.
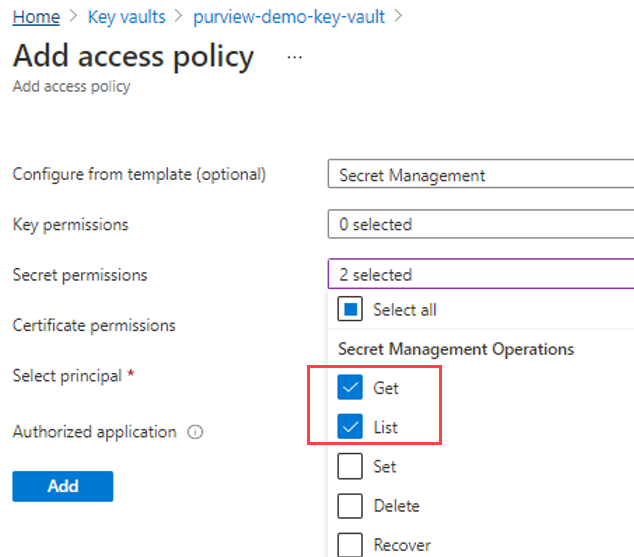
Add an access policy to your KeyVault with Get and List permissions. For example:
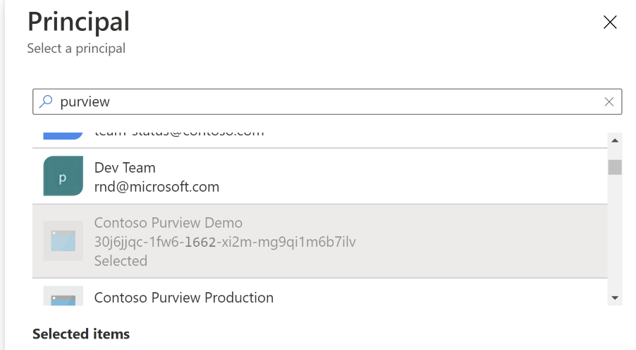
When defining the principal for the policy, select your Microsoft Purview account. For example:
Select Save to save your Access Policy update. For more information, see Assign an Azure Key Vault access policy.
In Microsoft Purview, add a KeyVault connection to connect the KeyVault with your RDS secret to Microsoft Purview. For more information, see Credentials for source authentication in Microsoft Purview.
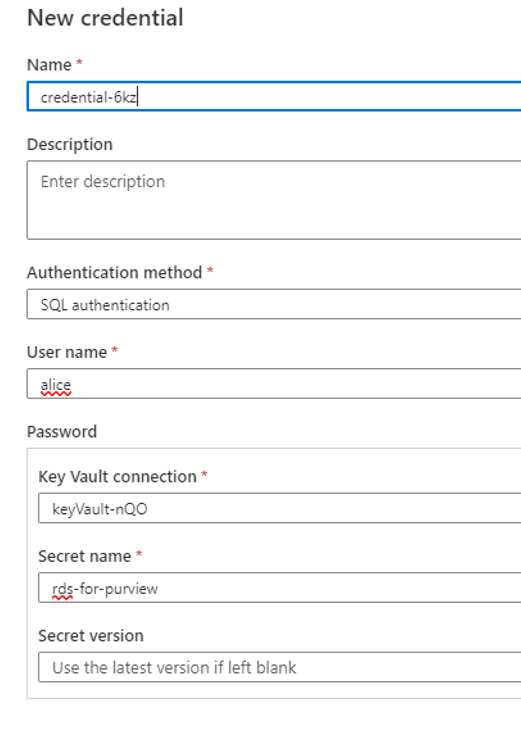
Create your Microsoft Purview credential object for RDS
In Microsoft Purview, create a credentials object to use when scanning your Amazon RDS account.
In the Microsoft Purview Management area, select Security and access > Credentials > New.
Select SQL authentication as the authentication method. Then, enter details for the Key Vault where your RDS credentials are stored, including the names of your Key Vault and secret.
For example:
For more information, see Credentials for source authentication in Microsoft Purview.
Scan an Amazon RDS database
To configure a Microsoft Purview scan for your RDS database:
From the Microsoft Purview Sources page, select the Amazon RDS data source to scan.
Select
 New scan to start defining your scan. In the pane that opens on the right, enter the following details, and then select Continue.
- Name: Enter a meaningful name for your scan.
- Connect with integration runtime: Choose an integration runtime based on your database type.
- Amazon AutoResolveIntegrationRuntime: Select for a public database.
- Self-Hosted Integration Runtime: Create new Kubernetes-based SHIR and use for a private database.
- Database name: Enter the name of the database you want to scan. You’ll need to find the names available from outside Microsoft Purview, and create a separate scan for each database in the registered RDS server.
- Credential: Select the credential you created earlier for the Multicloud Scanning Connectors for Microsoft Purview to access the RDS database.
On the Select a scan rule set pane, select the scan rule set you want to use, or create a new one. For more information, see Create a scan rule set.
On the Set a scan trigger pane, select whether you want to run the scan once, or at a recurring time, and then select Continue.
On the Review your scan pane, review the details and then select Save and Run, or Save to run it later.
While you run your scan, select Refresh to monitor the scan progress.
Note
When working with Amazon RDS PostgreSQL databases, only full scans are supported. Incremental scans are not supported as PostgreSQL does not have a Last Modified Time value.
Explore scanning results
After a Microsoft Purview scan is complete on your Amazon RDS databases, drill down in the Microsoft Purview Data Map area to view the scan history. Select a data source to view its details, and then select the Scans tab to view any currently running or completed scans.
Use the other areas of Microsoft Purview to find out details about the content in your data estate, including your Amazon RDS databases:
Explore RDS data in the catalog. The Microsoft Purview catalog shows a unified view across all source types, and RDS scanning results are displayed in a similar way to Azure SQL. You can browse the catalog using filters or browse the assets and navigate through the hierarchy. For more information, see:
View Insight reports to view statistics for the classification, sensitivity labels, file types, and more details about your content.
All Microsoft Purview Insight reports include the Amazon RDS scanning results, along with the rest of the results from your Azure data sources. When relevant, an Amazon RDS asset type is added to the report filtering options.
For more information, see the Understand Data Estate Insights in Microsoft Purview.
View RDS data in other Microsoft Purview features, such as the Scans and Glossary areas. For more information, see:
RDS errors
The following errors may appear in Microsoft Purview:
Unknown database. In this case, the database defined doesn't exist. Check to see that the configured database name is correctFailed to login to the Sql data source. The given auth credential does not have permission on the target database.In this case, your username and password is incorrect. Check your credentials and update them as needed.
Legacy AWS RDS Scan Configuration
Note
The method described below will be deprecated soon and should only be used for reference. We strongly recommend using the new AWS RDS Scan configuration method.
Previously, configuring Microsoft Purview to connect to your RDS VPC involved setting up a direct connection using a VPN or other network configuration methods. This approach required following steps for setup of network peering, security groups, and routing configurations.
- Set Up VPN or Direct Connect: Establish a secure connection between your AWS VPC and the Microsoft Purview scanning infrastructure.
- Configure Network Peering: Create VPC peering connections between your VPC and the VPC used by Microsoft Purview.
- Security Group Adjustments: Modify security groups to allow traffic from Microsoft Purview IP ranges to your RDS instances.
- Route Table Updates: Update route tables to ensure proper routing of traffic between the VPCs.
By transitioning to the new AWS Kubernetes-based Integration Runtime configuration, you can achieve a more secure, reliable, and simpler connection setup, ensuring better integration with Microsoft Purview.
Next steps
Learn more about Microsoft Purview Insight reports:
Feedback
Coming soon: Throughout 2024 we will be phasing out GitHub Issues as the feedback mechanism for content and replacing it with a new feedback system. For more information see: https://aka.ms/ContentUserFeedback.
Submit and view feedback for