Exercise - Create a SharePoint Framework client-side web part
- 14 minutes
In this exercise, you'll create a SharePoint Framework client-side web part.
Note
Completed code samples for the exercises in this module are available in the Developing with the SharePoint Framework: Web Parts repository.
Prerequisites
Important
In most cases, installing the latest version of the following tools is the best option. The versions listed here were used when this module was published and last tested.
- Node.js v22.*
- Heft v1.*
- Yeoman v5.*
- Yeoman Generator for SharePoint v1.23.0
- Visual Studio Code
- Access to a Microsoft 365 tenant
Create a new SharePoint Framework project
Open a command prompt and change to the folder where you want to create the project.
Run the SharePoint Yeoman generator by executing the following command:
yo @microsoft/sharepoint
Use the following to complete the prompt that is displayed:
- What is your solution name?: HelloWorld
- Which type of client-side component to create?: WebPart
- What is your Web part name?: HelloWorld
- Which template would you like to use?: No framework
After the generator scaffolds the folders required for the project, the generator will install all the dependency packages using npm.
When npm completes downloading all dependencies, ensure the developer certificate is installed by executing the following command:
heft trust-dev-cert
Run the project by executing the following command:
heft start --nobrowser
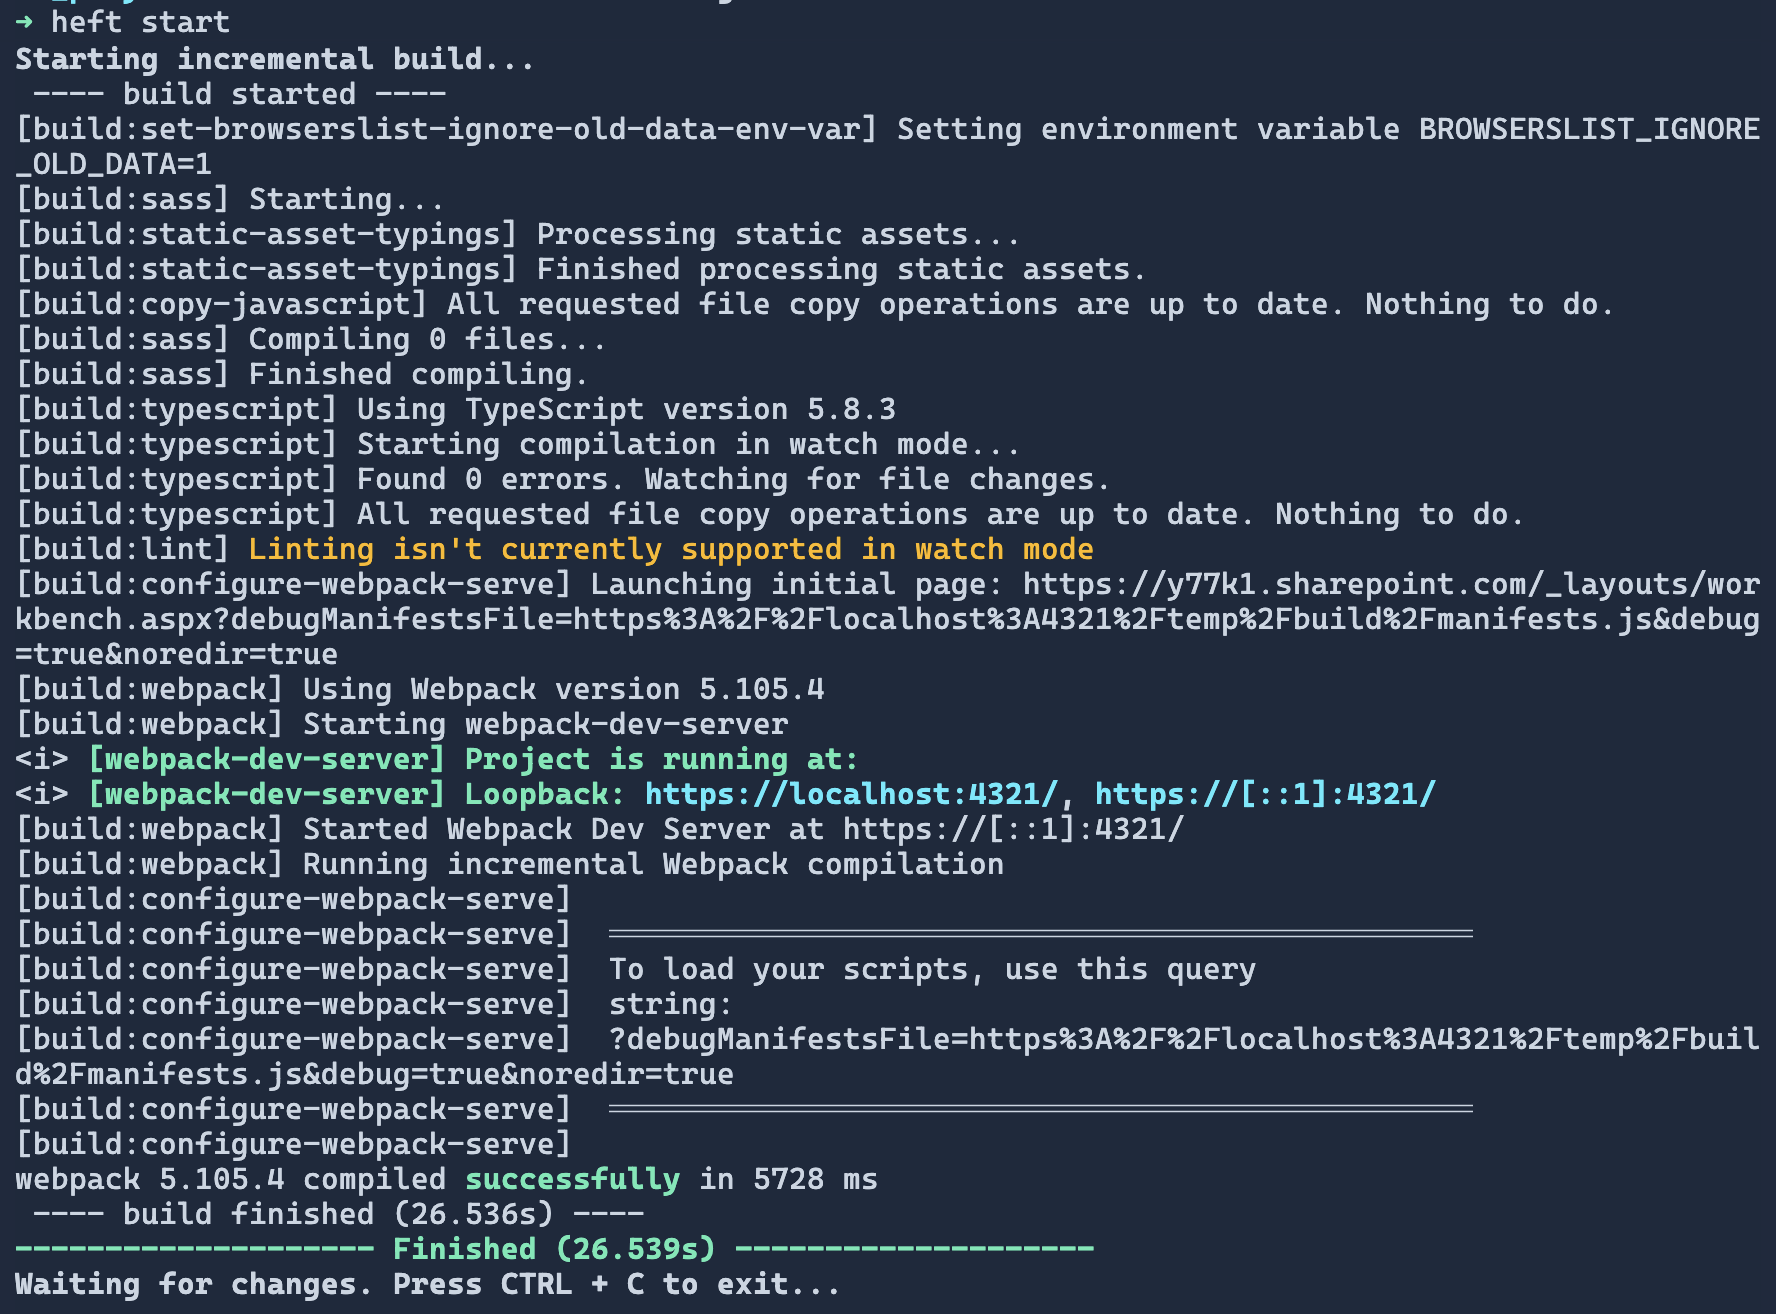
The SharePoint Framework's heft start task will build the project and start a local web server.
Wait for until you see ---- build finished ----. At this point, the web part will be ready for testing.
Open a browser and navigate to any SharePoint site in your tenant. If prompted, sign in using your Work or School credentials. Append the following to the end of the site's URL: /_layouts/workbench.aspx. This is the SharePoint-hosted workbench.
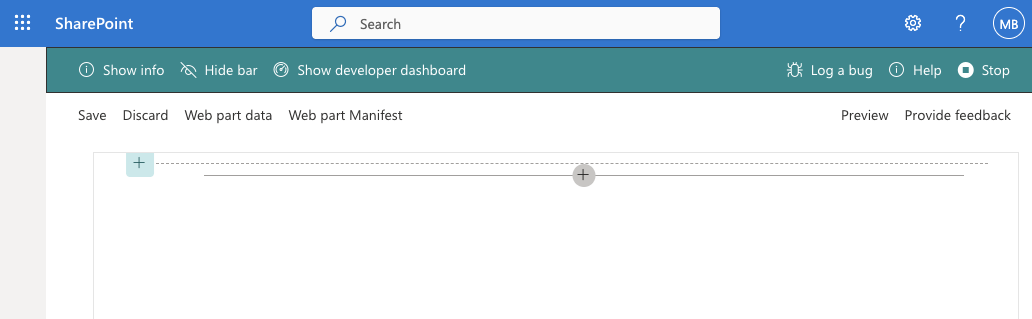
When prompted to Allow debug scripts, select Load debug scripts.
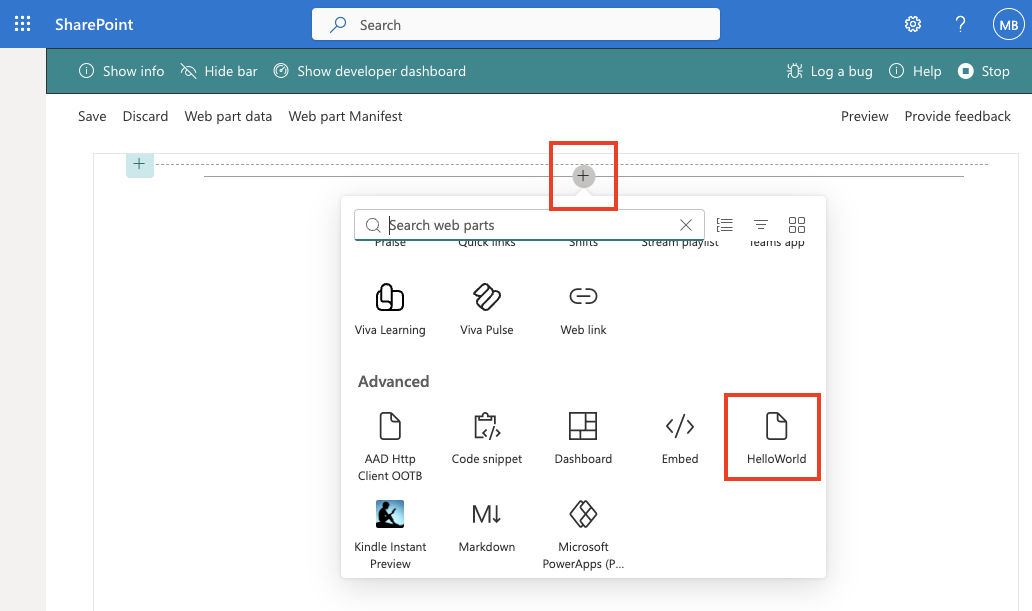
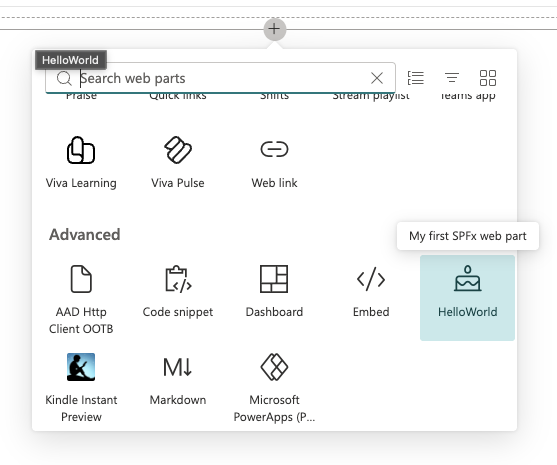
Select the web part icon button to open the list of available web parts, scroll down to the Advanced section, and select the HelloWorld web part:
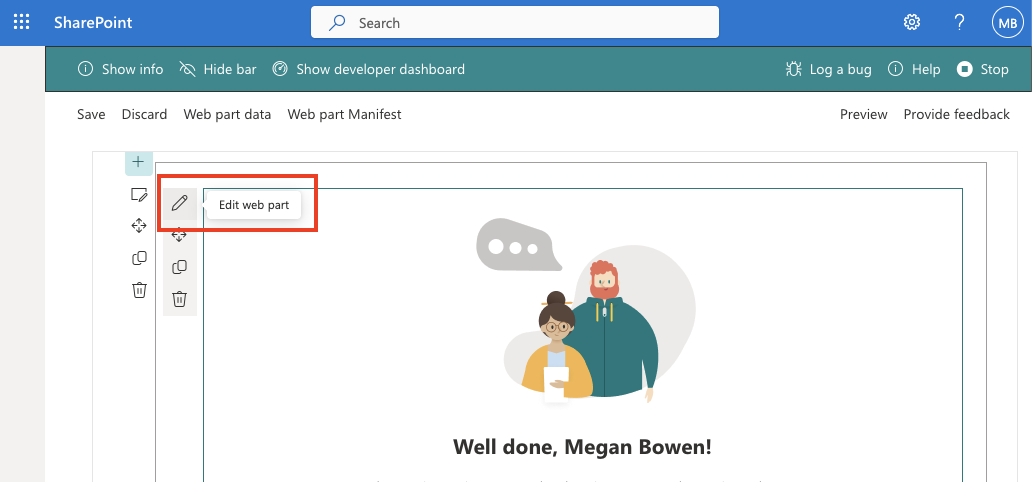
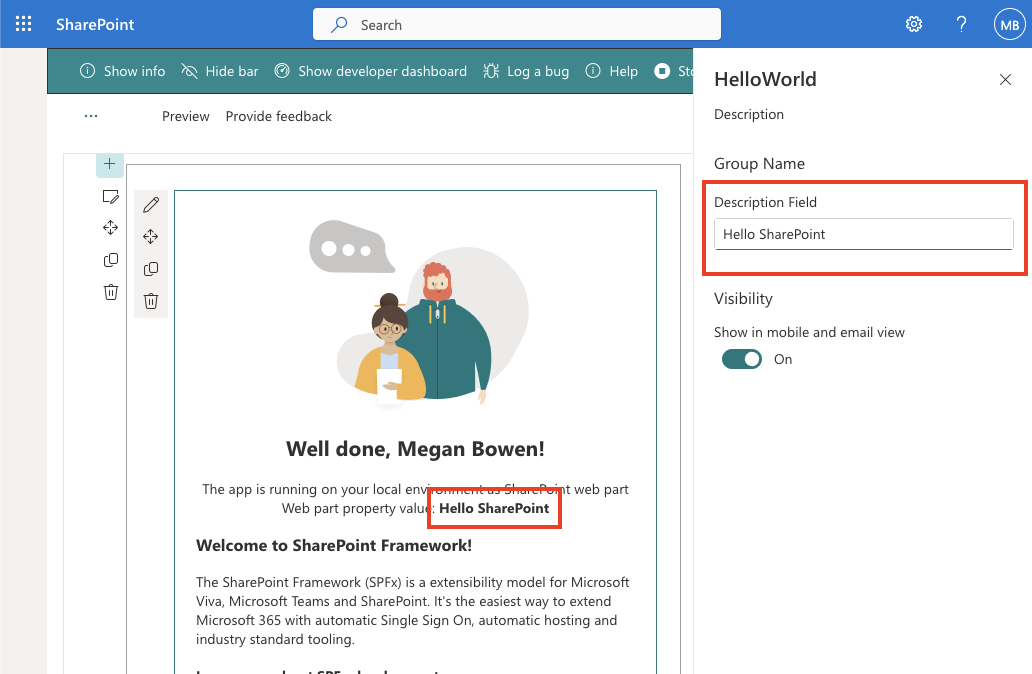
Edit the web part's properties by selecting the pencil (edit) icon in the toolbar to the left of the web part:
In the property pane that opens, change the value of the Description Field. Notice how the web part updates as you make changes to the text:
Update the web part code
Open the project folder in Visual Studio Code.
If the local web server isn't running, start it by running heft start --nobrowser on the command line from the root folder of the project, and add the HelloWorld web part to the SharePoint Workbench.
Next, update the code in the render() method to add a button that responds to an event.
Locate and open the file src/webparts/helloWorld/HelloWorldWebPart.ts.
Within this file, locate the render() method. Locate the following lines:
<h3>Welcome to SharePoint Framework!</h3>
<p>
The SharePoint Framework (SPFx) is a extensibility model for Microsoft Viva, Microsoft Teams and SharePoint. It's the easiest way to extend Microsoft 365 with automatic Single Sign On, automatic hosting and industry standard tooling.
</p>
<h4>Learn more about SPFx development:</h4>
<ul class="${styles.links}">
  <li><a href="https://aka.ms/spfx" target="_blank">SharePoint Framework Overview</a></li>
  <li><a href="https://aka.ms/spfx-yeoman-graph" target="_blank">Use Microsoft Graph in your solution</a></li>
  <li><a href="https://aka.ms/spfx-yeoman-teams" target="_blank">Build for Microsoft Teams using SharePoint Framework</a></li>
  <li><a href="https://aka.ms/spfx-yeoman-viva" target="_blank">Build for Microsoft Viva Connections using SharePoint Framework</a></li>
  <li><a href="https://aka.ms/spfx-yeoman-store" target="_blank">Publish SharePoint Framework applications to the marketplace</a></li>
  <li><a href="https://aka.ms/spfx-yeoman-api" target="_blank">SharePoint Framework API reference</a></li>
  <li><a href="https://aka.ms/m365pnp" target="_blank">Microsoft 365 Developer Community</a></li>
</ul>
Replace them with the following:
<button type="button">Show welcome message</button>
Next, add the following code to the end of the render() method. This will wire up some code to the click event on the button and display an alert on the page.
this.domElement.getElementsByTagName("button")[0]
  .addEventListener('click', (event: MouseEvent) => {
    event.preventDefault();
    alert('Welcome to the SharePoint Framework!');
  });
Save your changes. Wait a few seconds for the heft start task to rebuild your project. Once the process rebuilds your project, refresh the SharePoint Workbench in the browser so that you can test the changes.
Select the Show welcome message button.
Notice the button triggers a JavaScript alert displaying the message you added in the previously mentioned code.
Close the browser and stop the local web server by pressing CTRL+C in the command prompt.
Update the web part's properties
Now change the properties of the web part to give it a new name, description, and icon.
The web part's metadata is found in its manifest file.
Locate and open the file src/webparts/helloWorld/HelloWorldWebPart.manifest.json.
In the section preconfiguredEntries, locate the following lines:
"preconfiguredEntries": [{
  ...
  "title": { "default": "HelloWorld" },
  "description": { "default": "HelloWorld description" },
  "officeFabricIconFontName": "Page",
  ...
}]
Change the web part's title and description to something different.
The web part's icon is the name of one of the icons listed in the Fluent UI. Pick one and update the officeFabricIconFontName property:
"preconfiguredEntries": [{
  ...
  "title": { "default": "Hello SPFx" },
  "description": { "default": "My first SPFx web part" },
  "officeFabricIconFontName": "BirthdayCake",
  ...
}]
Start the local web server using the provided heft start task with the nobrowser switch:
heft start --nobrowser
Wait for the reload subtask to finish, then open or refresh the SharePoint Workbench. Now, when you hover over the web part in the toolbox, you'll see your changes:
Close the browser and stop the local web server by pressing CTRL+C in the command prompt.
Summary
In this exercise, you created a SharePoint Framework client-side web part.
Test your knowledge
Feedback
Was this page helpful?
No
Need help with this topic?
Want to try using Ask Learn to clarify or guide you through this topic?