Note
Access to this page requires authorization. You can try signing in or changing directories.
Access to this page requires authorization. You can try changing directories.
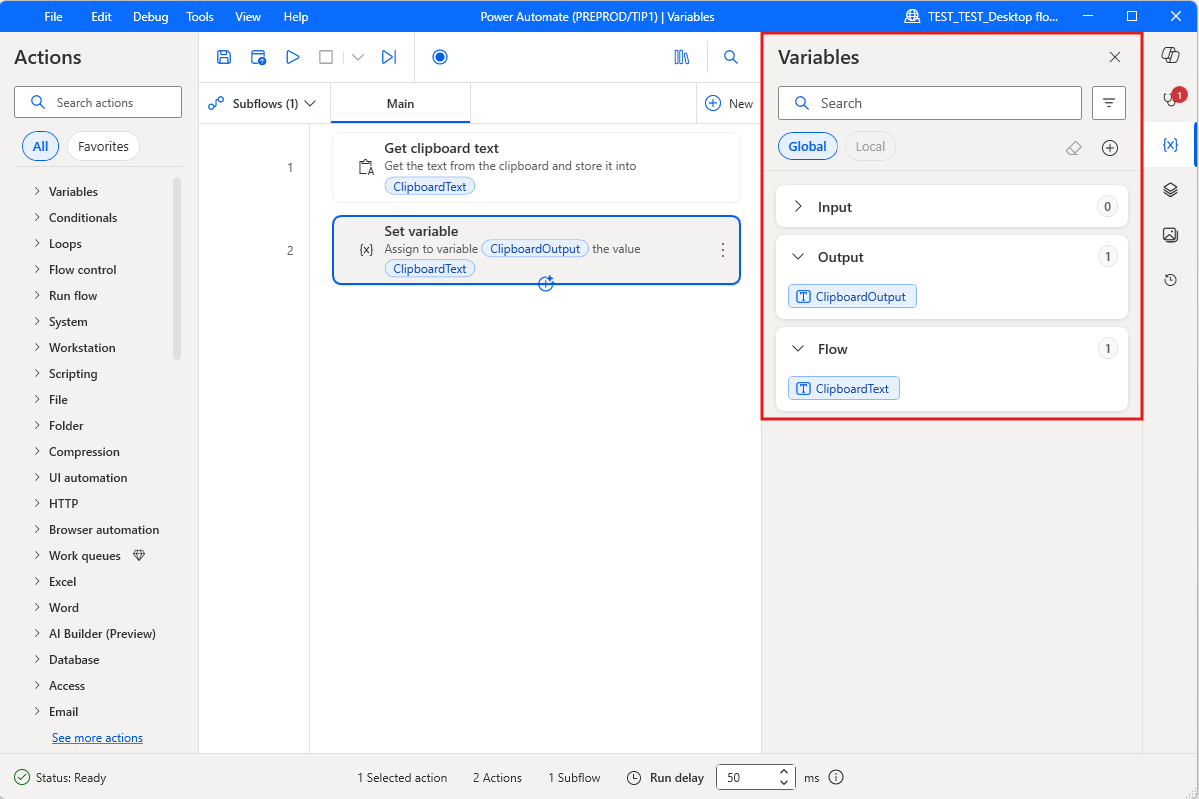
The variables pane shows the input and output variables passed to and from Power Automate desktop flows. It also displays all the variables used in the current desktop flow under Flow variables.
Through this pane, you can search for variables, rename them, find their usages, mark them as sensitive, pin them, and filter them by type. Filtering allows you to select whether to apply it to the pinned variables or not.
Managing flow variable values and default values
The flow designer lets you inspect and control the values of flow variables directly from the Variables pane, both while you build a flow and while it runs. For each flow variable, you can:
- See its current value inline in the Variables pane.
- Open the Edit flow variable dialog to review and change its details.
- Define a default value and default data type used when starting a run with defaults.
- Override the live value of a variable while the flow is paused during debugging.
- Mark a variable as sensitive so its value is masked.
- Start execution from a selected action using the variables' default values (Run from here with default values).
These capabilities help you test different scenarios without modifying actions or restarting the flow from the beginning.
The variable value viewer
When a flow runs, you see the current value of each variable next to its name. Select the eraser icon at the top right of the Variables pane to clear all the current values.
Note
Power Automate automatically omits the variables of disabled actions. Enable a disabled action to make its variables available in the variables pane.
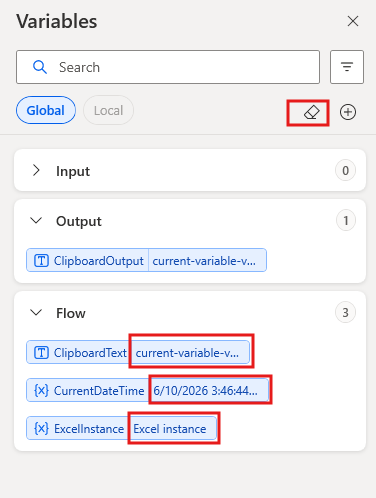
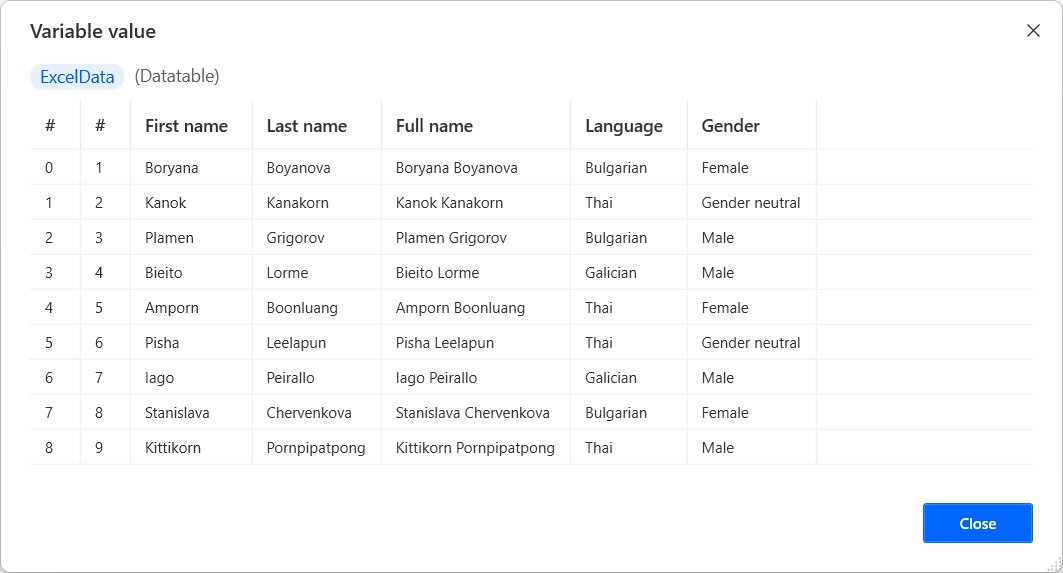
To examine the value of a variable in more detail, double-click on it or just hover over it for certain variable types. The variable value viewer displays the datatype of the selected variable and expands any datarows or datatables to show their contents.
The Edit flow variable dialog
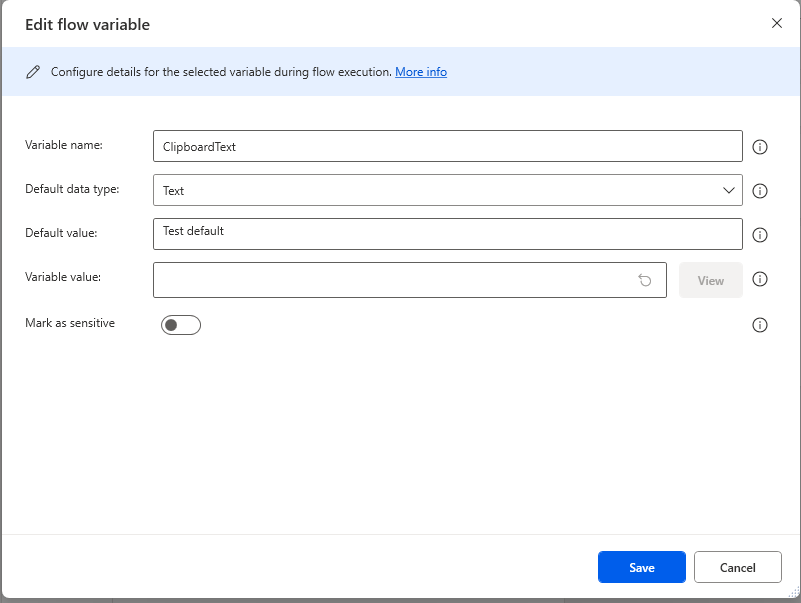
Double-click a flow variable (or use its menu) to open Edit flow variable.
This dialog contains:
- Variable name: The variable name (read-only during execution).
- Default data type: The type used for the default value.
- Default value: The value applied when running the flow with default values.
- Variable value: The current (live) value, editable during execution.
- Use the revert icon to set it to the default value.
- Use View to open the full value in a viewer or edit it during execution.
- Mark as sensitive: Masks the variable value in the UI.
Use Save to apply changes.
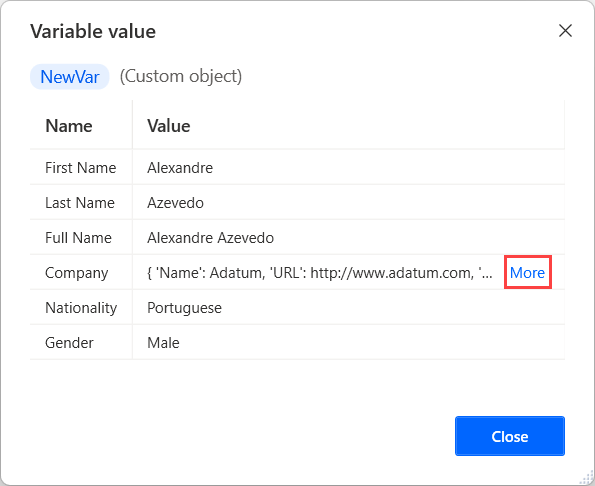
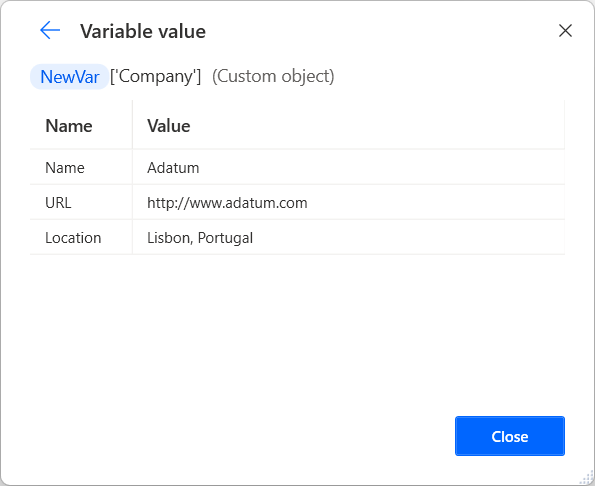
Certain data types might contain nested elements. For example, a custom object might contain another custom object in its properties. To view the properties of the nested element, select More.
Select the arrow icon on the top of the dialog to return to the parent element.
Renaming a desktop variable
To rename a desktop flow variable, right-click the variable name and select Edit or double-click the variable name in the Edit flow variable dialog and enter the new name. Power Automate automatically updates the variable name in all its occurrences.
Important
If you try to rename a variable to an existing name, Power Automate prompts you to confirm the merging of the two variables. Unintentional merging can affect the functionality of your flow and cause errors, so ensure that the merging is desirable.
Input and output variables
Power Automate lets you exchange data between cloud and desktop flows by using input and output variables, which expands automation capabilities. Input and output variables also let you pass information between desktop flows through the Run desktop flow action.
Additionally, you can use input variables to set values manually when the flows are triggered through the console.
For more information about passing data between cloud and desktop flows, see Trigger desktop flows from cloud flows.
Create an input variable
To create an input variable:
Select the plus button (+) in the variables pane, and then select Input.
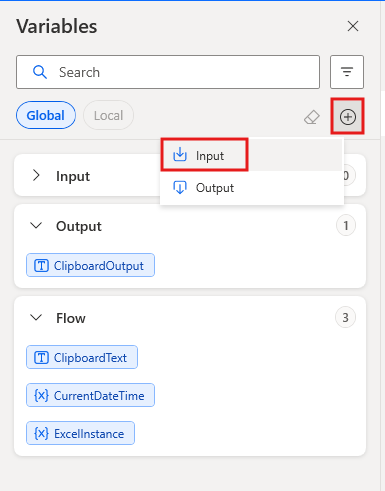
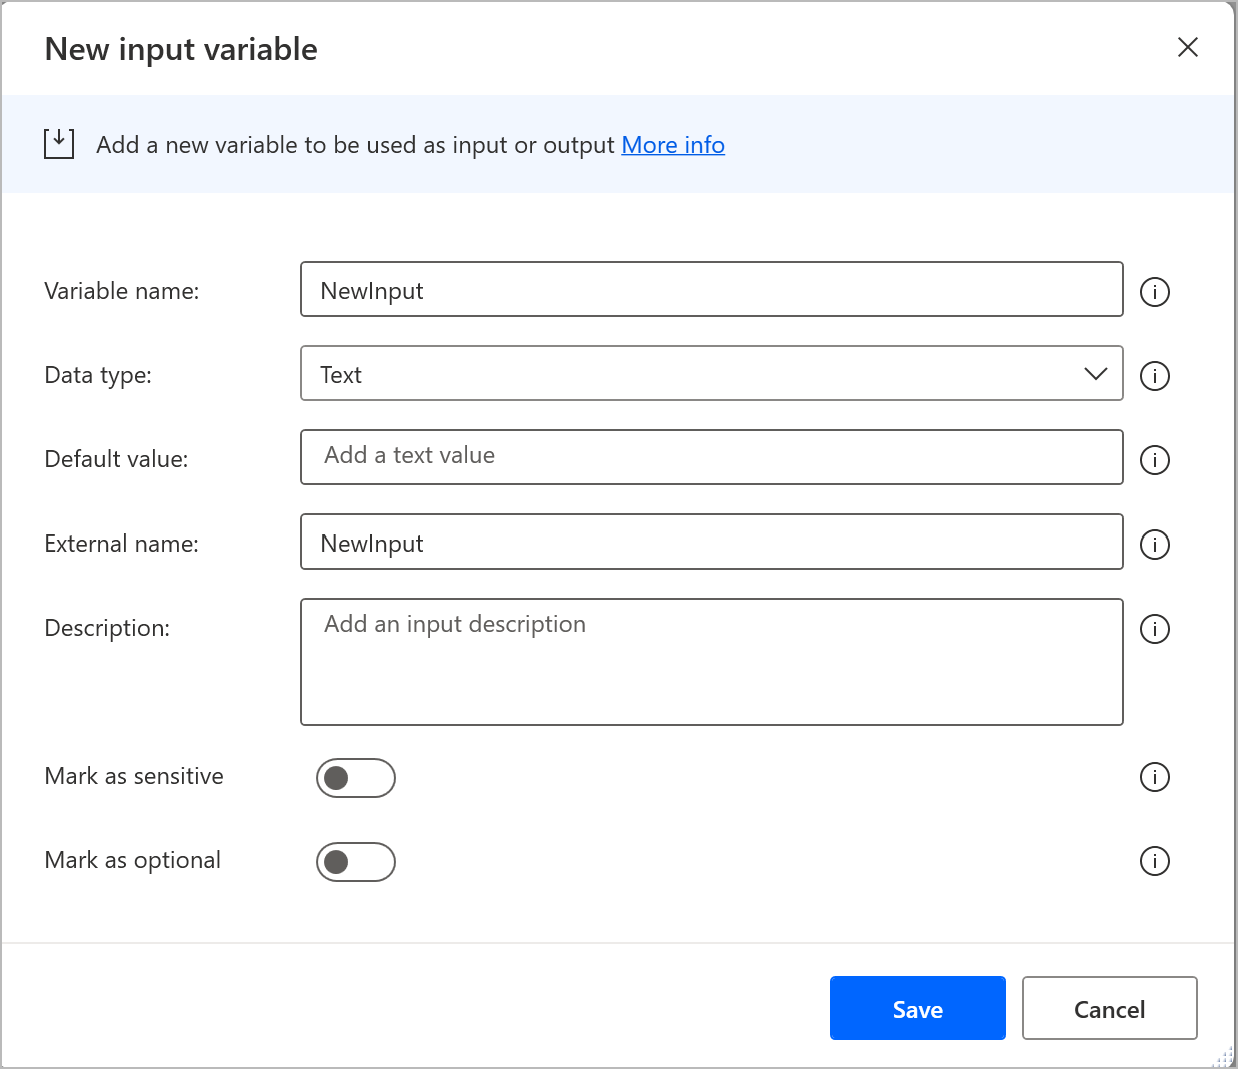
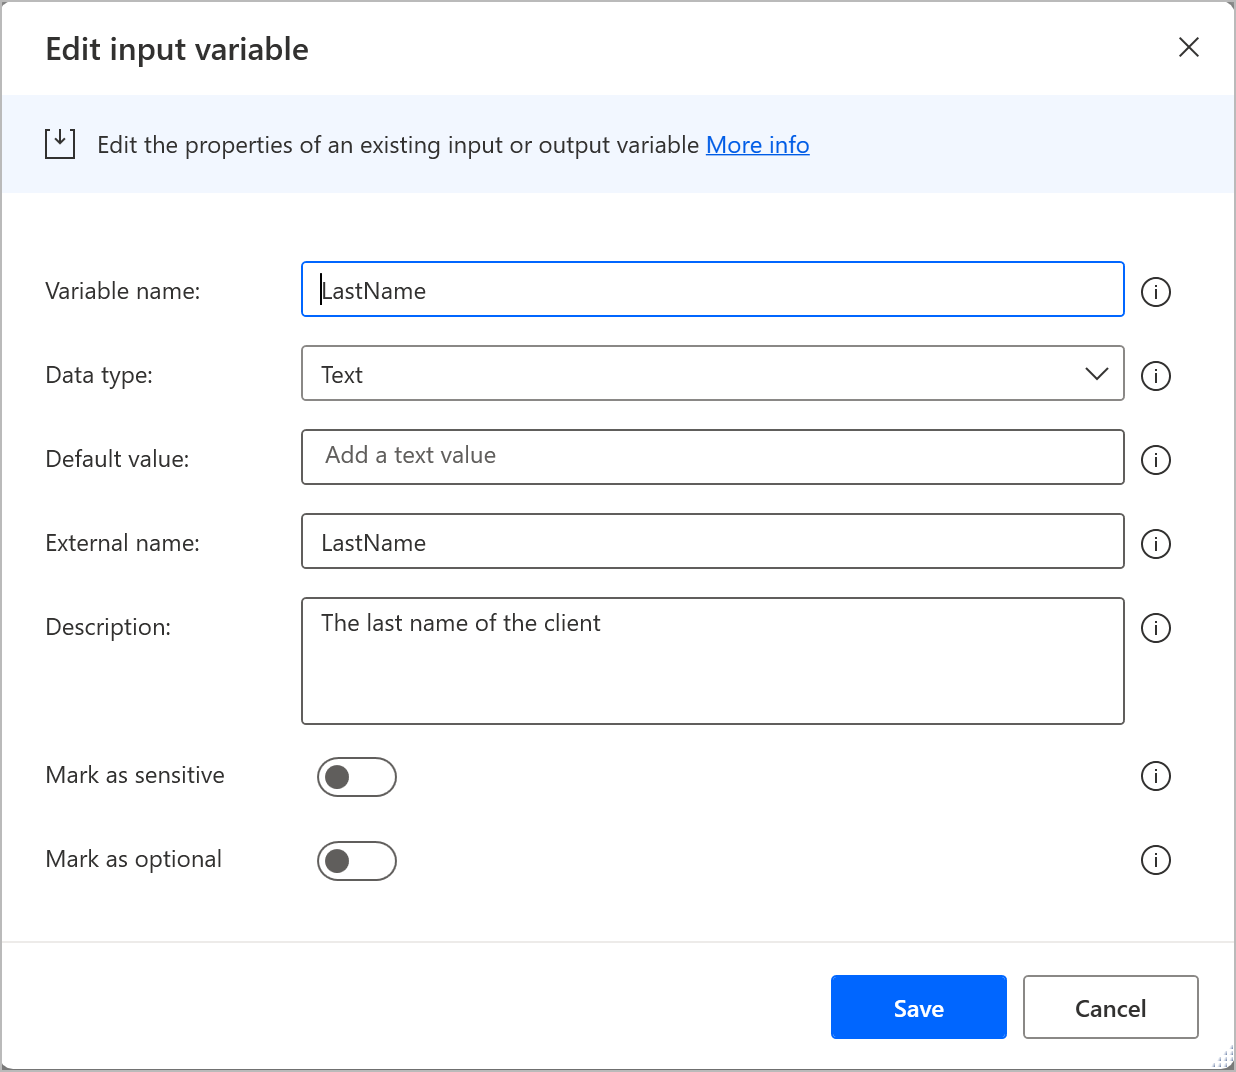
When the New input variable dialog appears, populate the following fields:
- Variable name: The name of the variable in the desktop flow.
- Data type: The type of the variable: text, number, boolean, custom object, list, datatable, instance, or session.
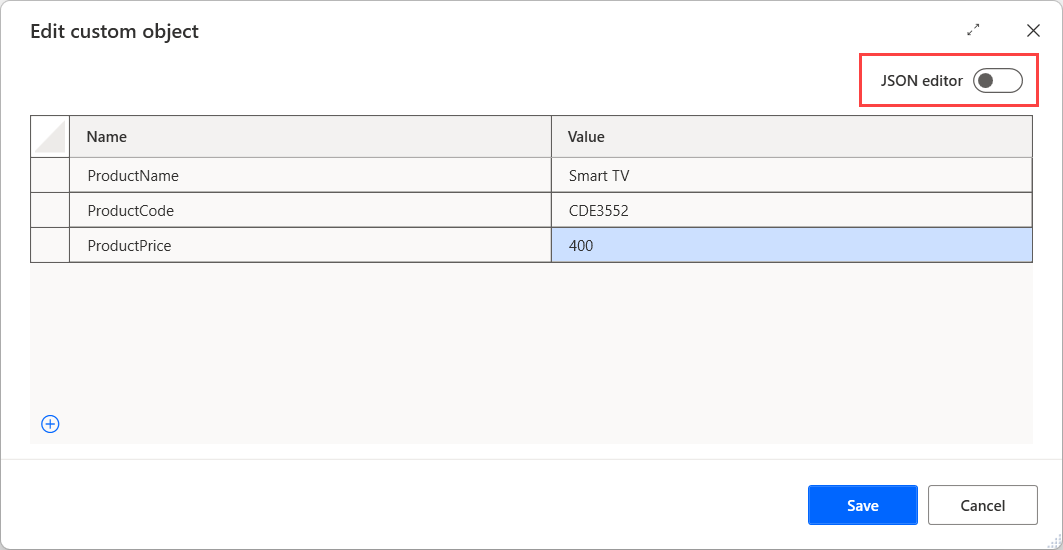
- Default value: The default value when the flow runs through the flow designer or console. When you create a custom object, list, or datatable input variable, Power Automate allows you to construct the default value through a visual or JSON editor.
- Data subtype: The exact type of the instance (available only when Instance or Session is previously selected as data type): Browser, Excel, Word, Outlook, Access, or Terminal respectively.
- External name: The external name is the name that appears in the cloud flow designer and the flow inputs dialog when calling the flow from the console.
- Description: The description of the variable that appears in the cloud and desktop flow designer while calling the flow.
- Mark as sensitive: Defines whether to mark the variable as sensitive or not. For more information about sensitive variables, see Sensitive variables.
- Mark as optional: Defines whether populating this input variable is mandatory or not. By marking an input variable as optional, you allow it to receive Blank values and omit passing an actual value, which doesn't result in an error. For more information about optional input variables, see Optional input variables.
Note
- The Variable name, Data type, and External name fields are required to create an input variable.
- Input variables of instance or session type (Browser, Excel, Word, Outlook, Access, or Terminal) don't support default values. Flows with these inputs can run through the Run desktop flow action of another desktop flow or through the designer for testing or debugging. In designer runs, instance and session input variables can be temporarily initialized by using them as the produced variables of the respective Launch, Open, or Attach actions.
- Edge, Chrome, and Firefox are supported as browser instances for input variables.
Important
If you choose an existing flow variable name for a new input variable, Power Automate prompts you to confirm the merging of the two variables. Unintentional merging might affect the functionality of your flow and cause errors. Also, you can't use the name of an existing input or output variable.
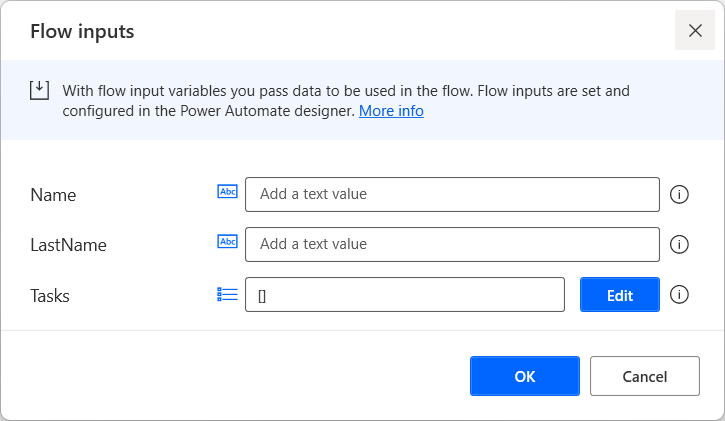
When you trigger desktop flows directly through the console, not a cloud flow, the Flow inputs dialog prompts you to set values for the input variables manually. For custom objects, lists, and datatables, the dialog allows you to populate values by using a visual or JSON editor.
Create an output variable
To create an output variable:
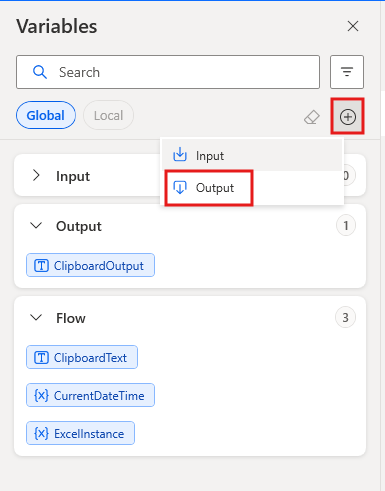
Select the plus button (+) in the variables pane, and then select Output.
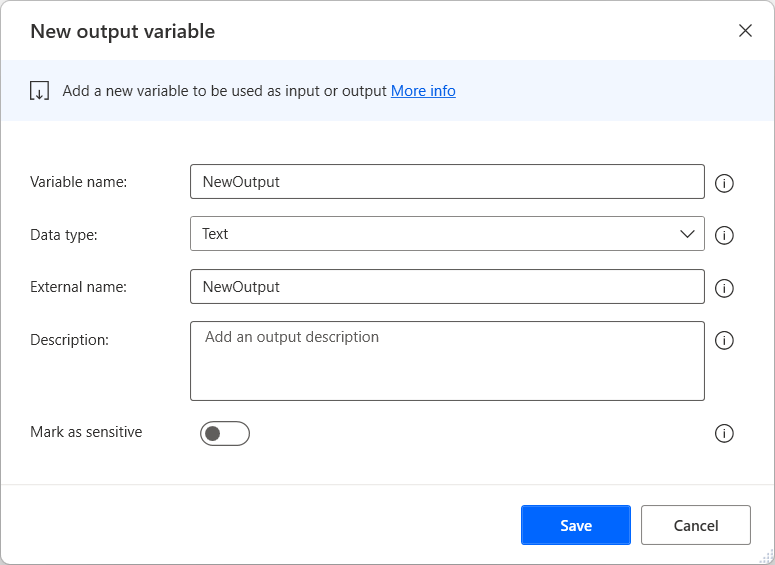
When the New output variable dialog appears, populate the following fields:
- Variable name: The name of the variable in the desktop flow.
- Data type: The type of the variable: text, number, boolean, custom object, list, datatable, instance, or session.
- Data subtype: The exact type of the instance (available only when Instance or Session is previously selected as data type): Browser, Excel, Word, Outlook, Access, or Terminal respectively.
- External name: The name that appears in the cloud flow designer.
- Description: The description of the variable that appears in the cloud or desktop flow designer while calling the flow.
- Mark as sensitive: Defines whether to mark the variable as sensitive or not. For more information about sensitive variables, see Sensitive variables.
Note
- The Variable name, Data type, and External name fields are required to create an output variable.
- Edge, Chrome, and Firefox are supported as browser instances for output variables.
Important
If you choose an existing flow variable name for a new output variable, Power Automate prompts you to confirm the merging of the two variables. Unintentional merging might affect the functionality of your flow and cause errors. Also, you can't use the name of an existing input or output variable.
Manage input and output variables
All created input and output variables are available in the appropriate section of the variables pane.
You can use this pane to rename, update, delete, find the usages, pin and filter each input/output variable. Filtering allows you to select whether to apply it to the pinned variables or not.
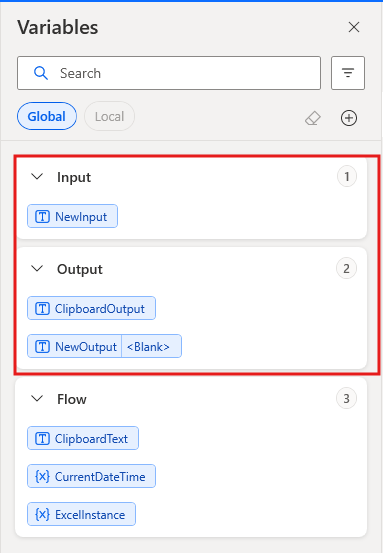
To update an input/output variable:
Right-click on its name in the variables pane and select Edit.
Important
If you try to rename an input or output variable to an existing flow variable name, Power Automate will prompt you to confirm the merging of the two variables. Unintentional merging may affect the functionality of your flow and cause errors. Also, you can't use the name of an existing input or output variable.
In the Edit input/output variable dialog, update the desired fields and select Save to apply the changes.
Sensitive variables
Important
Flows developed in older versions of Power Automate for desktop (v.2.13 or older) remain unaffected by the sensitive variables functionality as long as you don't edit them. If you run existing desktop flows through the console or portal without editing them, they'll keep the old behavior and work like before.
To apply the new functionality, edit and save the flows with Power Automate for desktop v.2.14 or above. Power Automate will convert past encrypted input variables and encrypted variables produced by the Get password from CyberArk action to text variables marked as sensitive.
Some automation scenarios handle confidential information and require special handling of variables that store and use sensitive data during runtime. Desktop flows support the creation of sensitive variables, whose values are masked during debugging in the variables pane of the flow designer.
Additionally, if you've logged in with an organization premium account, the values of sensitive variables aren't stored in the Run history in the portal, when the desktop flows run through the console or cloud flows.
Any variable can become sensitive, independently of its type. Sensitivity applies at the variable level, so lists, datarows, datatables, and custom objects, get sensitive as a whole. There's no way to mark a list item, a datatable column, or a variable property as sensitive in an otherwise nonsensitive variable.
You can use, manipulate, and process sensitive variables in every action without any limitation, like every other variable. Additionally, you can combine them with other variables and include them in expressions. In this case, logs handle the whole expression as sensitive.
The flow designer handles sensitivity as a mask that you can set on and off. Thus, you can unmask sensitive variables to see their values and mask them again to hide their values.
Important
Sensitive variables aren't meant to provide protection over hardcoded data. You shouldn't hardcode critical data in plain text, like passwords and PINs, in the properties of actions like Set variable, even if the said variables are marked as sensitive. The desktop flow logs will be protected, but the hardcoded values are visible in the modal and the flow definition in Microsoft Dataverse.
To find more information regarding sensitive inputs in cloud flows, see Manage sensitive input like passwords.
Note
- The value of a sensitive variable is visible when you send it outside desktop flows or display it through the Display message action.
- Sensitivity isn't inheritable in variables. If you add or assign a sensitive variable to another variable, the resulting variable won't be sensitive by default. The exception to this rule applies only to credential variable types. Credential variables, produced either by the respective action or by reassignment from another variable, are always sensitive, and their sensitivity is enforced. The same exception also applies to the "Password" property of credential variable types.
- Marking a variable as sensitive hides its values from the summary of the Set variable action.
- The input details of the Set variable action aren't visible in the desktop flow logs when the contained variables have been marked as sensitive.
- Masking sensitive variables during debugging provides only a basic form of protection to developers from third parties looking at their screens.
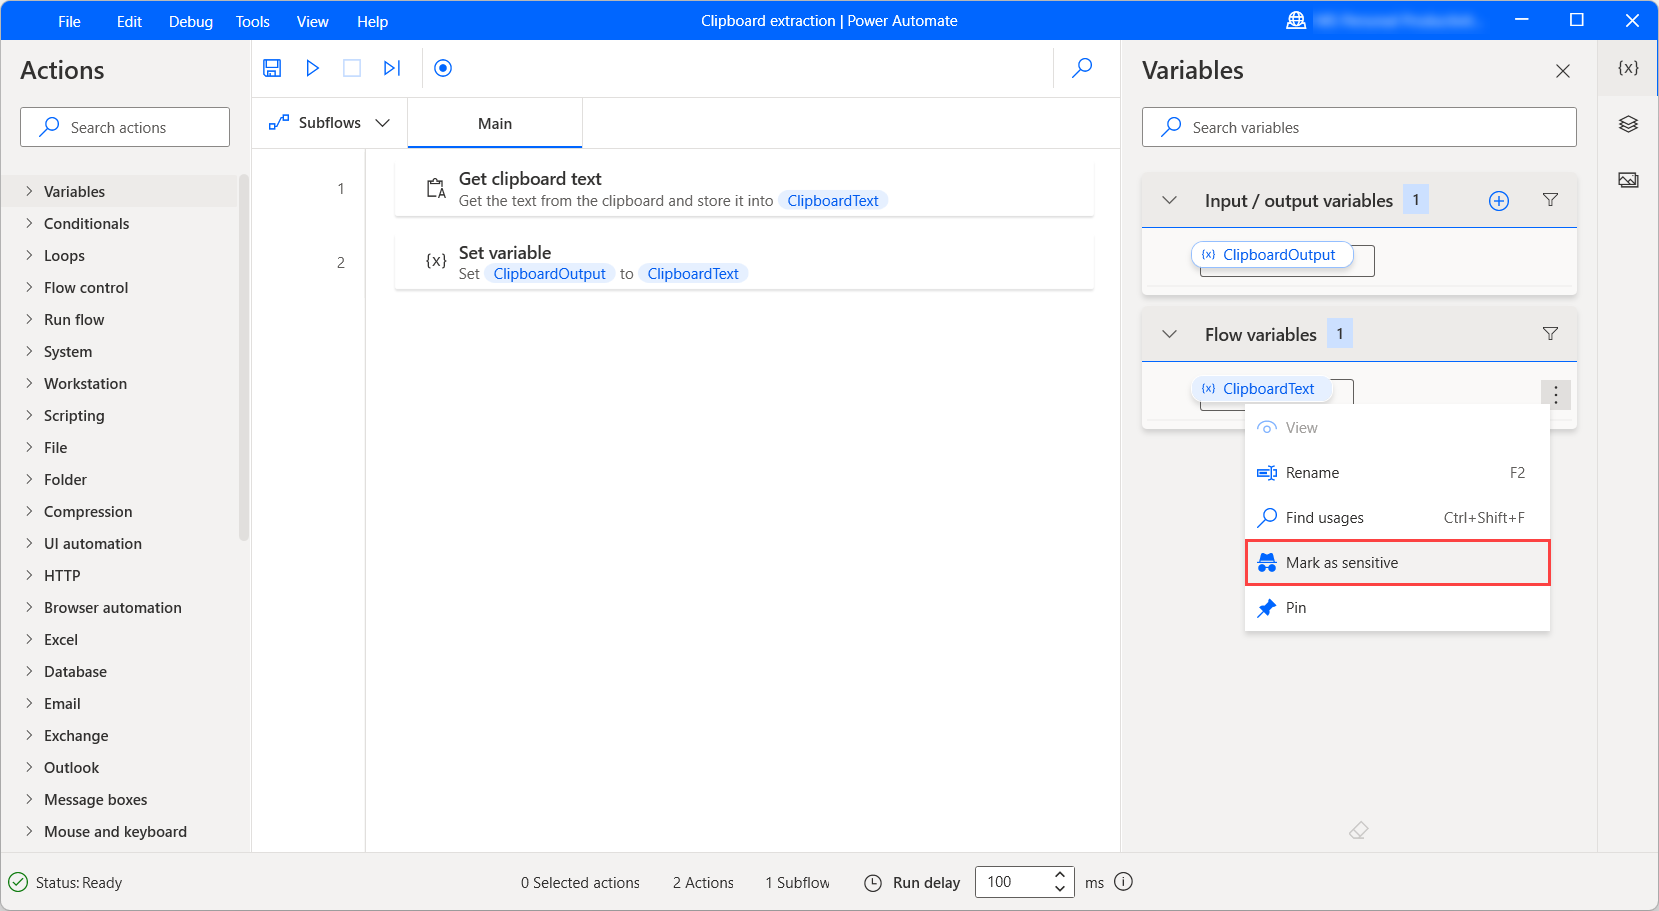
To mark a variable as sensitive, right-click it in the variables pane and select Mark as sensitive. To stop a variable from being sensitive, right-click it and select Mark as not sensitive.
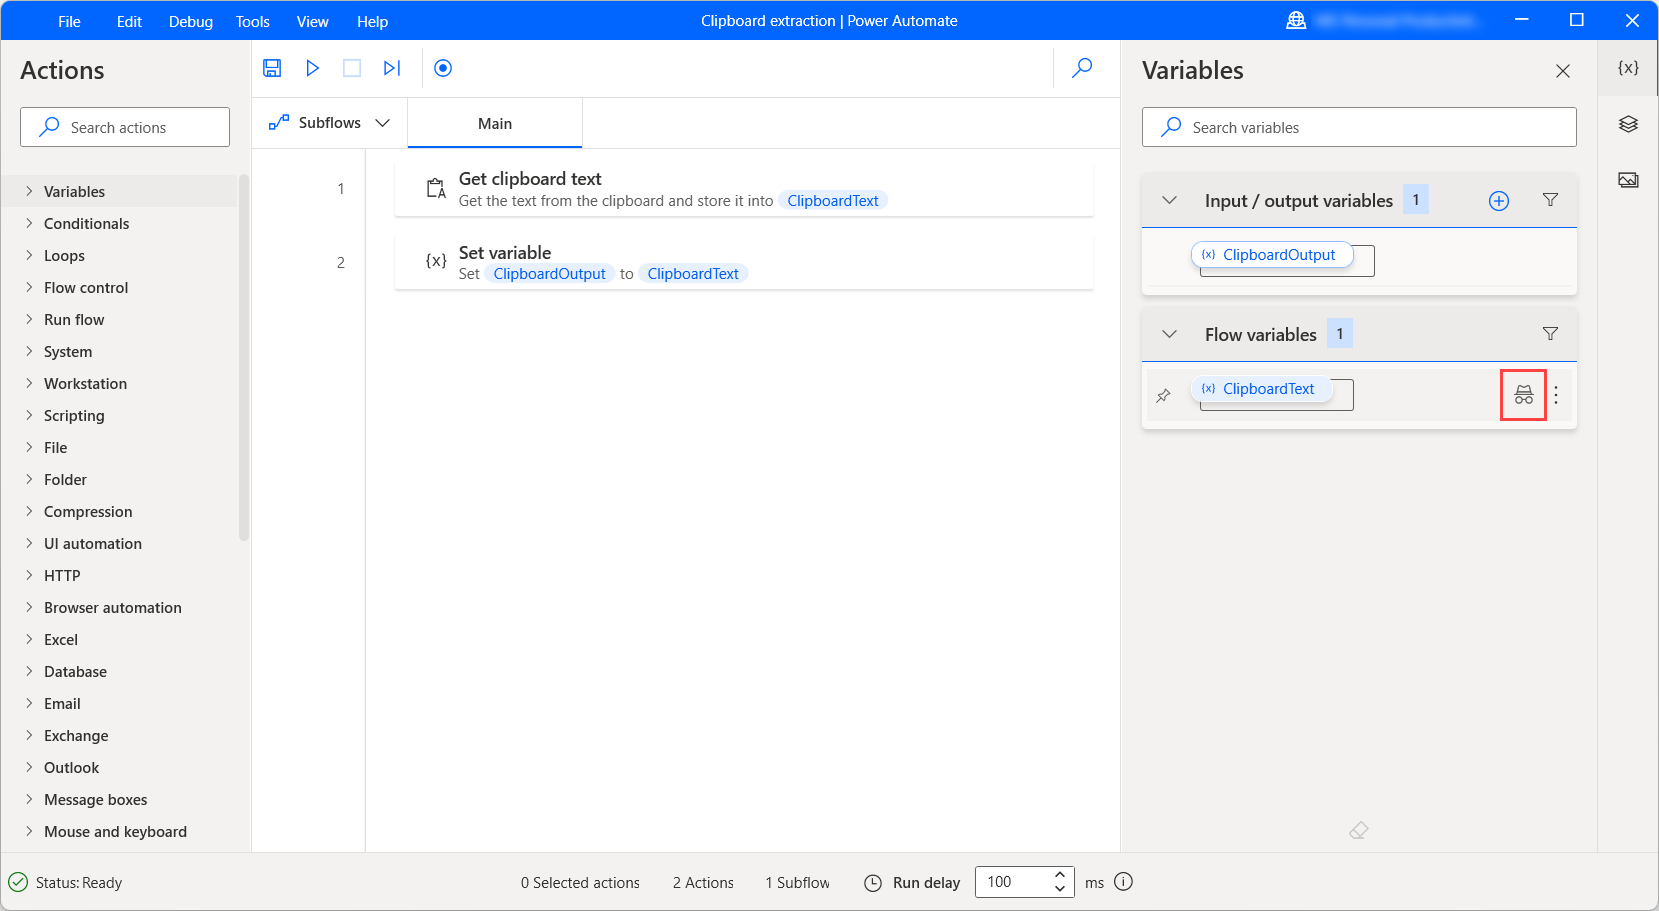
Apart from the context menus, you can use the dedicated icon next to each variable to mark it as sensitive or not sensitive.
Sensitive input and output variables
When you create or edit an input or output variable, select Mark as sensitive in the respective dialog to make it sensitive.
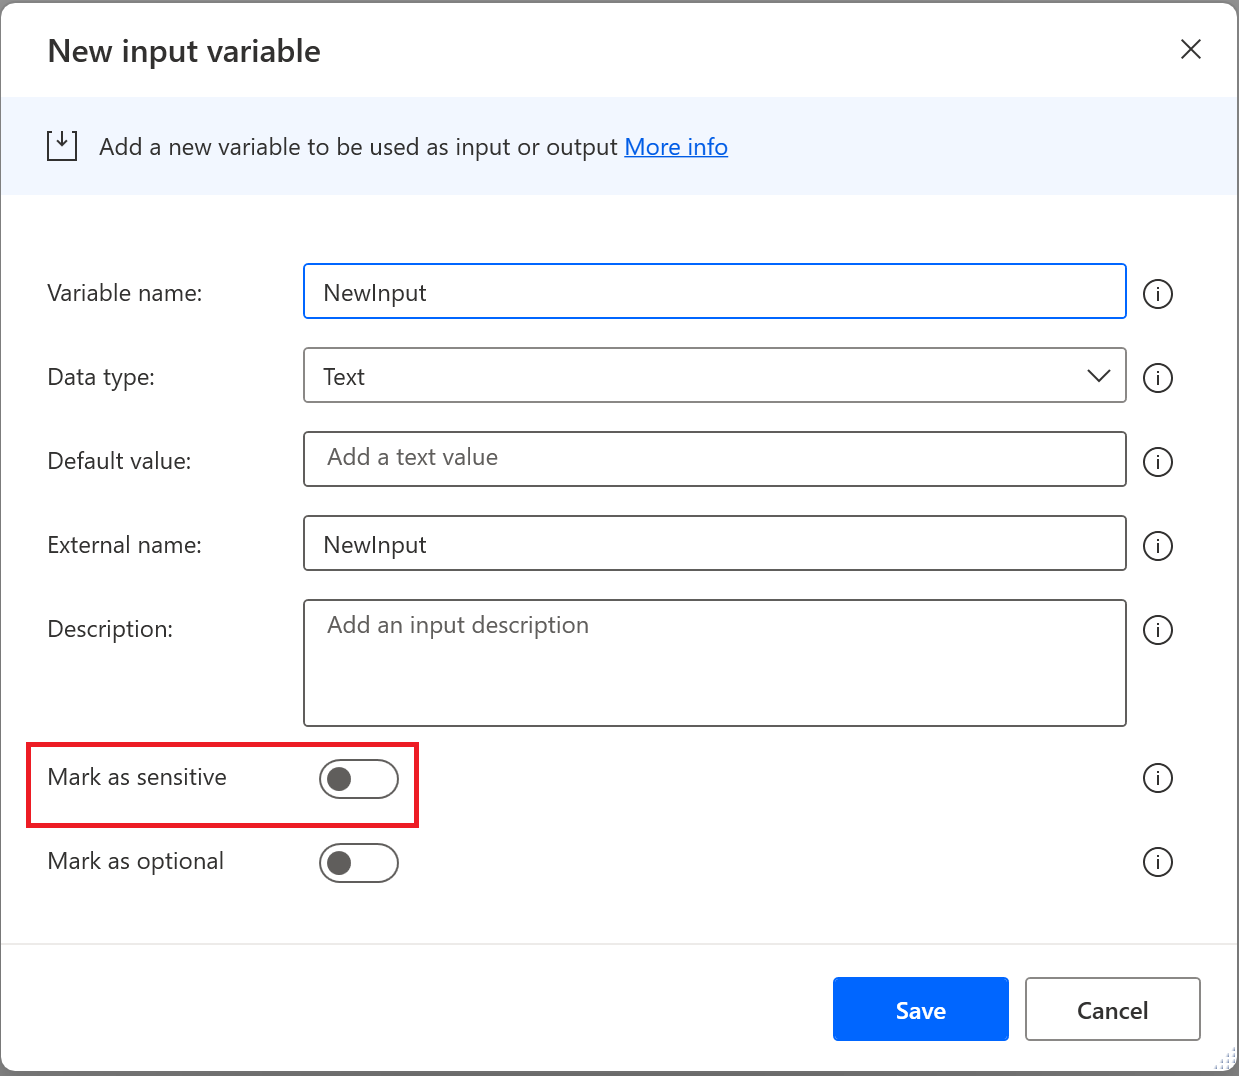
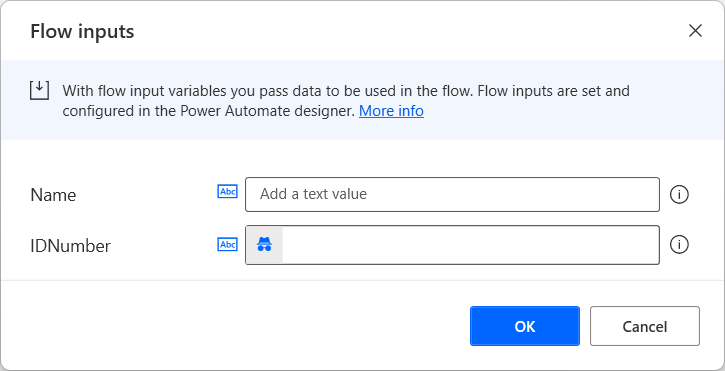
The default value of an input variable is visible in the creating or editing dialog when sensitivity is enabled. This value exists only for testing and debugging purposes, as you have to initialize each input in production runs through the portal or the console. The default values aren't protected in the action modals and the flow definition in Dataverse.
On the other hand, the default value isn't visible in the variables pane and the Flow input dialog, which appears when you run a desktop flow with input variables through the console.
The eye icon to reveal the value isn't available unless you delete the default text value and provide a new one. New values are visible when populating other datatypes besides text.
Optional input variables
When you create or edit an input or output variable, select Mark as optional in the respective dialog to make it optional.
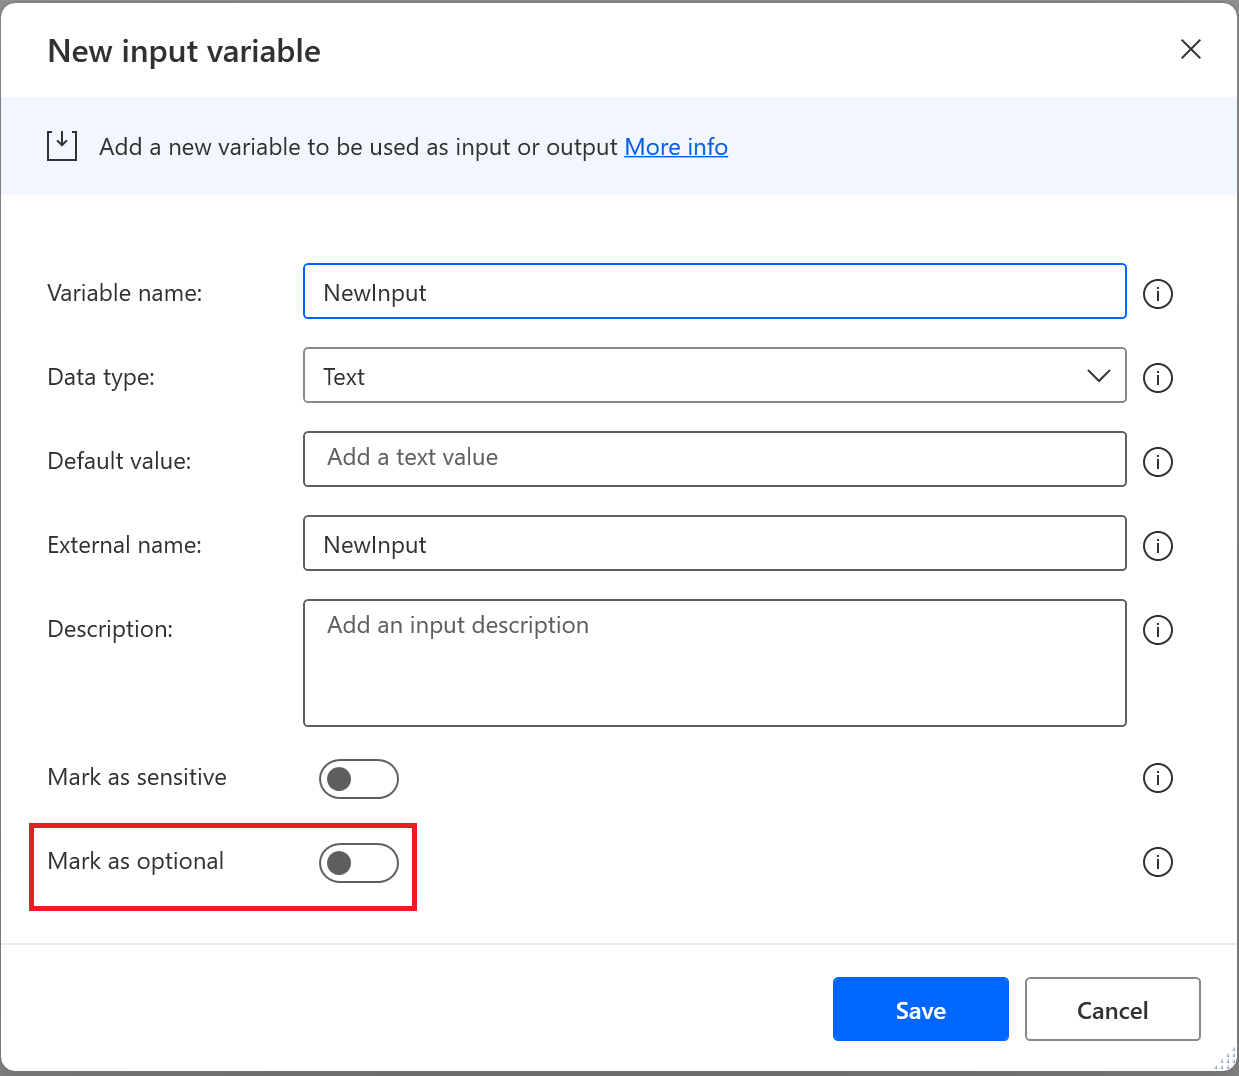
By default, input variables are mandatory, which means you must provide:
- A default value when creating the variable so that you can use it during debugging (console initiated) runs in case you don't pass another value.
- A value of the respective type to ensure proper execution.
If an input variable is marked as optional both of the above can be omitted because it can receive Blank values.
Setting optional inputs' default value to Blank
Text variables
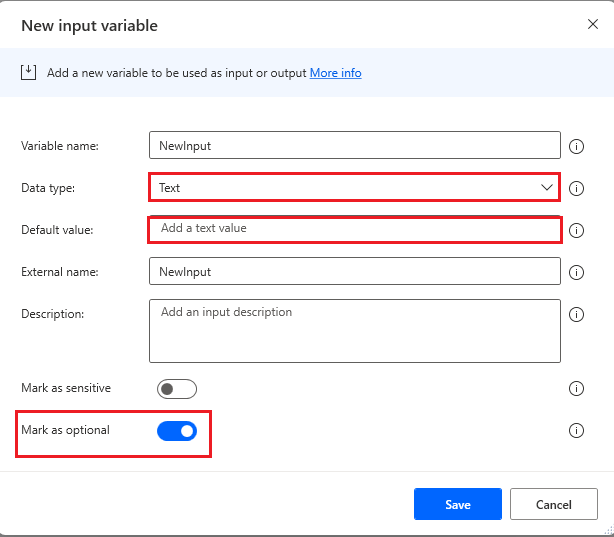
To set a text variable's default value to Blank:
- Set the Data type property to Text.
- Enable the Mark as optional control.
- Make sure the Default value property is empty.
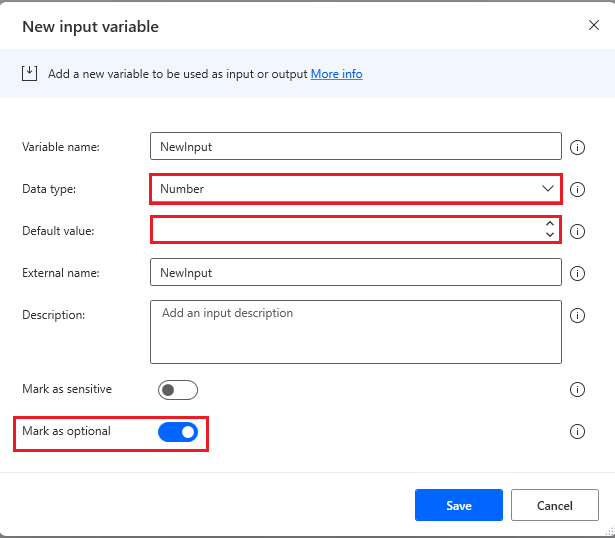
Blank numeric input
To set a numeric variable's default value to Blank:
- Set the Data type property to Number.
- Enable the Mark as optional control.
- Make sure the Default value property is empty.
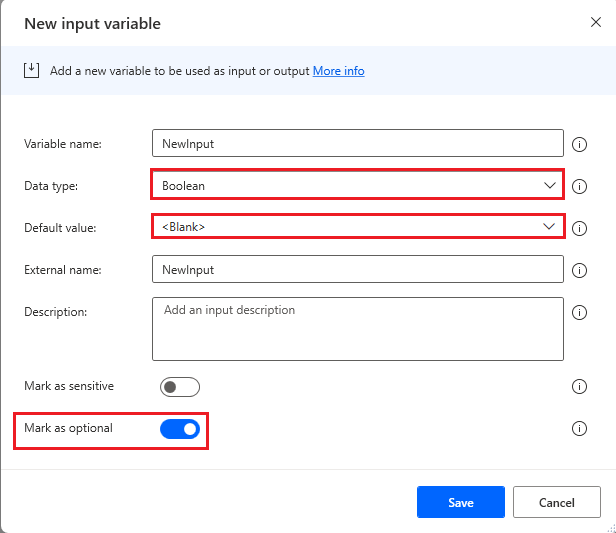
Blank boolean input
To set a boolean variable's default value to Blank:
- Set the Data type property to Boolean.
- Enable the Mark as optional control.
- Make sure the Default value property is set to <Blank>.
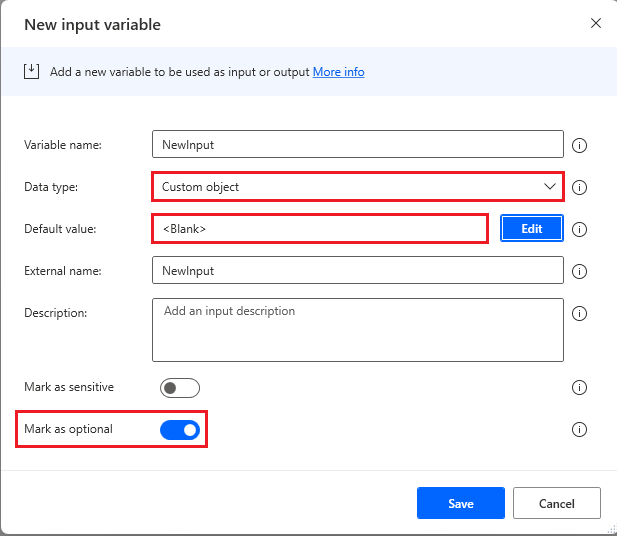
Blank custom object input
To set a custom object's default value to Blank:
- Set the Data type property to Custom object.
- Enable the Mark as optional control.
- Make sure the Default value property is set to <Blank>. To achieve this, select Edit next to the property and in the Edit custom object window, enable the JSON editor control. Delete all the contents, and then select Save.
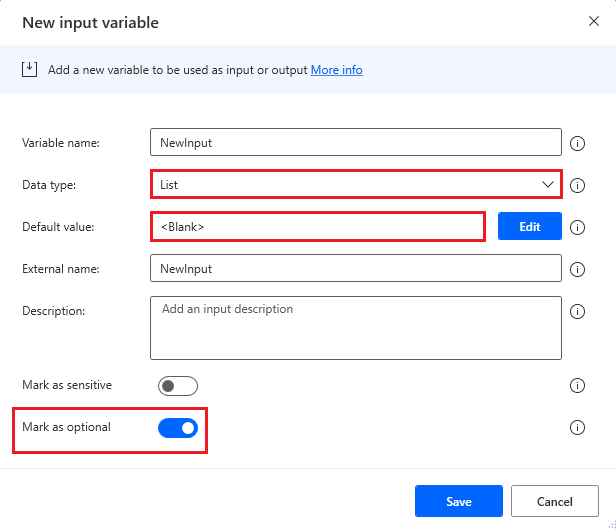
Blank list input
To set a list's default value to Blank:
- Set the Data type property to List.
- Enable the Mark as optional control.
- Make sure the Default value property is set to <Blank>. To achieve this, select Edit next to the property and in the Edit list window, enable the JSON editor control. Delete all the contents, and then select Save.
Blank data table input
To set a data table's default value to Blank:
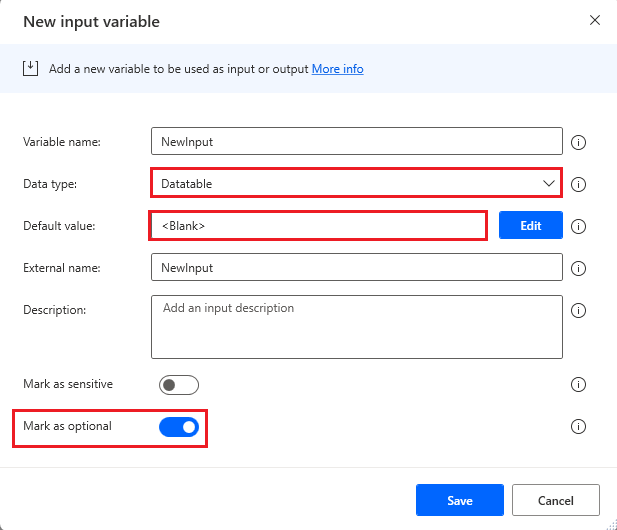
- Set the Data type property to Datatable.
- Enable the Mark as optional control.
- Make sure the Default value property is set to <Blank>. To achieve this, select Edit next to the property and in the Edit datatable window, enable the JSON editor control. Delete all the contents, and then select Save.
Edit variables while debugging a desktop flow
In the design console, Power Automate for desktop supports editing variable values while running the flow in the debugger. Editing is performed through the Edit flow variable dialog instead of type-specific editors.
How to edit variables while running a flow in the debugger
- Place a breakpoint before the point where you want to change the value.
- Run the flow until it pauses.
- Double-click the variable to open the Edit flow variable dialog.
- Modify the Variable value field (use View for full editing).
- Select Save to apply the change.
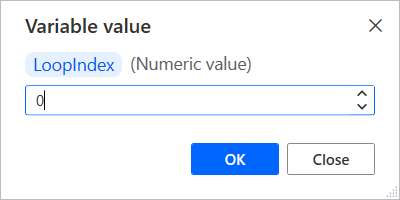
Modify a numeric value:
Open the variable that requires editing, follow the steps described above and manually edit the numeric value. Alternatively, there are buttons to count up, or down from the current value on the right side of the input in the variable viewer. Note, you can't change the value to something other than numeric.
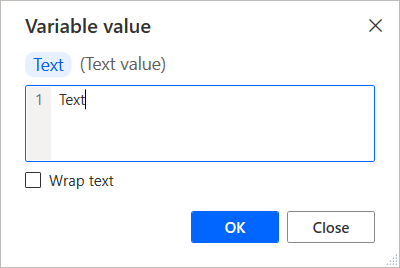
Modify a text value:
Open the variable that requires editing, follow the steps described above and manually edit the text value. There's a checkbox to wrap text within the input field, which makes it easier for you to view in the editor. Text value variables accept numbers as inputs, but keep in mind that if you modify this value and try to pass it to an action with an input parameter that only accepts numeric value, the flow throws an exception error when it reaches that point.
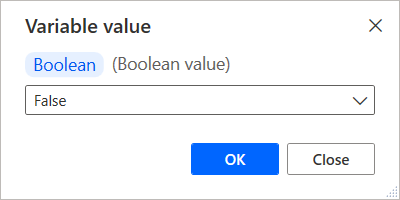
Modify a boolean value:
Open the variable that requires editing, follow the steps described above, and then manually edit the boolean value. Use the drop-down list to select true or false.
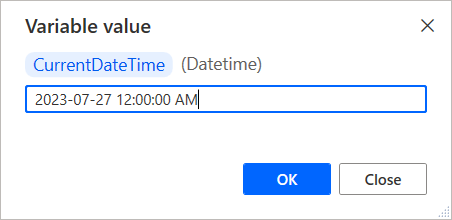
Modify a datetime value:
Open the variable that requires editing, follow the steps described above and manually edit the datetime value. There's a warning message that appears in the variable viewer if you enter a value that isn't acceptable.
Run from here with default values
You can start execution from a specific action and use each variable’s default value instead of recomputing it.
- Right-click the action you want to start from.
- Select Run from here with default values (Alt+F5).
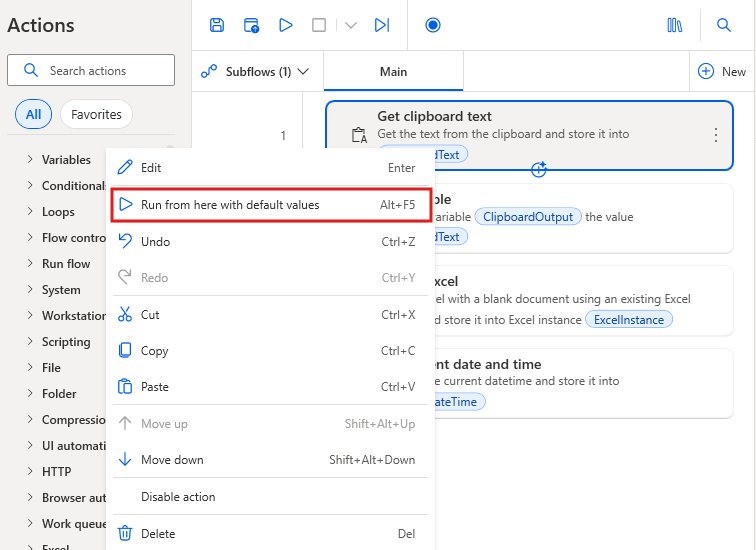
The flow runs from that action using the configured defaults.
Known issues and limitations
Issue: Flows built or edited with Power Automate for desktop version 2.14 or above are incompatible with older versions of Power Automate for desktop. You can't use older versions of Power Automate for desktop to open or run these flows.
Workarounds: None.