Tutorial: Configure networking for your VMware private cloud in Azure
An Azure VMware Solution private cloud requires an Azure virtual network. Because Azure VMware Solution doesn't support an on-premises vCenter Server instance, you need to take extra steps to integrate with your on-premises environment. You also need to set up a virtual network gateway and an Azure ExpressRoute circuit.
If you plan to scale your Azure VMware Solution hosts by using Azure NetApp Files datastores, deploying the virtual network close to your hosts with an ExpressRoute virtual network gateway is crucial. The closer the storage is to your hosts, the better the performance.
In this tutorial, you learn how to:
- Create a virtual network.
- Create a virtual network gateway.
- Connect an ExpressRoute circuit to the gateway.
This tutorial assumes that you completed the previous tutorial about creating a private cloud.
Note
Before you create a virtual network, evaluate whether you want to connect to Azure VMware Solution by using an existing virtual network or by creating a new one:
- To use an existing virtual network in the same Azure subscription as Azure VMware Solution, use the Azure VNet connect tab on the Connectivity pane.
- To use an existing virtual network in a different Azure subscription from Azure VMware Solution, use the guidance for connecting to the private cloud manually.
- To create a new virtual network in the same Azure subscription as Azure VMware Solution, use the Azure VNet connect tab or create one manually.
Prerequisites
Make sure that the virtual network that you use for this tutorial:
- Contains a gateway subnet.
- Is in the same region as the Azure VMware Solution private cloud.
- Is in the same resource group as the Azure VMware Solution private cloud.
- Contains an address space that doesn't overlap with CIDR in the Azure VMware Solution private cloud.
Validate that your solution design is within the Azure VMware Solution limits.
Connect to the private cloud by using the Azure VNet connect feature
You can take advantage of the Azure VNet connect feature if you want to connect to Azure VMware Solution by using an existing virtual network or by creating a new virtual network.
Azure VNet connect is a function to configure virtual network connectivity. It doesn't record configuration state. Browse through the Azure portal to check what settings are already configured.
Select an existing virtual network
When you select an existing virtual network, the Azure Resource Manager (ARM) template that creates the virtual network and other resources is redeployed. The resources, in this case, are the public IP address, gateway, gateway connection, and ExpressRoute authorization key.
If everything is set up, the deployment doesn't change anything. However, if anything is missing, it's created automatically. For example, if the gateway subnet is missing, it's added during the deployment.
In the Azure portal, go to the Azure VMware Solution private cloud.
Under Manage, select Connectivity.
Select the Azure VNet connect tab, and then select the existing virtual network.
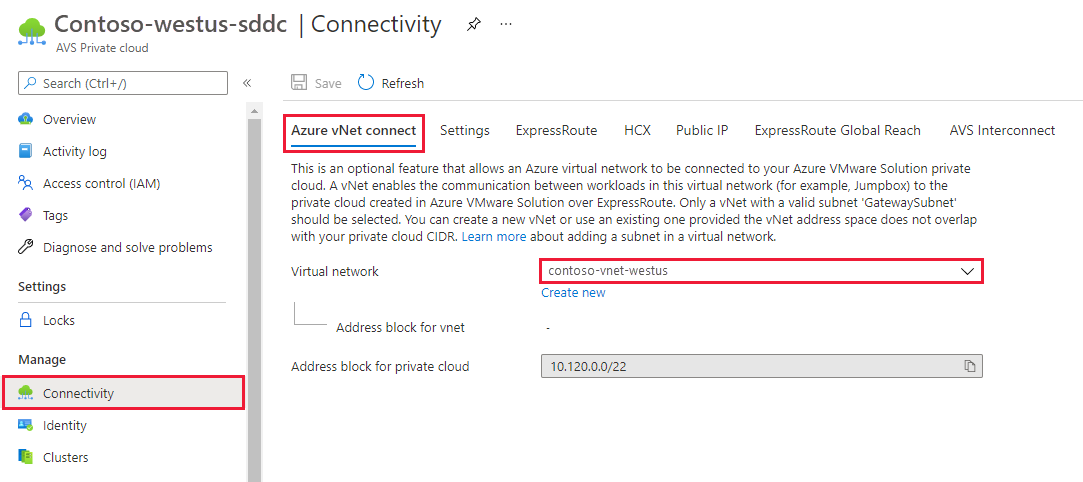
Select Save.
At this point, the virtual network detects whether IP address spaces overlap between Azure VMware Solution and the virtual network. If overlapping IP address spaces are detected, change the network address of either the private cloud or the virtual network so they don't overlap.
Create a new virtual network
When you create a virtual network, the required components to connect to Azure VMware Solution are automatically created.
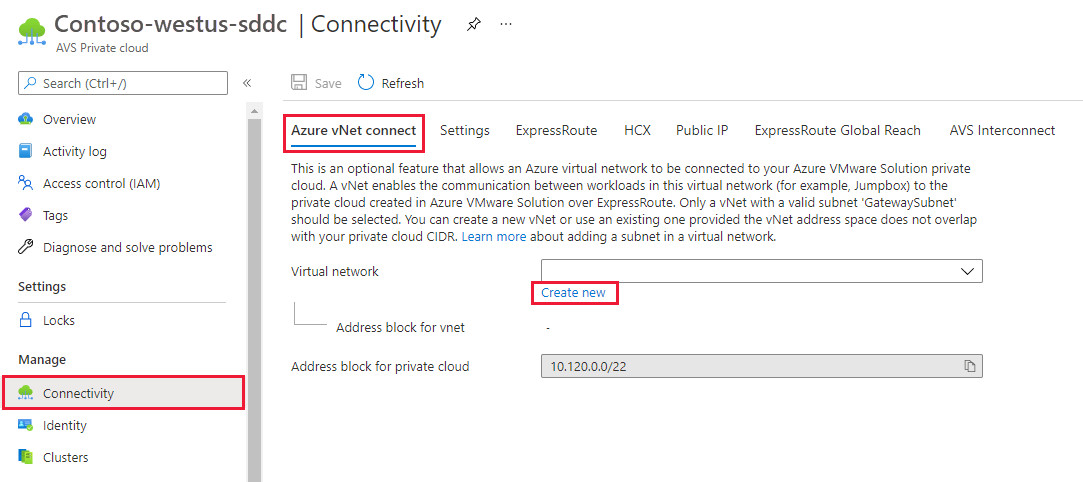
In the Azure portal, go to the Azure VMware Solution private cloud.
Under Manage, select Connectivity.
Select the Azure VNet connect tab, and then select Create new.
Provide or update the information for the new virtual network, and then select OK.
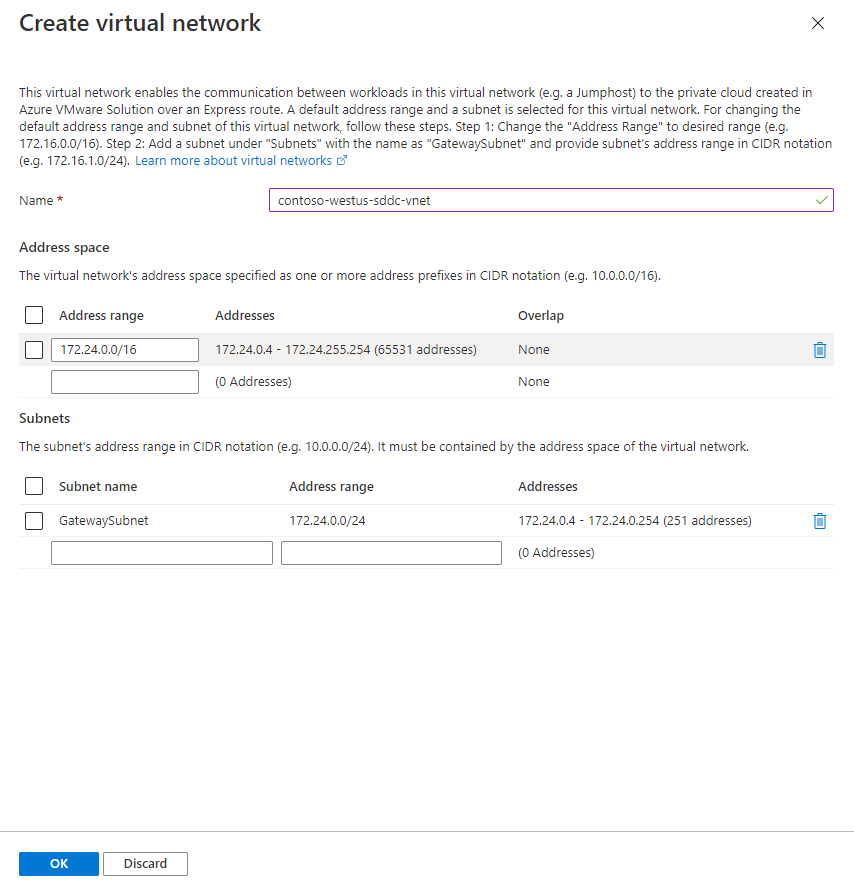
At this point, the virtual network detects whether IP address spaces overlap between Azure VMware Solution and the virtual network. If overlapping IP address spaces are detected, change the network address of either the private cloud or the virtual network so they don't overlap.
The virtual network with the provided address range and gateway subnet is created in your subscription and resource group.
Connect to the private cloud manually
Create a virtual network manually
Sign in to the Azure portal or, if necessary, the Azure Government portal.
Go to the resource group that you created in the tutorial for creating a private cloud, and then select + Add to define a new resource.
In the Search the Marketplace box, enter virtual network. Find the virtual network resource and select it.
On the Virtual Network page, select Create to set up your virtual network for your private cloud.
On the Create virtual network pane, enter the details for your virtual network:
On the Basics tab, enter a name for the virtual network, select the appropriate region, and then select Next : IP Addresses.
On the IP Addresses tab, under IPv4 address space, enter the address space that you created in the previous tutorial.
Important
You must use an address space that doesn't overlap with the address space that you used when you created your private cloud in the preceding tutorial.
Select + Add subnet. On the Add subnet pane, give the subnet a name and an appropriate address range, and then select Add.
Select Review + create.
Verify the information and select Create.
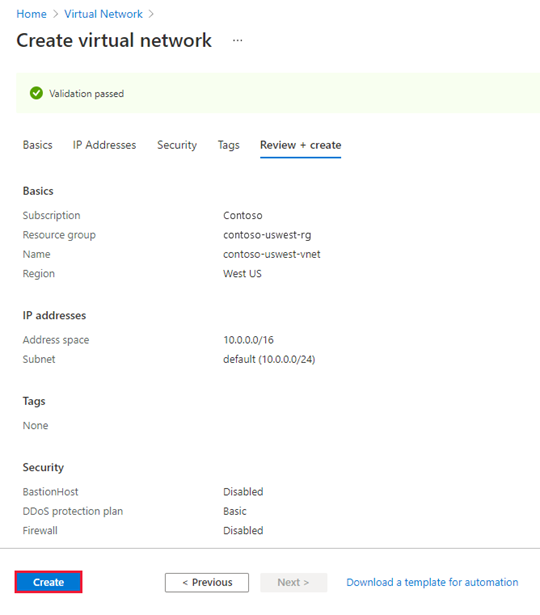
After the deployment is complete, your virtual network appears in the resource group.
Create a virtual network gateway
Now that you've created a virtual network, create a virtual network gateway:
In your resource group, select + Add to add a new resource.
In the Search the Marketplace box, enter virtual network gateway. Find the virtual network resource and select it.
On the Virtual Network gateway page, select Create.
On the Basics tab of the Create virtual network gateway pane, provide the following values, and then select Review + create.
Field Value Subscription The value is prepopulated with the subscription to which the resource group belongs. Resource group The value is prepopulated for the current resource group. It should be the resource group that you created in a previous test. Name Enter a unique name for the virtual network gateway. Region Select the geographical location of the virtual network gateway. Gateway type Select ExpressRoute. SKU Select the gateway type that's appropriate for your workload.
For Azure NetApp Files datastores, select UltraPerformance or ErGw3Az.Virtual network Select the virtual network that you created previously. If you don't see the virtual network, make sure the gateway's region matches the region of your virtual network. Gateway subnet address range The value is populated when you select the virtual network. Don't change the default value. Public IP address Select Create new. 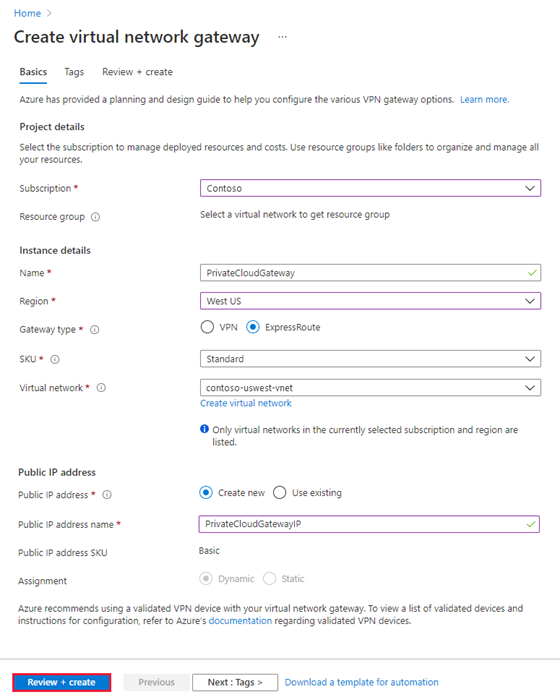
Verify that the details are correct, and then select Create to start deployment of your virtual network gateway.
After the deployment finishes, move to the next section to connect ExpressRoute to the virtual network gateway that contains your Azure VMware Solution private cloud.
Connect ExpressRoute to the virtual network gateway
Now that you've deployed a virtual network gateway, add a connection between it and your Azure VMware Solution private cloud:
Request an ExpressRoute authorization key:
In the Azure portal, go to the Azure VMware Solution private cloud.
Under Manage, select Connectivity.
Select the ExpressRoute tab, and then select + Request an authorization key.
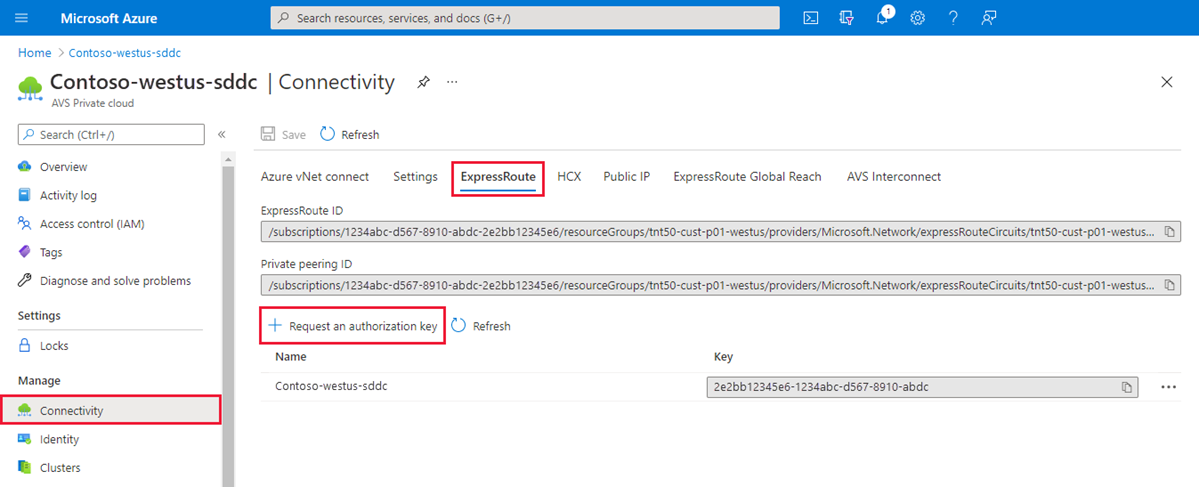
Provide a name for the authorization key, and then select Create.
It can take about 30 seconds to create the key. After the key is created, it appears in the list of authorization keys for the private cloud.
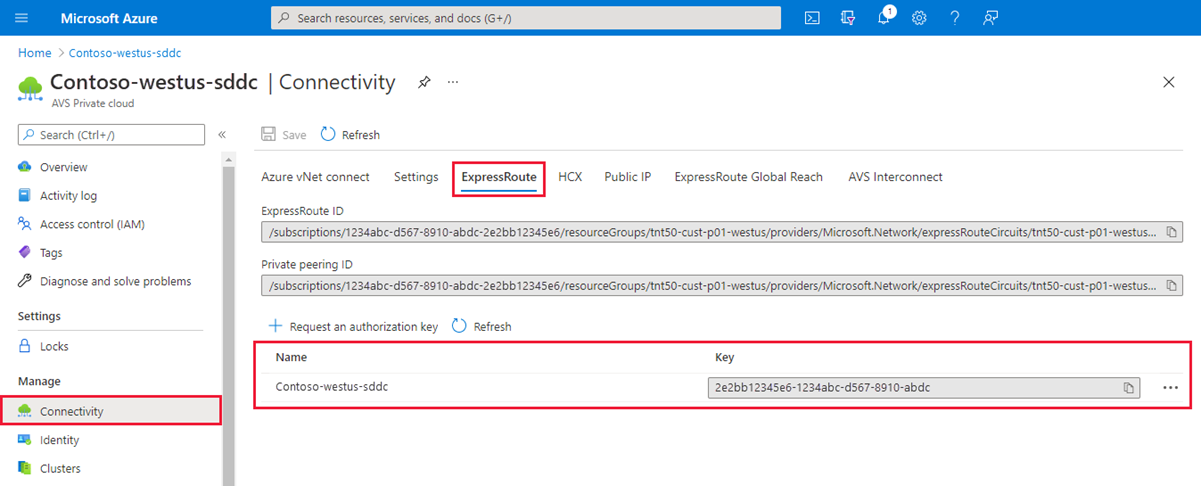
Copy the authorization key and the ExpressRoute ID. You need them to complete the peering. The authorization key disappears after some time, so copy it as soon as it appears.
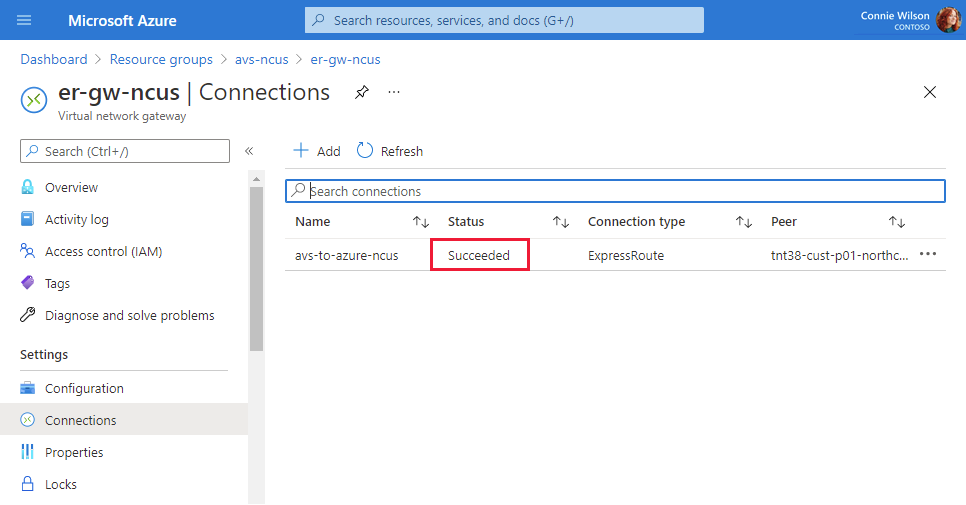
Go to the virtual network gateway that you plan to use, and then select Connections > + Add.
On the Add connection pane, provide the following values, and then select OK.
Field Value Name Enter a name for the connection. Connection type Select ExpressRoute. Redeem authorization Ensure that this checkbox is selected. Virtual network gateway The value is prepopulated with the virtual network gateway that you intend to use. Authorization key Paste the authorization key that you copied earlier. Peer circuit URI Paste the ExpressRoute ID that you copied earlier. 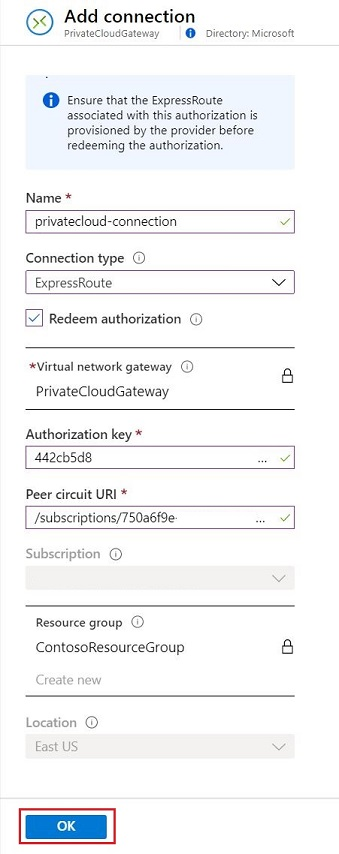


A status of Succeeded indicates that you finished creating the connection between your ExpressRoute circuit and your virtual network.
Next step
Continue to the next tutorial to learn how to create the NSX network segments for virtual machines in vCenter Server: