Note
Access to this page requires authorization. You can try signing in or changing directories.
Access to this page requires authorization. You can try changing directories.
In this article, you learn how to update the configuration and resize a SCVMM-managed VM in Azure through Azure Arc-enabled SCVMM.
From Azure, you can modify the following configuration of a VM:
- Add or remove network interfaces.
- Add or remove disks.
- Resize the VM by changing the CPU vCores, memory size, and type.
Prerequisites
Before you update and resize a virtual machine, make sure that you meet the following prerequisites:
- The SCVMM management server is in a Connected state and its associated Azure Arc resource bridge is in a Running state.
- The VM that you want to modify from Azure must be enabled for management in Azure.
- The VM that you want to modify from Azure must be in a Stopped state.
- Azure Arc SCVMM VM Contributor role or a custom Azure role with permissions to make changes to the SCVMM VM on which you want to perform update and resize operations.
Add or remove NICs to a virtual machine
To add or remove NICs to a VM, follow these steps:
Sign in to the Azure portal, go to Azure Arc > SCVMM management server, and then select the SCVMM server that manages the VM you want to modify.
Go to the Virtual machines inventory view under the SCVMM inventory. Alternatively, you can go to the inventory view for VMs enabled for management in Azure from Azure Arc > Machines blade.
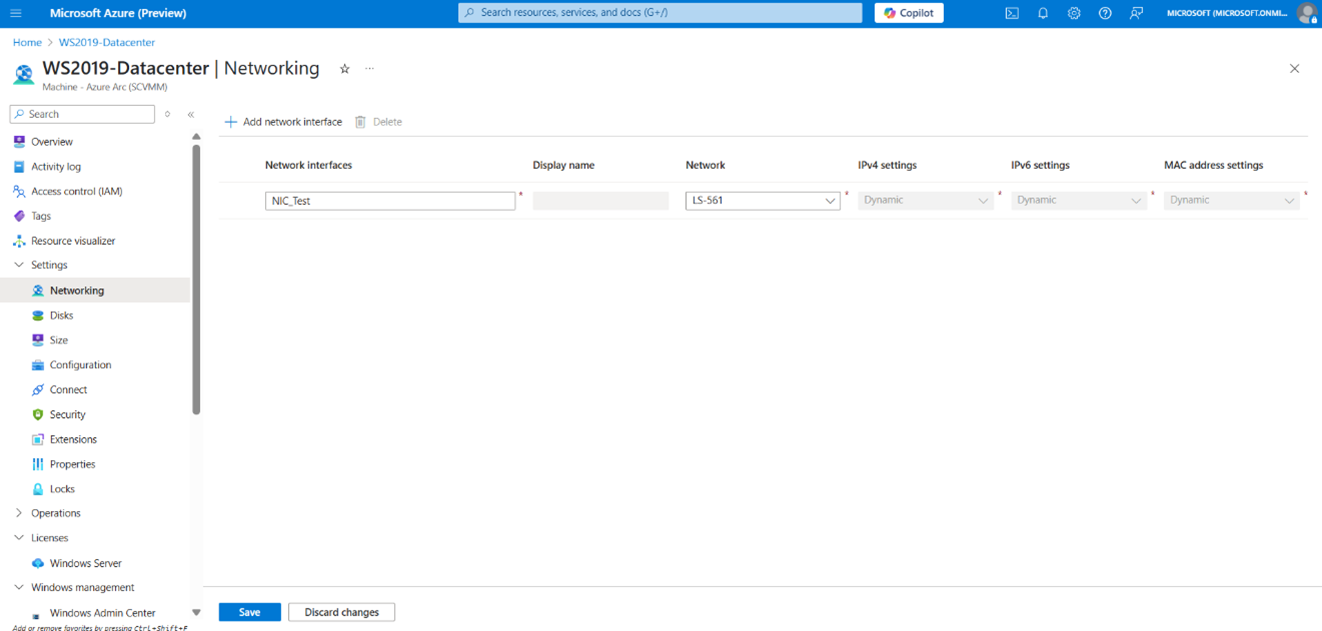
Select the machine for which you want to update the NICs and then select Settings > Networking:
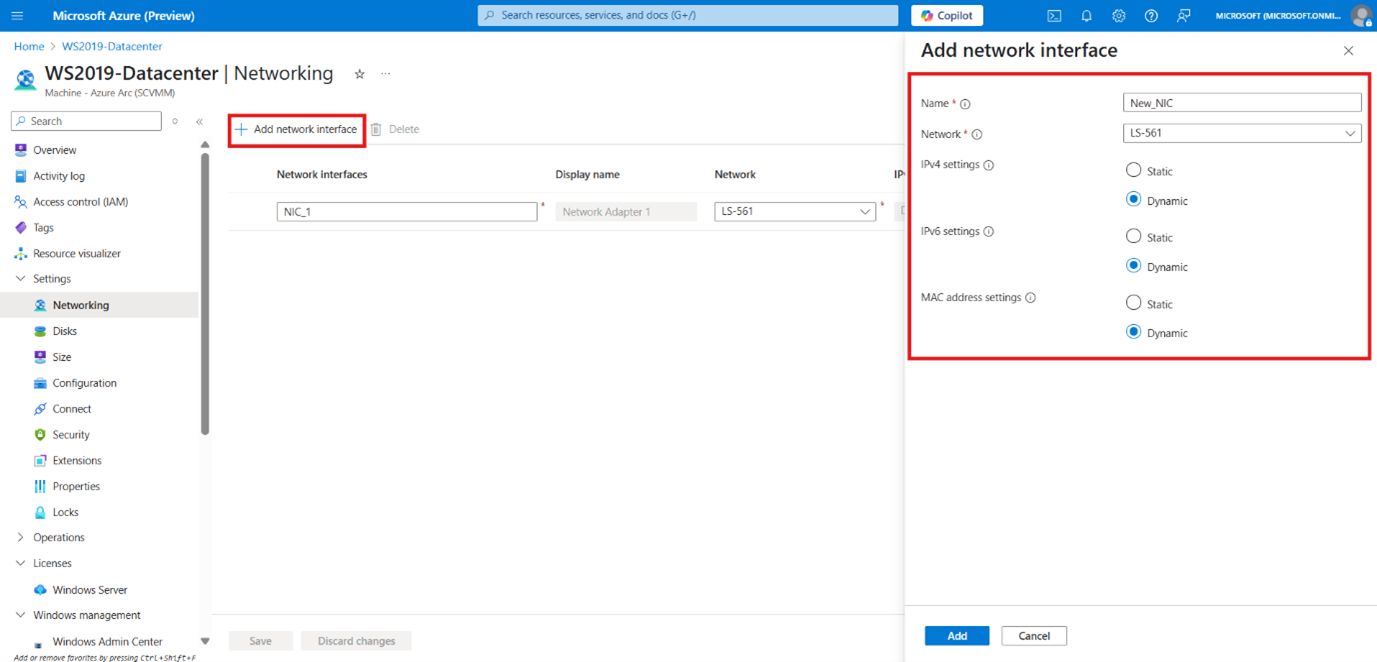
Add a network interface: Select Add network interface and enter the mandatory fields such as Name, VM network, IPv4 and IPv6 settings, and MAC address settings. Select Add and then Save to apply the changes.
Remove a network interface: Choose the network interface to remove and select Delete > Yes.
Add or remove disks to a virtual machine
To add or remove disks to a VM, follow these steps:
Sign in to the Azure portal, go to Azure Arc > SCVMM management server, and then select the SCVMM server that manages the VM you want to modify.
Go to the Virtual machines inventory view under the SCVMM inventory. Alternatively, you can go to the inventory view for VMs enabled for management in Azure from Azure Arc > Machines blade.
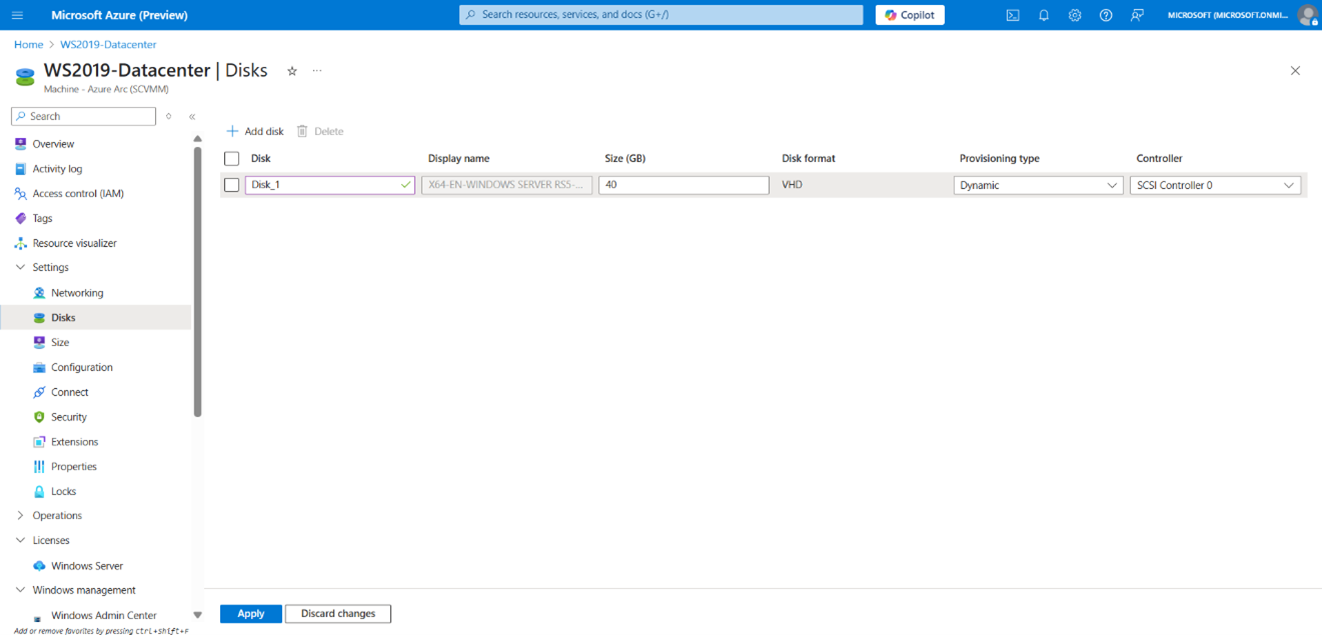
Select the machine for which you want to add or remove a disk. Then select Settings > Disks:
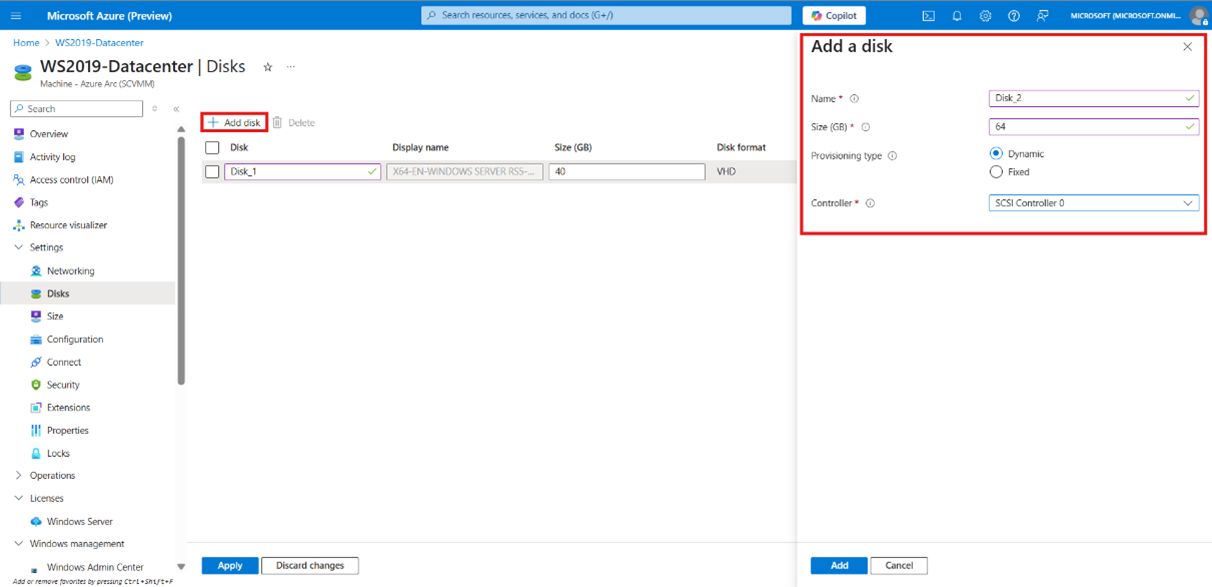
Add a disk: Select Add disk and enter the mandatory fields such as Disk name, size, provisioning type, and controller. Select Add and then Apply to apply the changes.
Remove a disk: Choose the disk to remove and select Delete > Yes.
Resize a virtual machine
To resize a VM, follow these steps:
Sign in to the Azure portal, go to Azure Arc > SCVMM management server, and then select the SCVMM server that manages the VM you want to modify.
Go to the Virtual machines inventory view under the SCVMM inventory. Alternatively, you can go to the inventory view for VMs enabled for management in Azure from Azure Arc > Machines blade.
Select the machine that you want to resize. Then select Settings > Size. You can change the number of CPU cores, memory size, and memory type.
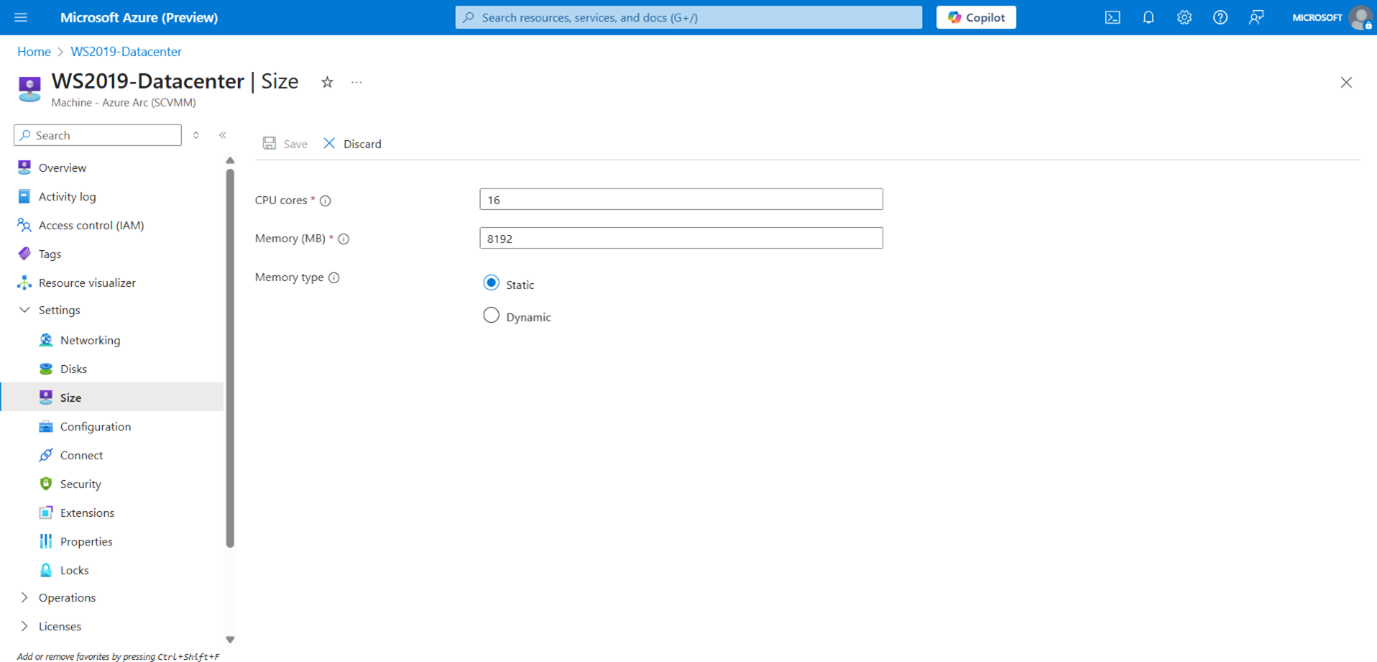
Select Save to apply the changes.
