How to configure a custom domain for Azure SignalR Service
In addition to the default domain provided with Azure SignalR Service, you can also add a custom DNS domain to your service. In this article, you'll learn how to add a custom domain to your SignalR Service.
Note
Custom domains is a Premium tier feature. Standard tier resources can be upgraded to Premium tier without downtime.
To configure a custom domain, you need to:
- Add a custom domain certificate.
- Create a DNS CNAME record.
- Add the custom domain.
Prerequisites
- A custom domain registered through an Azure App Service or a third party registrar.
- An Azure account with an active subscription.
- If you don't have one, you can create one for free.
- An Azure Resource Group.
- An Azure SignalR Service resource.
- An Azure Key Vault instance.
- A custom domain SSL certificate stored in your Key Vault instance. See Get started with Key Vault certificates
- An Azure DNS zone. (Optional)
Add a custom certificate
Before you can add a custom domain, you need to add a custom SSL certificate. Your SignalR Service accesses the certificate stored in your key vault through a managed identity.
There are three steps to adding a domain certificate.
- Enable managed identity in your SignalR Service.
- Give the managed identity access to your key vault.
- Add a custom certificate to your SignalR Service.
Enable managed identity in SignalR Service
You can use either a system-assigned or user-assigned managed identity. This article demonstrates using a system-assigned managed identity.
In the Azure portal, go to your SignalR service resource.
Select Identity from the menu on the left.
On the System assigned table, set Status to On.
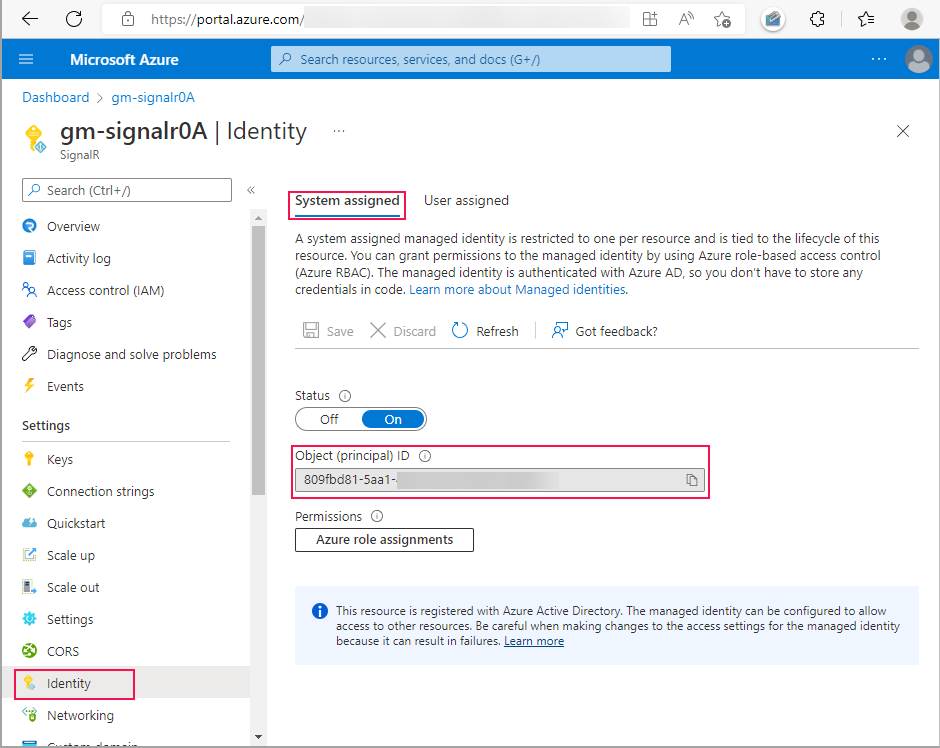
Select Save, and then select Yes when prompted to enable system-assigned managed identity.
Once the identity is created, the Object (principal) ID is displayed. SignalR Service will use the object ID of the system-assigned managed identity to access the key vault. The name of the managed identity is the same as the name of the SignalR Service instance. In the next section, you'll need to search for the principal (managed identity) using the name or Object ID.
Give the managed identity access to your key vault
SignalR Service uses a managed identity to access your key vault. You must give the managed identity permission to access your key vault.
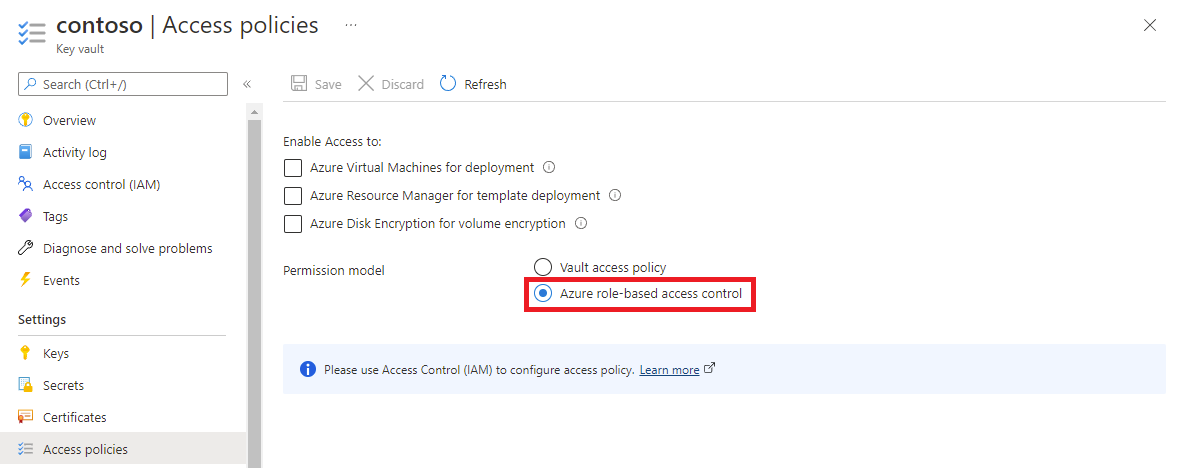
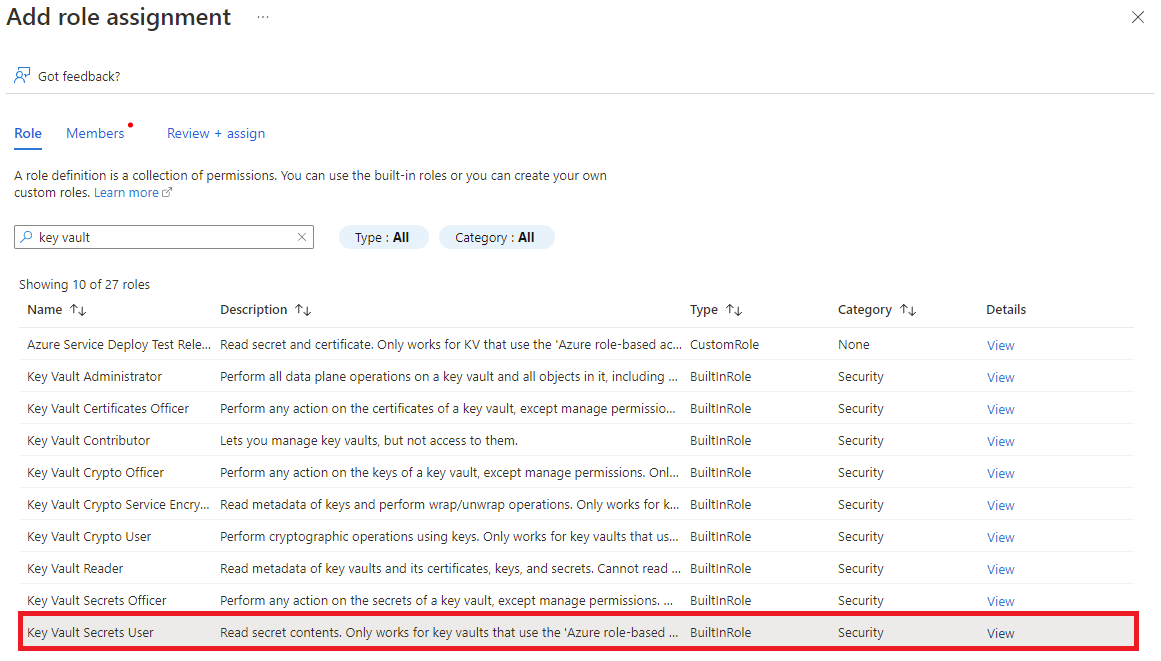
The steps to grant permission depends whether you selected vault access policy or Azure role-based access control as your key vault permission model.
If you're using Vault access policy as your key vault permission model, follow this procedure to add a new access policy.
Go to your key vault resource.
Select Access policies from the menu on the left.
Select Create.

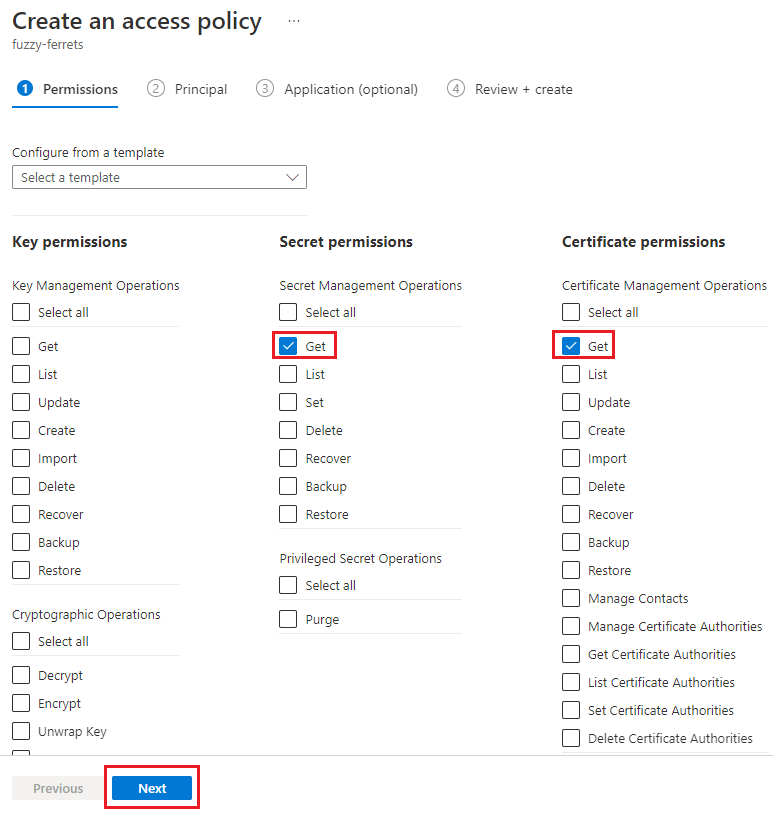
In the Permissions tab:
- Select Get under Secret permissions.
- Select Get under Certificate permissions.
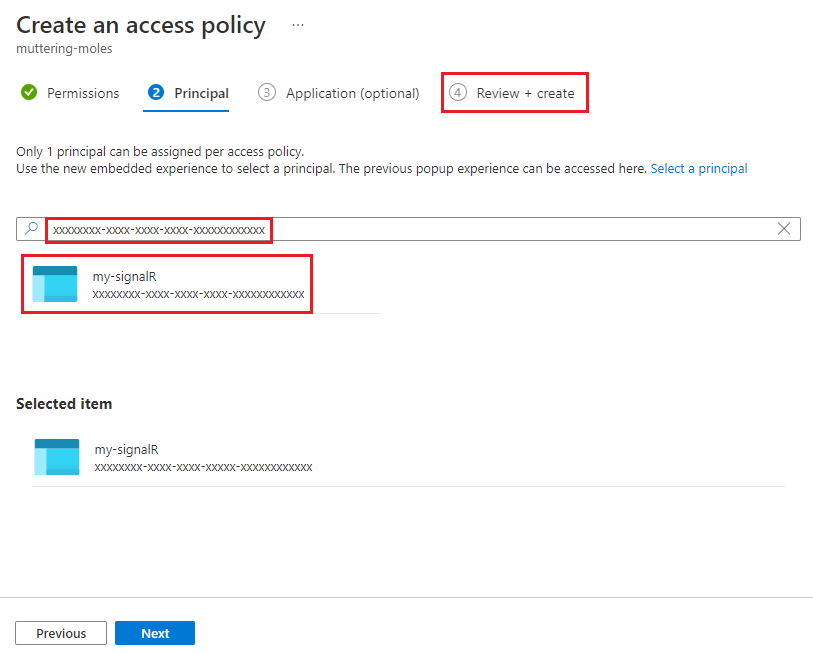
Select Next to go to the Principal tab.
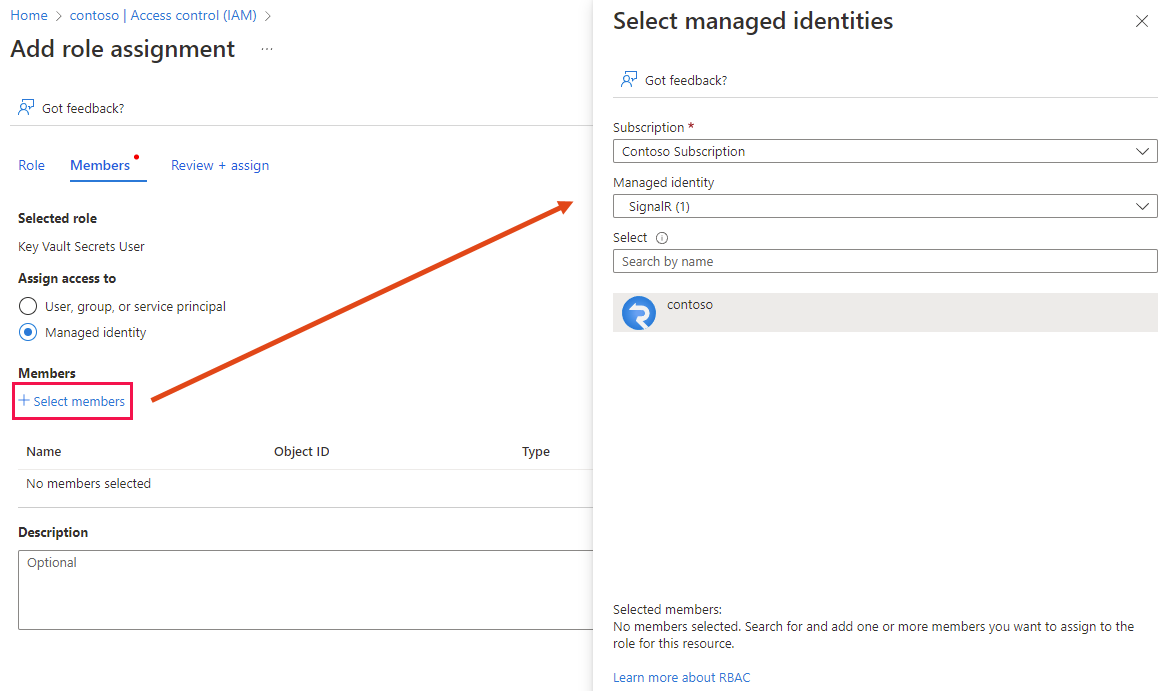
Enter the Object ID of the managed identity into the search box.
Select the managed identity from the search results.
Select the Review + create tab.
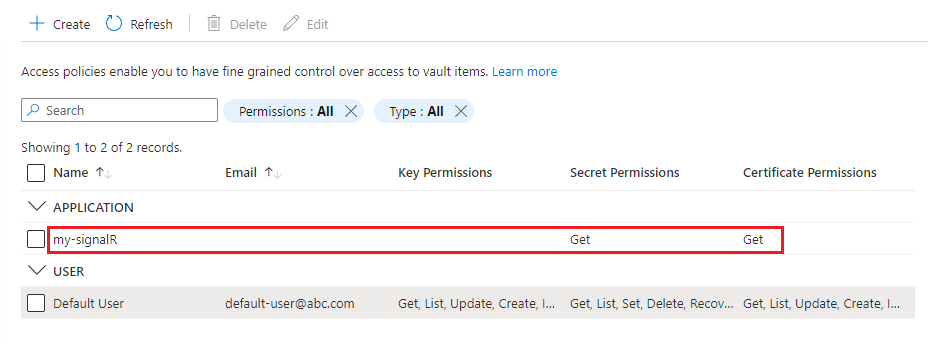
Select Create from the Review + create tab.
The managed identity for your SignalR Service instance is listed in the access policies table.

Add a custom certificate to your SignalR Service
Use the following steps to add the custom certificate to your SignalR Service:
In the Azure portal, go to your SignalR Service resource.
In the menu pane, select Custom domain.
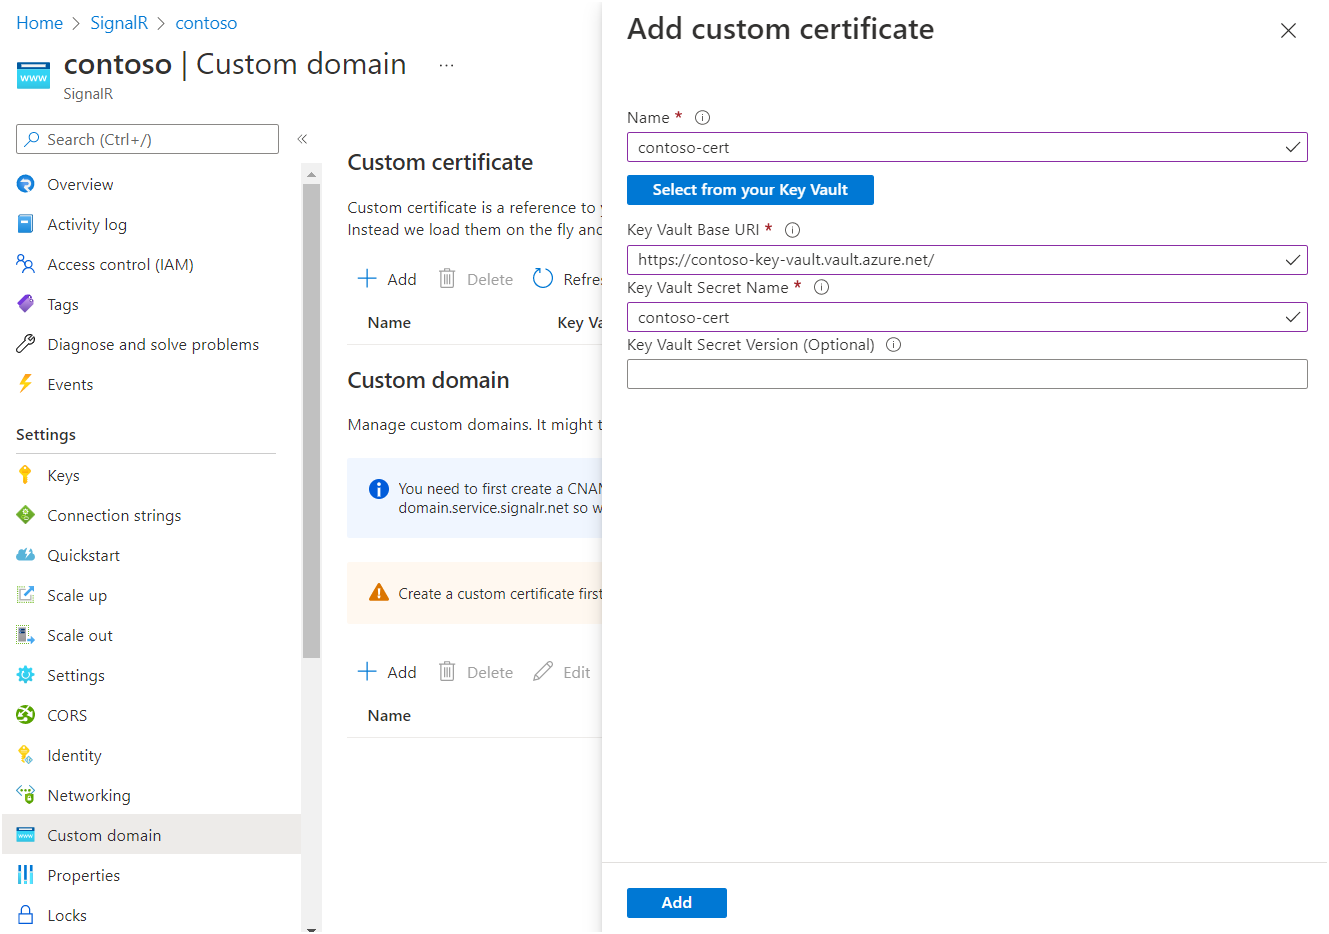
Under Custom certificate, select Add.
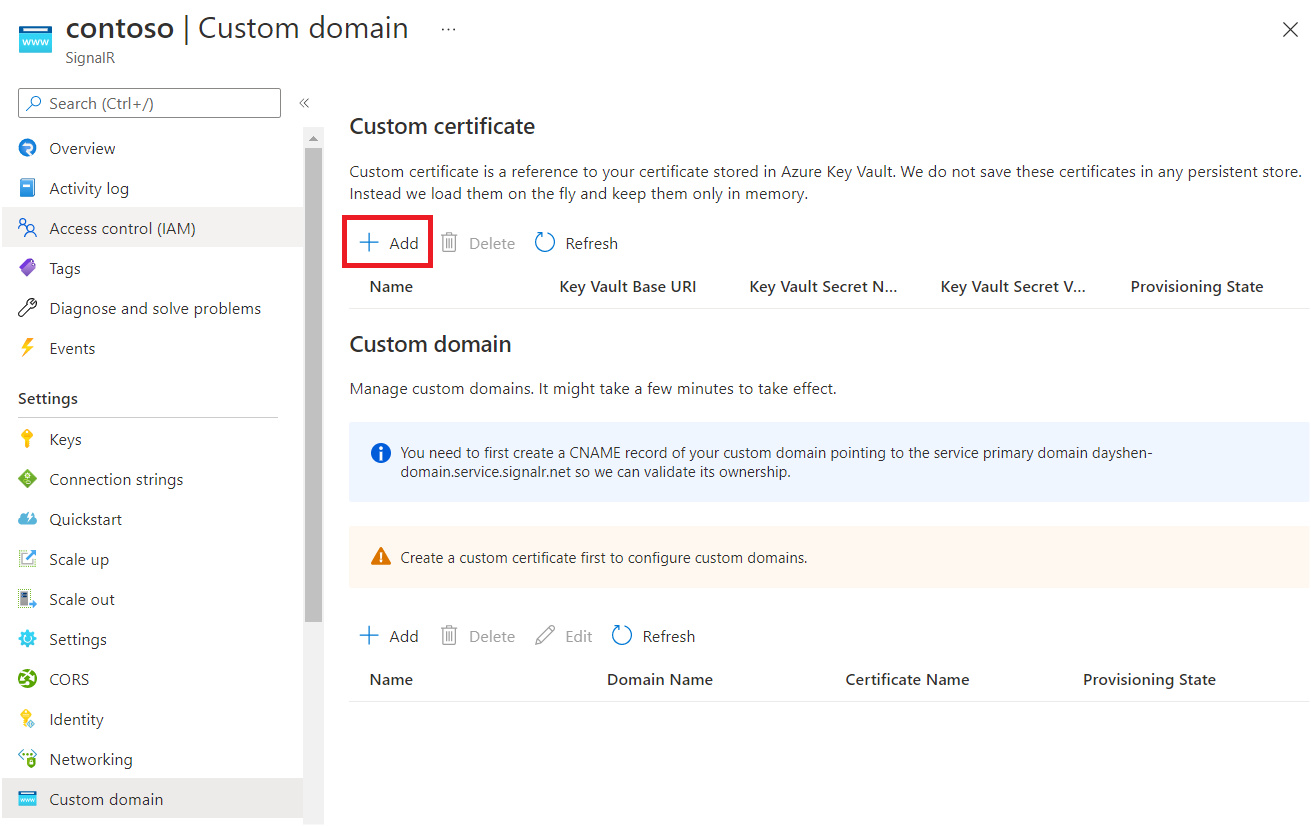
Enter a name of the custom certificate.
Select Select from your Key Vault to choose a key vault certificate. After selection the following Key Vault Base URI, Key Vault Secret Name should be automatically filled. Alternatively you can also fill in these fields manually.
Optionally, you can specify a Key Vault Secret Version if you want to pin the certificate to a specific version.
Select Add.
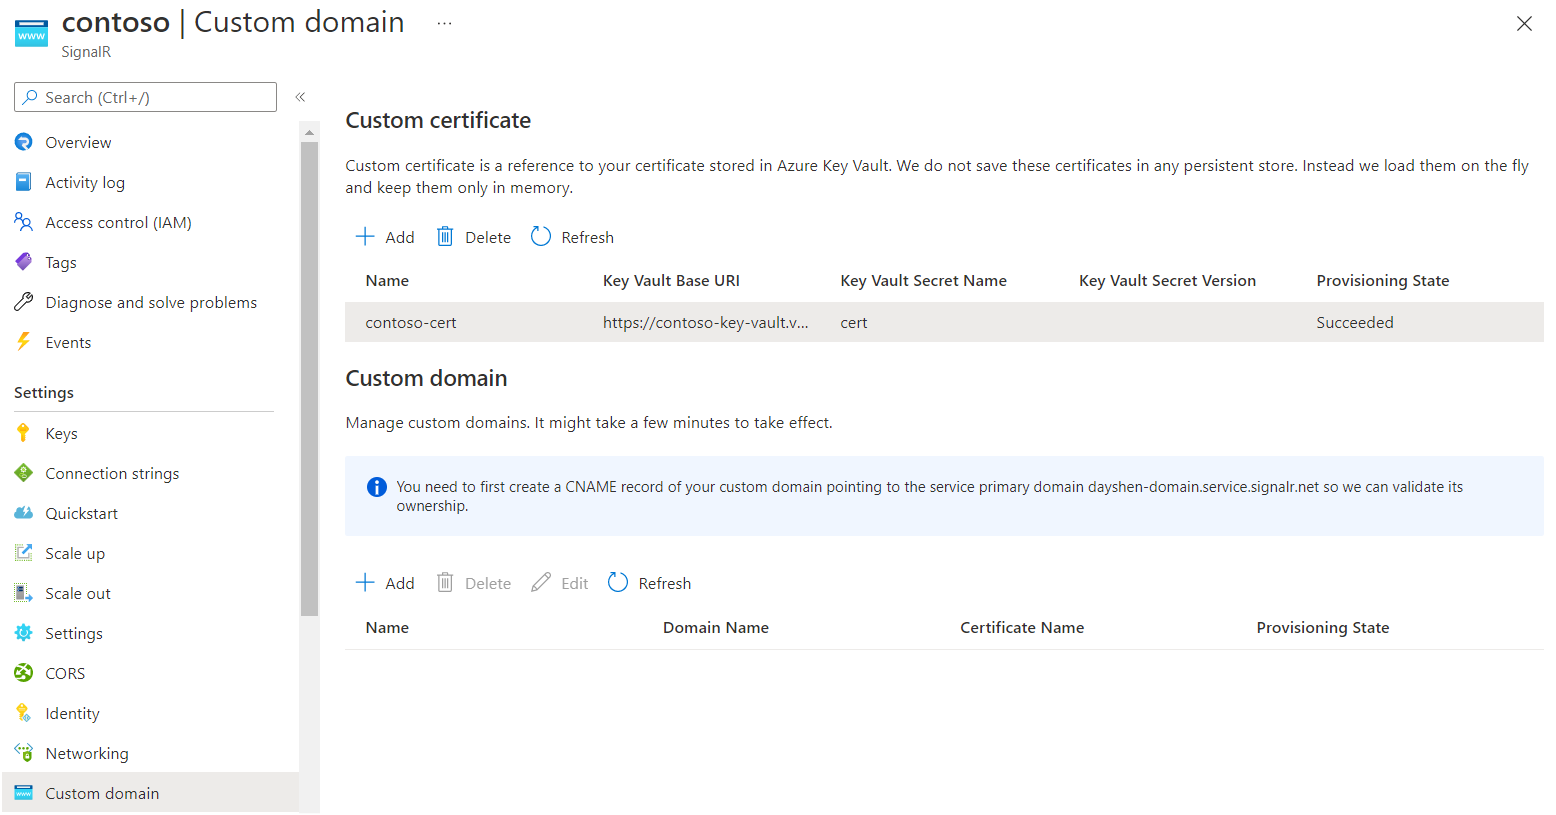
The SignalR Service will fetch the certificate and validate its content. When it succeeds, the certificate's Provisioning State will be Succeeded.
Create a custom domain CNAME record
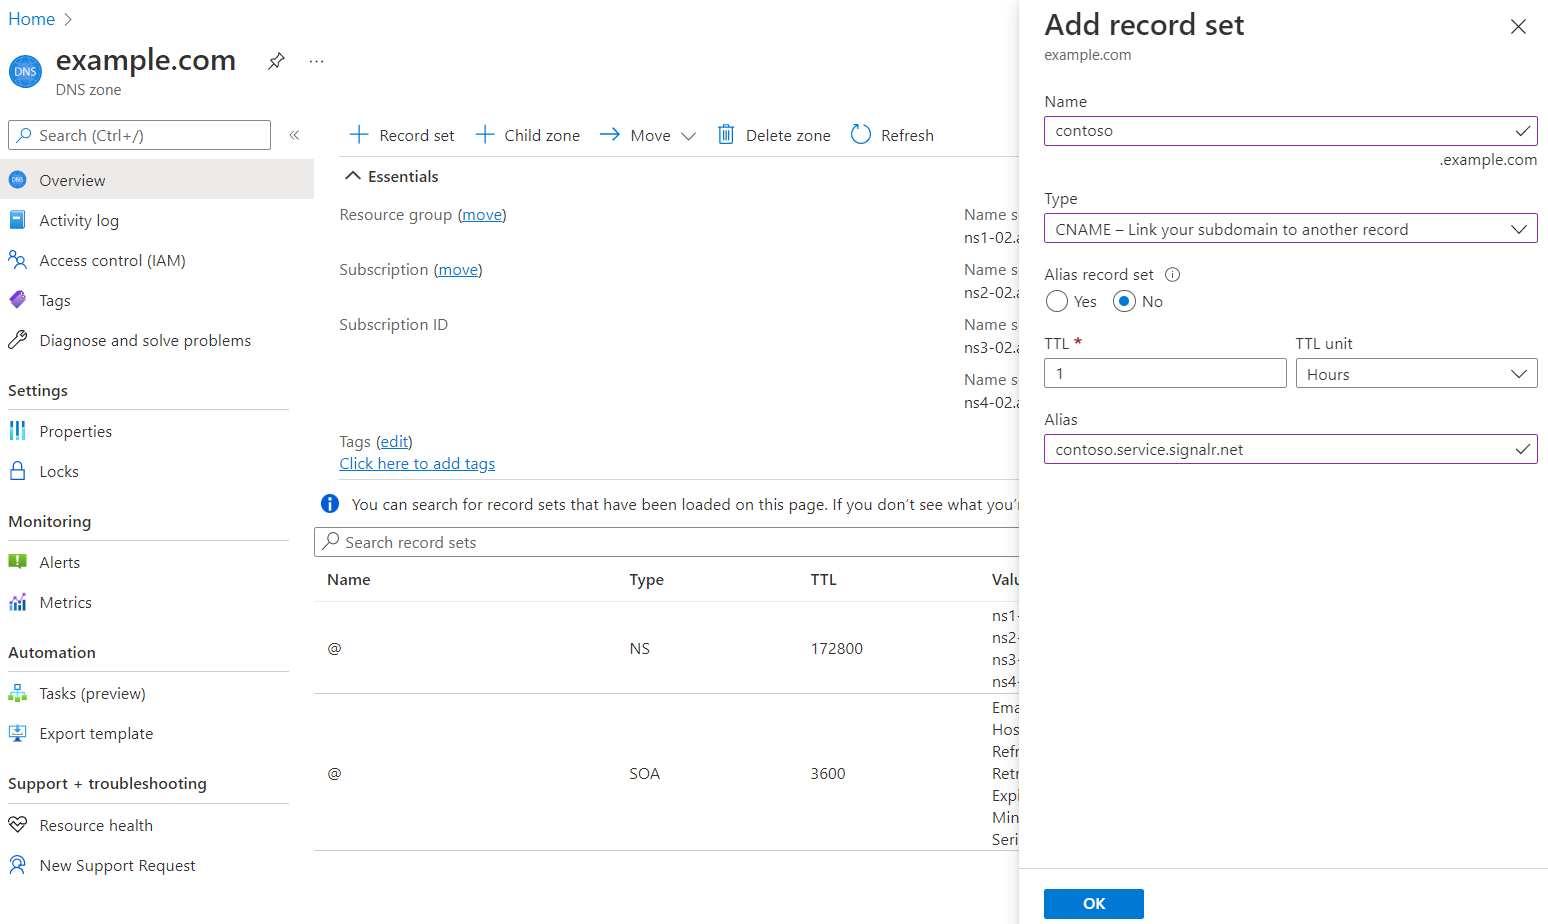
You must create a CNAME record for your custom domain in an Azure DNS Zone or with your third-party registrar service. The CNAME record creates an alias from your custom domain to the default domain of SignalR Service. The SignalR Service uses the record to validate the ownership of your custom domain.
For example, if your default domain is contoso.service.signalr.net, and your custom domain is contoso.example.com, you need to create a CNAME record on example.com.
Once you've created the CNAME record, you can perform a DNS lookup to see the CNAME information. In example, the output from the linux dig (DNS lookup) command should look similar to this output:
contoso.example.com. 0 IN CNAME contoso.service.signalr.net.
If you're using Azure DNS Zone, see manage DNS records to learn how to add a CNAME record.
If you're using other DNS providers, follow the provider's guide to create a CNAME record.
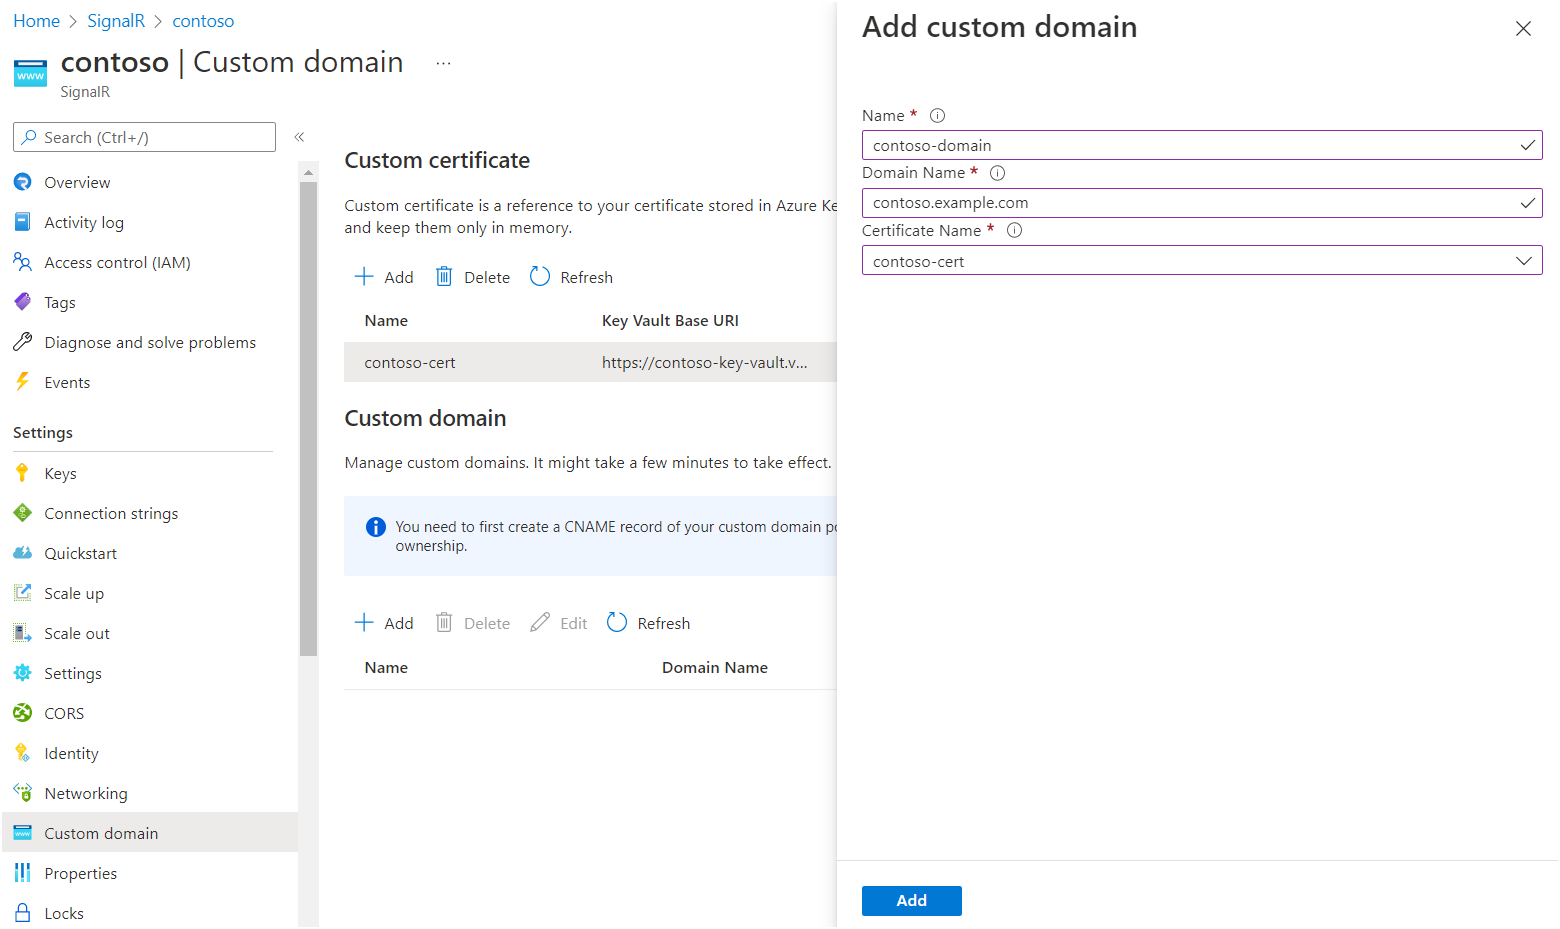
Add a custom domain
Now add the custom domain to your SignalR Service.
In the Azure portal, go to your SignalR Service resource.
In the menu pane, select Custom domain.
Under Custom domain, select Add.
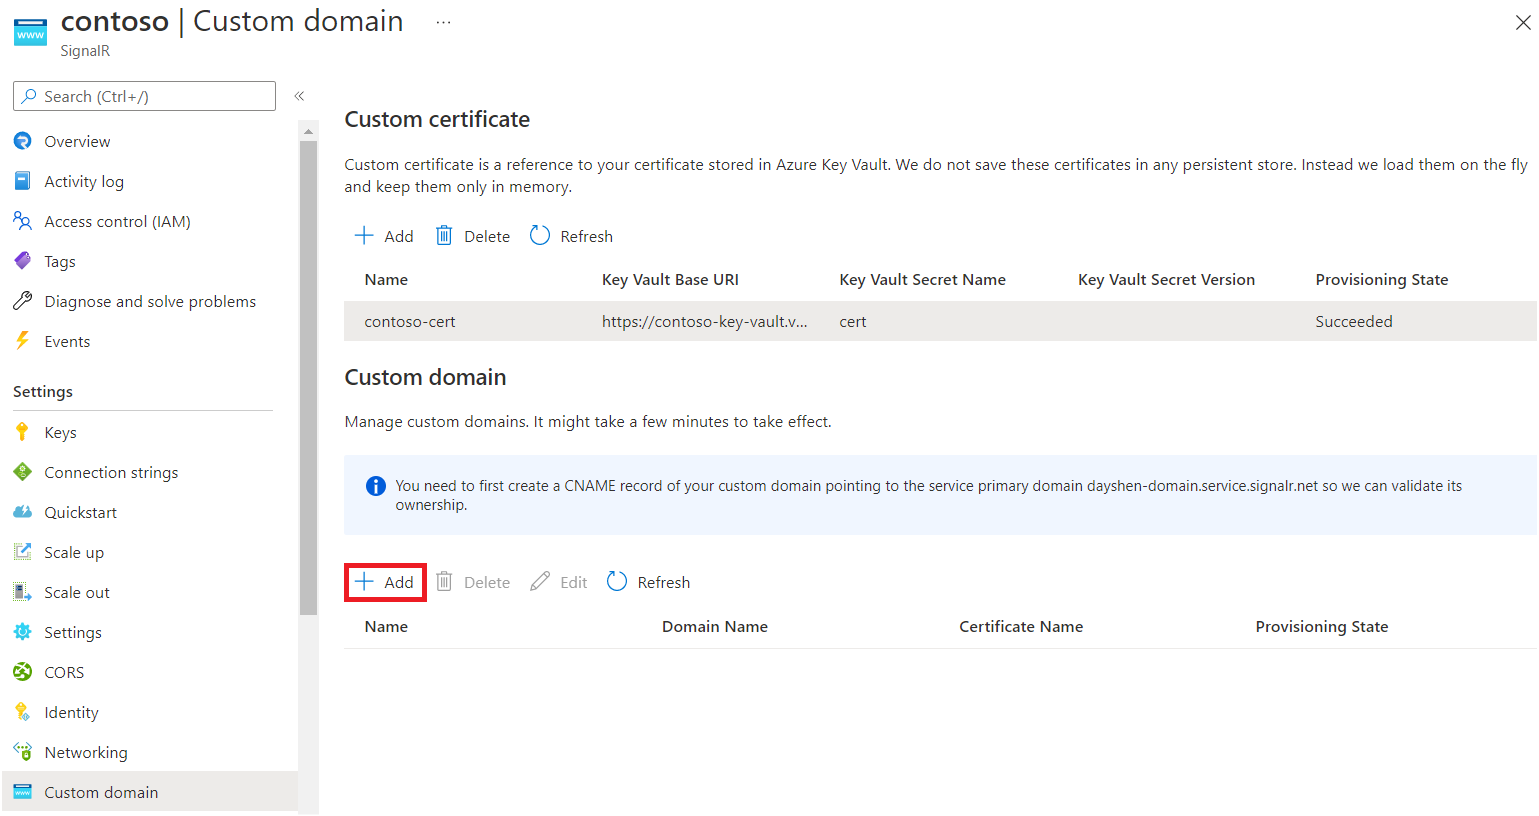
Enter a name for the custom domain.
Enter the full domain name of your custom domain, for example,
contoso.com.Select a custom certificate that applies to this custom domain.
Select Add.
Verify a custom domain
To verify the custom domain, you can use the health API. The health API is a public endpoint that returns the health status of your SignalR Service instance. The health API is available at https://<your custom domain>/api/health.
Here's an example using cURL:
PS C:\> curl.exe -v https://contoso.example.com/api/health
...
> GET /api/health HTTP/1.1
> Host: contoso.example.com

< HTTP/1.1 200 OK
It should return 200 status code without any certificate error.
Access Key Vault in private network
If you've configured a Private Endpoint to your key vault, your SignalR Service won't be able to access your key vault via a public network. You can give your SignalR Service access to your key vault through a private network by creating a Shared Private Endpoint.
After you create a Shared Private Endpoint, you can add a custom certificate as described in the Add a custom certificate to your SignalR Service section above.
Important
You don't have to change the domain in your key vault URI. For example, if your key vault base URI is https://contoso.vault.azure.net, you'll use this URI to configure a custom certificate.
You don't have to explicitly allow SignalR Service IP addresses in key vault firewall settings. For more info, see Key Vault private link diagnostics.
Certificate rotation
If you don't specify a secret version when creating custom certificate, Azure SignalR Service periodically checks latest version in Key Vault. When a new version is observed, it's automatically applied. The delay is usually within 1 hour.
Alternatively, you can also pin custom certificate to a specific secret version in Key Vault. When you need to apply a new certificate, you can edit the secret version and then update custom certificate proactively.
Cleanup
If you don't plan to use the resources you've created in this article, you can delete the Resource Group.
Caution
Deleting the resource group deletes all resources contained within it. If resources outside the scope of this article exist in the specified resource group, they will also be deleted.
Next steps
Feedback
Coming soon: Throughout 2024 we will be phasing out GitHub Issues as the feedback mechanism for content and replacing it with a new feedback system. For more information see: https://aka.ms/ContentUserFeedback.
Submit and view feedback for