Note
Access to this page requires authorization. You can try signing in or changing directories.
Access to this page requires authorization. You can try changing directories.
This article describes how to customize data sensitivity settings in Microsoft Defender for Cloud.
Data sensitivity settings are used to identify and focus on managing the critical sensitive data in your organization.
In this article, Defender cloud security posture management (Defender CSPM) refers to the Defender CSPM plan in Microsoft Defender for Cloud.
- You can select sensitive information types and sensitivity labels from the Microsoft Purview portal in Defender for Cloud.
- By default, Defender for Cloud uses built-in sensitive information types from Microsoft Purview.
- Some information types and labels are enabled by default.
- Sensitive data discovery supports a subset of those built-in types. See the reference list of supported sensitive information types, including defaults.
- You can modify the default settings on the Data sensitivity page.
- If you import labels, you can set sensitivity thresholds that determine the minimum threshold sensitivity level for a label to be marked as sensitive in Defender for Cloud.
This configuration helps you focus on your critical sensitive resources and improve the accuracy of the sensitivity insights.
Before you start
Before you customize data sensitivity settings, ensure the following requirements are met:
- Make sure that you review the prerequisites and requirements for customizing data sensitivity settings.
- In Defender for Cloud, enable sensitive data discovery capabilities in the Defender CSPM and/or Defender for Storage plans.
Changes in sensitivity settings take effect the next time that resources are discovered.
Import custom sensitivity info types/labels
Custom sensitivity info types and sensitivity labels are automatically imported into Defender for Cloud. If you have the Enterprise Mobility and Security E5/A5/G5 license, you don't need to manually provide consent in the Microsoft Defender XDR portal. For licensing details, see Microsoft Purview sensitivity labeling licensing.
Defender for Cloud only imports sensitivity labels with automatic labeling rules. Defender for Cloud ignores the "location" section in the automatic labeling rule and applies the label to all resource types and locations.
Customize sensitive data categories/types
To customize data sensitivity settings in Defender for Cloud, review the prerequisites for customizing data sensitivity settings. Then do the following.
Sign in to the Azure portal.
Navigate to Microsoft Defender for Cloud > Environment settings.
Select Data sensitivity.
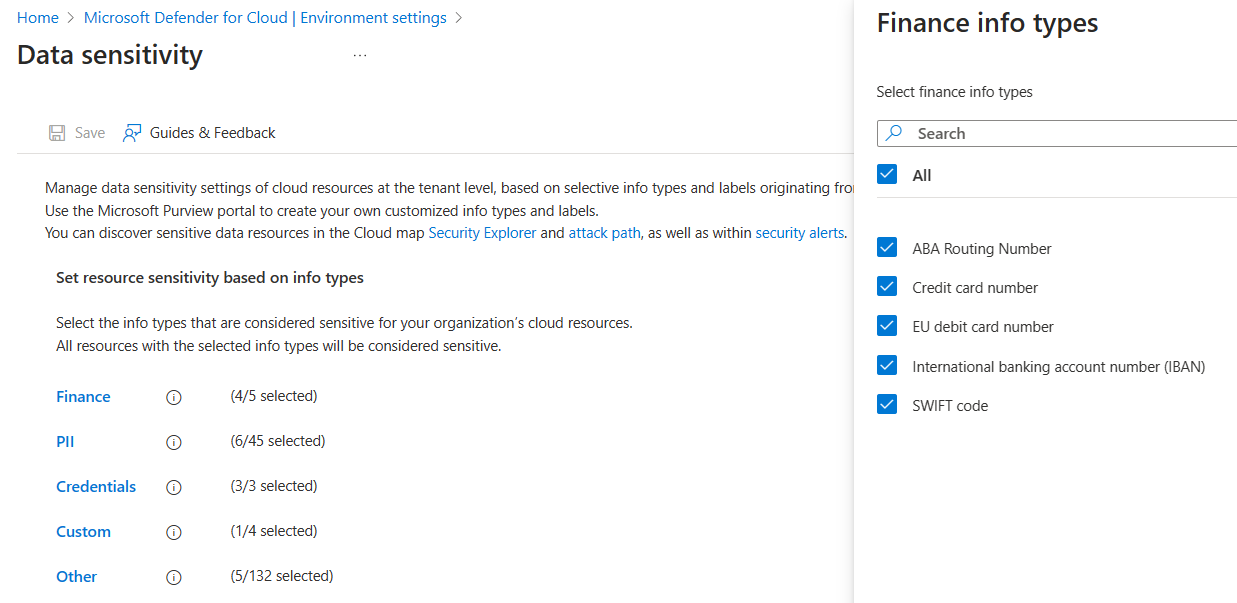
Select the info type category that you want to customize:
- The Finance, PII, and Credentials categories contain the default info type data that are typically sought out by attackers.
- The Custom category contains custom info types from your Microsoft Purview portal configuration.
- The Other category contains all of the rest of the built-in available info types.
Select the info types that you want to be marked as sensitive.
Select Apply and Save.
Set the threshold for sensitive data labels
If you're using Microsoft Purview sensitivity labels, make sure that:
You set the label scope to files and other data assets, and configure the auto-labeling rule for Office apps.
Your labels are published with a label policy that is in effect.
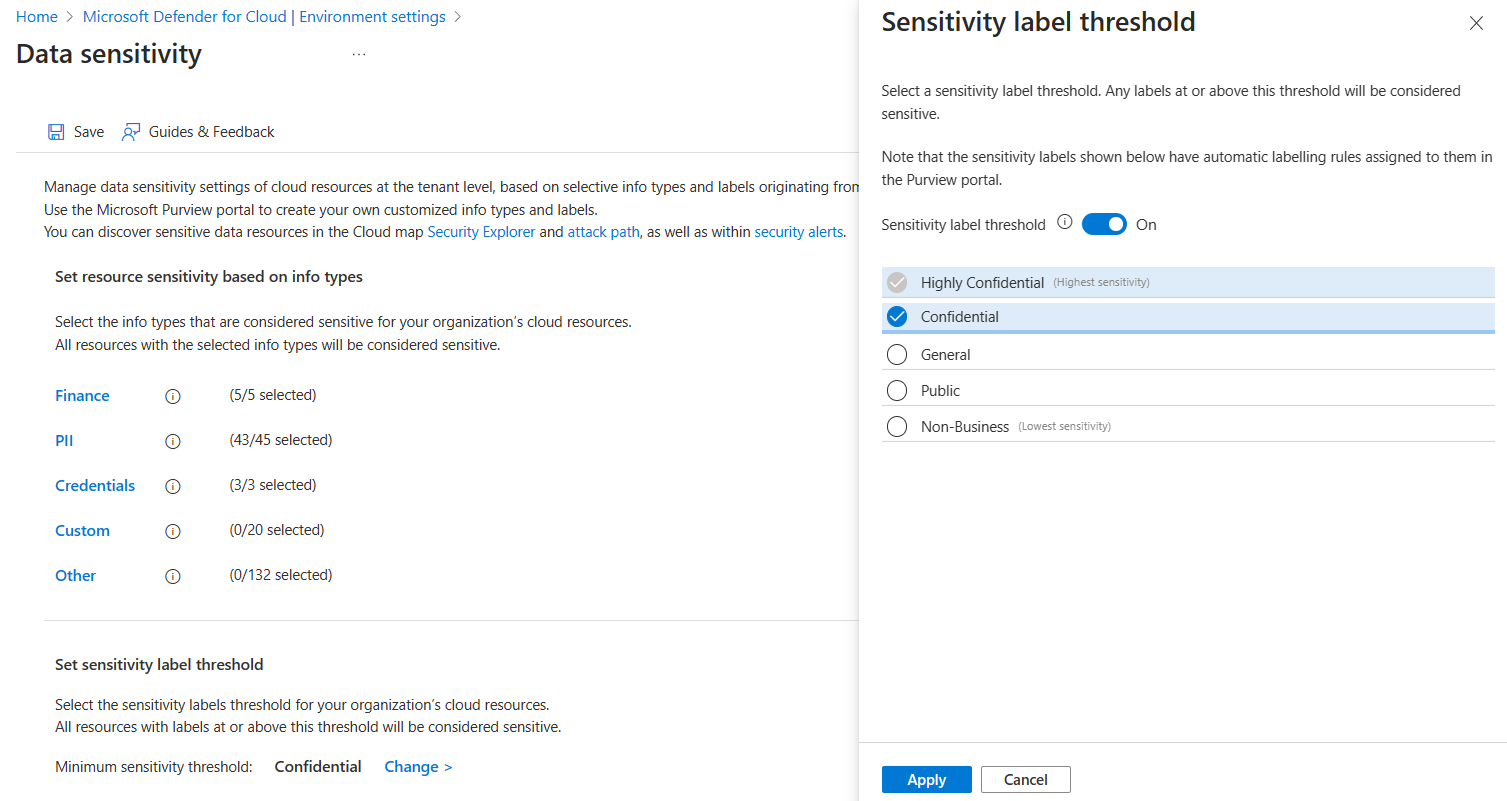
You can set a threshold to determine the minimum sensitivity level for a label to be marked as sensitive in Defender for Cloud.
Sign in to the Azure portal.
Navigate to Microsoft Defender for Cloud > Environment settings.
Select Data sensitivity. The current minimum sensitivity threshold is shown.
Select Change to see the list of sensitivity labels and select the lowest sensitivity label that you want marked as sensitive.
Select Apply and Save.
Note
- When you turn on the threshold, you select a label with the lowest setting that should be considered sensitive in your organization.
- Any resources with this minimum label or higher are presumed to contain sensitive data.
- For example, if you select Confidential as minimum, then Highly Confidential is also considered sensitive. General, Public, and Non-Business aren't.
- You can't select a sub label in the threshold. However, you can see the sublabel as the affected label on resources in attack path/Cloud Security Explorer, if the parent label is part of the threshold (part of the sensitive labels selected).
- The same settings apply to any supported resource (object storage and databases).
Next step
Review risks to sensitive data