Set up private access
In this guide, you'll learn how to disable public access to your Azure Managed Grafana workspace and set up private endpoints. Setting up private endpoints in Azure Managed Grafana increases security by limiting incoming traffic only to specific network.
Prerequisites
- An Azure account with an active subscription. Create an account for free.
- An existing Azure Managed Grafana instance in the Standard tier. Create one if you haven't already.
Disable public access to a workspace
Public access is enabled by default when you create an Azure Grafana workspace. Disabling public access prevents all traffic from accessing the resource unless you go through a private endpoint.
Note
When private access is enabled, pinging charts using the Pin to Grafana feature will no longer work as the Azure portal can't access an Azure Managed Grafana workspace on a private IP address.
Navigate to your Azure Managed Grafana workspace in the Azure portal.
In the left-hand menu, under Settings, select Networking.
Under Public Access, select Disabled to disable public access to the Azure Managed Grafana workspace and only allow access through private endpoints. If you already had public access disabled and instead wanted to enable public access to your Azure Managed Grafana workspace, you would select Enabled.
Select Save.

Create a private endpoint
Once you have disabled public access, set up a private endpoint with Azure Private Link. Private endpoints allow access to your Azure Managed Grafana workspace using a private IP address from a virtual network.
In Networking, select the Private Access tab and then Add to start setting up a new private endpoint.

Fill out the Basics tab with the following information:
Parameter Description Example Subscription Select an Azure subscription. Your private endpoint must be in the same subscription as your virtual network. You'll select a virtual network later in this how-to guide. MyAzureSubscription Resource group Select a resource group or create a new one. MyResourceGroup Name Enter a name for the new private endpoint for your Azure Managed Grafana workspace. MyPrivateEndpoint Network Interface Name This field is completed automatically. Optionally edit the name of the network interface. MyPrivateEndpoint-nic Region Select a region. Your private endpoint must be in the same region as your virtual network. (US) West Central US 
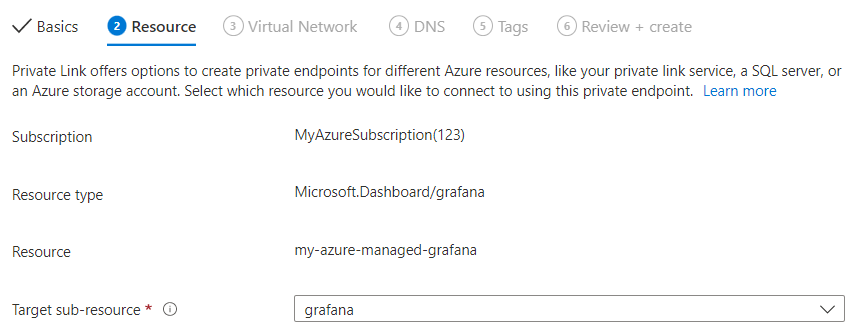
Select Next : Resource >. Private Link offers options to create private endpoints for different types of Azure resources. The current Azure Managed Grafana workspace is automatically filled in the Resource field.
The resource type Microsoft.Dashboard/grafana and the target sub-resource grafana indicate that you're creating an endpoint for an Azure Managed Grafana workspace.
The name of your workspace is listed under Resource.
Select Next : Virtual Network >.
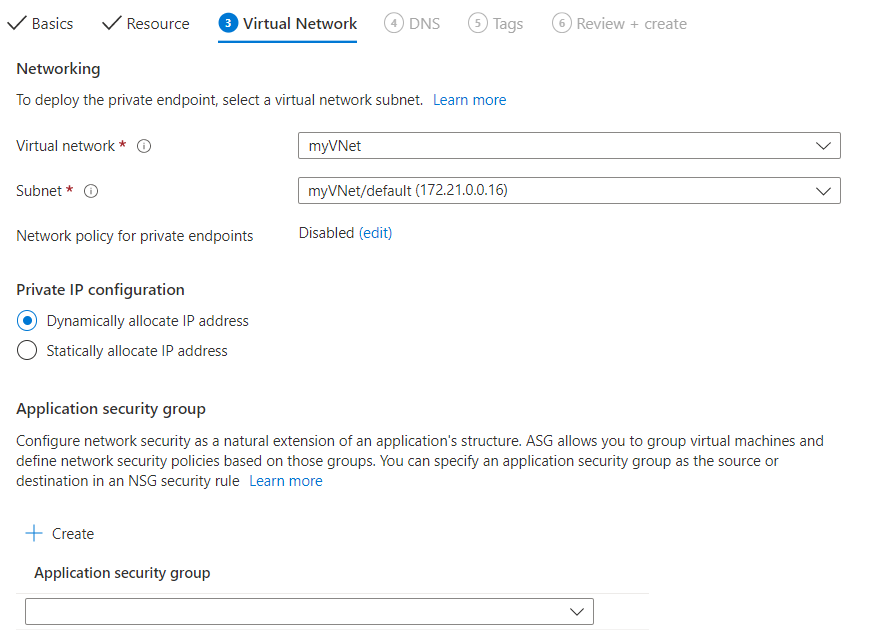
Select an existing Virtual network to deploy the private endpoint to. If you don't have a virtual network, create a virtual network.
Select a Subnet from the list.
Network policy for private endpoints is disabled by default. Optionally, select edit to add a network security group or a route table policy. This change would affect all private endpoints associated to the selected subnet.
Under Private IP configuration, select the option to allocate IP addresses dynamically. For more information, refer to Private IP addresses.
Optionally, you can select or create an Application security group. Application security groups allow you to group virtual machines and define network security policies based on those groups.
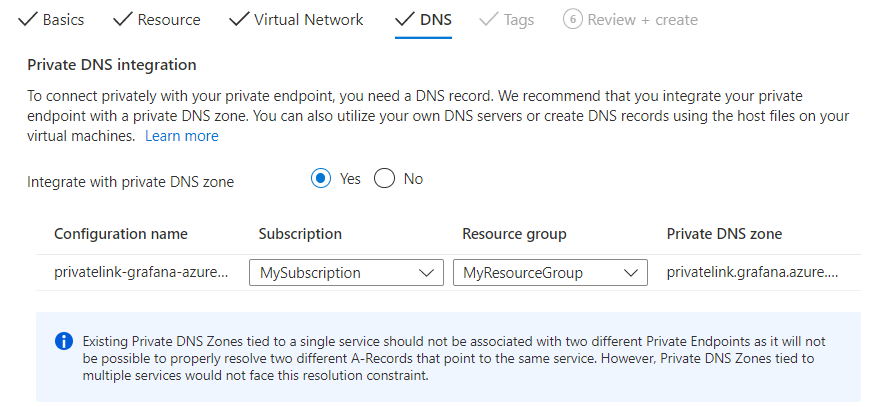
Select Next : DNS > to configure a DNS record. If you don't want to make changes to the default settings, you can move forward to the next tab.
For Integrate with private DNS zone, select Yes to integrate your private endpoint with a private DNS zone. You can also use your own DNS servers or create DNS records using the host files on your virtual machines.
A subscription and resource group for your private DNS zone are preselected. You can change them optionally.
To learn more about DNS configuration, go to Name resolution for resources in Azure virtual networks and DNS configuration for Private Endpoints. Azure Private Endpoint private DNS zone values for Azure Managed Grafana are listed at Azure services DNS zone.
Select Next : Tags > and optionally create tags. Tags are name/value pairs that enable you to categorize resources and view consolidated billing by applying the same tag to multiple resources and resource groups.
Select Next : Review + create > to review information about your Azure Managed Grafana workspace, private endpoint, virtual network and DNS. You can also select Download a template for automation to reuse JSON data from this form later.
Select Create.
Once deployment is complete, you'll get a notification that your endpoint has been created. If it's auto-approved, you can start accessing your workspace privately. Otherwise, you will have to wait for approval.
Manage private link connection
Go to Networking > Private Access in your Azure Managed Grafana workspace to access the private endpoints linked to your workspace.
Check the connection state of your private link connection. When you create a private endpoint, the connection must be approved. If the resource for which you're creating a private endpoint is in your directory and you have sufficient permissions, the connection request will be auto-approved. Otherwise, you must wait for the owner of that resource to approve your connection request. For more information about the connection approval models, go to Manage Azure Private Endpoints.
To manually approve, reject or remove a connection, select the checkbox next to the endpoint you want to edit and select an action item from the top menu.
Select the name of the private endpoint to open the private endpoint resource and access more information or to edit the private endpoint.

If you have issues with a private endpoint, check the following guide: Troubleshoot Azure Private Endpoint connectivity problems.
Next steps
In this how-to guide, you learned how to set up private access from your users to an Azure Managed Grafana workspace. To learn how to configure private access between a Managed Grafana workspace and a data source, see Connect to a data source privately.
Feedback
Coming soon: Throughout 2024 we will be phasing out GitHub Issues as the feedback mechanism for content and replacing it with a new feedback system. For more information see: https://aka.ms/ContentUserFeedback.
Submit and view feedback for