Set up a connector to apply security restrictions to mail sent from your partner organization to Microsoft 365 or Office 365
You can set up a connector to apply security restrictions to emails that your partner organization sends to you. The procedure to set up a connector is described as follows:
For New EAC
Navigate to Mail flow > Connectors. The Connectors screen appears.
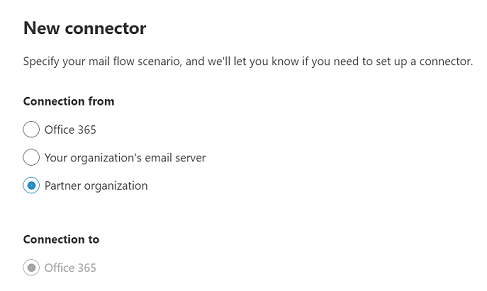
Select +Add a connector. The New connector screen appears.

- Under Connection from, choose Partner organization.
Note
Once you select the Partner organization radio button under Connection from, the option under Connection to is greyed out, implying that Office 365 is chosen by default.
Select Next. The Connector name screen appears.
Provide a name for the connector and select Next. The Authenticating sent email screen appears.
Choose one of the two options between By verifying that the sender domain matches one of the following domains and By verifying that the IP address of the sending server matches one of the following IP addresses, which belong to your partner organization.
Note
If you choose By verifying that the sender domain matches one of the following domains, you can provide the name of any one domain from the list of domains for your organization. If you have only one domain for your organization, enter its name. If you choose By verifying that the IP address of the sending server matches one of the following IP addresses, which belong to your partner organization, provide an IP address of any of the recipients who are part of your organization's mailbox.
Select Next. The Security restrictions screen appears.
Check the Reject email messages if they aren't sent over TLS checkbox.
Note
It's optional to choose the option of And require that the subject name of the certificate that the partner uses to authenticate with Office 365 matches this domain name. If you choose this option, enter the domain name of the partner organization.
- Check the Reject email messages if they aren't sent from within this IP address range checkbox, and provide the IP address range.
Important
You can choose this option in addition to the option specified in Step 5; Else, you can choose either this option or the one in Step 5. Choosing at least one of these options is mandatory.
Select Next. The Review connector screen appears.
Review the settings you've configured, and select Create connector.
The connector is created.
Note
For more information, select the Help or Learn More links. In particular, see Identifying email from your email server for help in configuring certificate or IP address settings for this connector. The wizard will guide you through the setup.
For Classic EAC
To start the wizard, click +. On the first screen, choose the options as shown in the following screenshot:
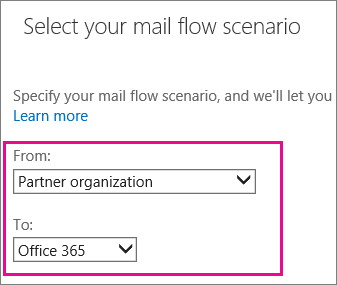
Select Next, and follow the instructions in the wizard. For more information, select the Help or Learn More links. The wizard will guide you through the setup. At the end, save your connector.
Ask your partner organization to send a test email. Ensure that the email your partner organization sends will cause the connector to be applied. For example, if you specified security restrictions for mails sent from a specific partner domain, ensure they send test mail from that domain. Check that the test email is delivered to confirm that the connector works correctly.