Note
Access to this page requires authorization. You can try signing in or changing directories.
Access to this page requires authorization. You can try changing directories.
APPLIES TO:  2013
2013  2016 2019 Subscription Edition SharePoint in Microsoft 365
In SharePoint Server, users can quickly and easily get to all of their SharePoint and Microsoft 365 workloads directly from the app launcher. Now in addition to those, you can also add your own custom tiles that point to other SharePoint sites, external sites, legacy apps, and more. This makes it easy to find the relevant sites, apps, and resources to do your job
This feature is configured on the web app level by an ITPro administrator by using PowerShell cmdlets.
Note
The list for the custom tiles is provisioned at the root level of the web application so anyone will be able to see or remove the list.
Enable Custom Tiles
The custom tile feature is not enabled by default. To enable the feature, do these steps.
Verify that you have the following memberships:
You must have membership in the securityadmin fixed server role on the SQL Server instance
You must have membership in the db_owner fixed database role on all databases that are to be updated.
You must be a member of the Administrators group on the server on which you are running the PowerShell cmdlet.
If these permissions are not satisfied, contact your Setup administrator or SQL Server administrator to request these permissions.
For more information about PowerShell permissions, see Permissions and Add-SPShellAdmin.
On the Start menu, click All Programs
Click Microsoft SharePoint Products.
Click SharePoint Management Shell.
To ensure the feature is available, at the PowerShell command prompt, type the following command:
Get-SPFeature -Identity CustomTilesNote
If the feature is not available, then ensure your SharePoint farm is patched with at least Feature Pack 1 contained in all cumulative updates of SharePoint Server of November 2016 and later. To validate this, you can run the following PowerShell command. Your SharePoint build version should be at 16.0.4456.1004 or later.
(Get-SPFarm).BuildVersionTo enable the feature, at the PowerShell command prompt, type the following command:
Enable-SPFeature -Identity CustomTiles -Url http://web_app -ForceNote
The URL you provide will be the location of where the Custom Tile list is provisioned, so you may need to provide permission access to the list accordingly. Custom Tiles List will be Created on specified URL on feature enable command as hidden list.
Since this list is Created as a Hidden List, browse to https://web_app/Lists/Custom%20Tiles/AllItems.aspx to access Custom tiles list.
Click new item to add a new item to the list.
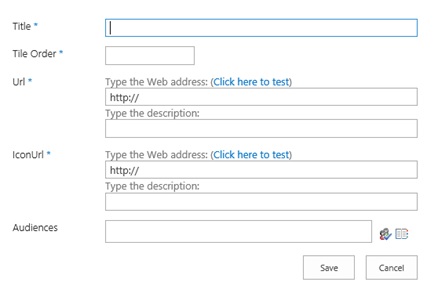
Enter a Title for the new tile. The name will appear in the tile.
Enter a number for Tile Order. This is the order you want the tile to appear after the default three tiles (that is, Newsfeeds, OneDrive, Sites).
Enter a Url for the tile. This is the location where you want your users to go when they select the tile.
Enter an IconURL for the tile. The recommended size for an icon is 50x50 pixels, however the thumbnail will automatically scale. The image appears on the app launcher.
Type the name of an Audience you want to use this tile. For example, Marketing.
Note
List or library items in SharePoint Server can be targeted to appear only to people who are members of a particular group or audience. An audience can be identified by using SharePoint groups, distribution lists, or security groups or by using a rules-based system to create a global audience.

After you add a new item in the custom tiles list due to caching, it may take up to 24 hours before you can see it appear in the app launcher. If you want to see it immediately, you can run ClearSuiteLinksCache() function in the developer browser's console that is displayed by pressing F12 while in a browser session as displayed in the following diagram.
Note
The ClearSuiteLinksCache() function is not available for modern sites in SharePoint Server 2019 and will generate an error if used.
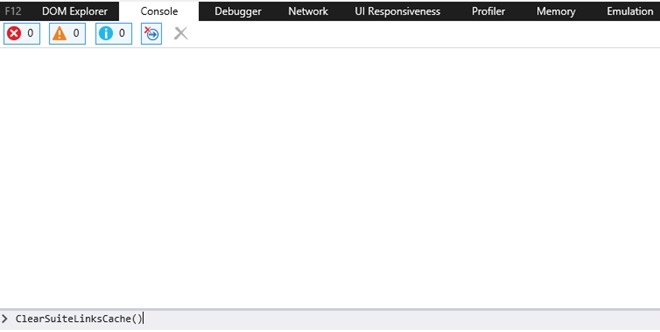
After the ClearSuiteLinksCache() function is run, it returns "undefined".

You must refresh the page by pressing F5 or the refresh button  on the Address bar of your browser for the tile to now appear in the app launcher.
Enable Custom Tiles across multiple web applications
If you want to use the same list of custom tiles across multiple web applications, enable the feature on each web application, and then update the web application property CustomTilesListHostUrl to the web application that contains the desired custom tiles list. To do this, follow these steps:
Verify that you have the following memberships:
You must have membership in the securityadmin fixed server role on the SQL Server instance
You must have membership in the db_owner fixed database role on all databases that are to be updated.
You must be a member of the Administrators group on the server on which you are running the PowerShell cmdlet.
If these permissions are not satisfied, contact your Setup administrator or SQL Server administrator to request these permissions.
For more information about PowerShell permissions, see Permissions and Add-SPShellAdmin.
On the Start menu, click All Programs
Click Microsoft SharePoint Products.
Click SharePoint Management Shell.
To ensure the feature is available, at the PowerShell command prompt, type the following commands:
$w = Get-SPWebApplication http://web_app
$w.Properties.CustomTilesListHostUrl = "http://web_app url"
$w.Update()
If you want to unhide list of custom tiles, you can do this by using PowerShell.
From a PowerShell command prompt, type the following commands:
$web = get-spweb "http://web_app"
$list = $web.Lists["Custom Tiles"]
$list.hidden = $false
$list.update()
Note
The List will be visible when site Contents is viewed.
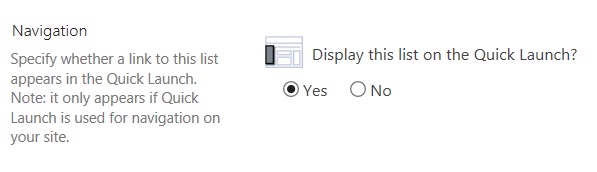
To add this list to Left Navigation pane, do the following steps:
Browse to List settings.
Click on List name, description, and navigation.
Select Yes for Navigation setting to display list on Quick Launch as displayed with this image.